Windows 11, the latest operating system from Microsoft, brings a fresh and visually stunning interface to enhance the user experience. One of the exciting features of Windows 11 is the ability to change themes, allowing users to personalize their desktop and create a unique look and feel. Whether you prefer a light or dark mode, vibrant colors, or minimalist designs, Windows 11 offers a range of themes to suit your preferences. In this guide, we will explore the simple process of changing themes in Windows 11, enabling you to customize your desktop and make it truly yours. Let’s delve into the world of themes and discover how to transform the appearance of your Windows 11 operating system.
Page Contents
How to change themes in Windows 11
Method 1: Using the file explorer
1. Open the Run prompt by pressing Windows + R keys.
2. Type the below command in the “Open:” bar and press Enter.
%LocalAppData%\Microsoft\Windows\Themes

3. Double-click on the theme to install it.

Method 2: Using the Settings app to change themes in Windows 11
1. Press Windows + I keys to open Settings.
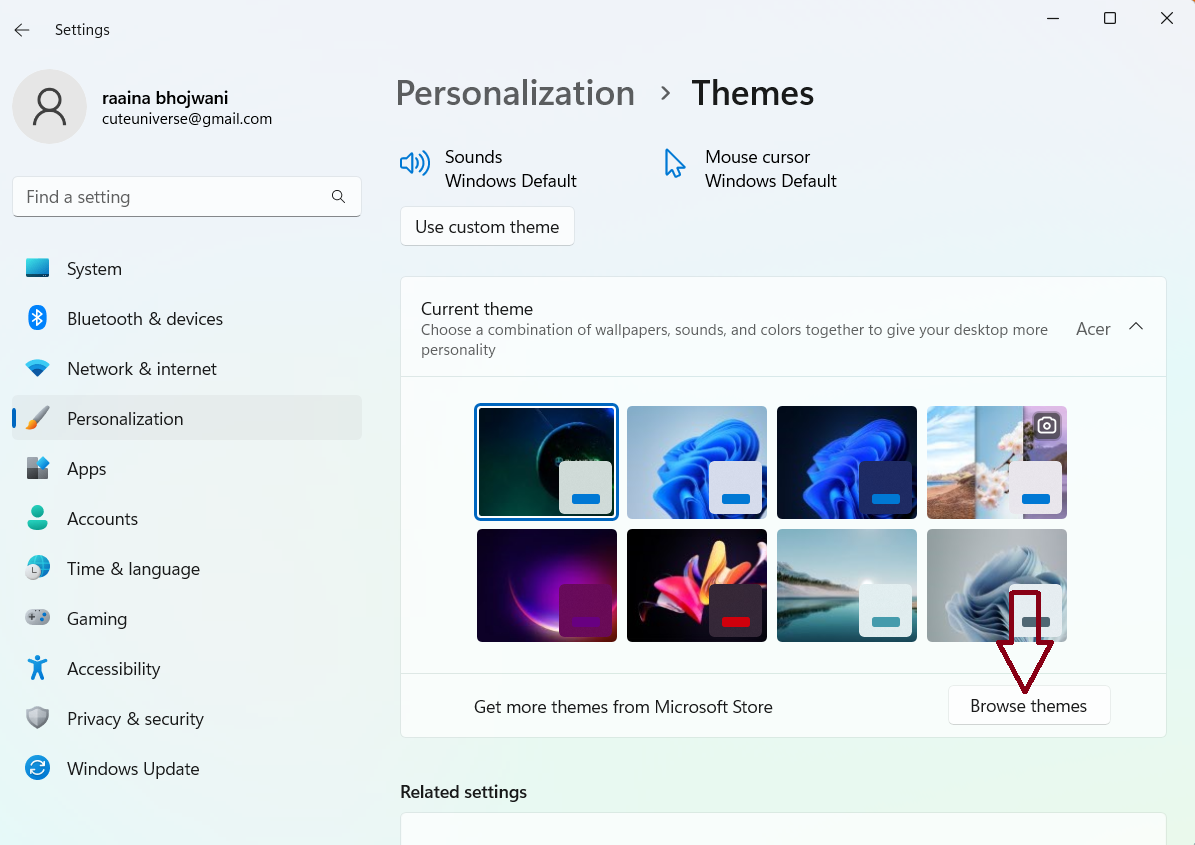
2. Click on “Personalization” > then click on “Themes”.

3. Click on the “Browse theme” button to download some good themes from the Windows store.

Method 3: Using command-line tools
1. Open File Explorer by pressing the Windows + E keys.
2. Click on “This PC” > then open “Windows”.

3. Open “Resources”.

4. Next open “Themes”.

5. Select the path in the address bar and right-click it. Choose “Copy”.
6. Note the theme name that you want to apply.

7. Search the Command prompt in the Search bar and click “Open”.

8. Paste the path that you had copied earlier with “\<theme name>” as shown below:
C:\Windows\Resources\Themes\themeA.theme

9. Press Enter.
Method 4: Using the control panel to change themes in Windows 11
1. Press Windows + R keys to open the Run prompt.
2. Type the bellow command and press Enter.
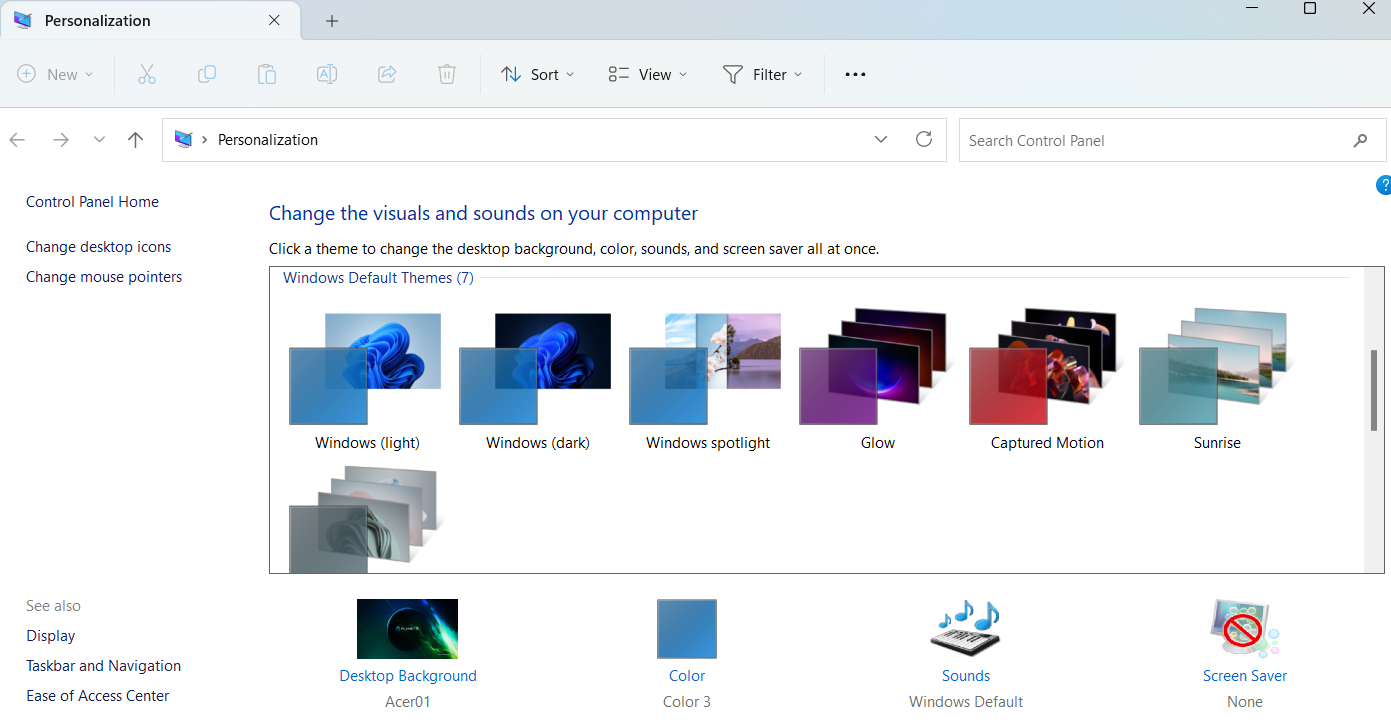
shell:::{ED834ED6-4B5A-4bfe-8F11-A626DCB6A921}-Microsoft.Personalization

3. Double-click on the theme to install it.

That’s It!
![KapilArya.com is a Windows troubleshooting & how to tutorials blog from Kapil Arya [Microsoft MVP (Windows IT Pro)]. KapilArya.com](https://images.kapilarya.com/Logo1.svg)


![[Latest Windows 10 Update] What’s new in KB5055612? [Latest Windows 10 Update] What’s new in KB5055612?](https://www.kapilarya.com/assets/Windows10-Update.png)


Leave a Reply