In Windows 11 operating system, when you open Settings app, by default it opens to System section. Here at the top of the screen, you will see your device name mentioned and beneath it, you will find device model name mentioned. This device model name is usually referred as System Product Name in Windows. This article will show you how to change System Product Name in Windows 11.
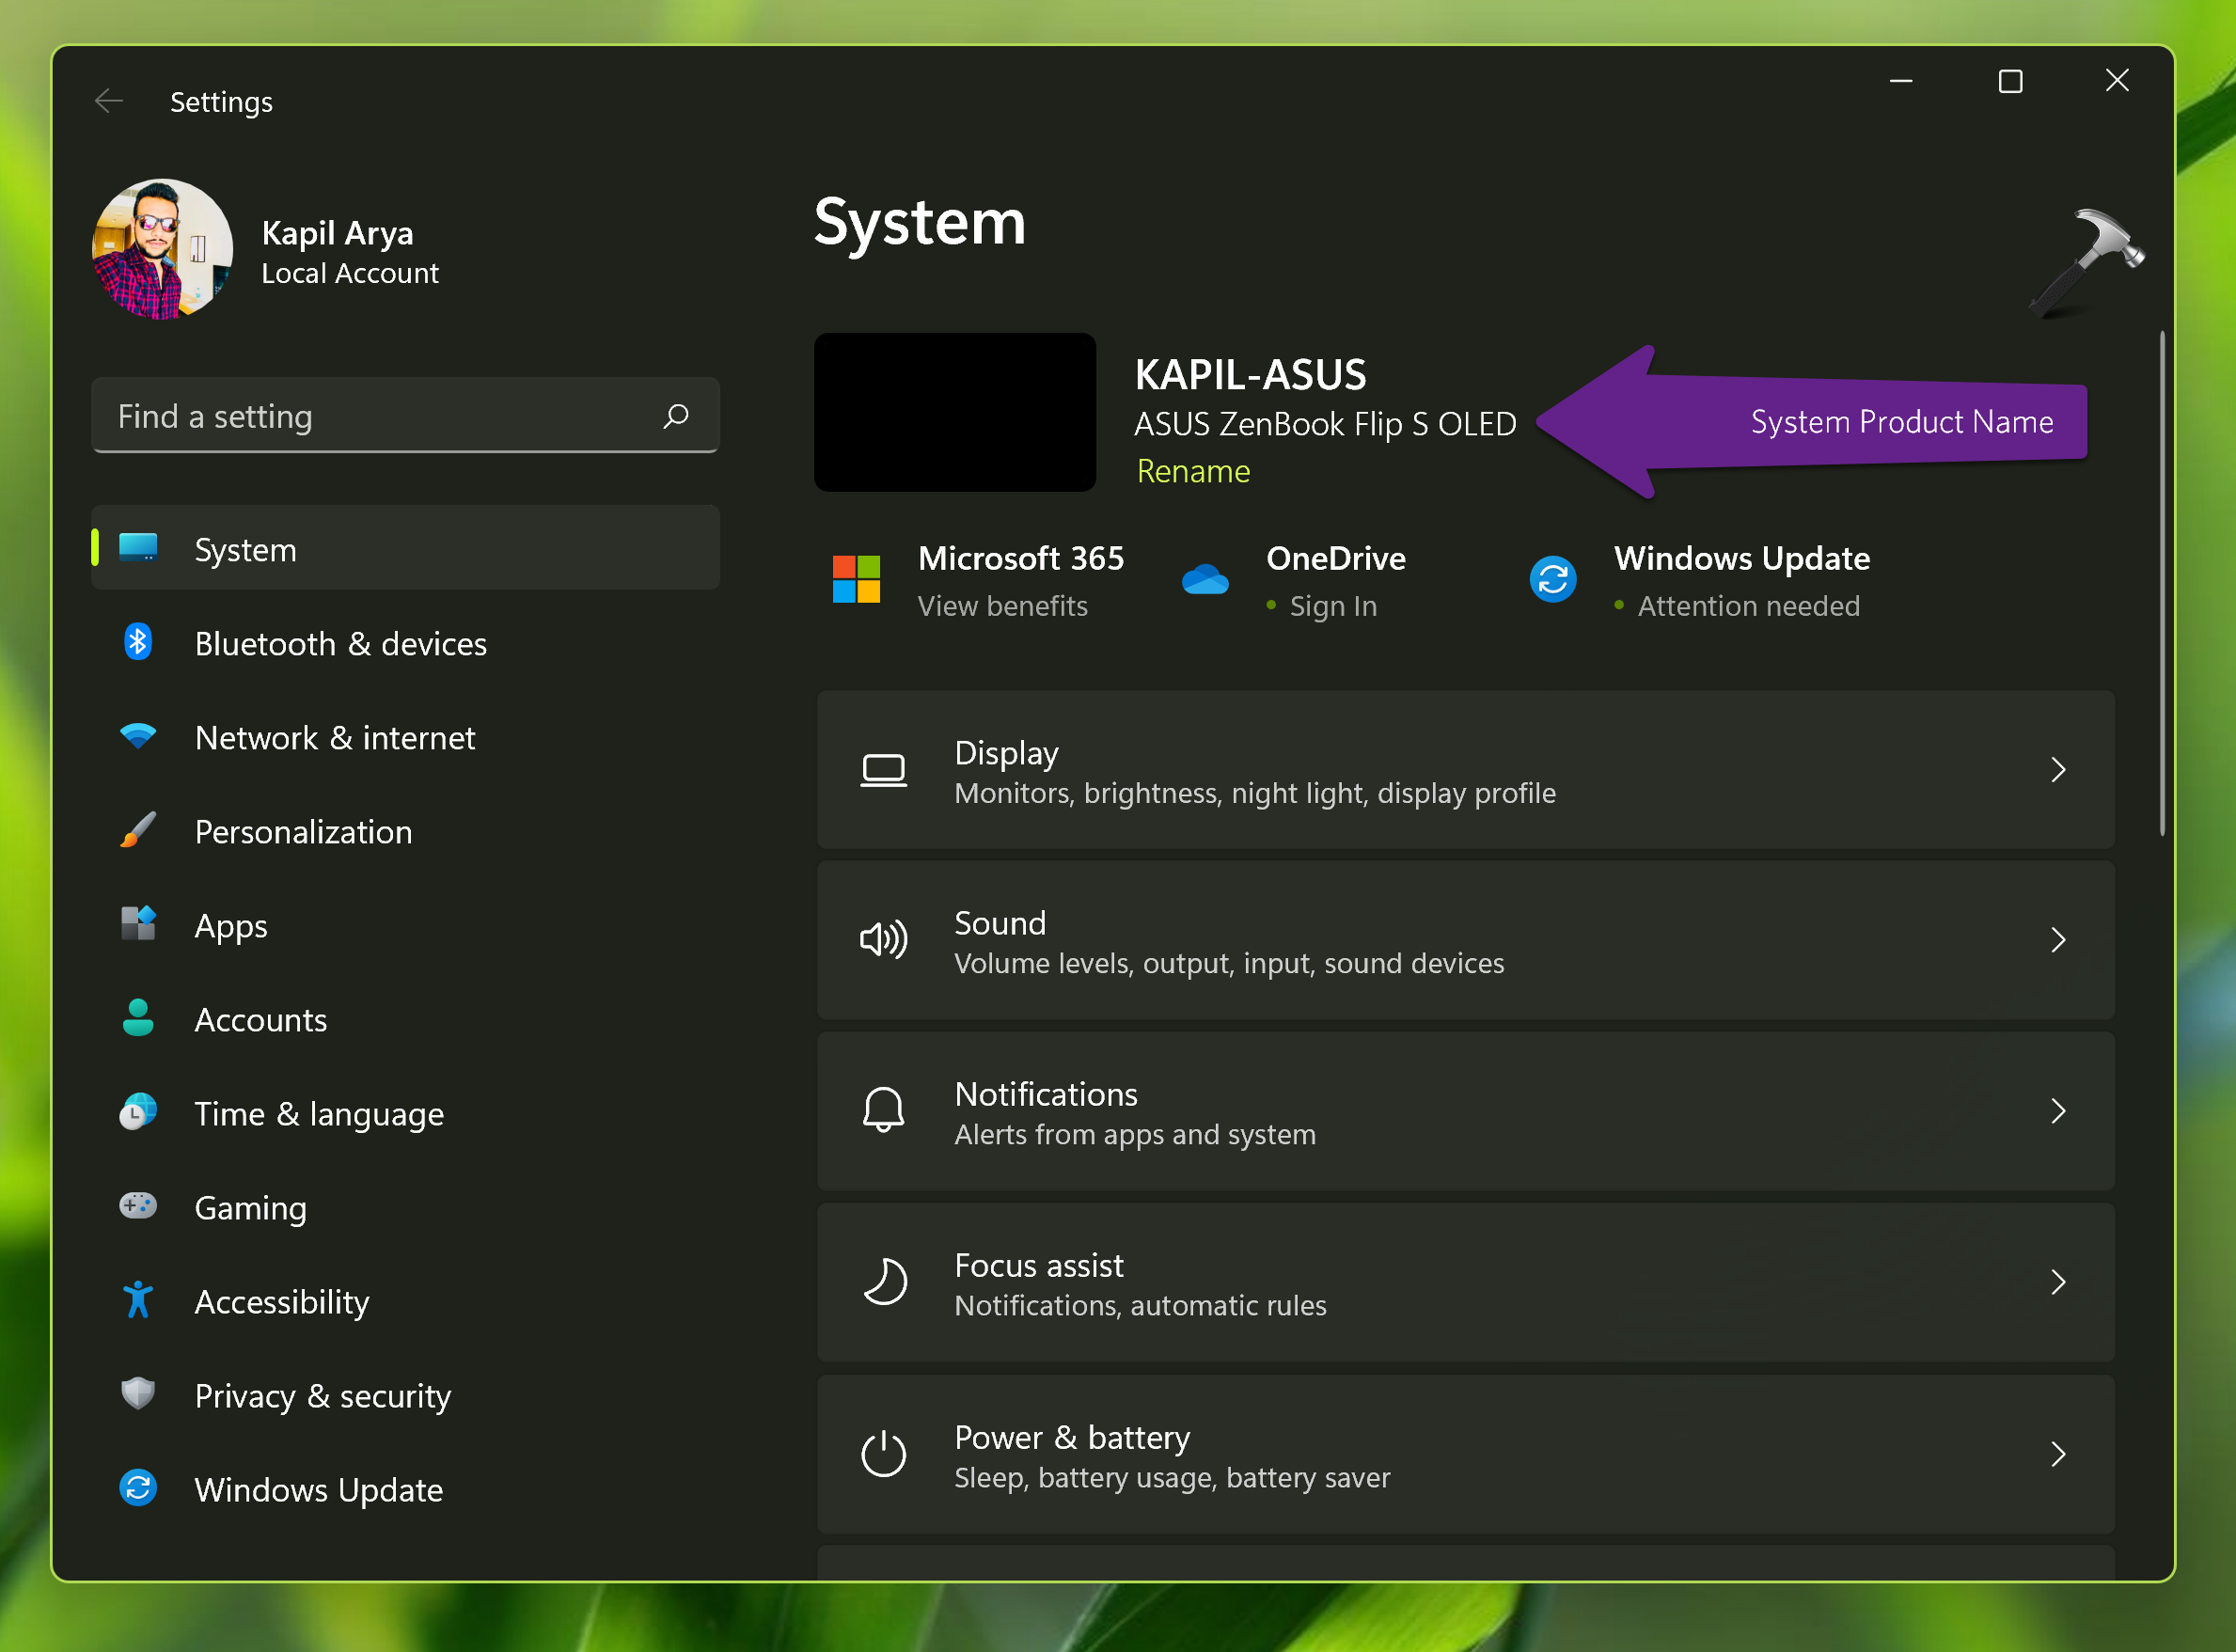
For example, in the below screenshot you can see that System Product Name is mentioned which is ‘ASUS ZenBook Flip S OLED’.

Usually, the Original Equipment Manufacturer also known as OEM fill up that device model information which shows here. If you have self built your device, then you can use this registry workshop to add customize System Product Name.
Here is how you can take the help of registry edit to customize System Product Name to desired text.
Page Contents
How to change System Product Name in Windows 11
Manual steps
 Registry Disclaimer: It is recommended to create a System Restore point first, if you’re not familiar with registry manipulation.
1. Press  + R and execute
 regedit command to open Registry Editor.
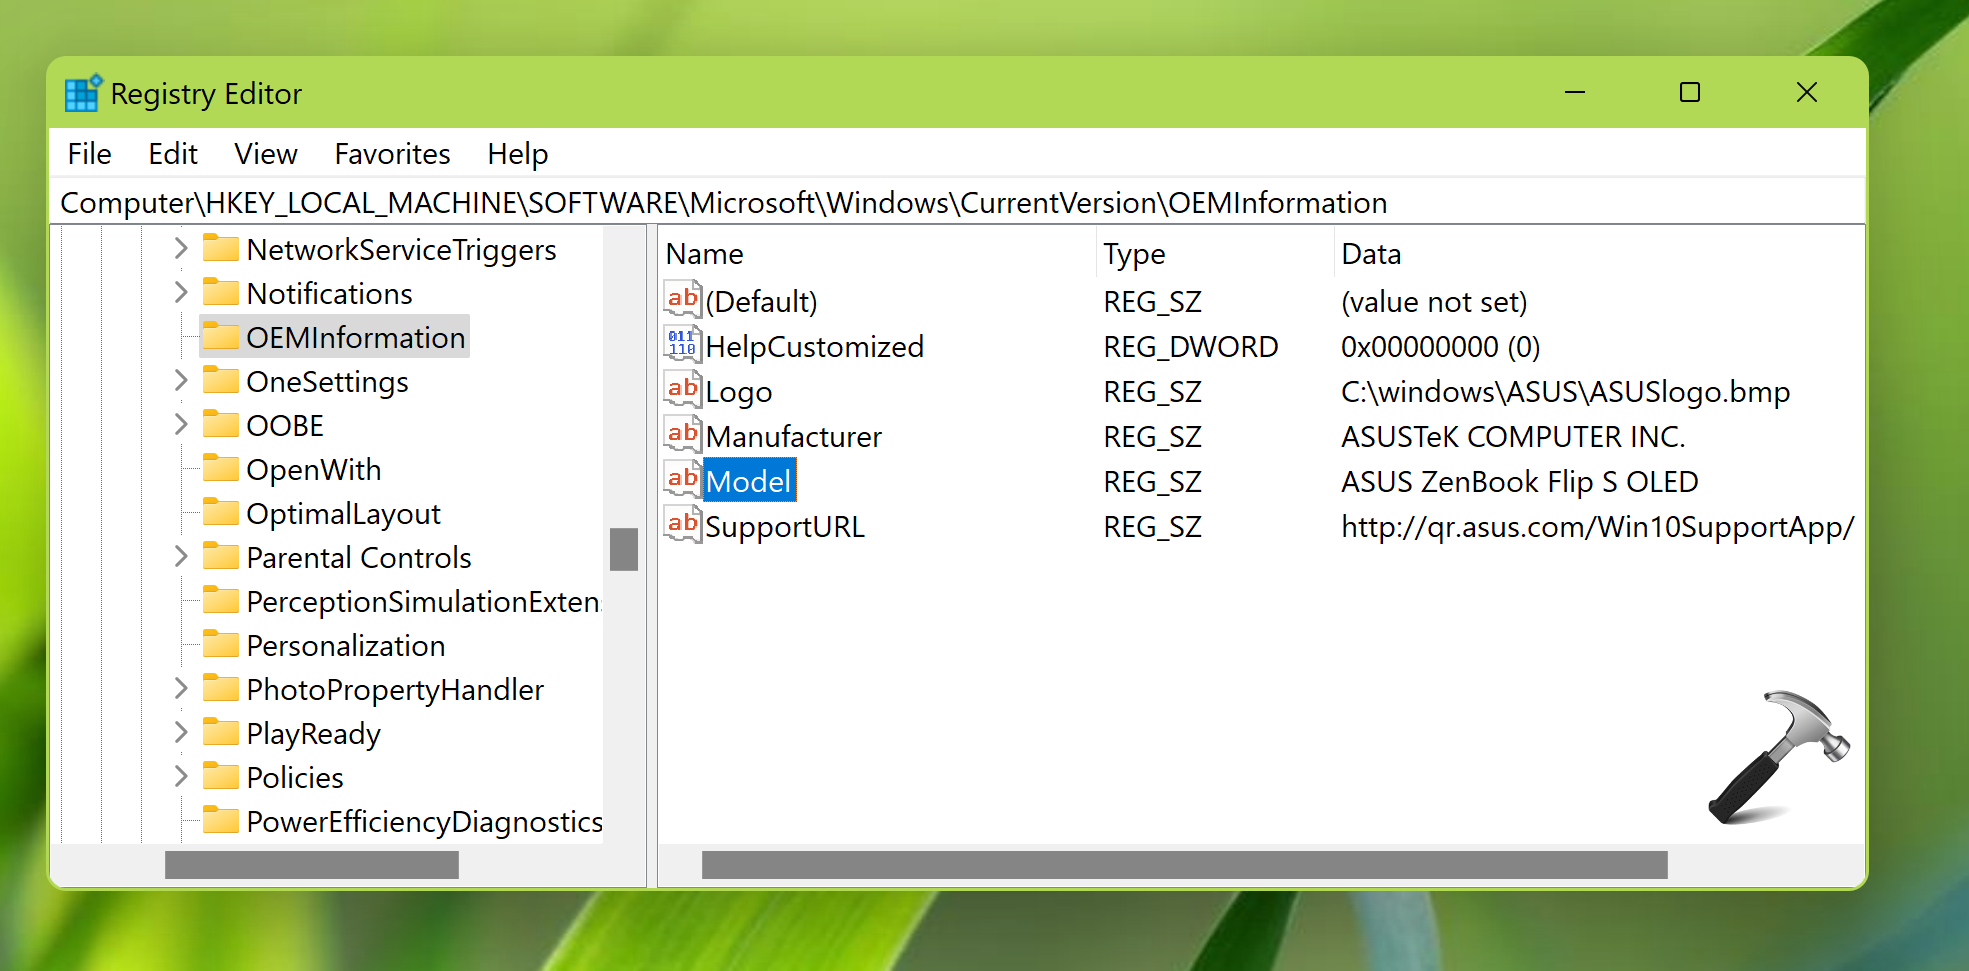
2. Go to HKEY_LOCAL_MACHINE\SOFTWARE\Microsoft\Windows\CurrentVersion\OEMInformation.
3. Under OEMInformation registry key, you’ll find Model registry string (REG_SZ). Double click on this registry string to modify its value data.

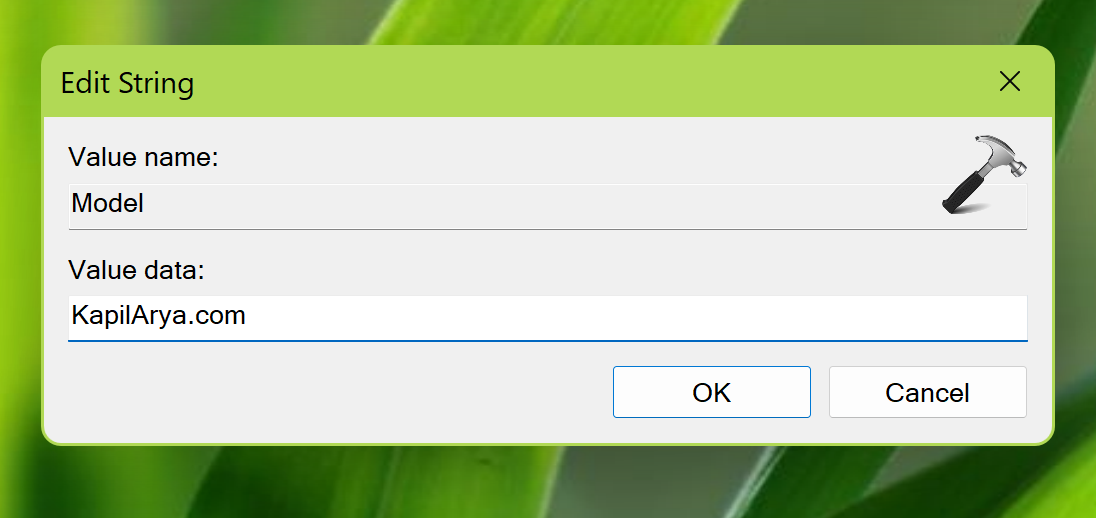
4. Now under Edit string, type the Value data has the desired text you want to show for System Product Name. Once done, click OK.

5. You can now close the Registry Editor.
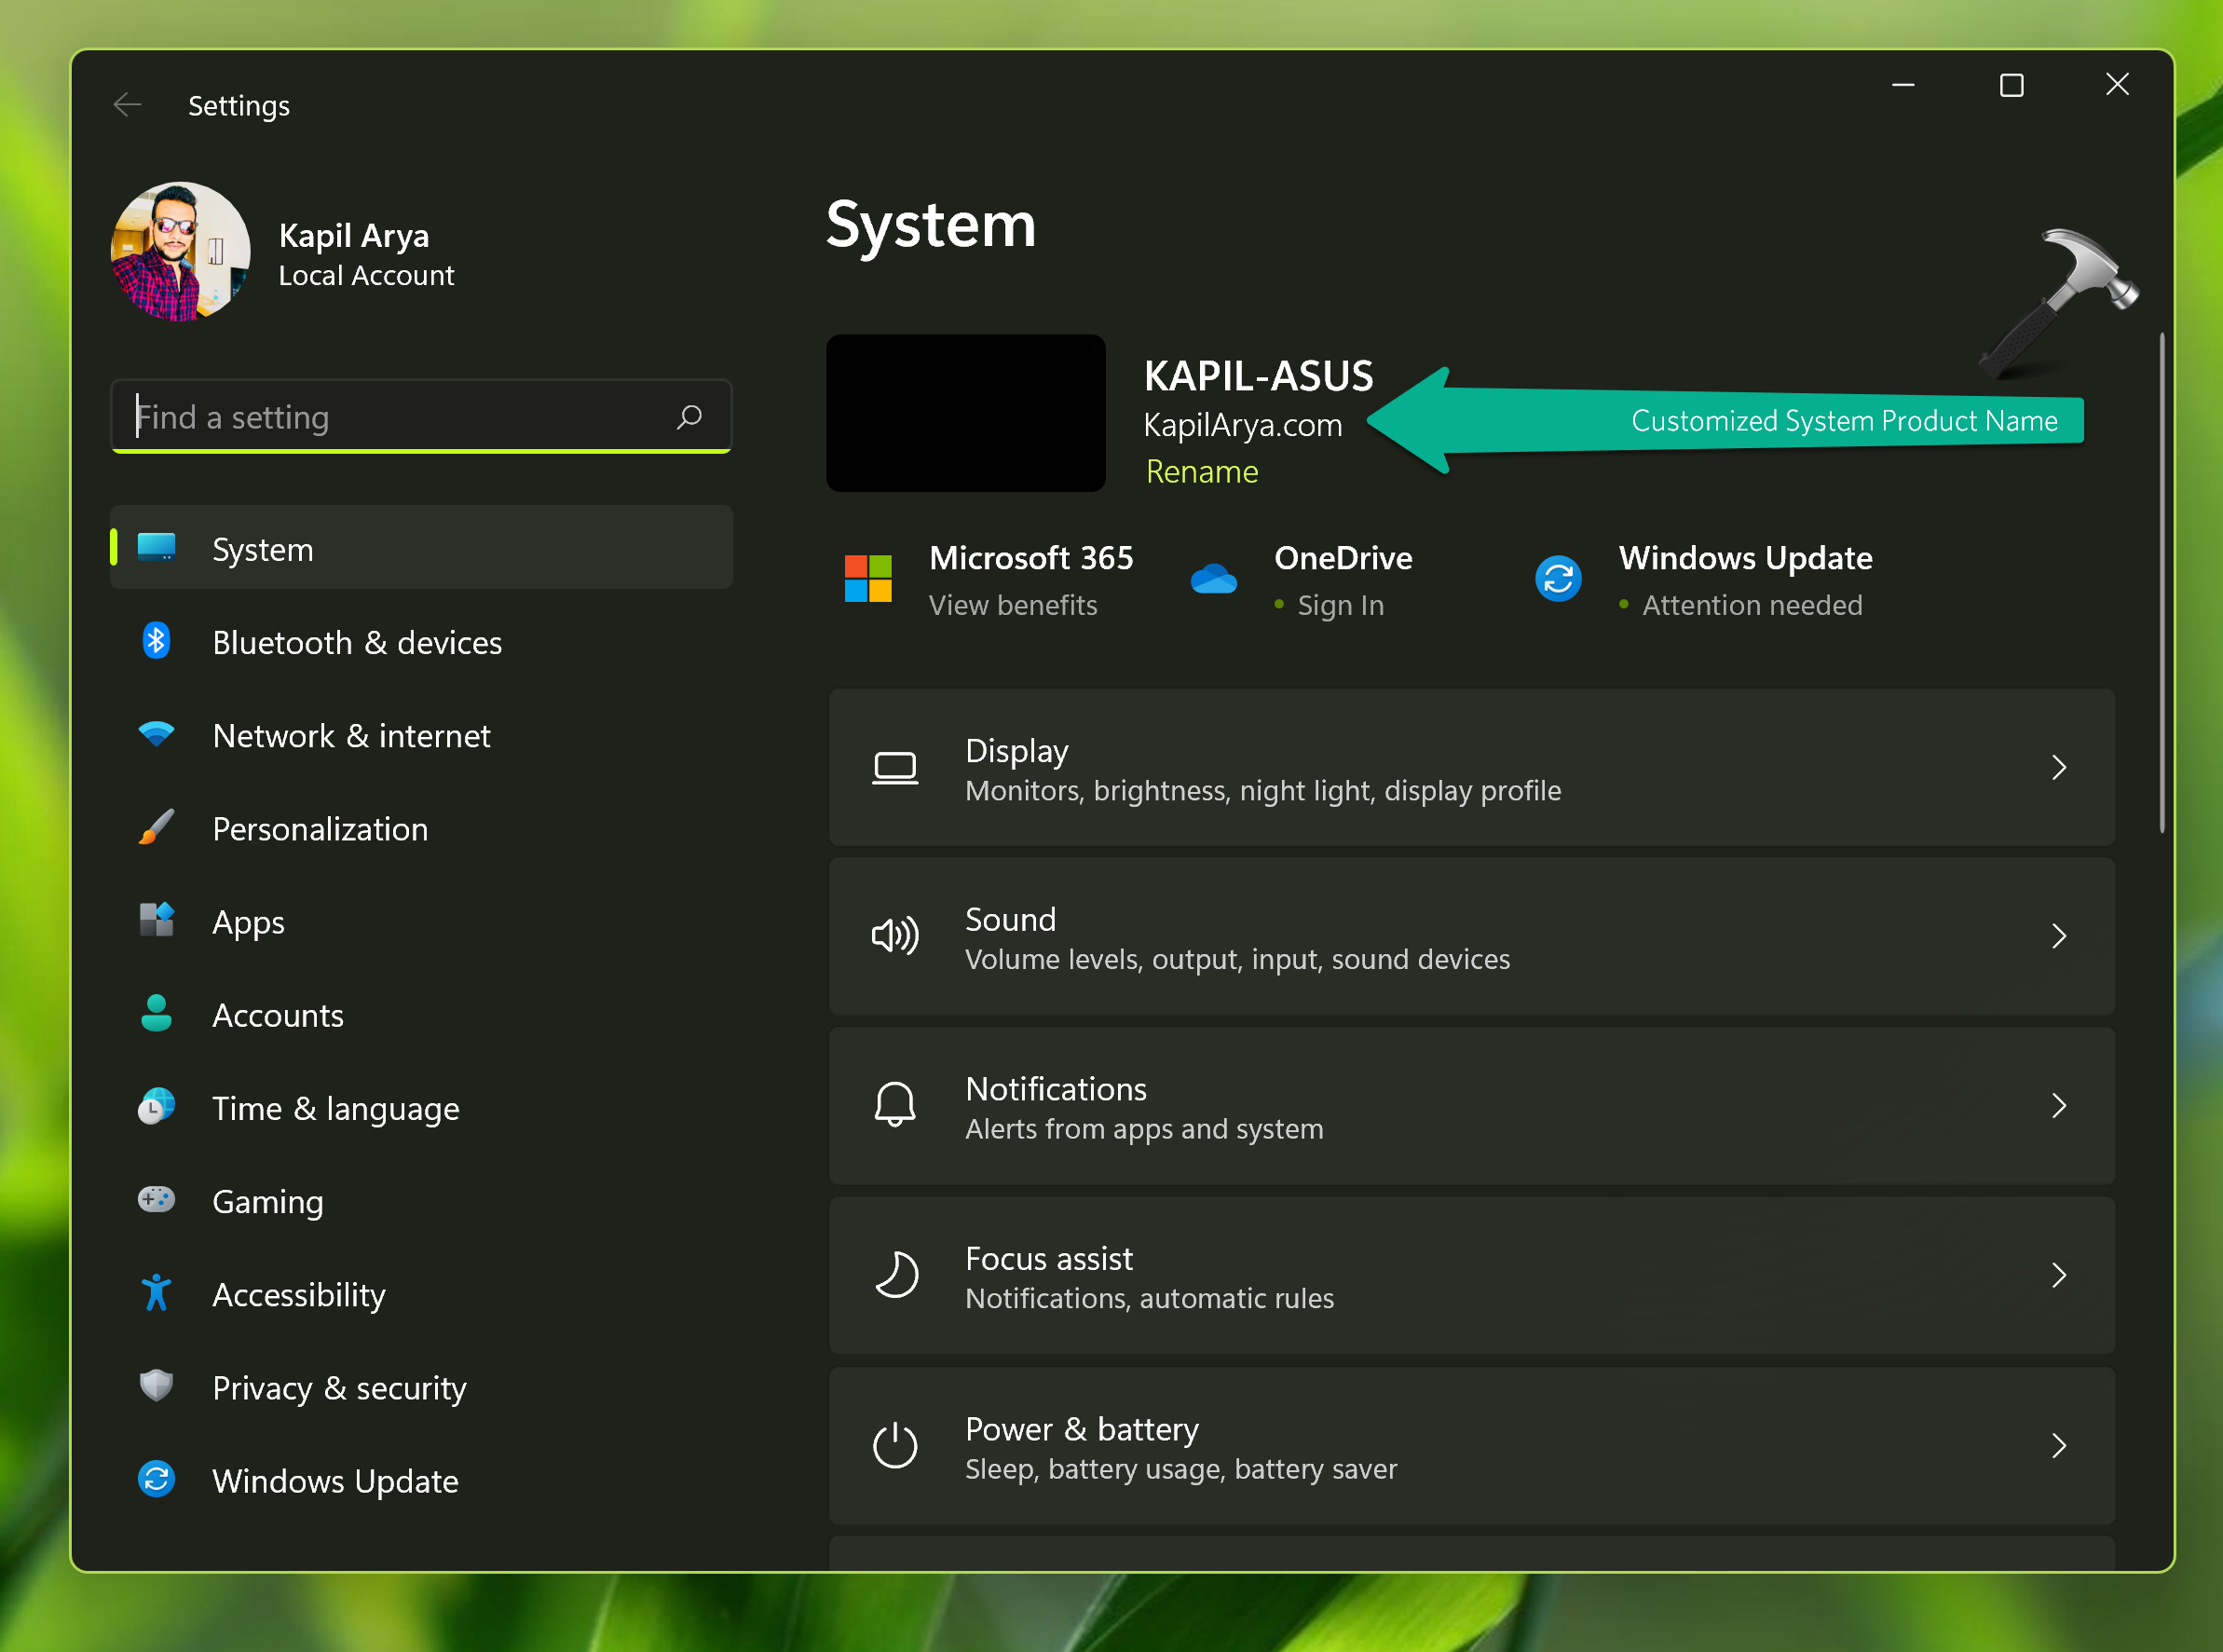
6. Press  + I keys now to launch the Settings app. When Settings app open, under system you will be able to locate the customized System Product Name as shown below.

 Note: If you can’t locate
 HKEY_LOCAL_MACHINE\SOFTWARE\Microsoft\Windows\CurrentVersion\OEMInformation, then you can instead go to HKEY_LOCAL_MACHINE\SYSTEM\CurrentControlSet\Control\SystemInformation and modify SystemProductName with your device model name desired text.Video guide
You can also check out following video for live demonstration of above steps:
That’s it!
Related: How to rename your Windows 11 PC.
![KapilArya.com is a Windows troubleshooting & how to tutorials blog from Kapil Arya [Microsoft MVP (Windows IT Pro)]. KapilArya.com](https://images.kapilarya.com/Logo1.svg)


![[Latest Windows 10 Update] What’s new in KB5055612? [Latest Windows 10 Update] What’s new in KB5055612?](https://www.kapilarya.com/assets/Windows10-Update.png)


Leave a Reply