In Windows 10, Sleep mode is usually defined as low-power state in which system display is turned off and running programs are saved into memory. Usually, by default, your Windows 10 will go to sleep mode after 5 minutes of inactivity when it on battery. The same thing happens in 10 minutes, when your system is on AC power.
This default time which lets Windows to go in sleep mode is defined in the power plan currently active. When you shift to different power plan, sleep settings are also changed. So if some day you discover that your computer goes to sleep early, this might be due to change in power plan.
You can try below mentioned methods to change sleep time and set it as per your requirement:
Page Contents
How To Change Sleep Settings On Windows 10
Method 1 – Via Settings App
FYI: These steps are illustrated on Windows 10 V1709.
1. Right click Start Button or press  + X keys and select Settings.
2. In the Settings app, navigate to System > Power & sleep.
3. Moving on, in the right pane of Power & sleep, under Sleep, you can change after how much time your system should go to sleep mode. You can select this setting individually for battery power (on laptops, tablets etc.) and AC power (on all devices).
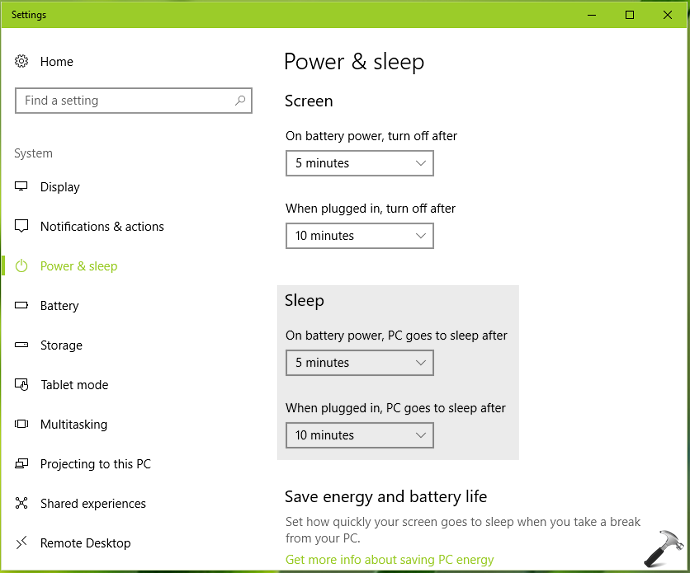
The settings you configured here are applied immediately. So you can close Settings app and return to Desktop, if you like.
Method 2 – Via Power Options
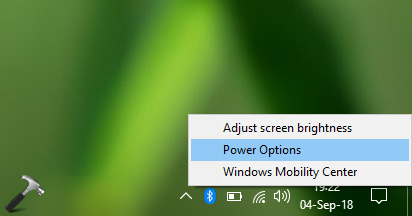
1. Right click on battery or power icon on taskbar and select Power Options. See this fix, if you don’t have power icon present.
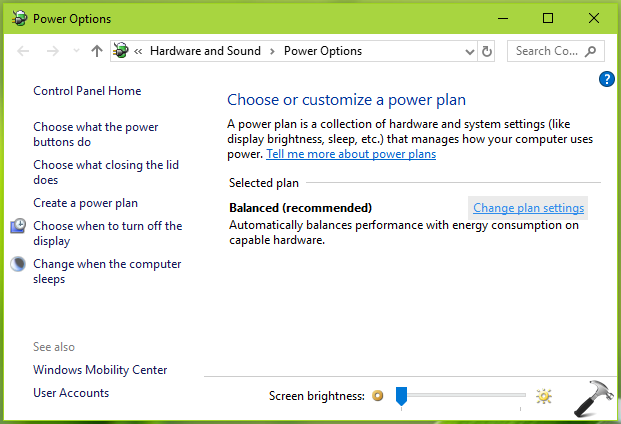
2. In the Power Options window, under Selected plan, click Change plan settings.
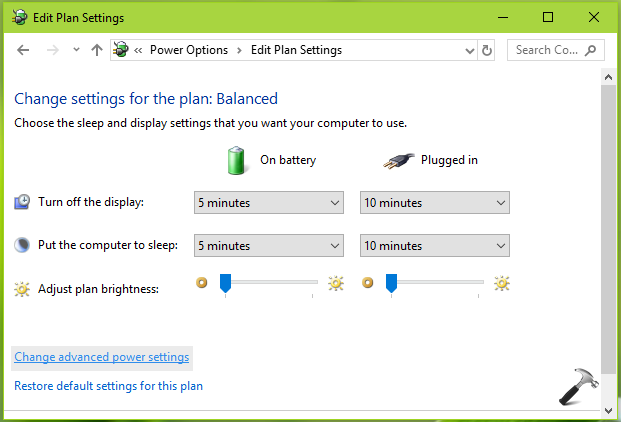
3. Next, in Edit Plan Settings window, click Change advanced power options link.
4. Finally, on Power Options Advanced Settings window, expand Sleep > Sleep after and set the time at which your computer goes to sleep. Like Method 1, here also you can configure this setting individually for battery and AC power.
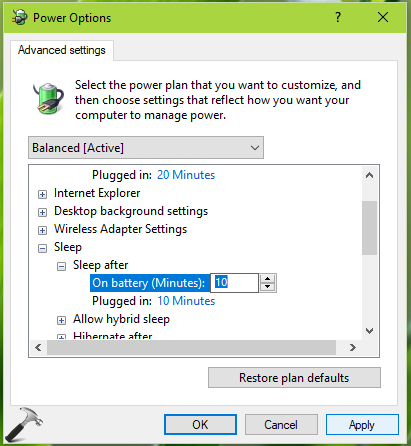
In this window, you can configure sleep settings for different power plans (if exists on your system). You can similarly configure hibernate settings on this same window. When you’re done, click Apply, followed by OK to change your settings.
So this is how you can change sleep time on Windows 10.
That’s it!
Related: Windows 10 Keeps Locking After 2 Minutes Of Inactivity.
![KapilArya.com is a Windows troubleshooting & how to tutorials blog from Kapil Arya [Microsoft MVP (Windows IT Pro)]. KapilArya.com](https://images.kapilarya.com/Logo1.svg)


![[Latest Windows 10 Update] What’s new in KB5055612? [Latest Windows 10 Update] What’s new in KB5055612?](https://www.kapilarya.com/assets/Windows10-Update.png)


Leave a Reply