

Do you need to change the partition size of your Windows 11 disk? This detailed tutorial provides step-by-step instructions about changing partition sizes on Windows 11 systems.
The optimization of storage together with system performance requires proper disk partition management. Knowledge about partition size adjustment on Windows 11 becomes crucial when your drive runs out of space or needs better storage organization.
Page Contents
When Should You Change the Partition Size in Windows 11?
The process of partition modification provides solutions for different types of situations. These are the situations where you would need to modify partition sizes on your Windows 11 system.
1. Running Out of Storage Space – The system partition at the C: drive needs sufficient space to prevent slowdowns and performance problems on your PC. System performance will improve after extending the partition.
2. Creating Separate Partitions for Better Organization – Creating separate partitions for different file types enables better organization and protects your data from system crashes.
3. Merging or Removing Unused Partitions – A single merged partition from multiple unused small partitions will simplify storage management while providing more available disk space.
4. Upgrading to a Larger or Smaller Storage Drive – You need to resize and migrate partitions when moving from an HDD to an SSD or when you replace a smaller SSD with a larger one.
5. Fixing Partition Errors or Corruption – Boot errors and system crashes, together with missing storage space, can result from partition misconfiguration or corruption. Partition resizing or recreation provides solutions to repair such problems.
Methods to Change Partition Size on Windows 11
Method 1: Resize Partitions Using Disk Management
Windows 11 users can manage partition size through the built-in Disk Management tool, which operates as one of the simplest methods for resizing partitions.
1. Open the Windows + X menu by pressing the keys together, then choose Disk Management from the list.

2. Select the disk partition that requires resizing. Tap Shrink Volume from the right-click menu on the partition.

3. Type the desired shrink size in megabytes before clicking the Shrink button.

4. Right-click on the partition that has unallocated space next to it and choose Extend Volume from the options.

Proceed through the on-screen directions to incorporate unallocated space. Users can perform this process without requiring external software since it remains user-friendly.
Method 2: Adjust Partition Size via Windows Settings
Users who prefer graphical interfaces can access partition modification through the Windows Settings app.
1. Open the Settings app through the Windows + I keyboard shortcut. Navigate to System > Storage.
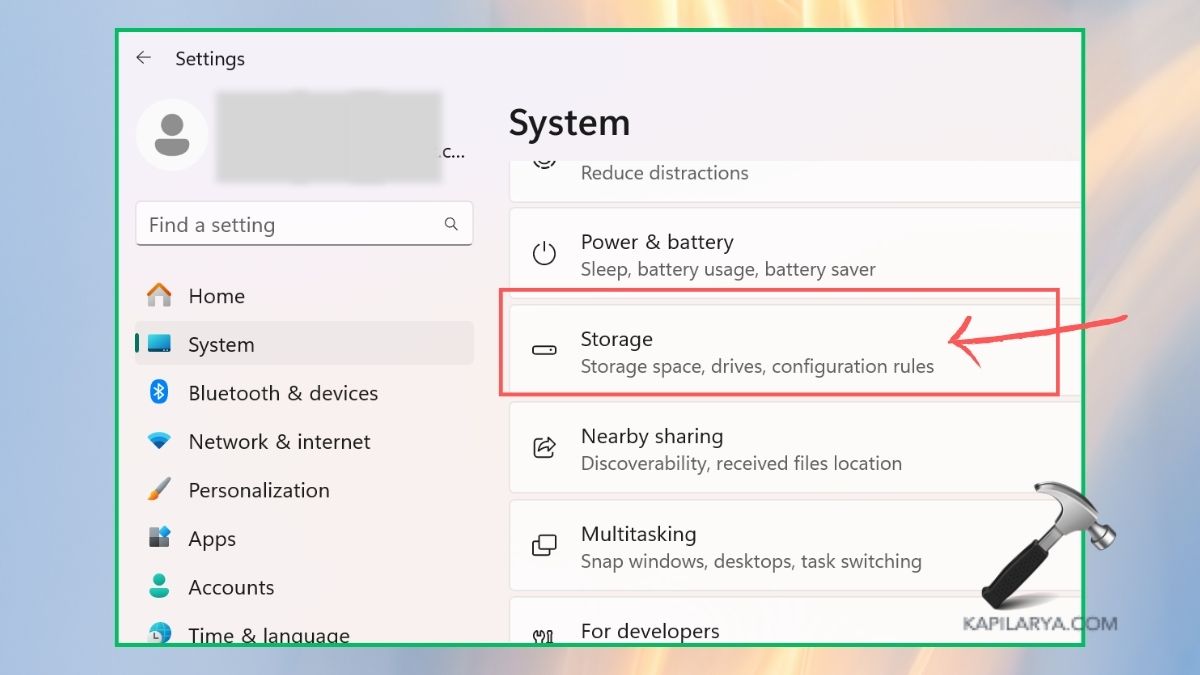
2. Click on Advanced storage settings at the bottom of the screen, then select Disks & volumes.

3. Open the partition, then access Properties followed by Change size. Type the desired partition size and complete the process.

The approach is easy to use yet restricted in its capabilities because it might fail to expand system partition sizes.
Method 3: Resize Partitions Using the Command Prompt (CMD)
Users who work with command-line tools can resize Windows 11 partitions through Command Prompt (CMD) by using the Diskpart utility.
1. Open the Run dialog by pressing Windows + R, then type this, followed by pressing Ctrl + Shift + Enter.
cmd

2. Enter the following commands one by one after pressing the Enter key.
diskpart
list disk
select disk X
Users need to determine the disk number before substituting X with the appropriate value.

4. Now, enter these commands followed by pressing the Enter key.
list partition
select partition X

5. Choose and paste the below commands as per your needs-
a. Enter this command to shrink, followed by the partition size in MB, where you should input the value of XXXX.
shrink desired=XXXX
b. The command for extension requires unallocated space availability and works only when entered.
extend size=XXXX

The use of CMD provides precise control, yet users need to exercise caution to prevent data loss.
Method 4: Modify Partition Size with PowerShell
Advanced users and automation professionals can use PowerShell to resize partitions in Windows 11.
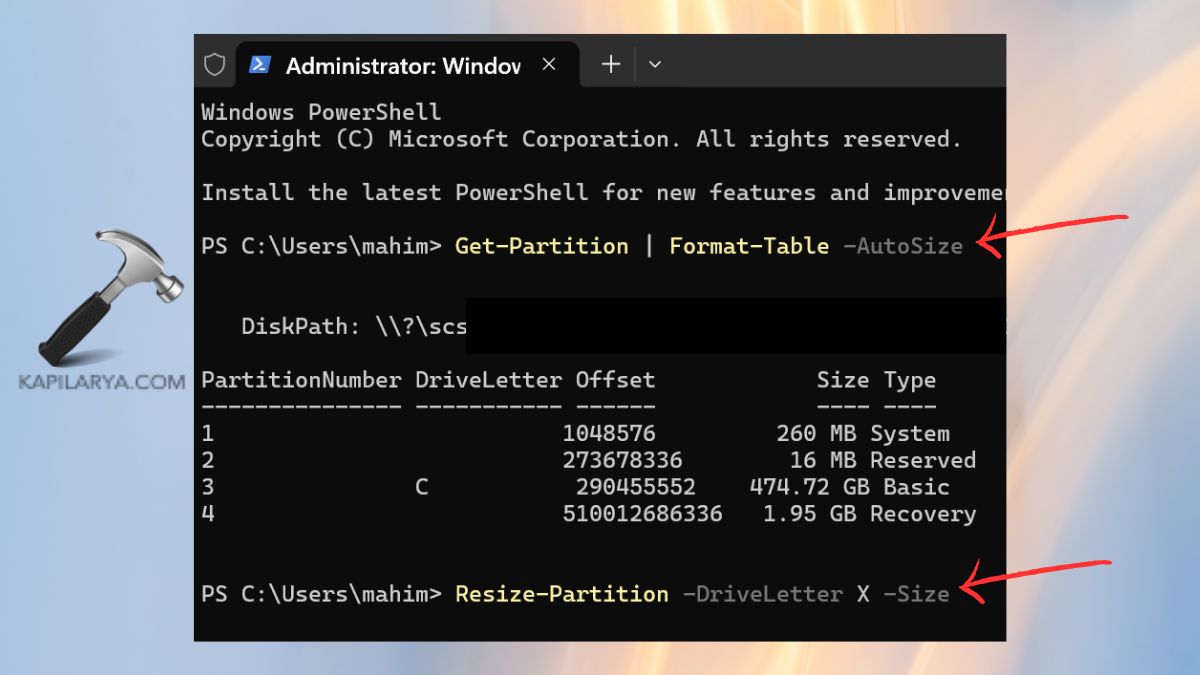
1. Press Windows + X, then select Windows Terminal (Admin). Or you can directly open it with right-clicking the Start menu.

2. Enter each command one by one, followed by pressing the Enter key.
Get-Partition | Format-Table -AutoSize
Resize-Partition -DriveLetter X -Size (NewSizeInBytes)
The command requires users to substitute X for the partition letter and NewSizeInBytes for the target partition size.
3. Enter the command when unallocated space exists.
Resize-Partition -DriveLetter X -Size (Get-PartitionSupportedSize -DriveLetter X).SizeMax
The command enables partition expansion to reach its maximum supported capacity.

The partition resizing process through PowerShell delivers quick results for managing multiple disk partitions.
Frequently Asked Questions (FAQs)
#1 Can I change the partition size without losing data?
Users can resize partitions through Disk Management and Settings as well as CMD and PowerShell tools without losing any files. It remains essential to create backups of essential data before starting any modifications.
#2 Why can’t I extend my partition in Windows 11?
A partition extension requires unallocated space to exist adjacent to the partition. You should consider moving or deleting other partitions because unallocated space is not available next to your partition.
#3 What is the best method to change partition size in Windows 11?
Beginners can easily operate Disk Management or Settings. Users with advanced skills can choose between Command Prompt (CMD) or PowerShell.
That’s it!


Leave a Reply