If you like to things customize in your Windows, this article will surely interest you. So by default, the lock screen in Windows 10 displays time in 12-hour format. This setting is applied for all users (currently logged in plus new user accounts). When you system is idle and it automatically goes to lock screen, depending on the settings configured, you’ll have lock screen clock displayed. You can also access the lock screen manually by pressing  + L keys.
In this article, we’ll see how to change lock screen clock format and set it to 24-hour format.
How To Change Lock Screen Clock Format In Windows 10
1. Open Control Panel and click on Region.
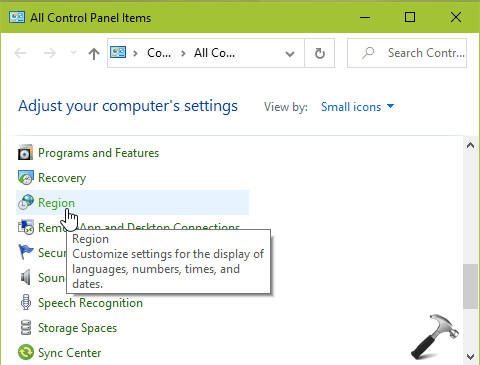
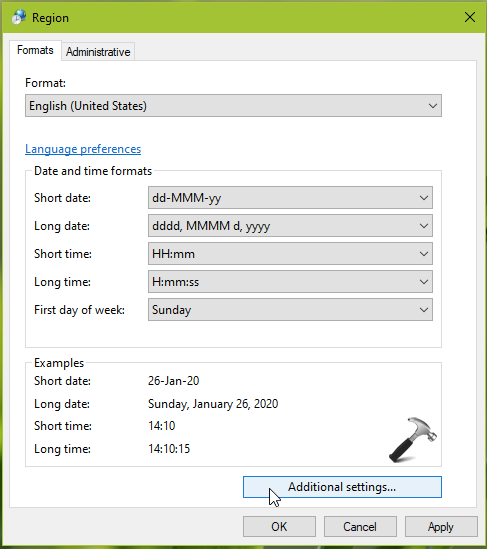
2. First we’ll set the 24-hour time format in HH:mm, as default is H:mm:ss. If we do not do this, we’ll have 24-hour time displayed in H:mm:ss format, like 14:06:23. If you do not want to include seconds in 24-hour time format, try this else you can directly go to step 4. In Region window, click on Additional settings.
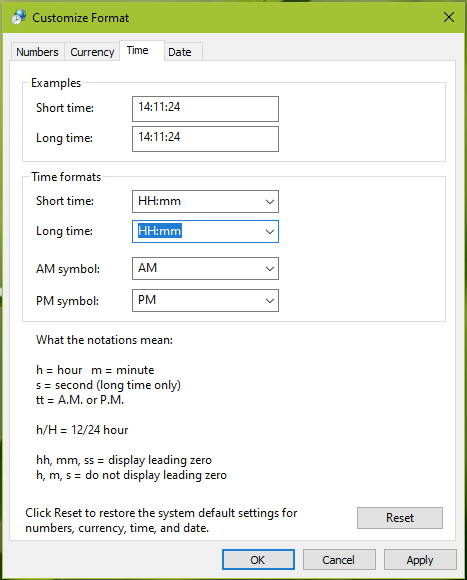
3. Then in Customize Format, for Long time, type HH:mm and click Apply/OK.
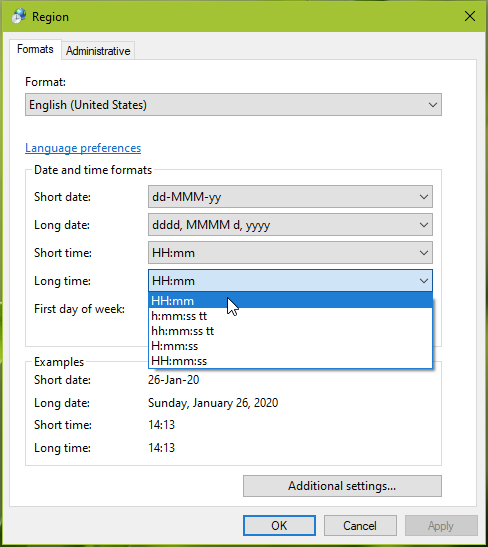
4. In Region window, set the Long time from default value to HH:mm or set it to HH:mm:ss, if you want to include seconds on lock screen clock. Click OK.
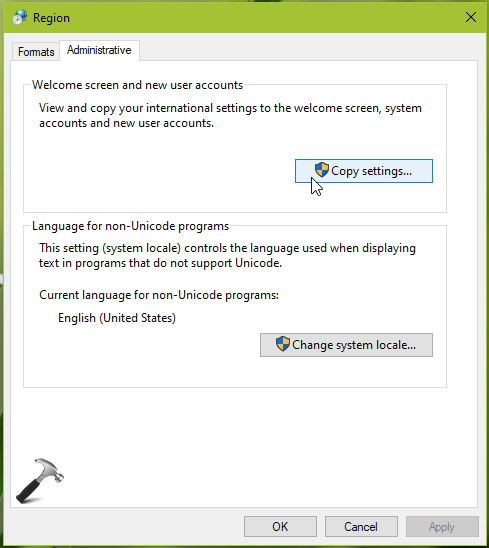
5. If you want to apply the same time format for all users accounts (present plus future), you can try these additional steps. In Region window, switch to Administrative tab, under Welcome screen and new user accounts, click on Copy settings.
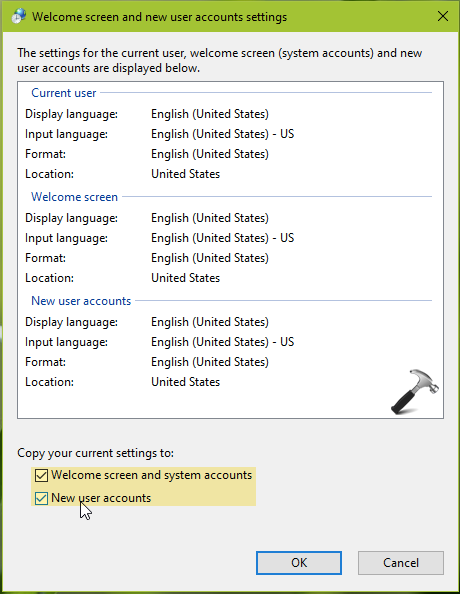
6. Then under Welcome screen and new user accounts settings window, for Copy your current settings to, check Welcome screen and system accounts, New user accounts options.
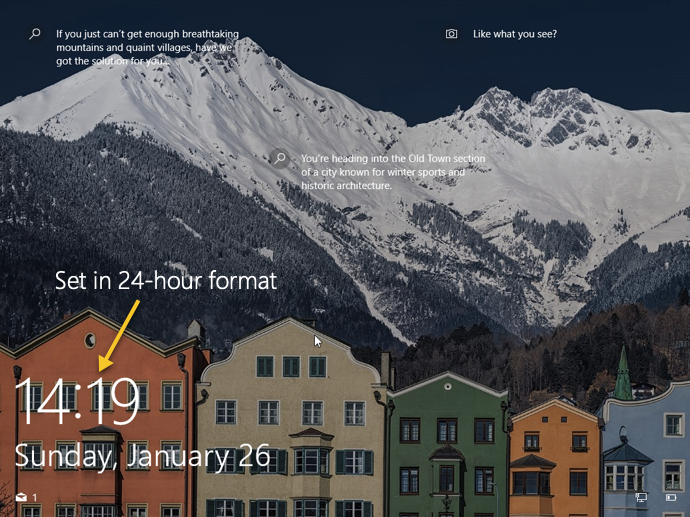
7. Now press  + L to access lock screen and check the clock. You should have time format in the way you’ve set in above steps.
Checkout below video to illustrate this method:
That’s it!
![KapilArya.com is a Windows troubleshooting & how to tutorials blog from Kapil Arya [Microsoft MVP (Windows IT Pro)]. KapilArya.com](https://images.kapilarya.com/Logo1.svg)




Leave a Reply