Windows 11, offers an amazing default setting named display scaling. This setting usually applies automatically, but can even be adjusted based on the necessity. By adjusting the display scaling settings in Windows 11, all your struggles regarding the visibility of icons, texts or navigator pointer on the screen of your device can easily be resolved. This setting of change in display scaling is needed for all those who suffer from eye problems, especially eye straining. Thus, the convenient display scaling feature in Windows 11 can be used to efficiently resolve all these issues.
In order to change display scaling based on your requirement, you can swiftly follow either of the below mentioned tutorial.
There are two convenient methods, wherein Settings App is used to change display scaling in Windows 11.
Page Contents
Method 1: Using default scaling option offered by Settings
1. Begin by clicking on the Start button followed by selecting Settings or by pressing Windows Key + i.
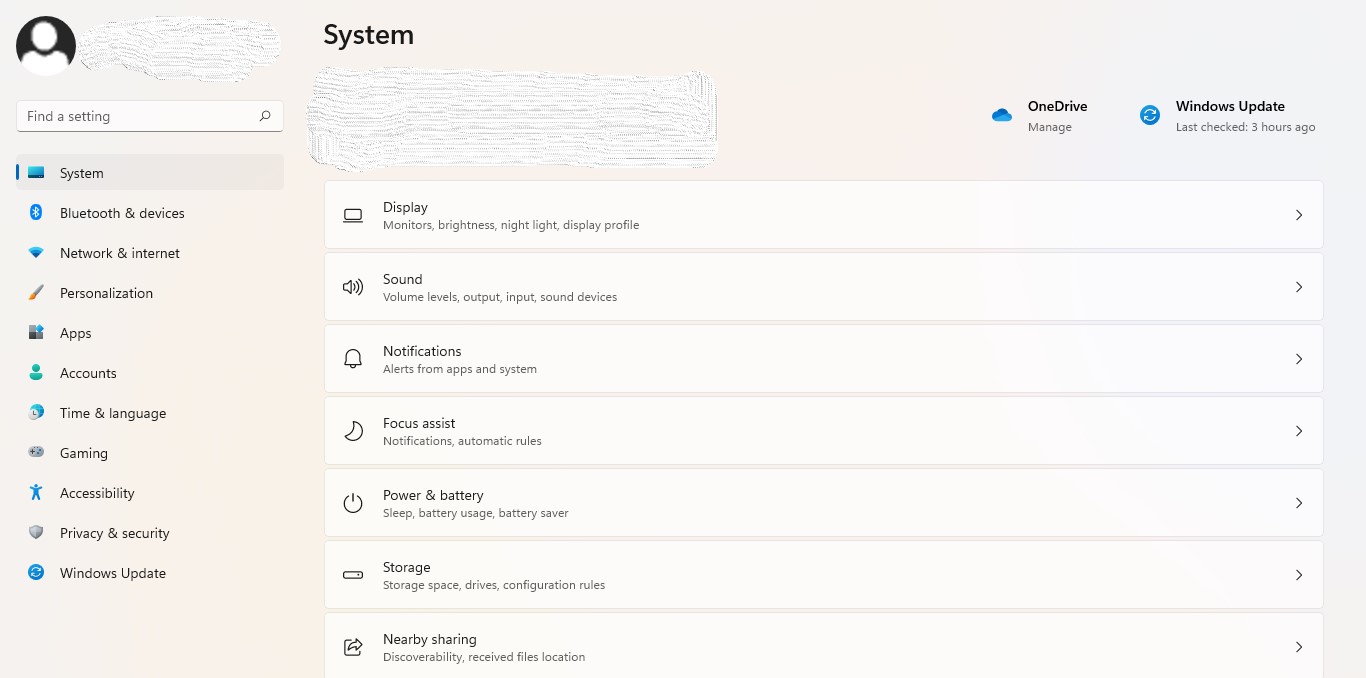
2. Click on the System from the left of the panel.
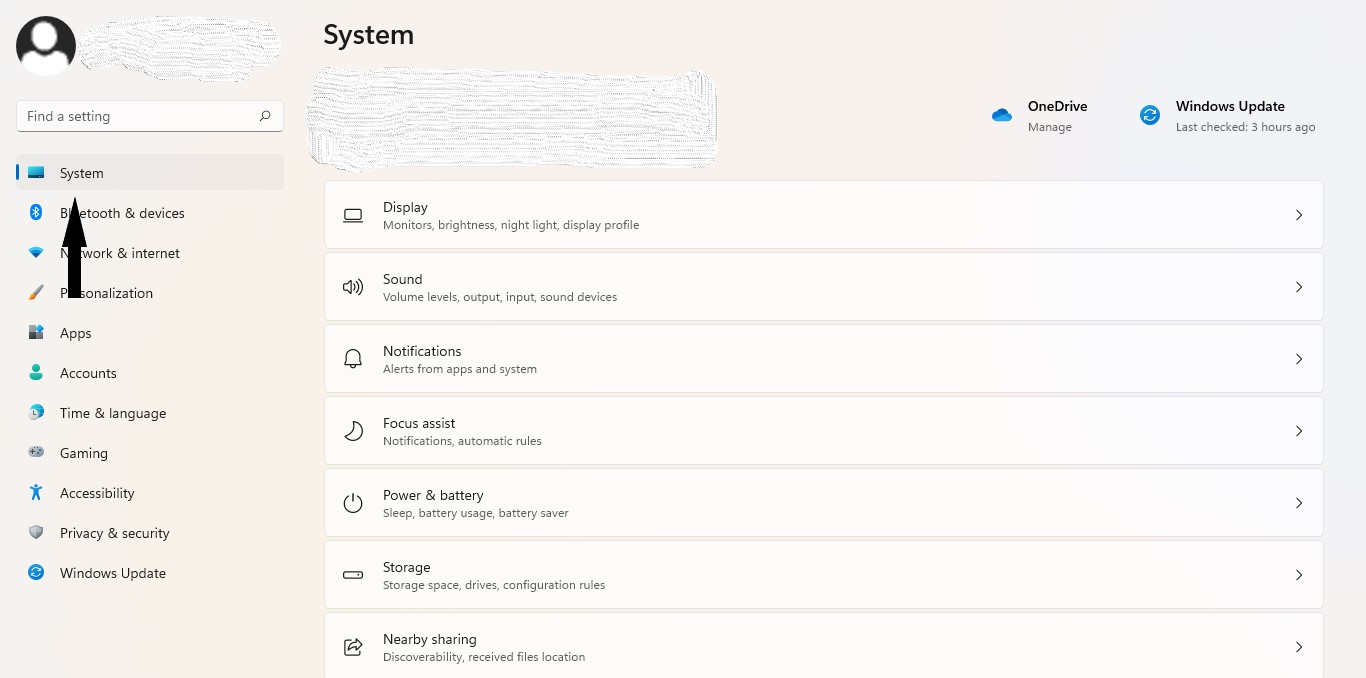
3. Now, click on the Display mentioned on the right side.

4. Under the Scale & layout section, click on the dropdown menu next to Scale and select your desired option. (take reference from the screenshot)
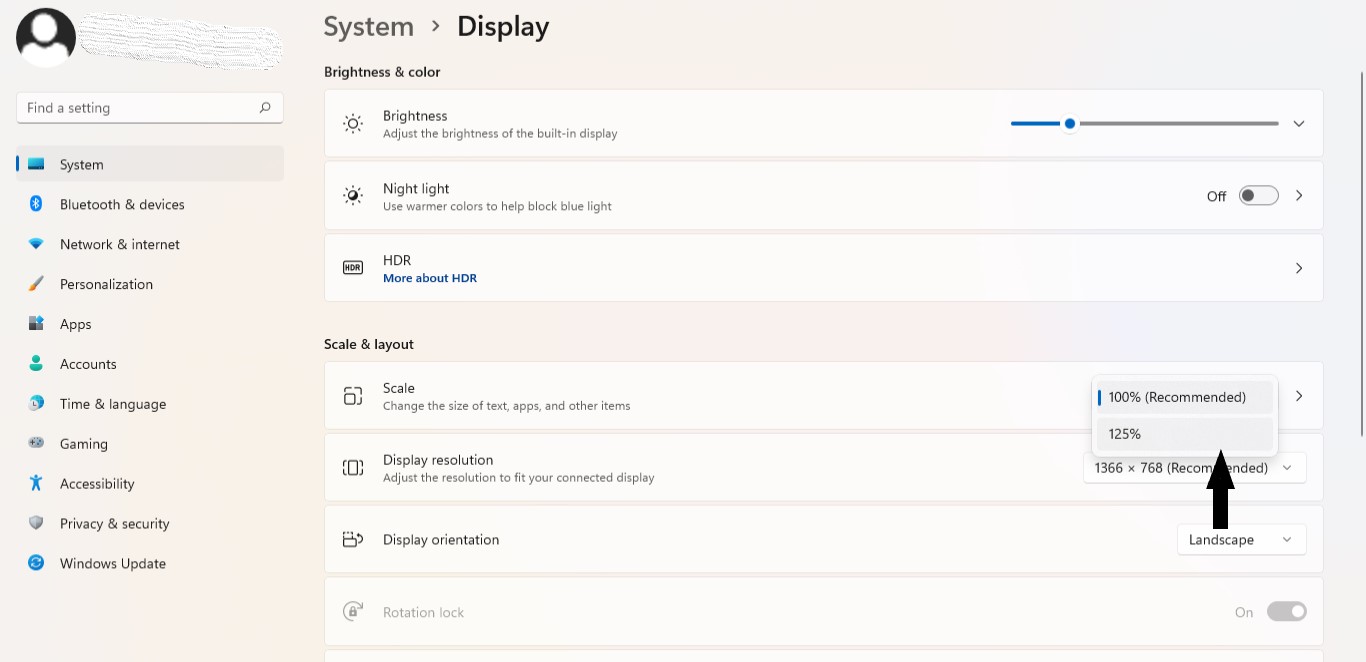
5. Now, your desired changes in display scaling will apply immediately, else you can restart your device to observe the desired change.
Method 2: Using custom value for changing display scaling
1. Copy steps 1, 2 and 3 from the Method 1.
2. Double-click on Scale mentioned under Scale & layout.
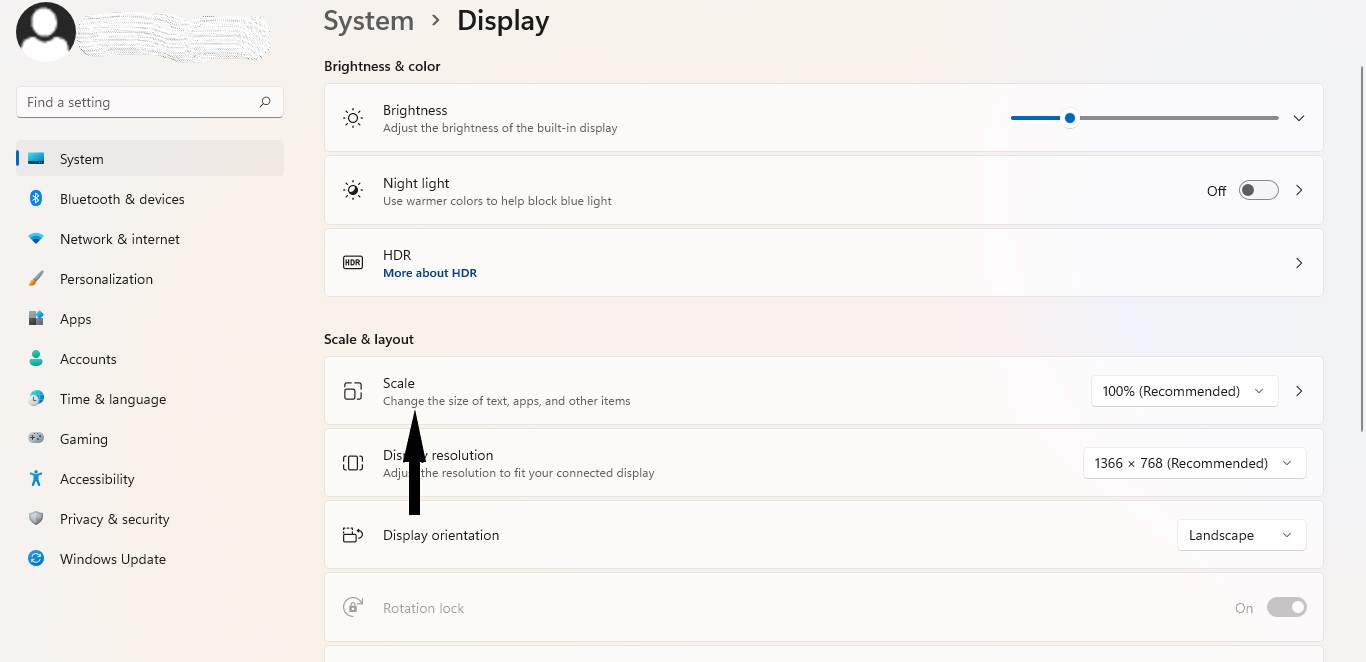
3. Now, type your desired value ( value should be between 100% to 500%) under the Custom scaling section.
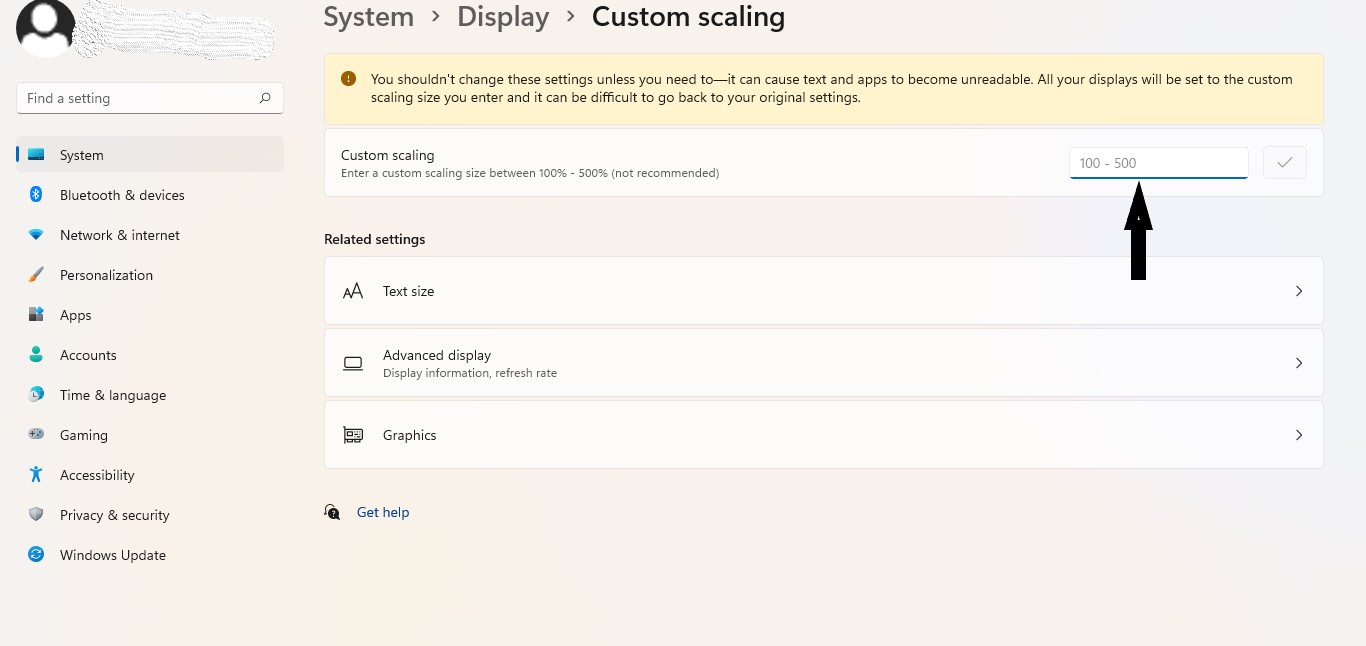
4. Click on the check mark placed next to the value you entered.
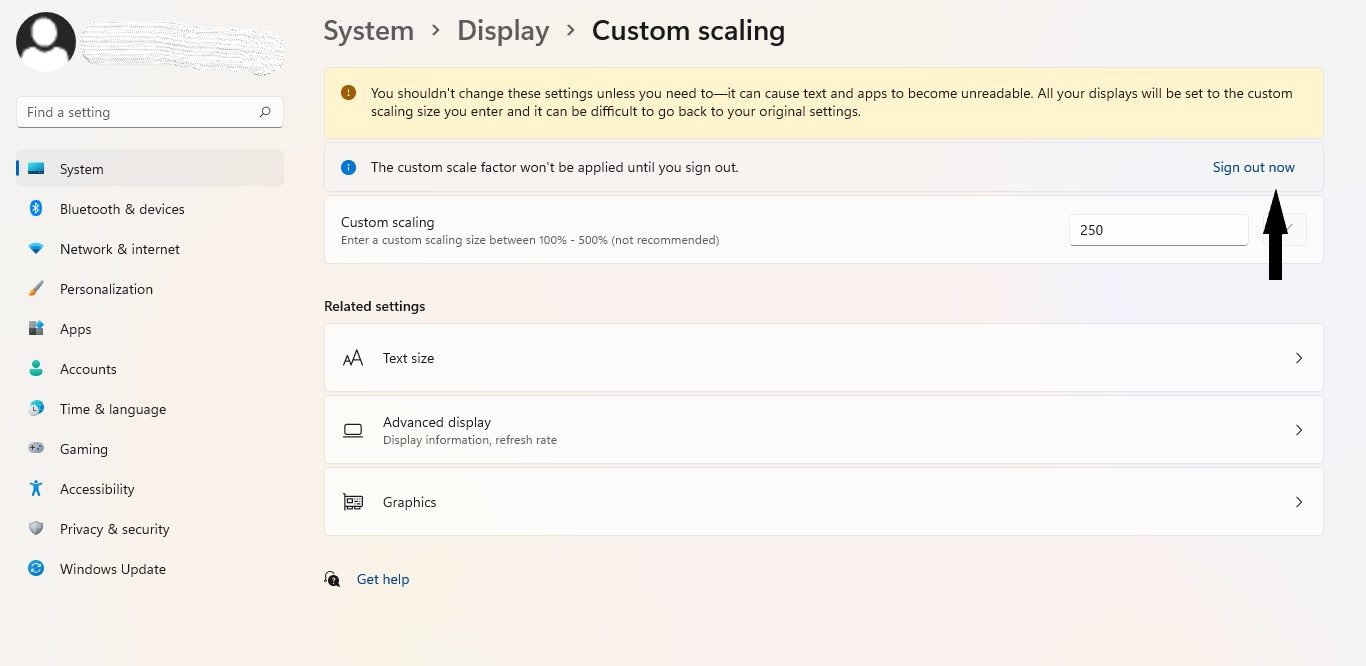
5. Your changes in display scaling will be visible once you click on the Sign out now button mentioned above (refer the screenshot mentioned below).
The selection of either of these methods will result in the adequate change of display scaling in Windows 11 of your device.
![KapilArya.com is a Windows troubleshooting & how to tutorials blog from Kapil Arya [Microsoft MVP (Windows IT Pro)]. KapilArya.com](https://images.kapilarya.com/Logo1.svg)


![[Latest Windows 10 Update] What’s new in KB5055612? [Latest Windows 10 Update] What’s new in KB5055612?](https://www.kapilarya.com/assets/Windows10-Update.png)


Leave a Reply