Are you looking for a way on how to change your account picture in Windows 11? If yes, then you are at the right place. If you want your account picture to be more personal, then change it. When you set up a Windows 11 PC using a Microsoft account, then your account’s profile picture will be used. On the other hand, if you use a local account, then your account picture will be generic.
In both cases, you can change your account picture. So, now let’s see how to change account picture in Windows 11!
Page Contents
How to Change Account Picture in Windows 11
Method 1: Change Account Picture for Local Accounts
1. In the first place, open Settings by pressing the Windows + I keys together on your keyboard. Once opened, click on the Accounts tab.
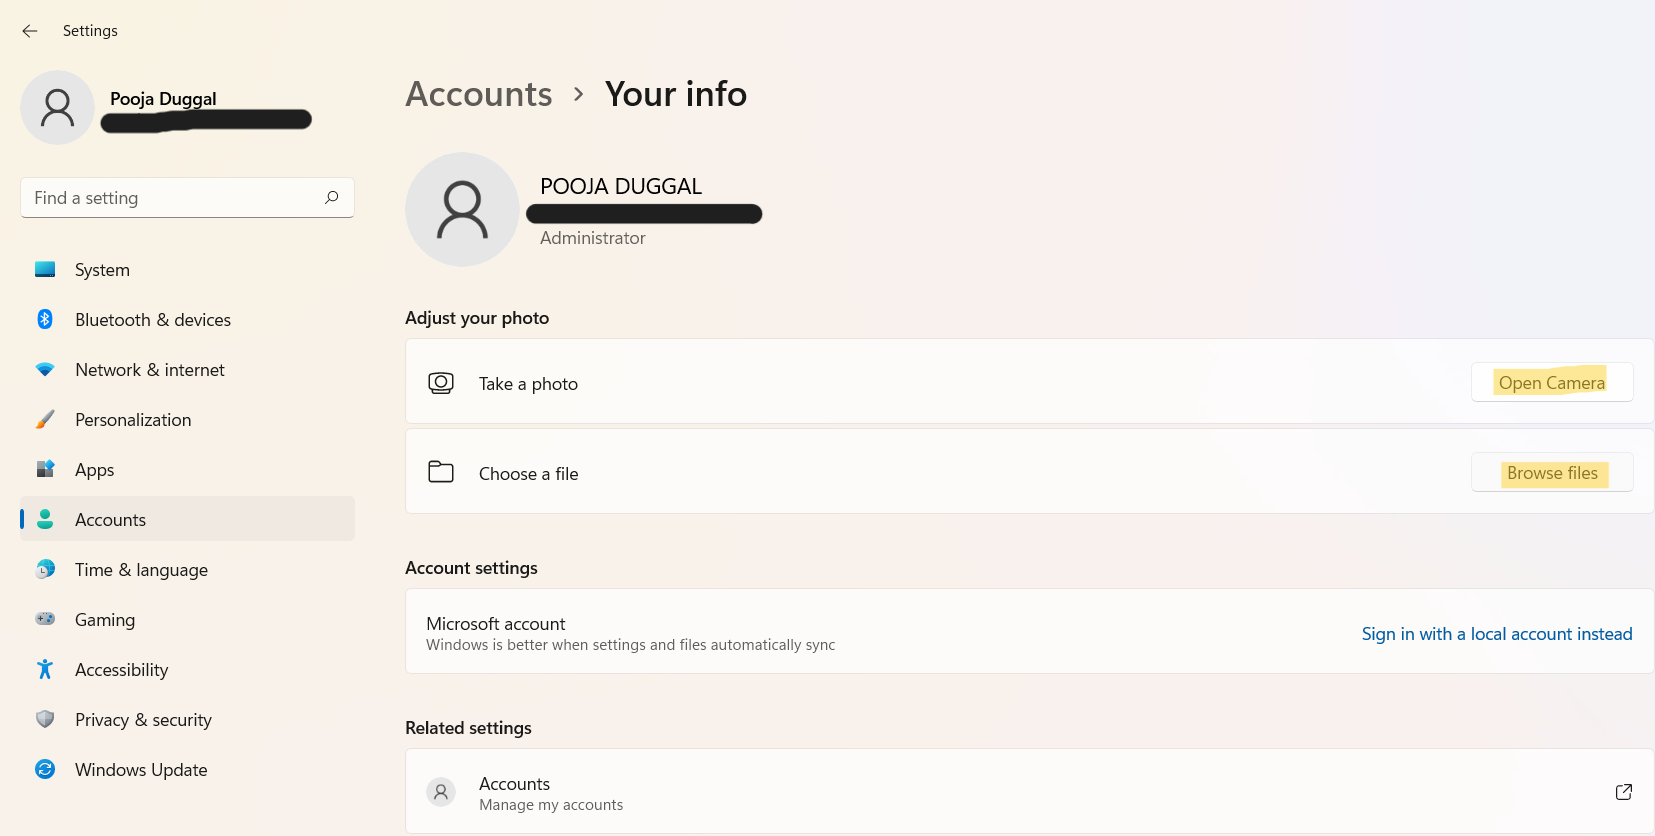
2. Under the Accounts tab, click on the Your Info option.

3. Now, you will come across two options under the Adjust Your Photo section – Open Camera and Browse Files. Either select Open Camera to use the webcam for taking a shot or choose Browse Files to select the photo you like to use.

4. If you click on Browse Files, then you can navigate to the location of a picture that you like to put on. Select the picture and then, click on Choose picture.

5. Once done, your profile picture will be changed successfully now.
Method 2: Change Account Picture for Microsoft Account
1. To change account picture for a Microsoft account, go to the official Microsoft account profile page (https://account.microsoft.com/profile). If you have not logged in, then login to your Microsoft account.
2. After that, click on the Add a photo option under Your info.

3. Once again, select the Add a photo Now, choose the picture that you like to put as your account picture.

4. Lastly, click on Save.

Now, your new account picture will sync across the devices you use your Microsoft account for signing in.
So, this is how to change account picture in Windows 11 for local accounts and Microsoft accounts. Now, add personal touch to your profile picture hassle-free!
![KapilArya.com is a Windows troubleshooting & how to tutorials blog from Kapil Arya [Microsoft MVP (Windows IT Pro)]. KapilArya.com](https://images.kapilarya.com/Logo1.svg)


![[Latest Windows 10 Update] What’s new in KB5055612? [Latest Windows 10 Update] What’s new in KB5055612?](https://www.kapilarya.com/assets/Windows10-Update.png)


Leave a Reply