For Windows Server, Directory Services Restore Mode (DSRM) is a special boot mode to repair or recover damaged Active Directory (AD). If the AD on your Windows Server is so damaged, using DSRM is recommended. In our previous article, we’ve seen how to reset Directory Services Restore Mode password. Now, in this article, we’ll see how to boot Windows Server in Directory Services Restore Mode (DSRM).
DSRM would be the only way to log in to a Windows Server, in case if you can’t login with AD. Also, when you boot into DSRM, the domain controller is taken offline. To login into DSRM, you can only use DSRM password. This is because the DSRM password used is for the local Administrator account. It is authenticated by the local Security Accounts Manager (SAM) database.
Here’s how to boot your Windows Server into DSRM.
Page Contents
How to boot Windows Server in Directory Services Restore Mode (DSRM)
Method 1 – Using MSCONFIG
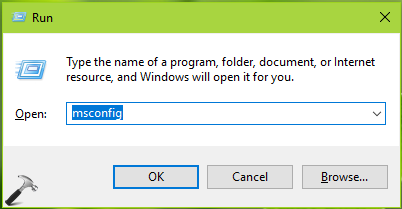
1. Press  + R and type
 msconfig in Run dialog box to open System Configuration Utility. Click OK.
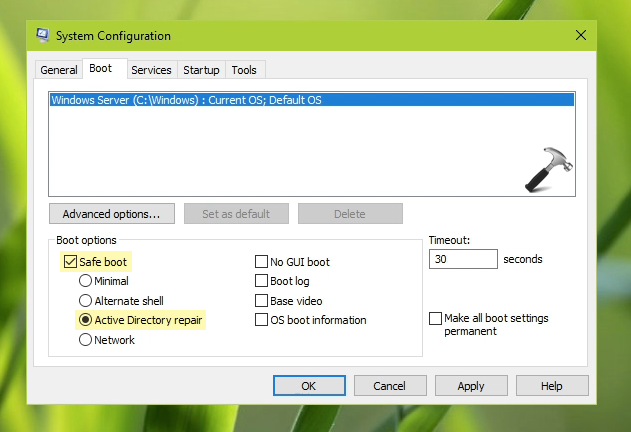
2. In System Configuration Utility, go to Boot tab. Under Boot options, check Safe boot and then select Active Directory repair. Click Apply, OK.
3. After that, you would immediately see a pop-up, click on Restart in that.
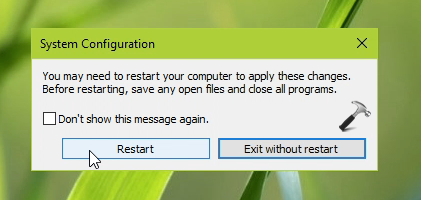
Now your Windows Server will restart and then boot into DSRM.
Method 2 – Using Advanced Recovery Options
1. Right click Start Button or press  + X keys and select Settings.
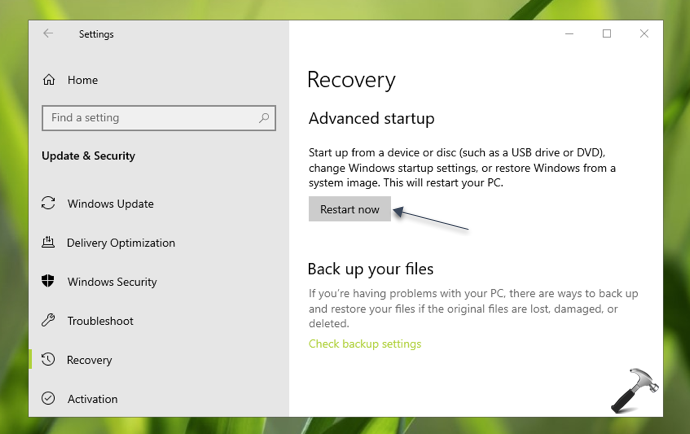
2. In the Settings app, navigate to Update & Security > Recovery and click on Restart now under Advanced startup.
3. Choose a reason to restart and click Continue.
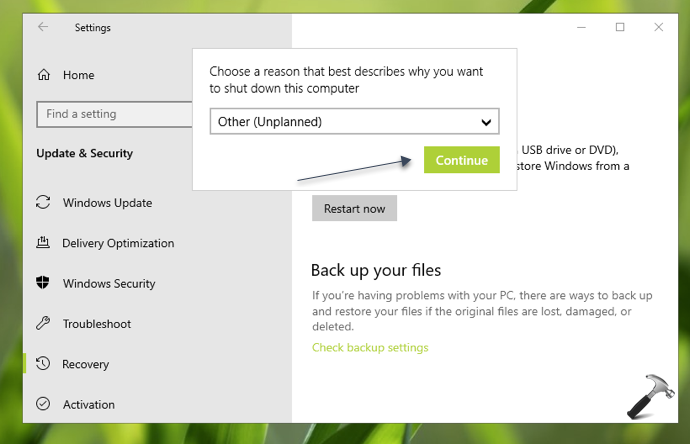
4. You should be now seeing recovery mode interface. Under Choose an option, click Troubleshoot.
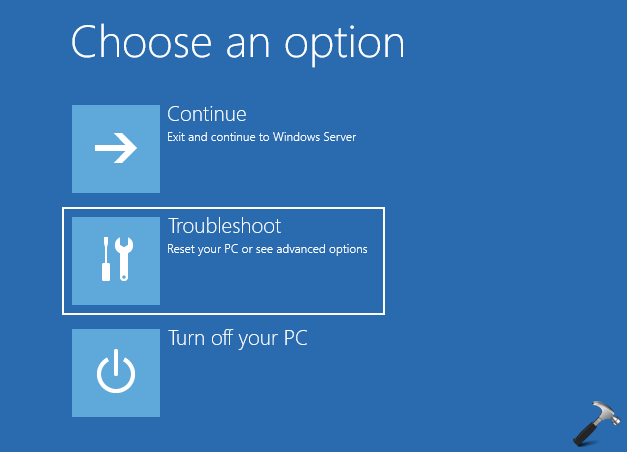
5. Moving on, under Advanced options, click on Startup Settings.
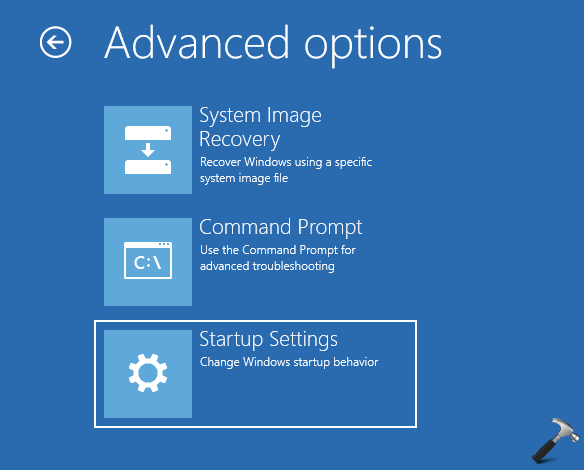
6. In the next window, under Startup Settings, click on Restart.
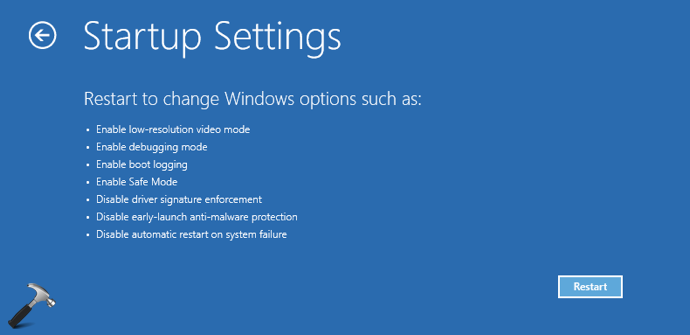
7. Finally, under Advanced Boot Options, select Directory Services Repair Mode and press Enter.
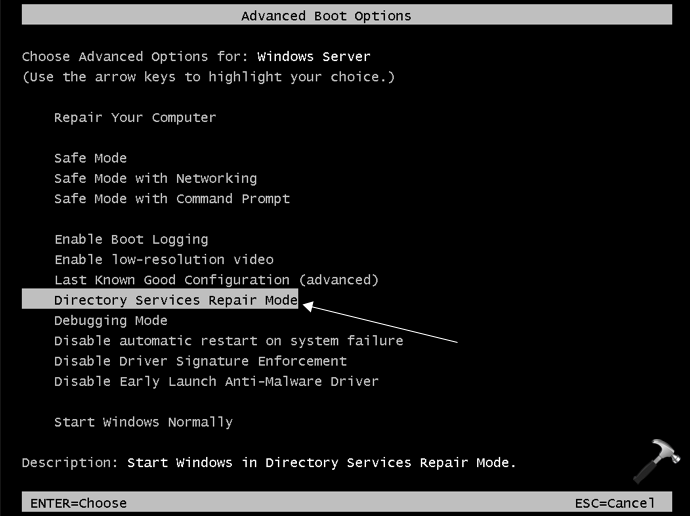
Your system should now restart and boot into DSRM.
That’s it!
![KapilArya.com is a Windows troubleshooting & how to tutorials blog from Kapil Arya [Microsoft MVP (Windows IT Pro)]. KapilArya.com](https://images.kapilarya.com/Logo1.svg)


![[Latest Windows 10 Update] What’s new in KB5055612? [Latest Windows 10 Update] What’s new in KB5055612?](https://www.kapilarya.com/assets/Windows10-Update.png)


Leave a Reply