Windows 11 includes built-in backup features to protect your data from issues such as malware attacks, hardware failures, or software problems. Windows Backup helps you back up important folders, system settings, apps, preferences, and credentials, while File History saves multiple versions of frequently edited files. In this guide, we’ll see how to use Windows Backup and File History to back up your Windows 11 computer.
Page Contents
How to backup Windows 11 PC
Backup Windows 11 using Windows Backup
1. Make sure you’re signed to Windows using your Microsoft Account.
2. Open Windows Settings and navigate to “Accounts > Windows backup”.

2. If you’re not signed into your OneDrive account, click “Set up syncing” next to OneDrive folder syncing.
3. Enter your email address and click “Sign in“. Then, enter your password.

4. Click “Next” and follow the OneDrive instructions to set up your OneDrive app.

5. Click the “Manage sync settings” button to choose the folders you want to backup.

6. Select the folders you want to back up and click “Save changes“. Note that this will also update your OneDrive backup preferences.

7. Turn on the “Remember my apps” toggle to back up the list of your installed apps.
8. Enable “Remember my preferences” to back up your system settings. You can also expand this option to exclude specific settings you don’t want to back up.

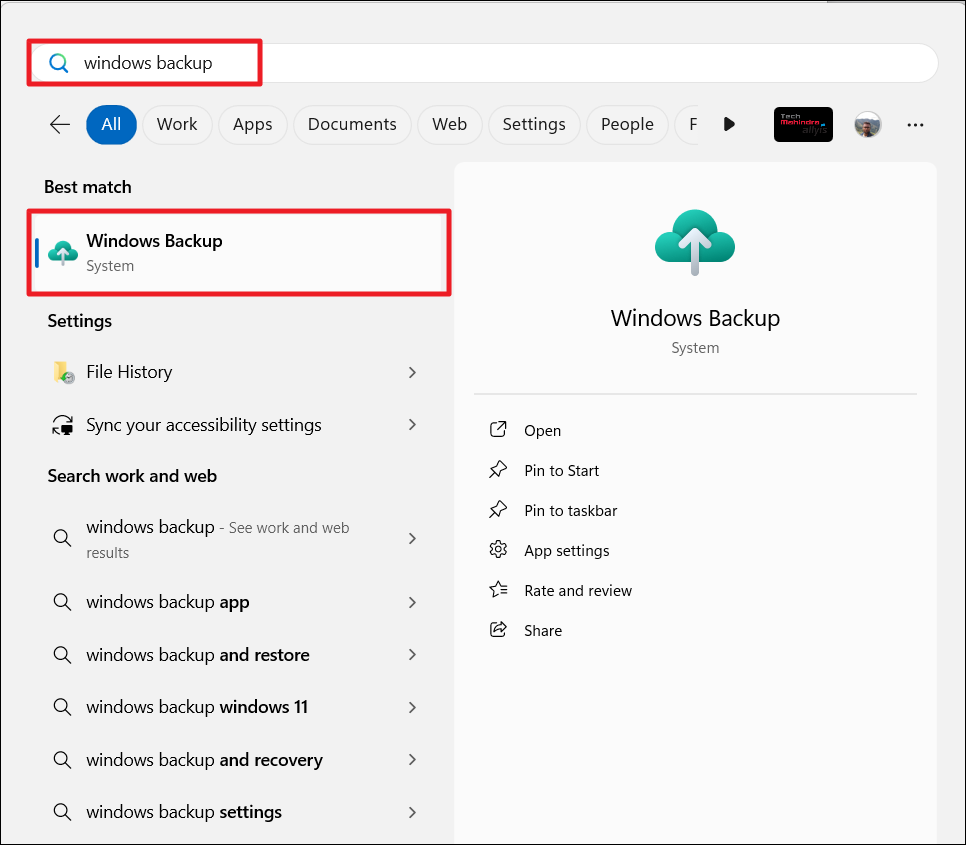
9. Then, search for “Windows Backup” in the Start menu and select the Windows Backup app.

10. Confirm your backup preferences and click “Back up” to start the process.

After a reset or clean install, you can sign in with your Microsoft Account and choose the desired backup to restore your computer.
Backup Windows 11 using File History
Follow these steps to configure File History and set up automatic backups for your libraries, desktop, contacts, and favorites:
1. Open the Start menu, type “File History” in the search bar, and select the top result.
2. In the File History window, Windows may automatically detect and select a compatible drive for the backup. To choose a different drive, click “Select drive“, choose a desired drive, or enter a network location and click “OK“.

3. Click “Turn on” to enable File History.

File History will automatically back up your files every hour by default, saving them to a folder named File History on the selected drive.
Exclude Folders from File History
By default, File History backs up all the libraries’ folders. To exclude specific folders, follow these steps:
1. Click “Exclude folders” in the left-hand menu.

2. Click the “Add” button at the bottom.
3. Navigate to and select the folder you want to exclude, then click “Select Folder“.
4. To remove a folder from the exclusion list, select it and click “Remove”.

5. Click “Save changes“.
Change Backup Frequency
You can customize how often backups occur and how long old versions are kept:
1. In the File History window, click “Advanced settings” in the left-hand menu.

2. Under Versions, use the “Save copies of files” dropdown to choose how often you want the backups to occur (from every 10 minutes to once daily).
3. Then, use the “Keep saved versions” dropdown to select how long to keep backups (from Until space is needed to Forever).
4. After making your changes, click “Save changes“.

5. Click “Run now” in the File History window to start the backup immediately.
That’s it.
![KapilArya.com is a Windows troubleshooting & how to tutorials blog from Kapil Arya [Microsoft MVP (Windows IT Pro)]. KapilArya.com](https://images.kapilarya.com/Logo1.svg)


![[Latest Windows 10 Update] What’s new in KB5055612? [Latest Windows 10 Update] What’s new in KB5055612?](https://www.kapilarya.com/assets/Windows10-Update.png)


Leave a Reply