In Windows, every object has an owner and it doesn’t matters if the object is located on local system or Active Directory database. Usually, owner is the creator of object and hence posses rights to grant permissions to other entities such as other groups, users, or processes. In short, the owner has control for the permissions of objects.
We’ve seen following guide to take ownership of files/folders in Windows. By default, members in Administrators group or the administrators can take ownership of files/object (collectively let us call it content). But you can also allow other users to take ownership of the content. In this article, we’ll see the step-by-step process to add other users who can take ownership in the system, along with administrators.
How To Allow/Prevent Users To Take Ownership Of Files Or Other Objects
1. Press  + R and put
 secpol.msc in Run dialog box. Click OK to open Security Policy snap-in.
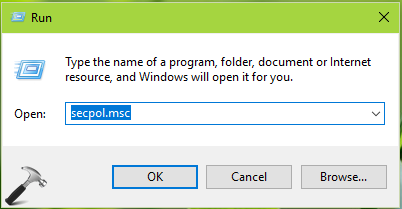
2. Then in Security Policy snap-in window, navigate here:
Security Settings > Local Policies > User Rights Assignment
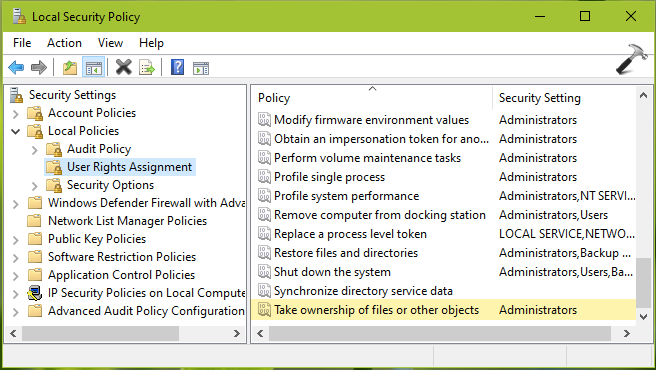
3. In the right pane of User Rights Assignment, double click on Take ownership of files or other objects. In the security setting configuration sheet, click on Add User or Group.
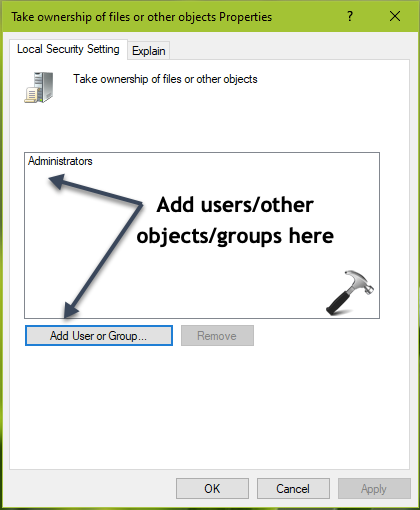
4. Under Select Users or Groups, click Advanced.
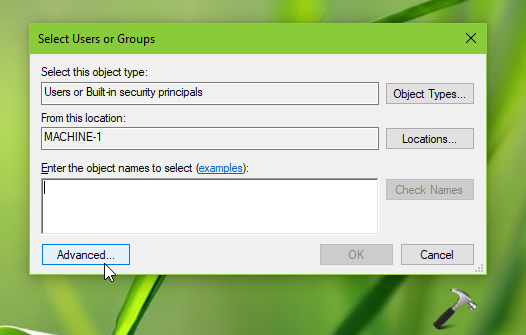
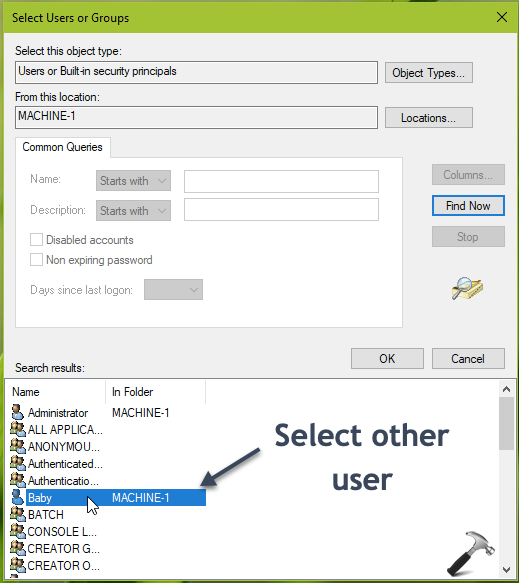
5. Moving on, in next window, click Find Now. From the search results, select the other user account to which you want to allow to take ownership for files and other objects. Then click OK and again OK in remaining window and close Security Policy snap-in.
Since the security setting doesn’t requires rebooting, the changes should be effective immediately. This means other user/group added to setting should be able to take ownership of files/objects now.
To remove the granted users/groups later, you can simply select their entry in security setting configuration sheet and click Remove. However, this change will not be effective until user/groups log on next time.
That’s it!
![KapilArya.com is a Windows troubleshooting & how to tutorials blog from Kapil Arya [Microsoft MVP (Windows IT Pro)]. KapilArya.com](https://images.kapilarya.com/Logo1.svg)


Leave a Reply