In our previous guide, we have seen how to use Windows Terminal app in Windows 10. Terminal app provides you a platform to run different command-line tools and it called as profiles. Each command-line tool is treated as a separate profile in Windows Terminal app. In this article, we will see how to add new profile in Windows Terminal app.
When you start Terminal app for the first time, Windows PowerShell is the default profile. After this, Command Prompt is the next assured profile you will see in Terminal app. The other profile you will be seeing in the app depends upon whether a shell is installed. For example, if your system is connected to Azure Active Directory, you’ll be seeing Azure Cloud Shell. Similarly, if your system have Windows Subsystem for Linux (WSL) activated, you’ll see its shell as profile. In short, the Terminal app can automatically add a profile, when a new shell is detected on system.
However, if you like, you can also add new profiles in your Windows Terminal app as required. Here is how you can.
How to add new profile in Windows Terminal app
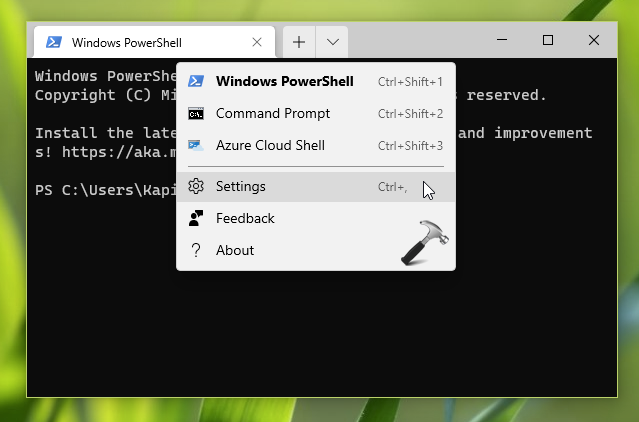
1. In Terminal app, click on ⌄ over tab bar and select Settings.

2. On the settings tab, under Profiles, click on Add new.

3. Now you should see a new profile creation wizard in right pane. On General tab, fill out the details for new profile. Once you’re done with details, you can click on Appearance to move on.

4. Moving on, in Appearance, you can customize how you want to see the new profile visually. Once done, you can click Advanced.

5. In Advanced tab, you finalize your settings for new profile. Once you’re done, you can hit the Save button and new profile should be created now.

You can go back to Windows Terminal and click on ⌄ over tab bar and select your new profile and start working on it.

That’s it!
![KapilArya.com is a Windows troubleshooting & how to tutorials blog from Kapil Arya [Microsoft MVP (Windows IT Pro)]. KapilArya.com](https://images.kapilarya.com/Logo1.svg)


Leave a Reply