

Format USB drive as FAT32 in Windows 11 is quite a requirement by users who require their tool to work on most platforms and systems available. USB drives that use FAT32 can be interchanged with any other FAT32 flash drive without much of a problem due to the compatibility. However, there are things like the maximum file size which is 4 GB. Hence, occasionally, it is the most preferred format for the USB drives.
Formatting a USB drive to FAT32 in Windows 11 is as easy as it is anytime, whether the user wants to use it for older devices, or ensure compatibility across various systems. In this guide, learn about how to format your USB as FAT32 in Windows 11.
Page Contents
Format USB drive as FAT32 on Windows 11
Method 1: Format USB flash drive using FAT32 from Settings
1. Open Windows Settings app and go to System > Storage.
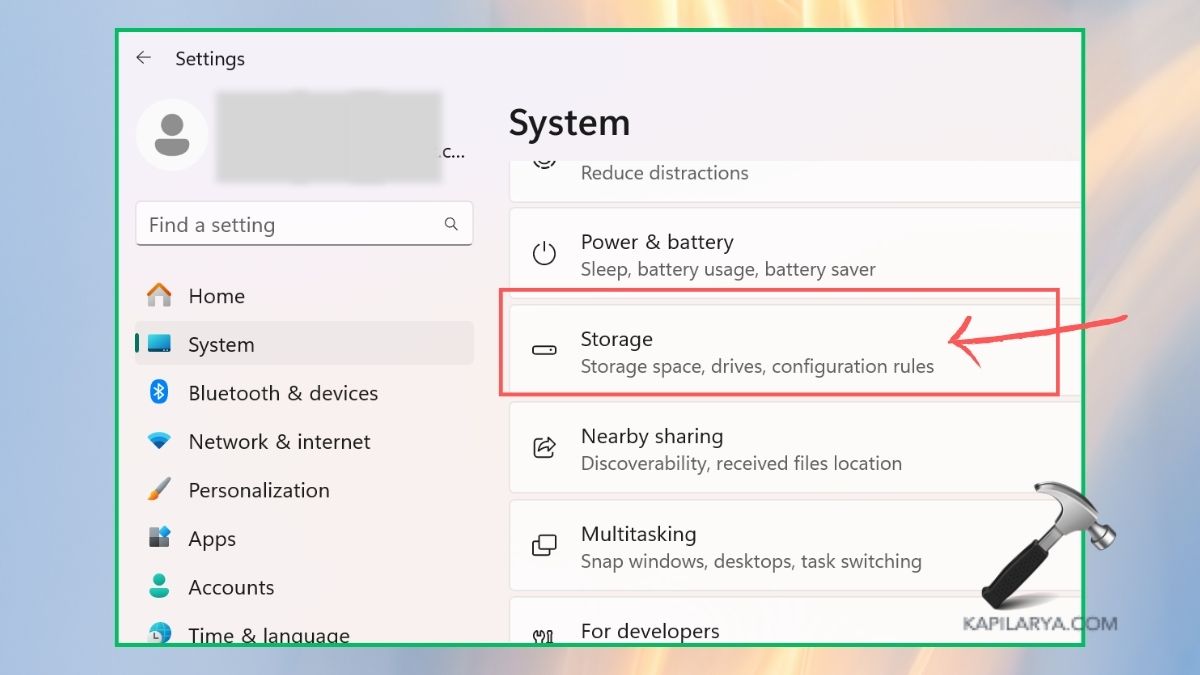
2. Click on “Advanced storage settings” and choose “Disk and Volumes”.

3. Now, select “Properties” for the drive you want to format.

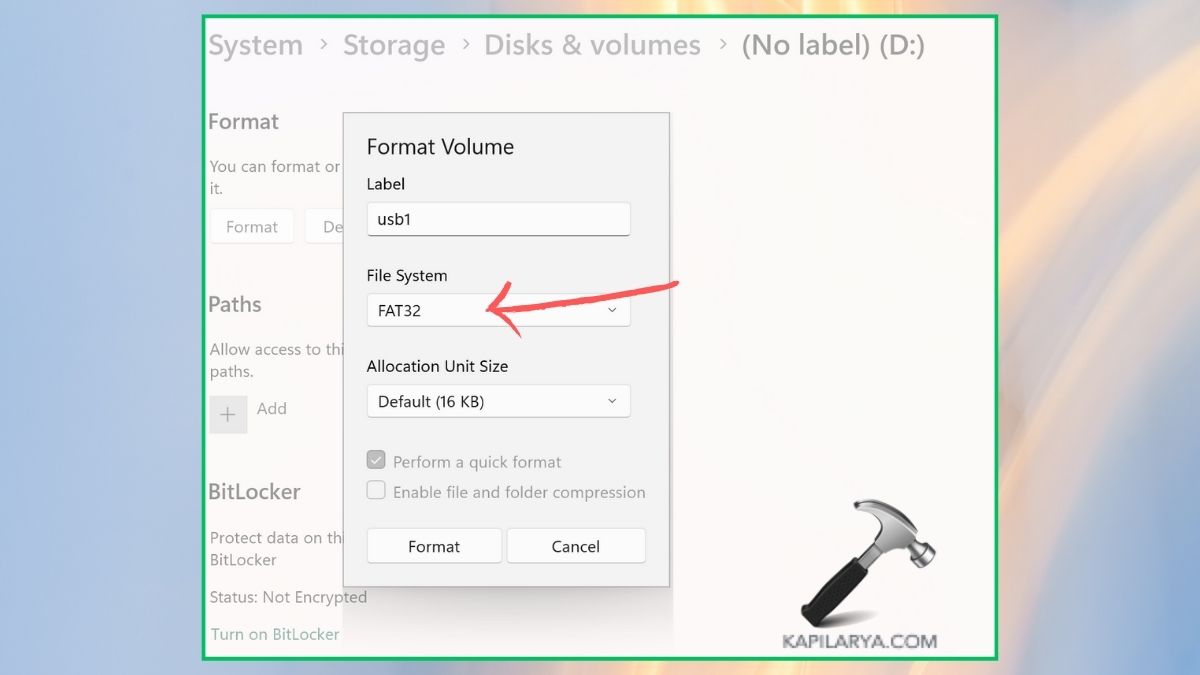
4. Tap “Format” and select the File system as “FAT32”. Make sure to check the “Perform a quick format” option.
Method 2: Format as FAT32 on Windows
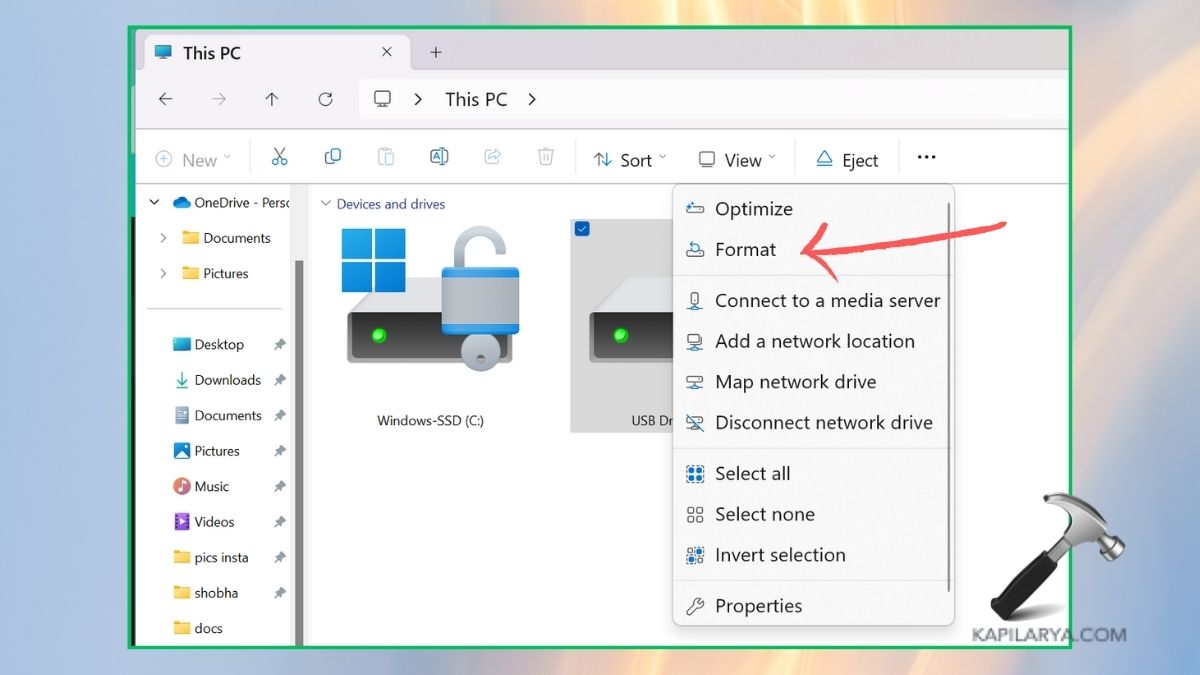
1. Go to File Explorer and go to This PC. Right-click on the drive and choose “Format”.
2. Choose the “File system” as “FAT32” for the drop-down. Make sure to check the “Quick format” option. Tap “Start”.

Note: The below two methods: “Method 3” and “Method 4” will not work if your USB drive crosses the 32 GB limit.
Method 3: Format USB flash drive using FAT32 with CMD
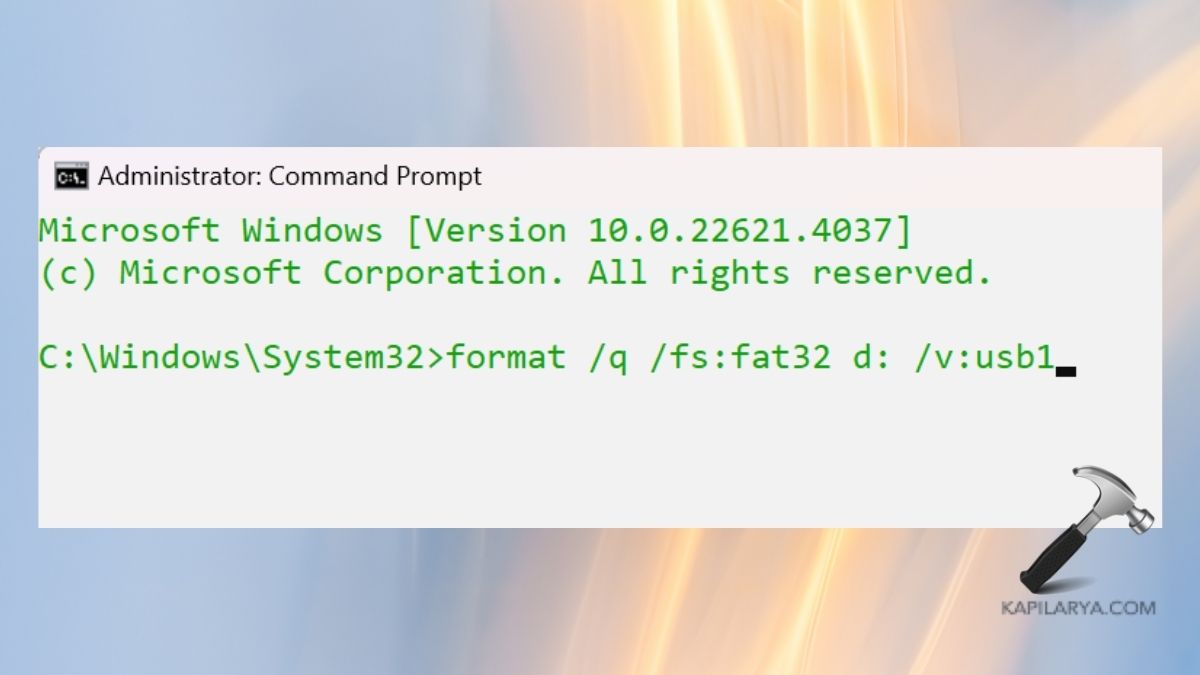
1. Search and right-click the command prompt on the Windows search bar. Choose “Run as Administrator” to open it with admin rights. Accept “Yes” to the UAC pop-up.

2. Now, type-in the below command and press the “Enter” key. Make sure to replace “d:” with the drive letter, and replace “label” with the drive’s label you wish to format.
format /q /fs:fat32 d: /v:label
Method 4: Format as FAT32 with PowerShell
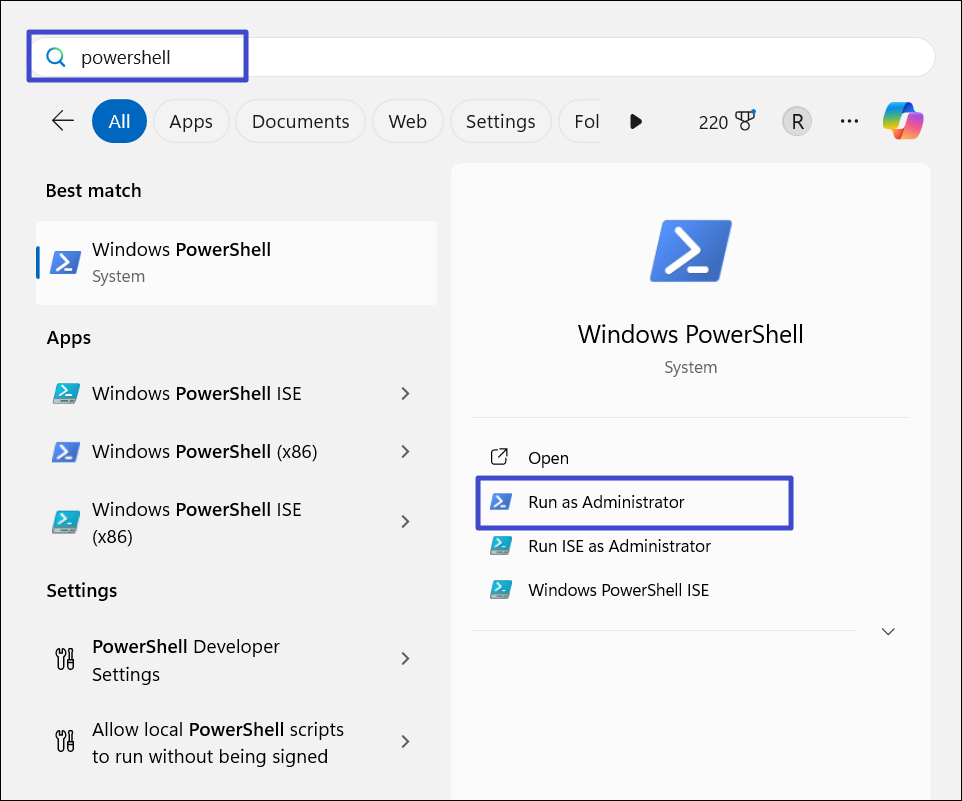
1. Search for “Powershell” from the Windows search bar and right-click it to choose “Run as Administrator”. Accept “Yes” to the UAC pop-up.
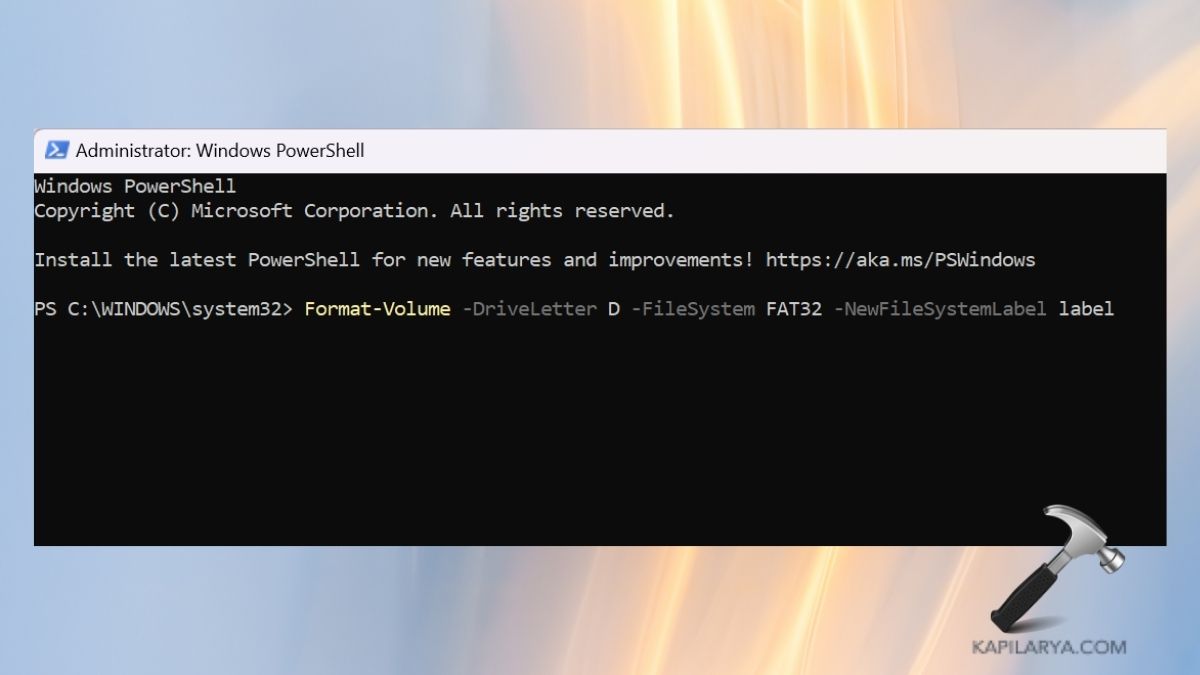
2. Now, type-in the below command and press the “Enter” key. Make sure to replace “d:” with the drive letter, and replace “label” with the drive’s label you wish to format.
Format-Volume -DriveLetter D -FileSystem FAT32 -NewFileSystemLabel label
We hope these methods help you. If you experience any error while performing any of these methods to format USB drive as FAT32 on Windows 11, leave a comment below so we can help you out.
That’s it!


 on Windows 11")


Leave a Reply