Welcome to the era of Windows 11, where the boundaries of technology are constantly being pushed. In this digital age, staying connected is paramount, and WiFi networks have become an essential part of our lives. However, there may be occasions when you need to forget a WiFi network on your Windows 11 device. Whether you’re troubleshooting connection issues, prioritizing networks, or simply wanting to remove an unnecessary network from your list, learning how to fix and forget a WiFi network on Windows 11 is an invaluable skill. In this guide, we will walk you through the methods to remove a WiFi network from your Windows 11 device, helping you regain control over your wireless connections and ensuring a seamless and efficient networking experience.
Page Contents
Forget WiFi network on Windows 11
Method 1: Remove a saved WiFi network with a Command prompt or PowerShell
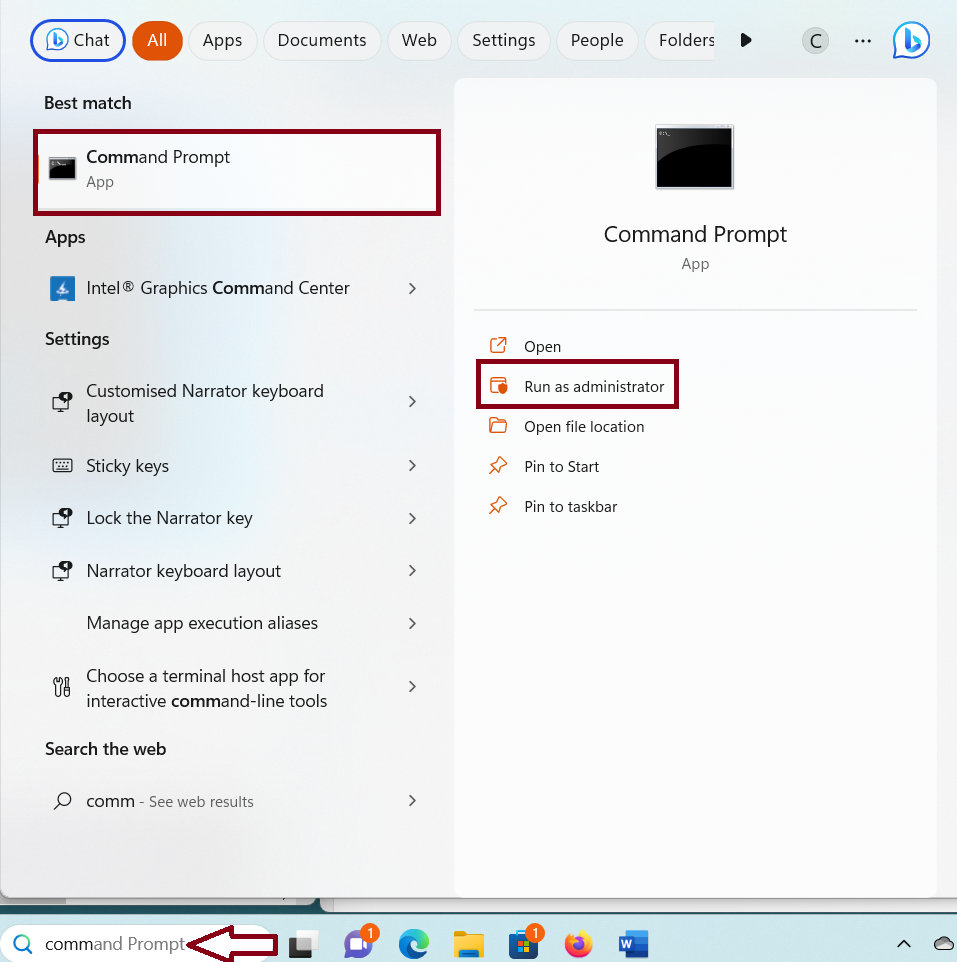
1. Find the Command prompt by searching it in the Search bar of the Taskbar and click on “Run as administrator”.
2. Type this command and press Enter key:
netsh wlan show profiles

3. Next execute this command :
netsh wlan delete profile name="WIFIName"
Replace “WIFIName” with the network name which you want to remove.

4. Repeat the same command to remove other networks if needed.
Method 2: Remove a Saved Wi-Fi Network Using the Quick Settings Panel
1. Press Windows + A keys to open the Quick Settings panel.
2. Click on the arrow shown next to the WiFi icon.

3. Right-click on the network which you want to remove and choose “Forget”.

Method 3: Remove a Saved Wi-Fi Network Using Registry Editor to Forget WiFi network on Windows 11
1. Press Windows + R to open Run and type “regedit”. Click “OK”.

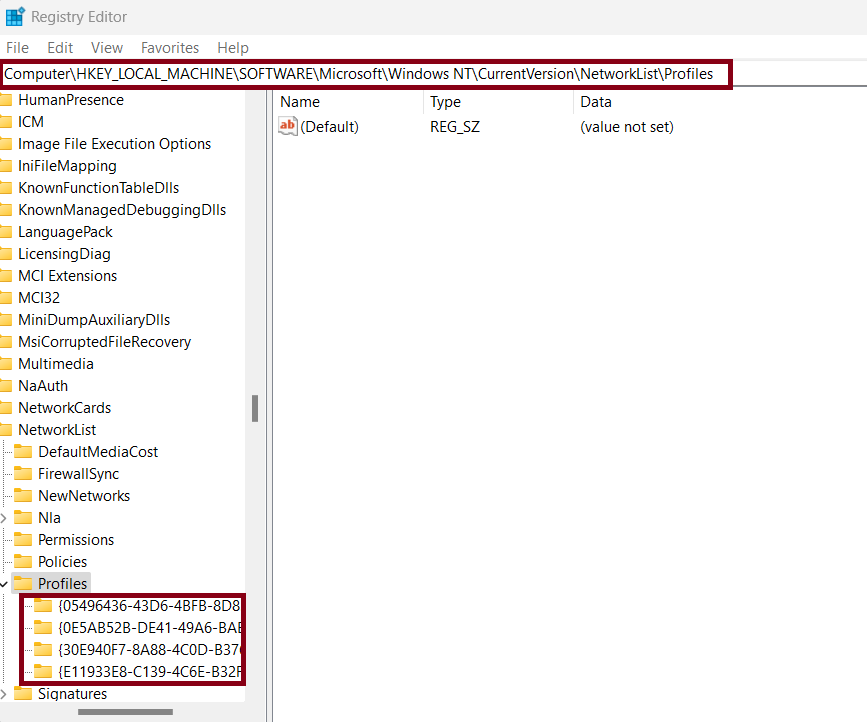
2. In Registry Editor navigate to the path:
Computer > HKEY_LOCAL_MACHINE > SOFTWARE > Microsoft > Windows NT > CurrentVersion > NetworkList > Profiles.
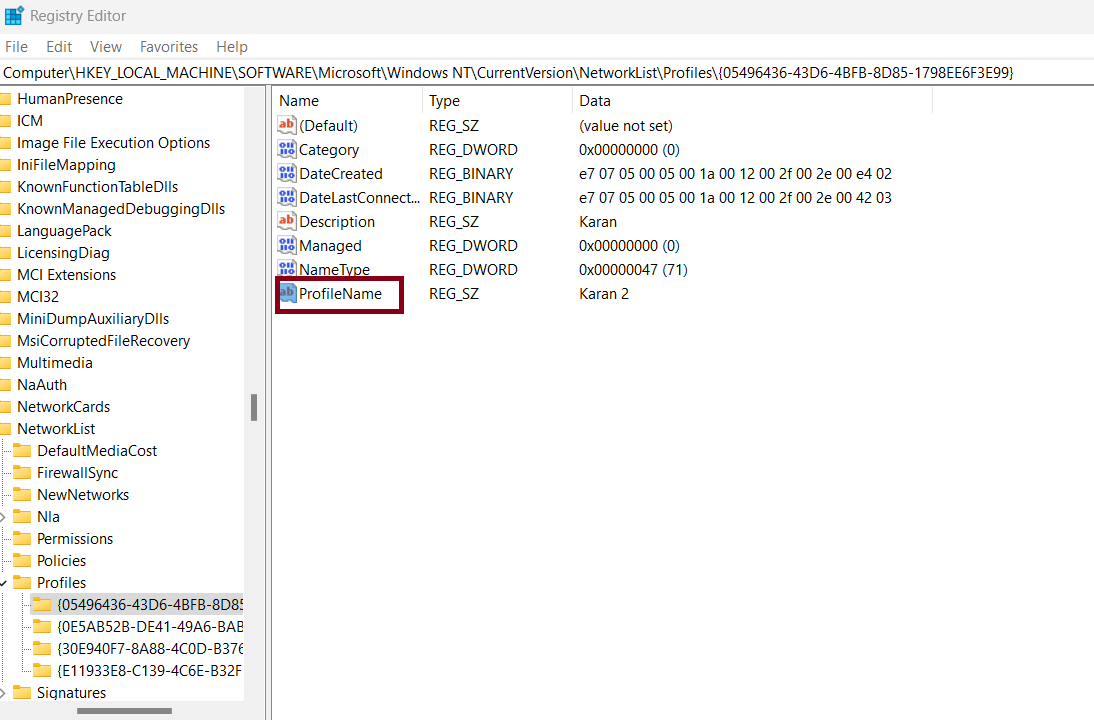
3. In the Profiles key, there will be many subkeys. Click one by one on each subkey to know the name of the network which you want to remove.
4. Once found, right-click on “ProfileName” and choose “Delete”.
5. Click “Yes” to confirm.
Method 4: Remove a Saved Wi-Fi Network via the Settings App
1. Open Settings by pressing the Windows + I keys.
2. Click on “Network & internet”.
3. Then click “Wi-Fi”.
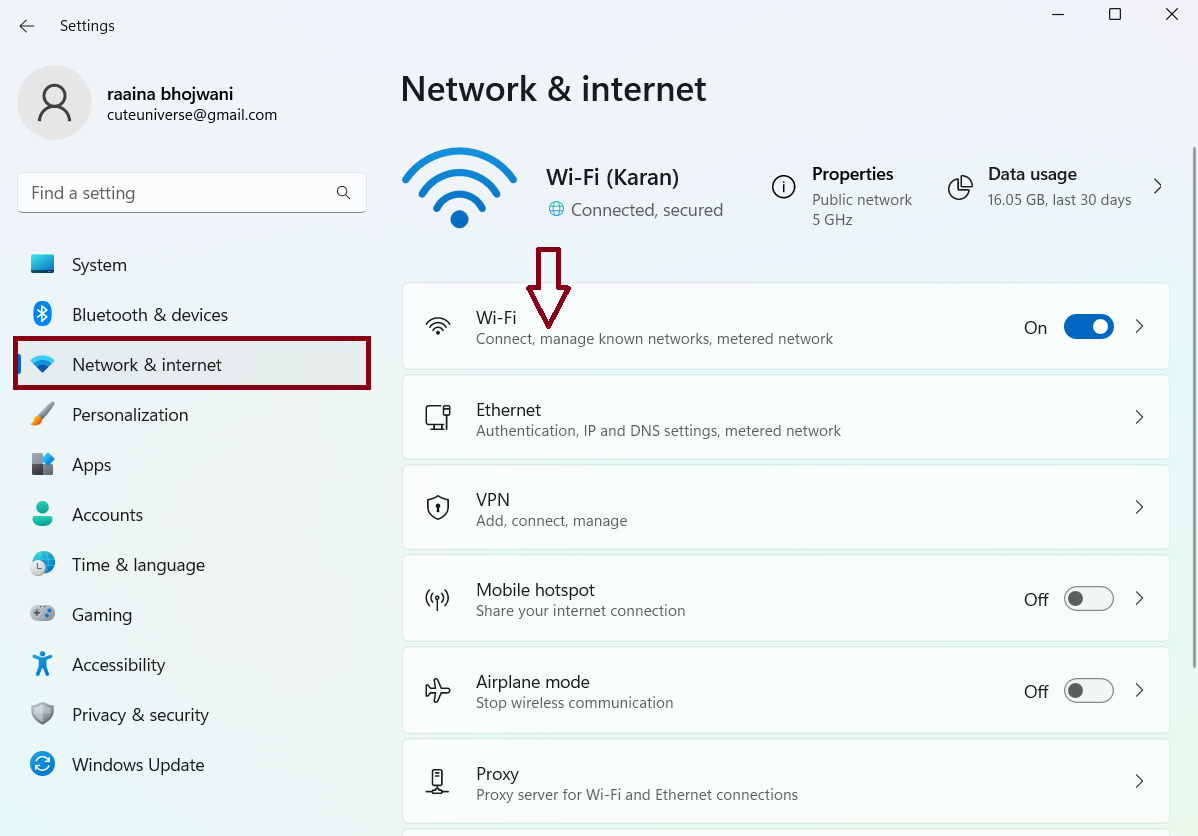
4. Click on “Manage known networks”.
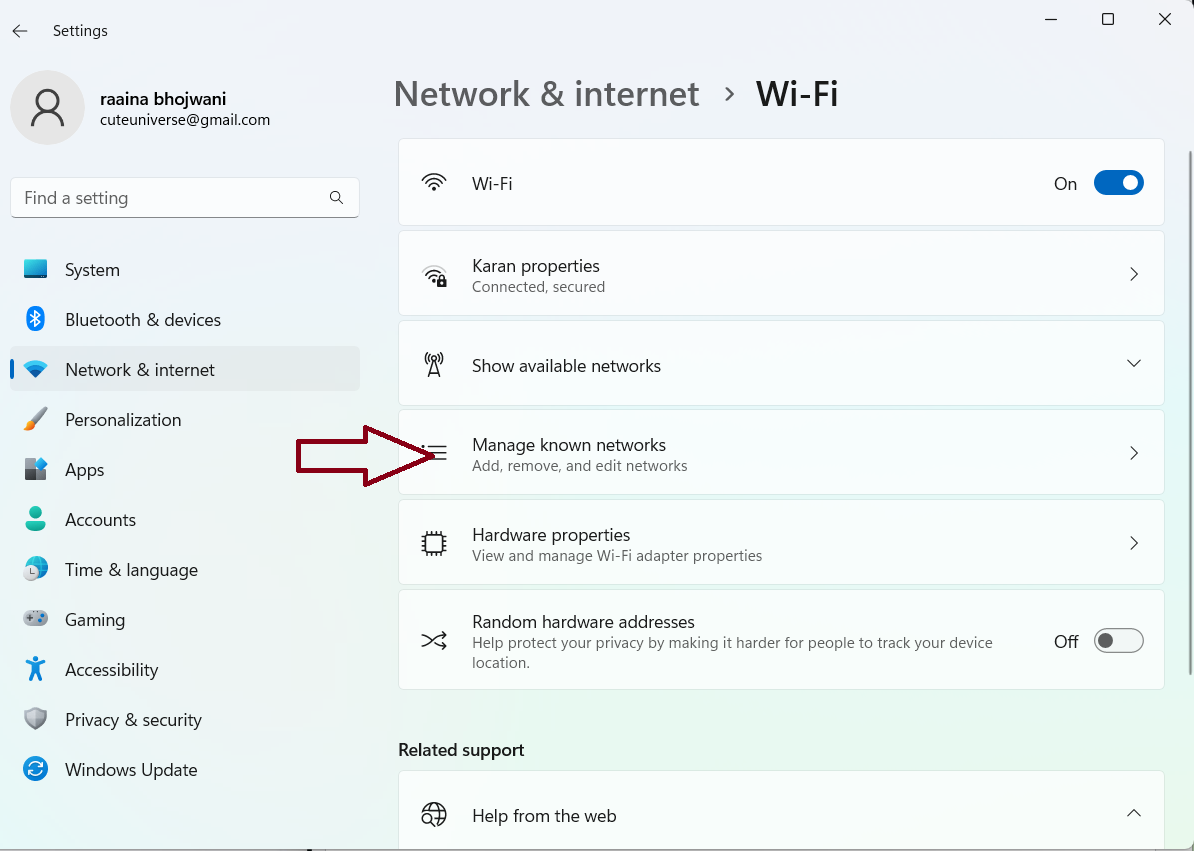
5. Click on the “Forget” button of the network that you want to delete.

That’s it!
![KapilArya.com is a Windows troubleshooting & how to tutorials blog from Kapil Arya [Microsoft MVP (Windows IT Pro)]. KapilArya.com](https://images.kapilarya.com/Logo1.svg)



![[Latest Windows 10 Update] What’s new in KB5055612? [Latest Windows 10 Update] What’s new in KB5055612?](https://www.kapilarya.com/assets/Windows10-Update.png)


Leave a Reply