Usually phishing is something which would create most of malware execution on a Windows OS. Microsoft introduced Windows Defender Application Control (WDAC), a security based feature for Windows 10 to control malware from executing on client machines. This would be specifically used by organizations to prevent their clients from running malicious app. WDAC is considered as enhanced AppLocker feature, as it provides trustworthy benefit from hardware to kernel.
Windows 10 Version 1709 or later recognize whether a program is safe to run via Microsoft Security Intelligent Graph. This additionally requires Windows Defender SmartScreen to be running for authorization.
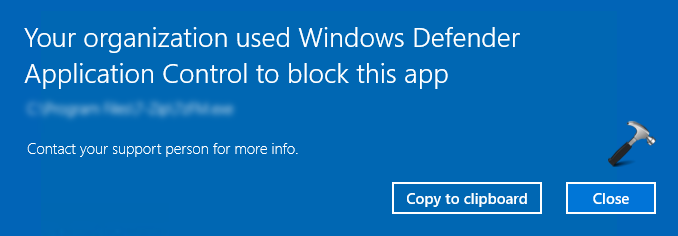
When WDAC is in effect, following is the expected message appearing when a non-trusted app is about to execute:
Page Contents
Your organization used Windows Defender Application Control to block this app.

In this case, when client try to install untrusted app, its execution is immediately blocked to safeguard the machine.
However there are some exceptions as well. Sometimes, users may see this message for native Windows programs such Command Prompt. So if you’re facing this issue, here is what you can do to fix this:
FIX: Your Organization Used Windows Defender Application Control To Block This App
FIX 1 – Ask Your IT Admin To Allow The App
If you’re pretty sure that the app you’re running is from trusted source, you need to contact your IT admin to make an exception for the app. An IT admin would be exactly the person involved in implementation of WDAC. Note, there are different methods for configuring WDAC.
A short process via Microsoft System Center Configuration Manager (SCCM) for allowing the app as trustworthy:
1. Ensuring Windows Defender Application Control is turned on in features.
2. For WDAC policy, go to Assets and Compliance > Overview > Endpoint Protection > Windows Defender Application Control. Right click on Windows Defender Application Control, select Create Application Control Policy.
3. In Create Application Control Policy wizard, under Inclusions tab, click on Add and enlist the trusted app and complete wizard.
FIX 2 – Via Windows Defender SmartScreen Settings
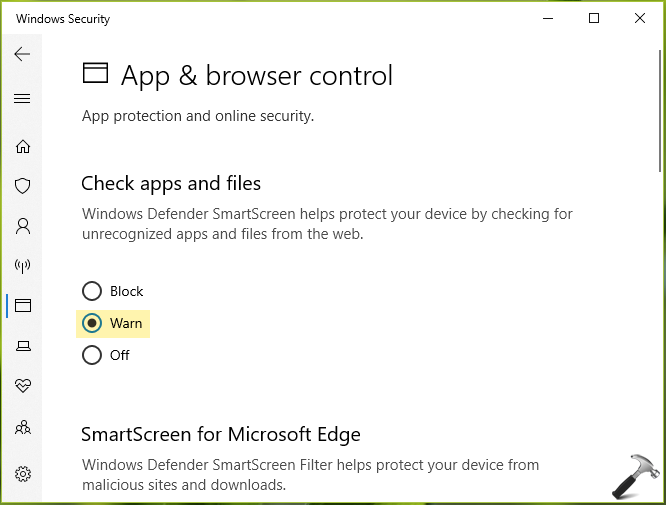
If you’re facing this issue on a standalone system which is not part of any organization then here is how to fix it. Open Windows Security and go to App & browser control and under Check apps and files, set it to Warn instead of Block. After setting Windows Defender SmartScreen to Warn, you may not face this issue.

Hope this helps!
![KapilArya.com is a Windows troubleshooting & how to tutorials blog from Kapil Arya [Microsoft MVP (Windows IT Pro)]. KapilArya.com](https://images.kapilarya.com/Logo1.svg)


Leave a Reply