Dealing with a Windows Update that’s stuck at 100% can be a frustrating and time-consuming issue for many users. When your computer gets stuck in this update limbo, it can disrupt your workflow and leave you wondering how to get things back on track. In this guide, we’ll explore some effective solutions to fix Windows Update stuck at 100% problem and help you get your system up to date without the hassle.
Page Contents
Fix: Windows Update stuck at 100% problem
Here are some common reasons why this problem may occur:
- Software Conflicts: In some cases, conflicts with existing software or drivers on your computer can interfere with the update process. These conflicts can cause the update to stall.
- Large or Complex Updates: Updates that are particularly large or complex may take a significant amount of time to install, and during this process, it may appear as if the update is stuck at 100%.
- Network Issues: Problems with your internet connection or the Windows Update servers can disrupt the update process, causing it to get stuck.
- Insufficient System Resources: If your computer doesn’t have enough available resources (such as disk space or RAM), it can hinder the update process.
- Corrupted System Files: Corruption in system files can lead to update problems. If Windows Update encounters corrupted files, it may struggle to complete the update.
- Pending Updates: Sometimes, multiple updates are pending, and one update may block the others from progressing, giving the impression that it’s stuck.
- Third-Party Software: Certain third-party security software or other utilities may interfere with the update process, causing it to hang.
- Hardware Issues: In rare cases, hardware issues, such as a failing hard drive or faulty RAM, can lead to update problems.
To address this issue effectively, consider the below solutions:
Fix 1: Restart in Safe Mode
Some Windows functions or features can sometimes interfere with the update process. To check if this is the issue, you can start your Windows 11 computer in Safe Mode. Safe Mode restricts most Windows-related functions and services.
After that, you can try restarting Windows 11 as usual to install the update.
If this doesn’t resolve the problem, you can move on to the next method.
Fix 2: Set Windows Update Services to Automatic
1. Press the Windows Key + R. Type “Services.msc” and click OK.
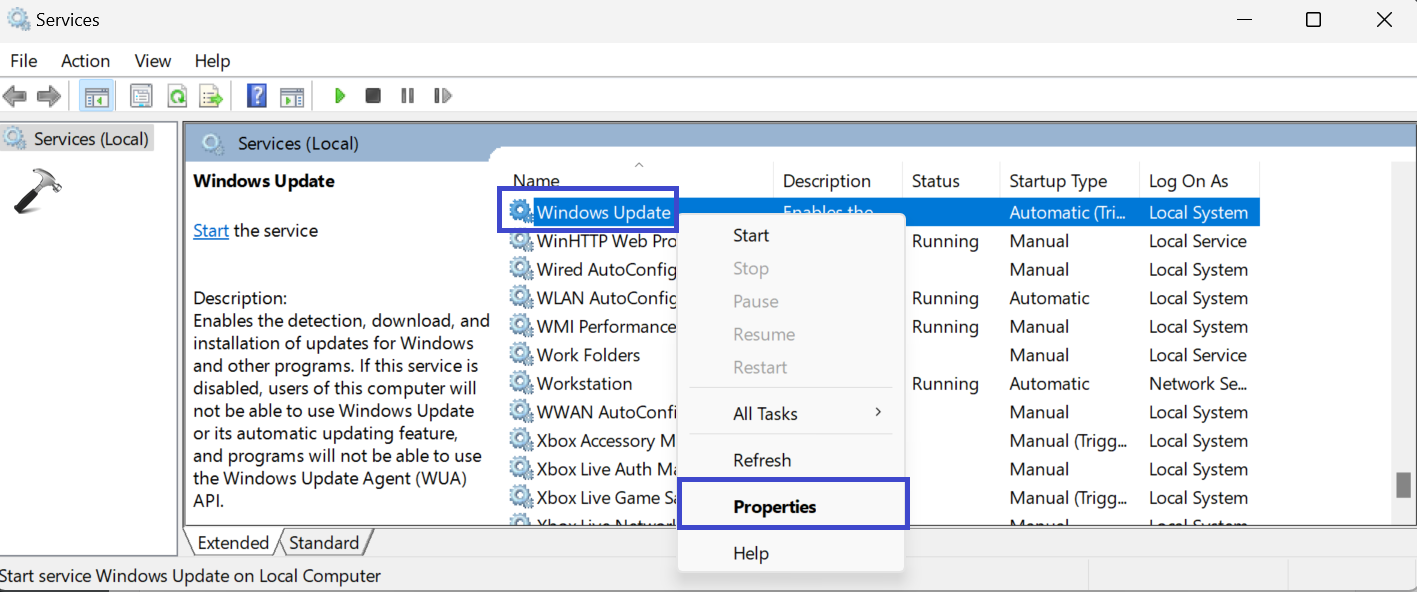
2. Right-click on “Windows Update” and select “Properties“.
3. A prompt box will appear. Under the Startup type, select “Automatic“. Then, click “Start“.
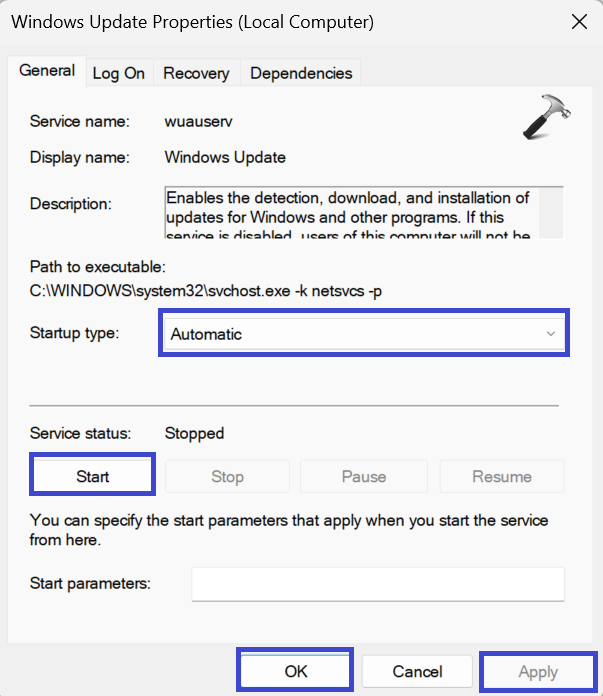
4. Click OK followed by Apply.
Fix 3: Remove External Devices and Force Restart Windows
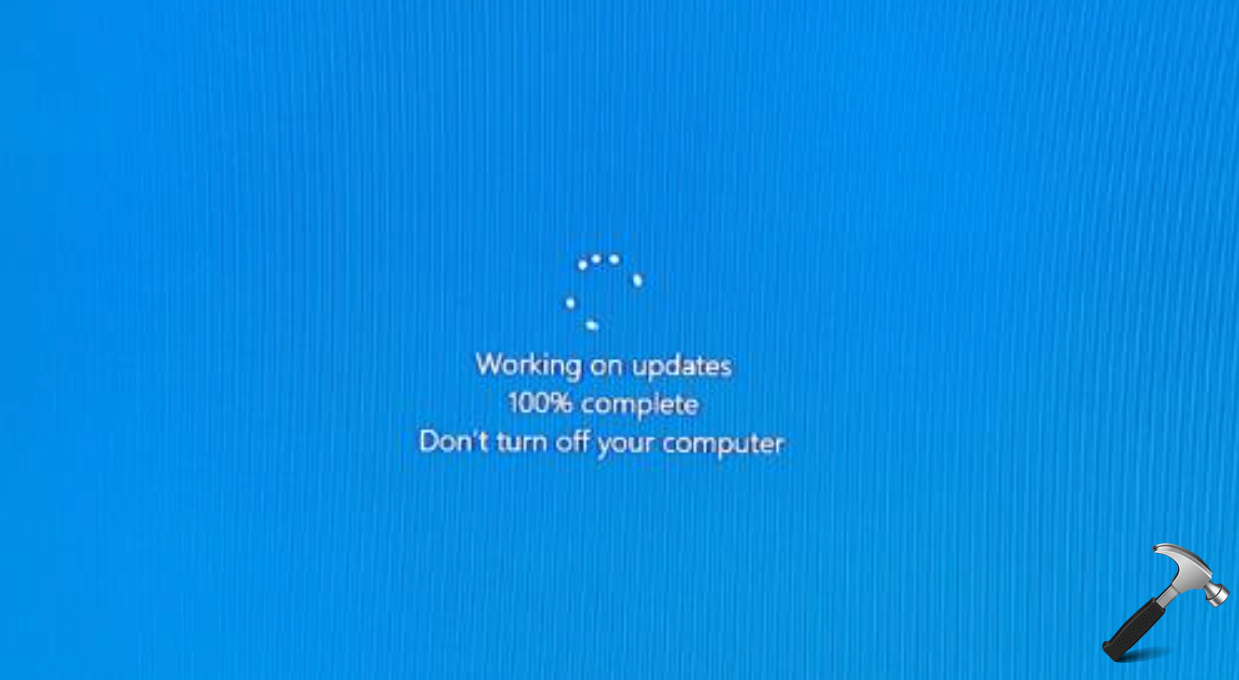
Your Windows 11 computer might have things like a mouse, printer, or USB drive connected to it. Your computer tries to figure out how to work with these things, which are called drivers. Sometimes, this driver stuff can get mixed up with updating your computer, and it gets stuck at “Working on updates 100% complete.”
When that happens, unplug all the things you connected via USB, and make your computer shut down by holding the power button for a bit. Then, press the power button again to turn it on. If the problem keeps going, you can try some more fixes to get it working right.
Fix 4: Perform a Clean Boot
1. Open the “System Configuration” app by searching it in the search menu.
2. Under the “General” tab, check the “Selective Startup” box.

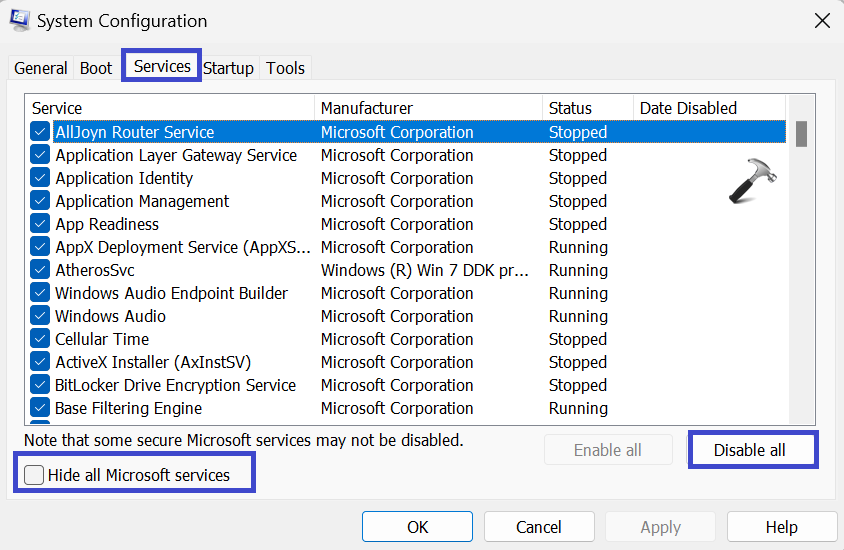
3. Now, under the “Services” tab, check the “Hide all Microsoft services” box and then click on “Disable all“.
4. Click on “Open Task Manager” under the “Startup” tab.
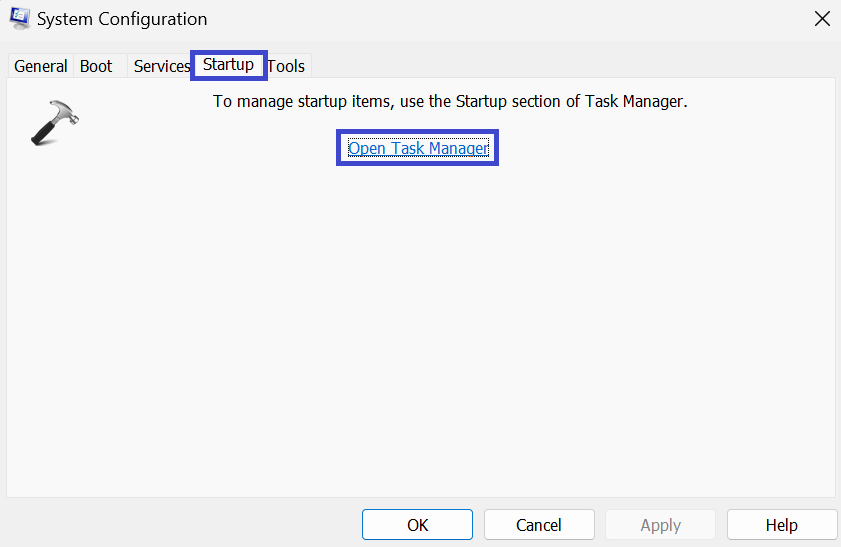
5. Disable all the third-party apps. Simply select the third-party app and click “Disable“.
6. At the end, restart the PC to apply the changes.
Fix 5: Run Windows Update Troubleshooter
1. Open the Settings app and click on “Troubleshoot“.
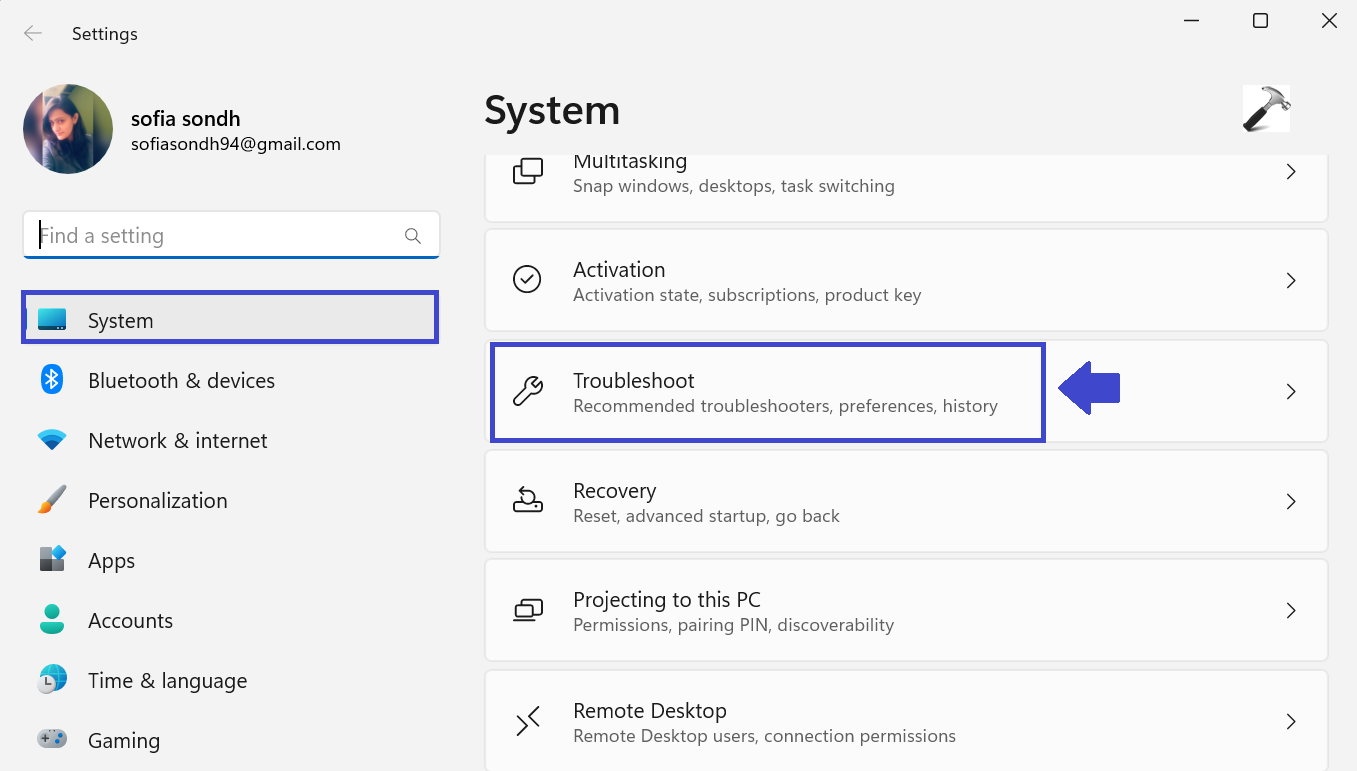
2. Then, click on “Other troubleshooter“.
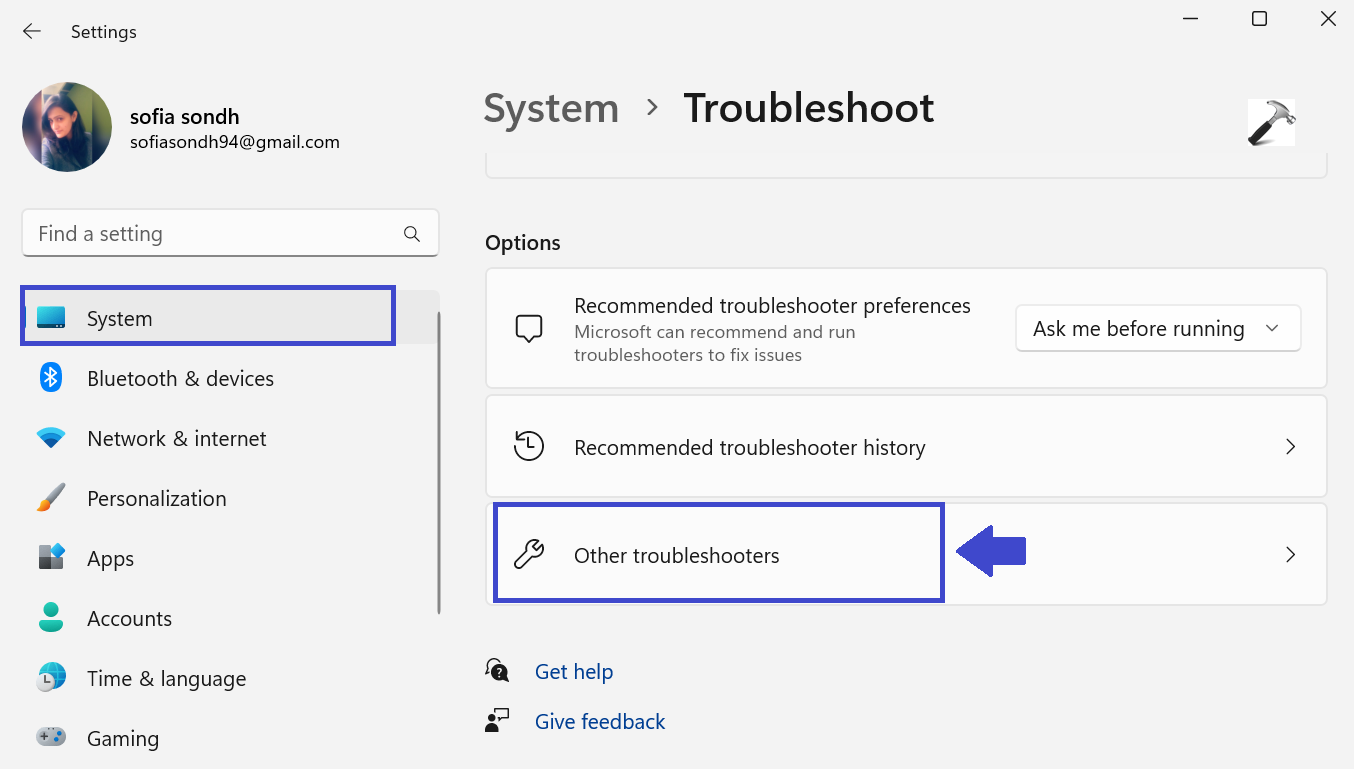
3. Click “Run” next to Windows Update.

Fix 6: Rename the SoftwareDistribution Folder
1. Press the Windows key + R. Type “services.msc” and click OK.
2. Now, right-click on “Windows Update” and select “Stop“.

3. After that, open the File Explorer and go to C:\Windows folder.

4. Locate the SoftwareDistribution folder, right-click on it and select “Rename“.
5. Rename it as “Old SoftwareDistribution” or “SoftwareDistributionOld”.
6. Now, go back to the services and click on “Start“.
Fix 7: Perform System Restore in WinRE
If your Windows computer isn’t working properly, you can use something called “System Restore” in an area called “Windows Recovery Environment” (WinRE). It’s like a reset button that takes your PC back to a time when it was working well. You can do this from a menu called “Advanced Startup Options.”
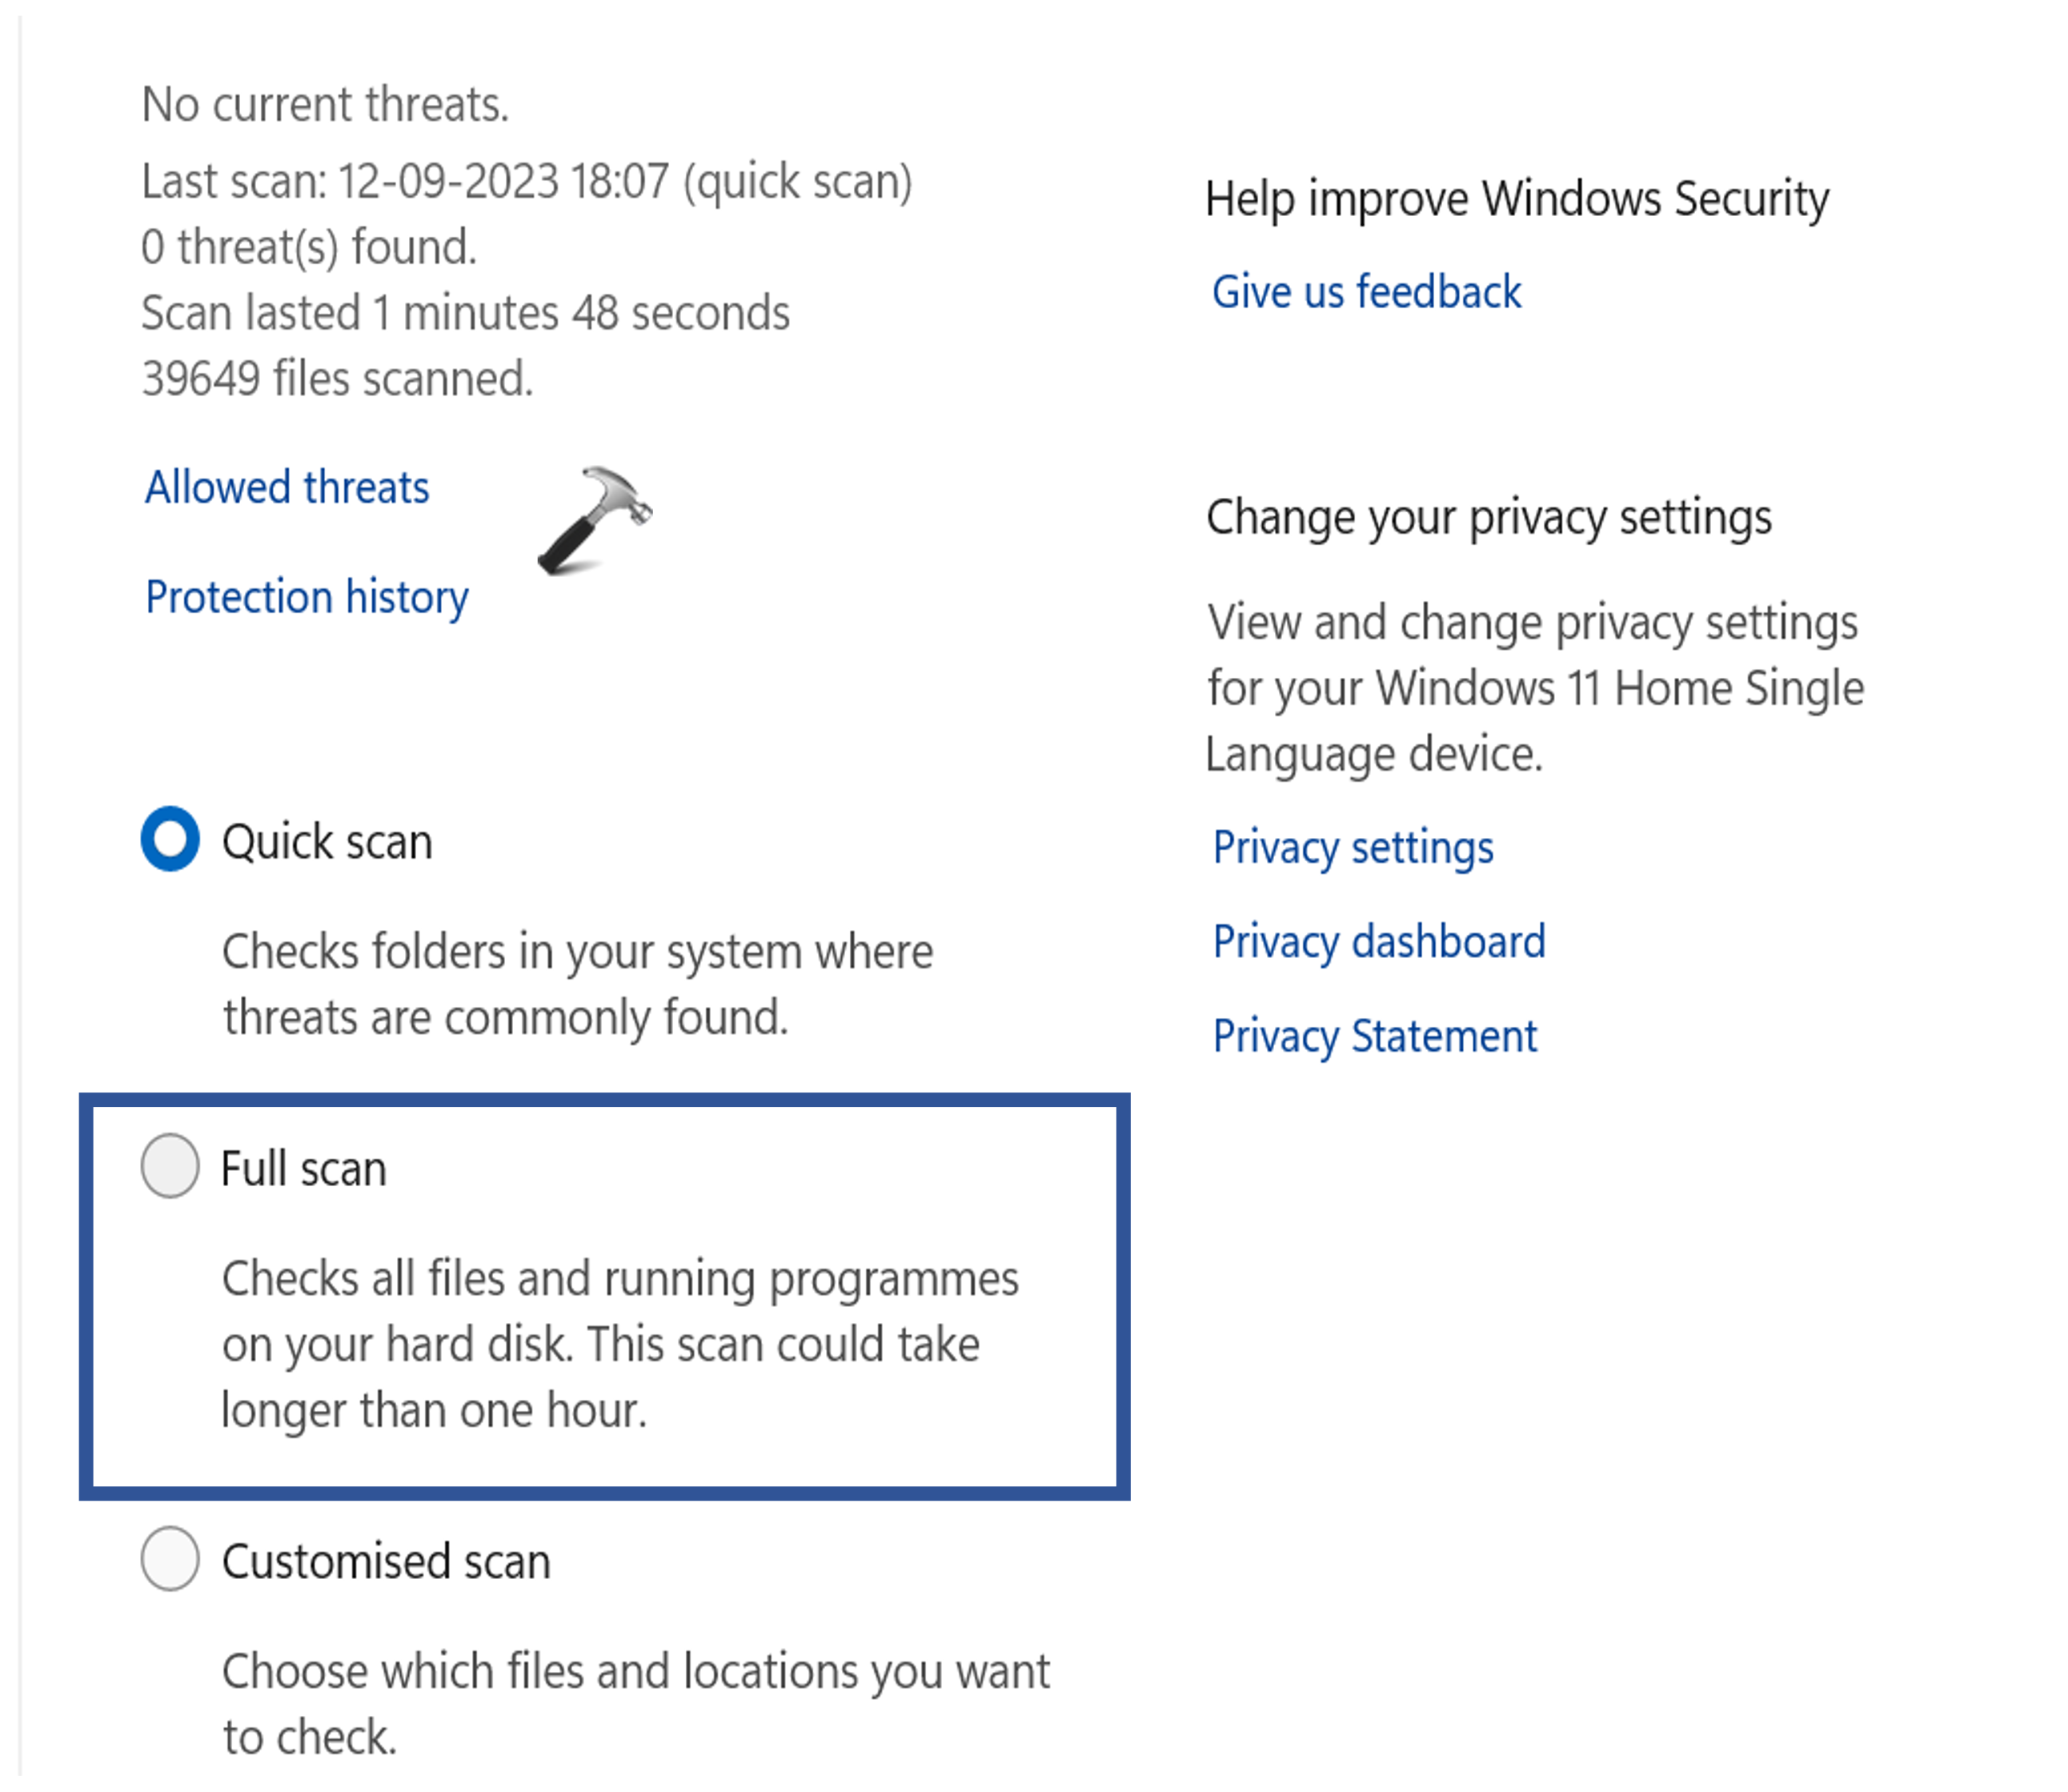
Fix 8: Scan for Virus
1. Open the search menu and type “Windows Security” and open it.
2. Now, click on “Virus & threat protection“.

3. Click on “Scan options“.
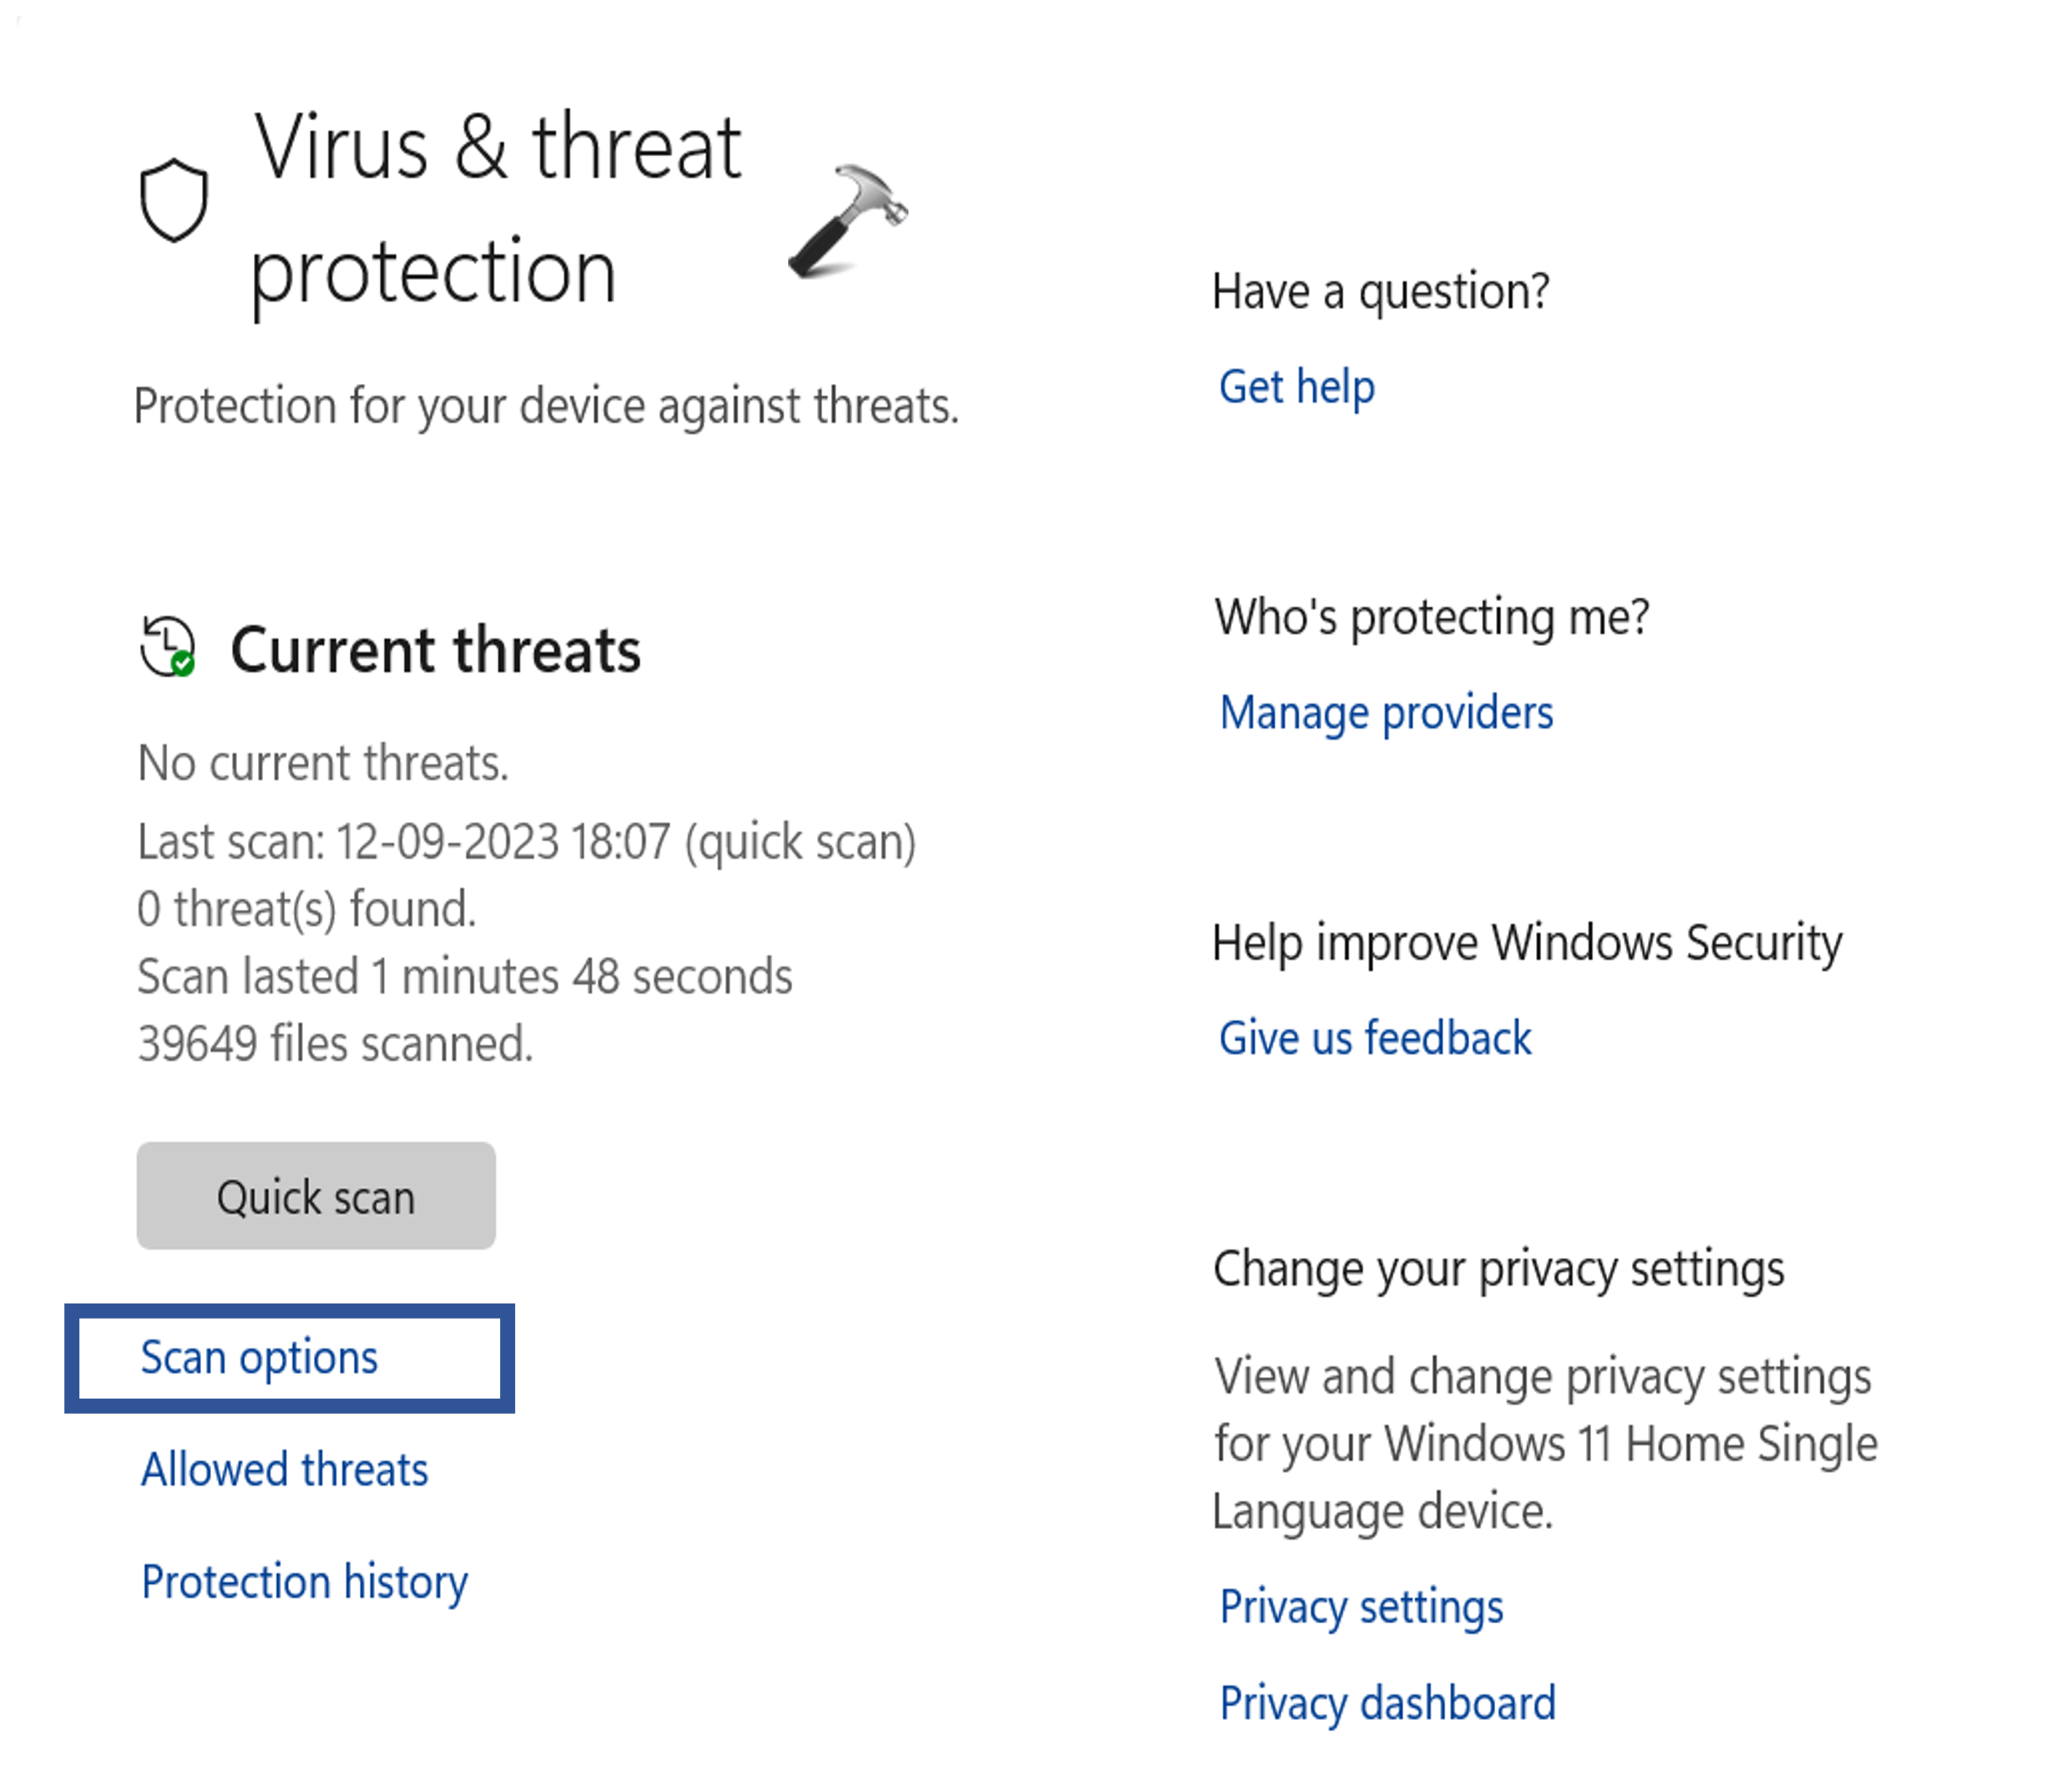
4. Then, click on “Full scan” and then click on “Scan now“.
Fix 9: Run SFC and DISM Scan
1. Open the Command prompt and run as administrator.
2. Copy the below command:
sfc /scannow

Press Enter.
3. After executing the above command, execute the below commands one by one:
DISM /Online /Cleanup-Image /CheckHealth
DISM /Online /Cleanup-Image /ScanHealth
DISM /Online /Cleanup-Image /RestoreHealth
4. After executing all the commands, restart the PC.
Fix 10: Rollback Windows Update
If a previous update is causing problems, it might stop your Windows computer from installing the next one. In such cases, you can undo or remove the problematic update and then attempt the new one.
Here’s how to do it:
1. Open the Settings App and go to Windows Update.
2. Now, click on “Update History”
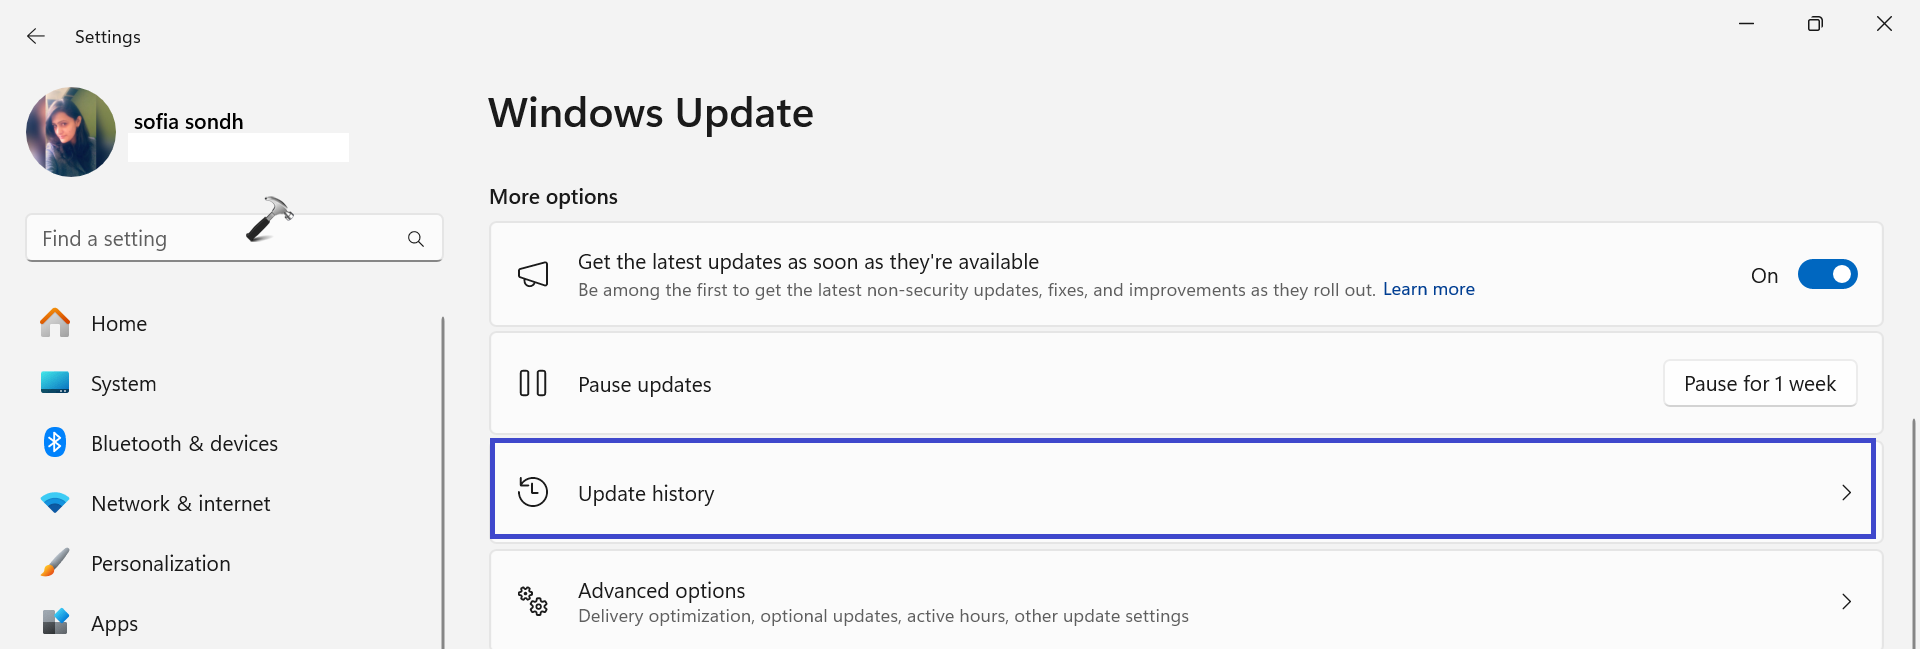
3. After that, click “Uninstall update“.

4. Now, uninstall the latest Windows update.

That’s It!
![KapilArya.com is a Windows troubleshooting & how to tutorials blog from Kapil Arya [Microsoft MVP (Windows IT Pro)]. KapilArya.com](https://images.kapilarya.com/Logo1.svg)




Leave a Reply