Windows Update is a crucial component of the Windows operating system, responsible for delivering security patches, bug fixes, and feature updates to keep your system running smoothly and securely. However, encountering error code 0x80248014 during the update process can be frustrating, as it indicates a roadblock in accessing these essential updates. In this article, we’ll explore eight solutions to Fix: Windows Update error code 0x80248014 and ensure your PC remains up to date and secure.
Page Contents
What is Error Code 0x80248014?
Error code 0x80248014 on Windows 11 is a Windows Update error that can occur when trying to install updates, download apps from the Microsoft Store, or use other Microsoft services.

Error code 0x80248014 can be caused by a variety of factors, including:
- Corrupted or missing Windows Update files
- Problems with the Windows Update service
- Insufficient disk space
- Network connection problems
- Antivirus software interference
- Third-party software conflicts
Fix: Windows Update error code 0x80248014
Here are eight solutions that can assist you in resolving this problem:
- Run Windows Update Troubleshooter
- Restart Windows Store Cache
- Remove Unnecessary Temp Files
- Reset Windows Update Component
- Scan for Virus
- Verify Windows Update Services Status
- Recreate Software Distribution Folder
- Clear the Catroots2 Folders Contents
Fix 1: Run Windows Update Troubleshooter
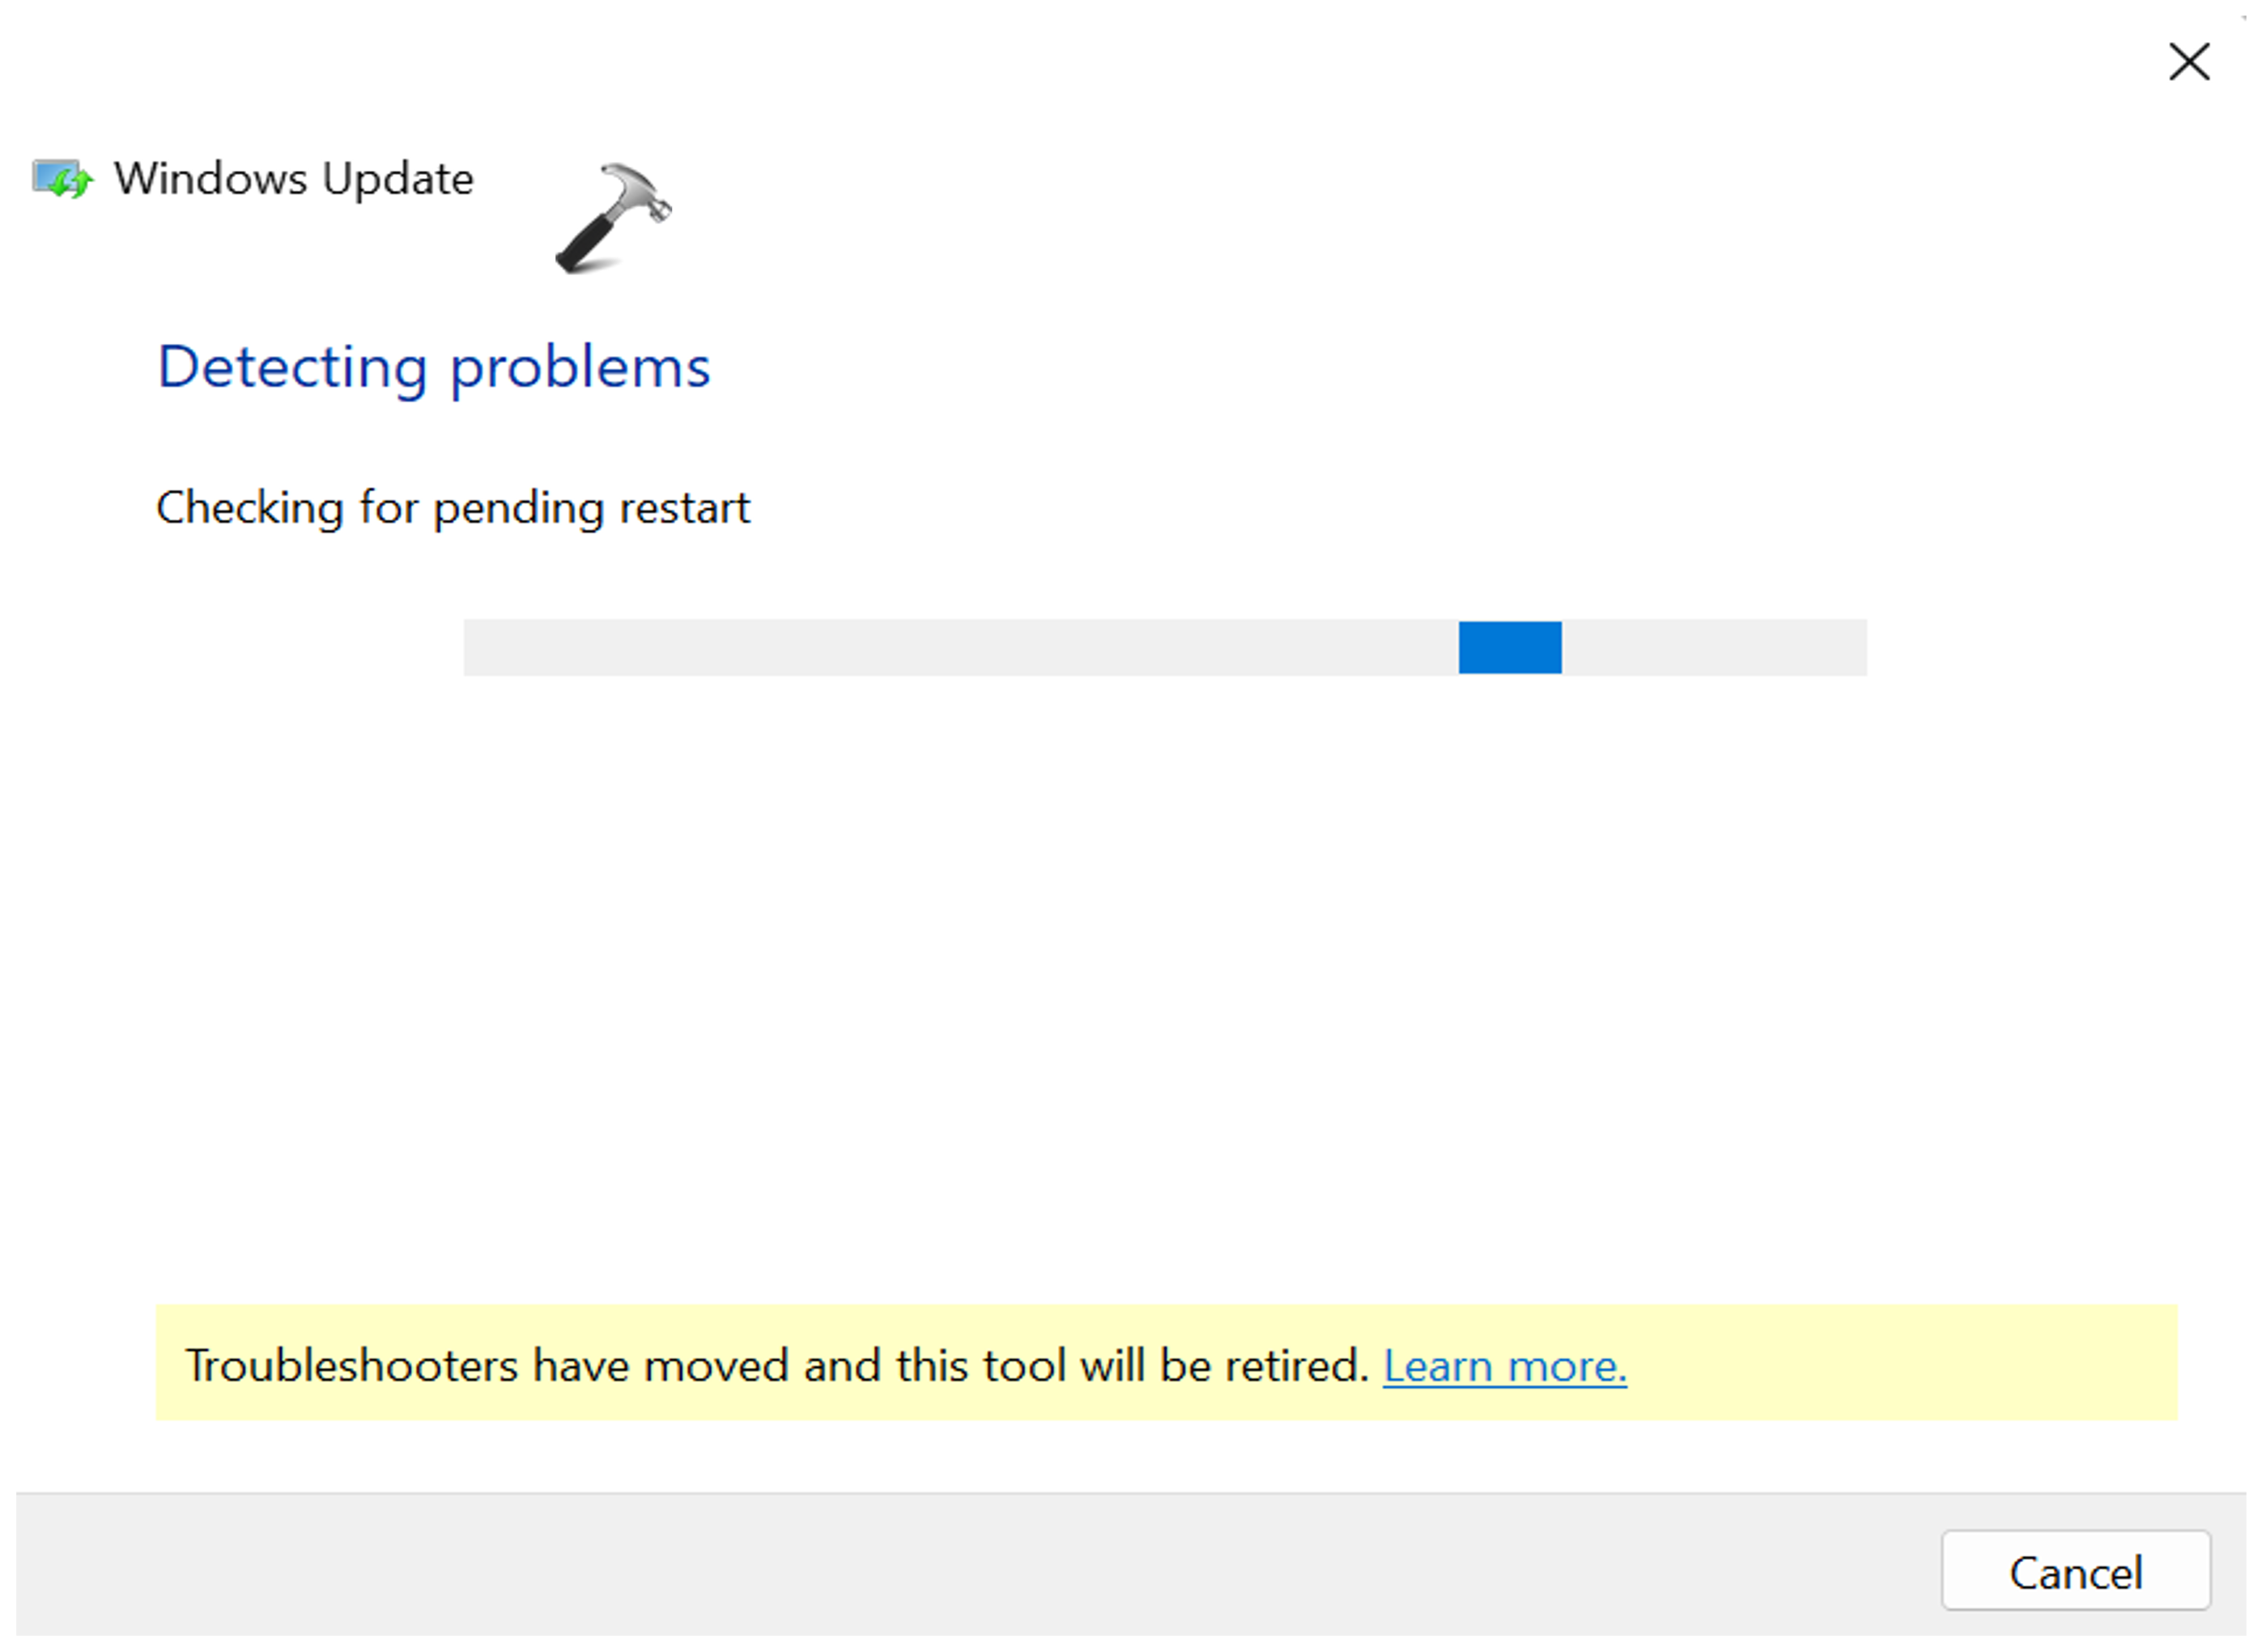
The Windows Update Troubleshooter is a built-in tool that can help you to identify and fix common Windows Update problems. It is a good place to start if you are getting error code 0x80248014.
Follow the below steps to run troubleshooting for Windows Update:
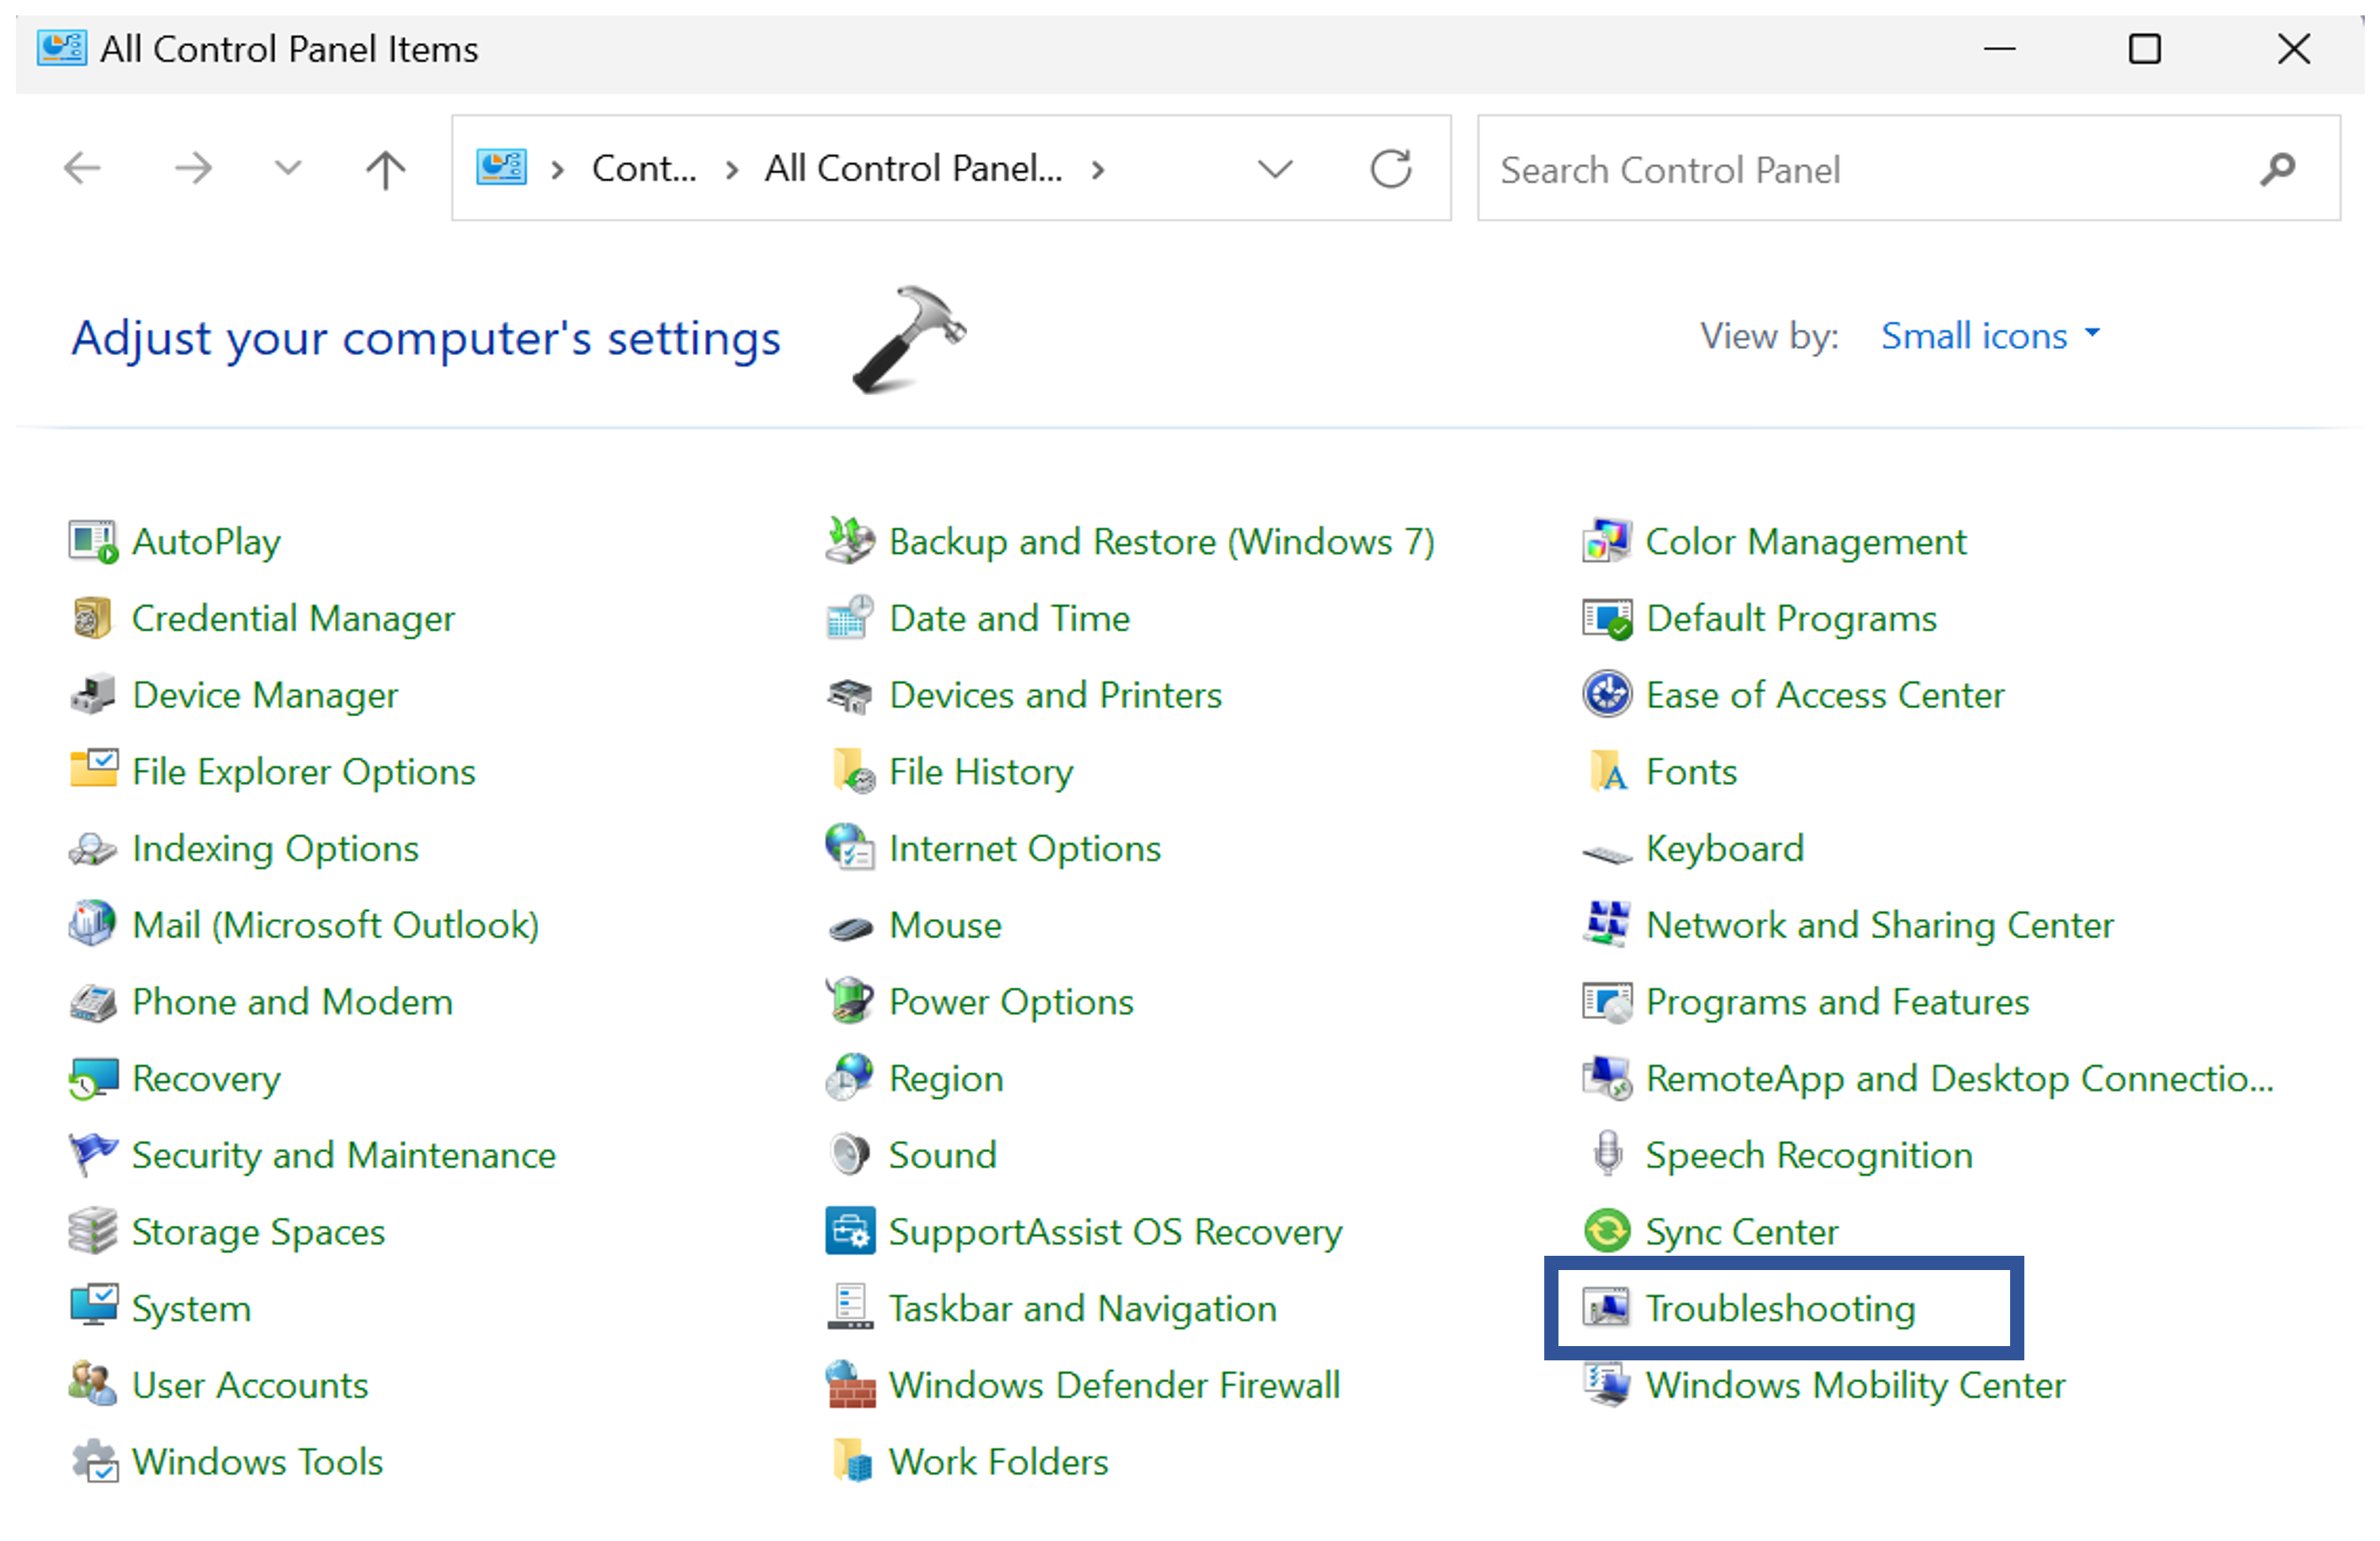
1. Open the Control Panel and click on “Troubleshooting“.
2. Now, click on “Other Troubleshooters“.
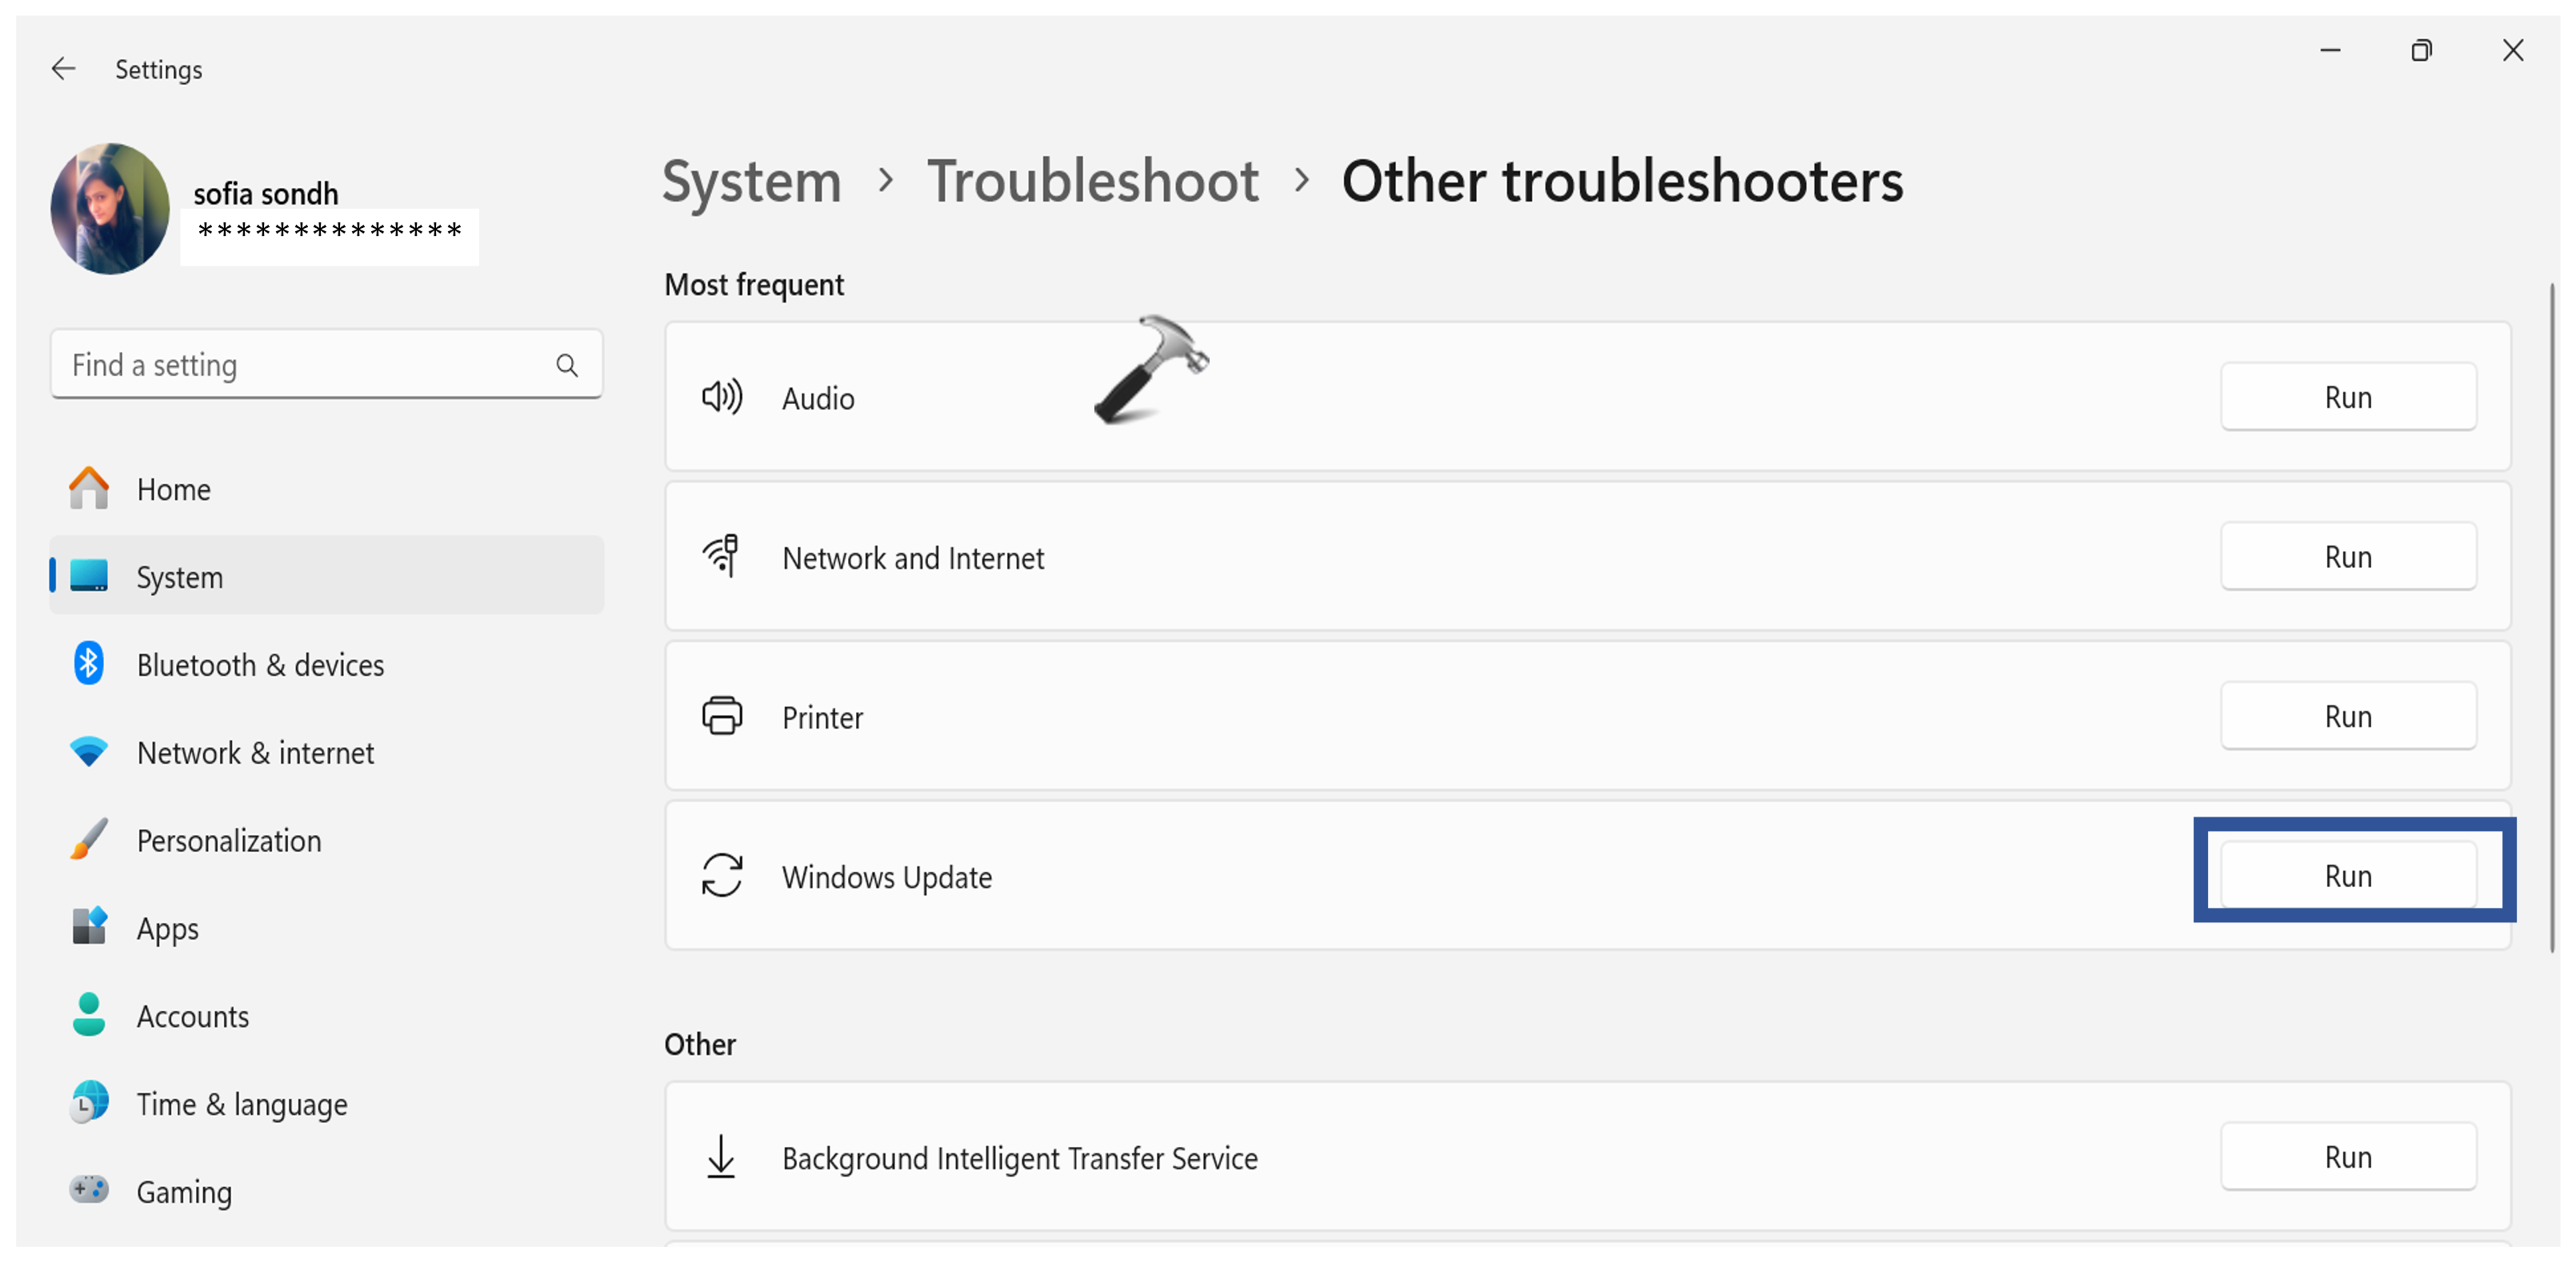
3. Click on “Run” next to “Windows Update“.
The troubleshooter will scan your system for problems and then try to fix them. Once the scan is complete, you will see a report of the problems that were found and the actions that were taken.
Fix 2: Reset Windows Store Cache
The Windows Store cache is a temporary storage location for files that are downloaded from the Microsoft Store. Sometimes, this cache can become corrupted or damaged, which can lead to problems with downloading and installing apps and updates.
To reset the Windows Store cache:
1. Open the Search box and type “WSReset.exe”
2. Click on “WSReset.exe“.

A blank Command Prompt window will open. After about ten seconds, the window will close and the Microsoft Store will open automatically.
Resetting the Windows Store cache will delete all of the files in the cache. However, it will not delete any of your installed apps or app data.
Fix 3: Remove Unnecessary Temp Files
Temporary files are created by Windows and other programs when they are running. These files are typically used to store temporary data, such as browser cache and cookies, downloaded files, and error logs.
Over time, temporary files can accumulate and take up valuable disk space. They can also interfere with Windows Update and other system processes.
To remove unnecessary temporary files:
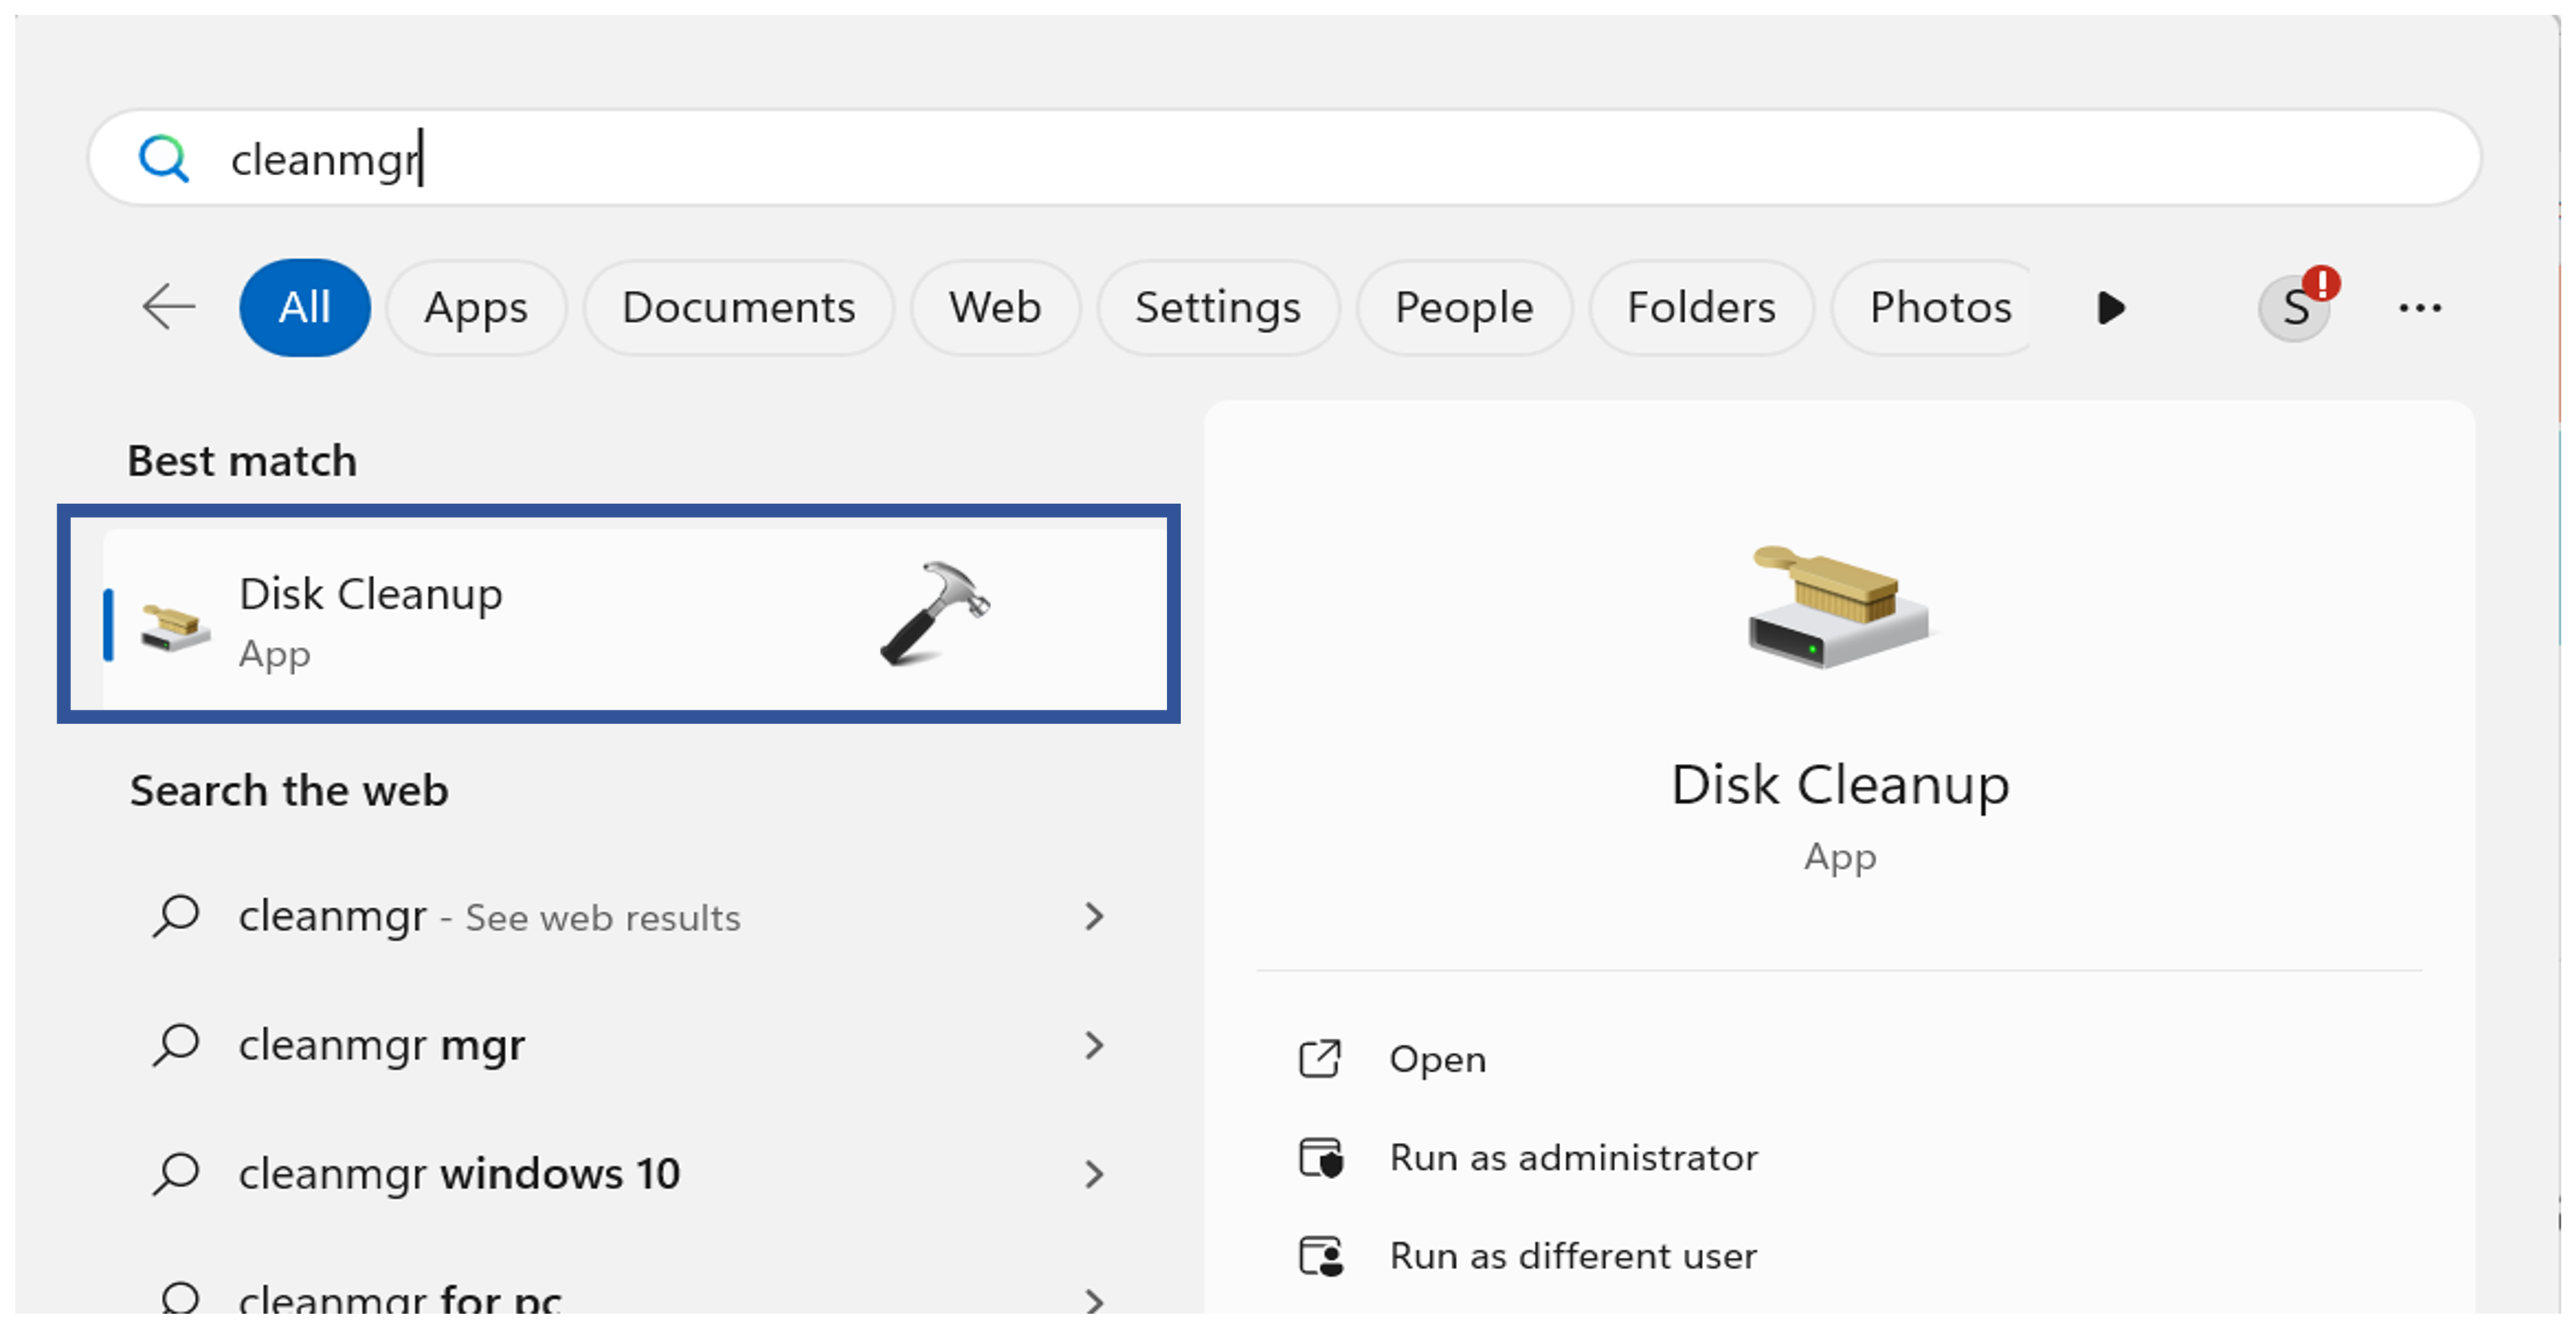
1. Open the search box and type “cleanmgr“. Press “Enter“.
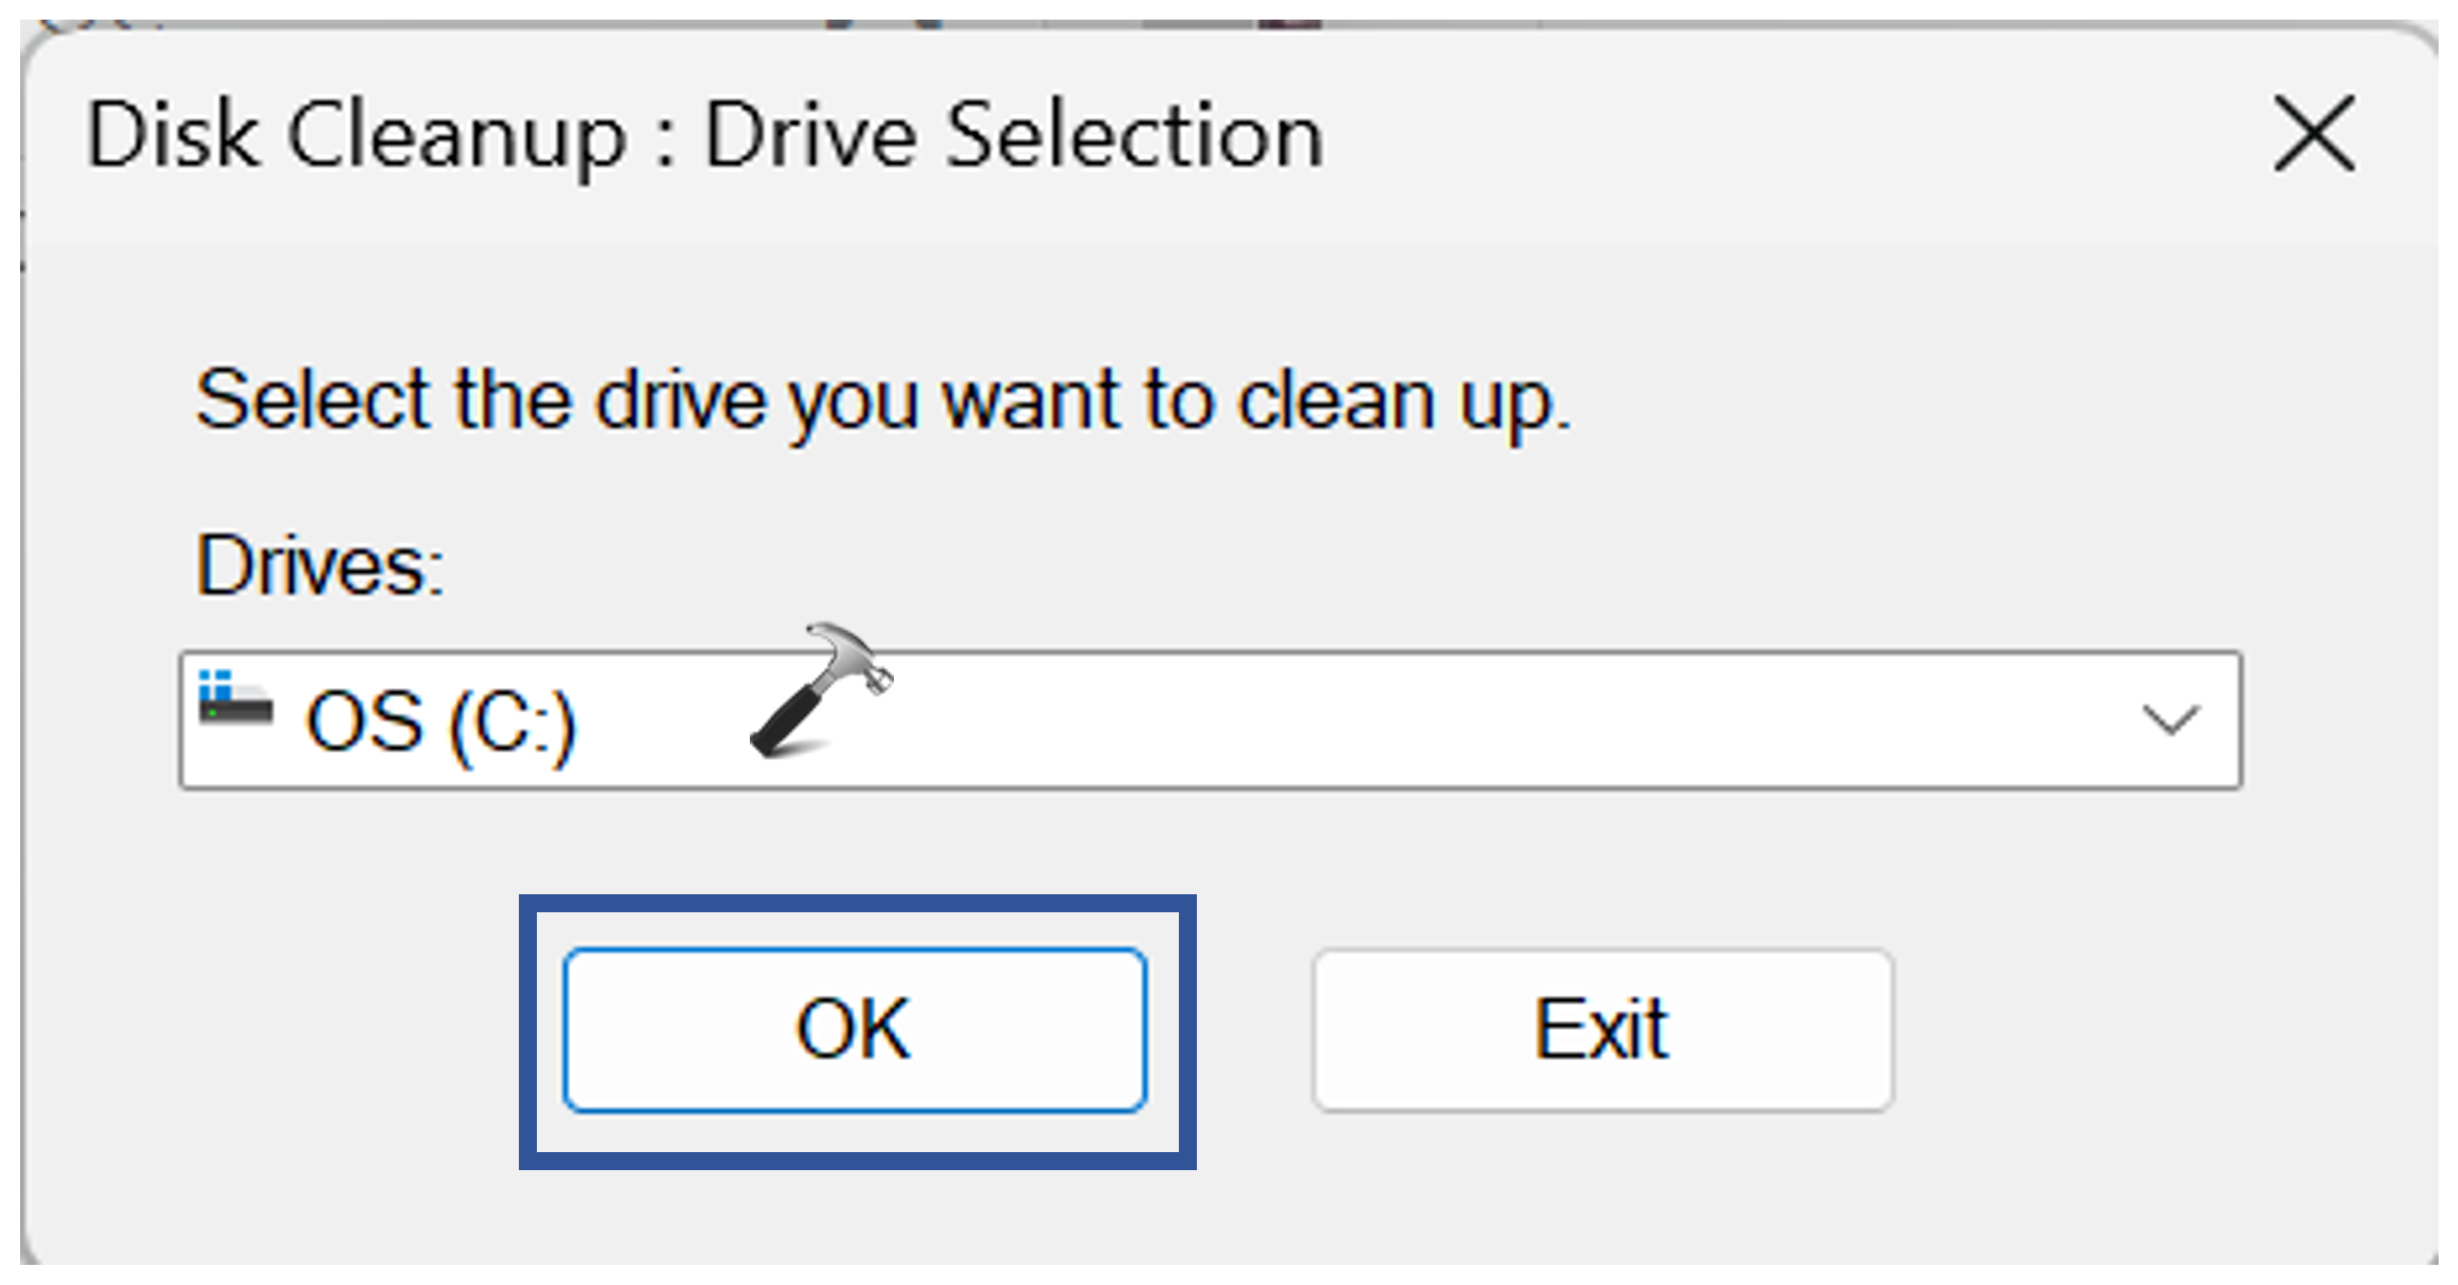
2. The “Disk cleanup” pop-up will appear. Click OK.
3. Now, select “Clean up system files“. Click OK.
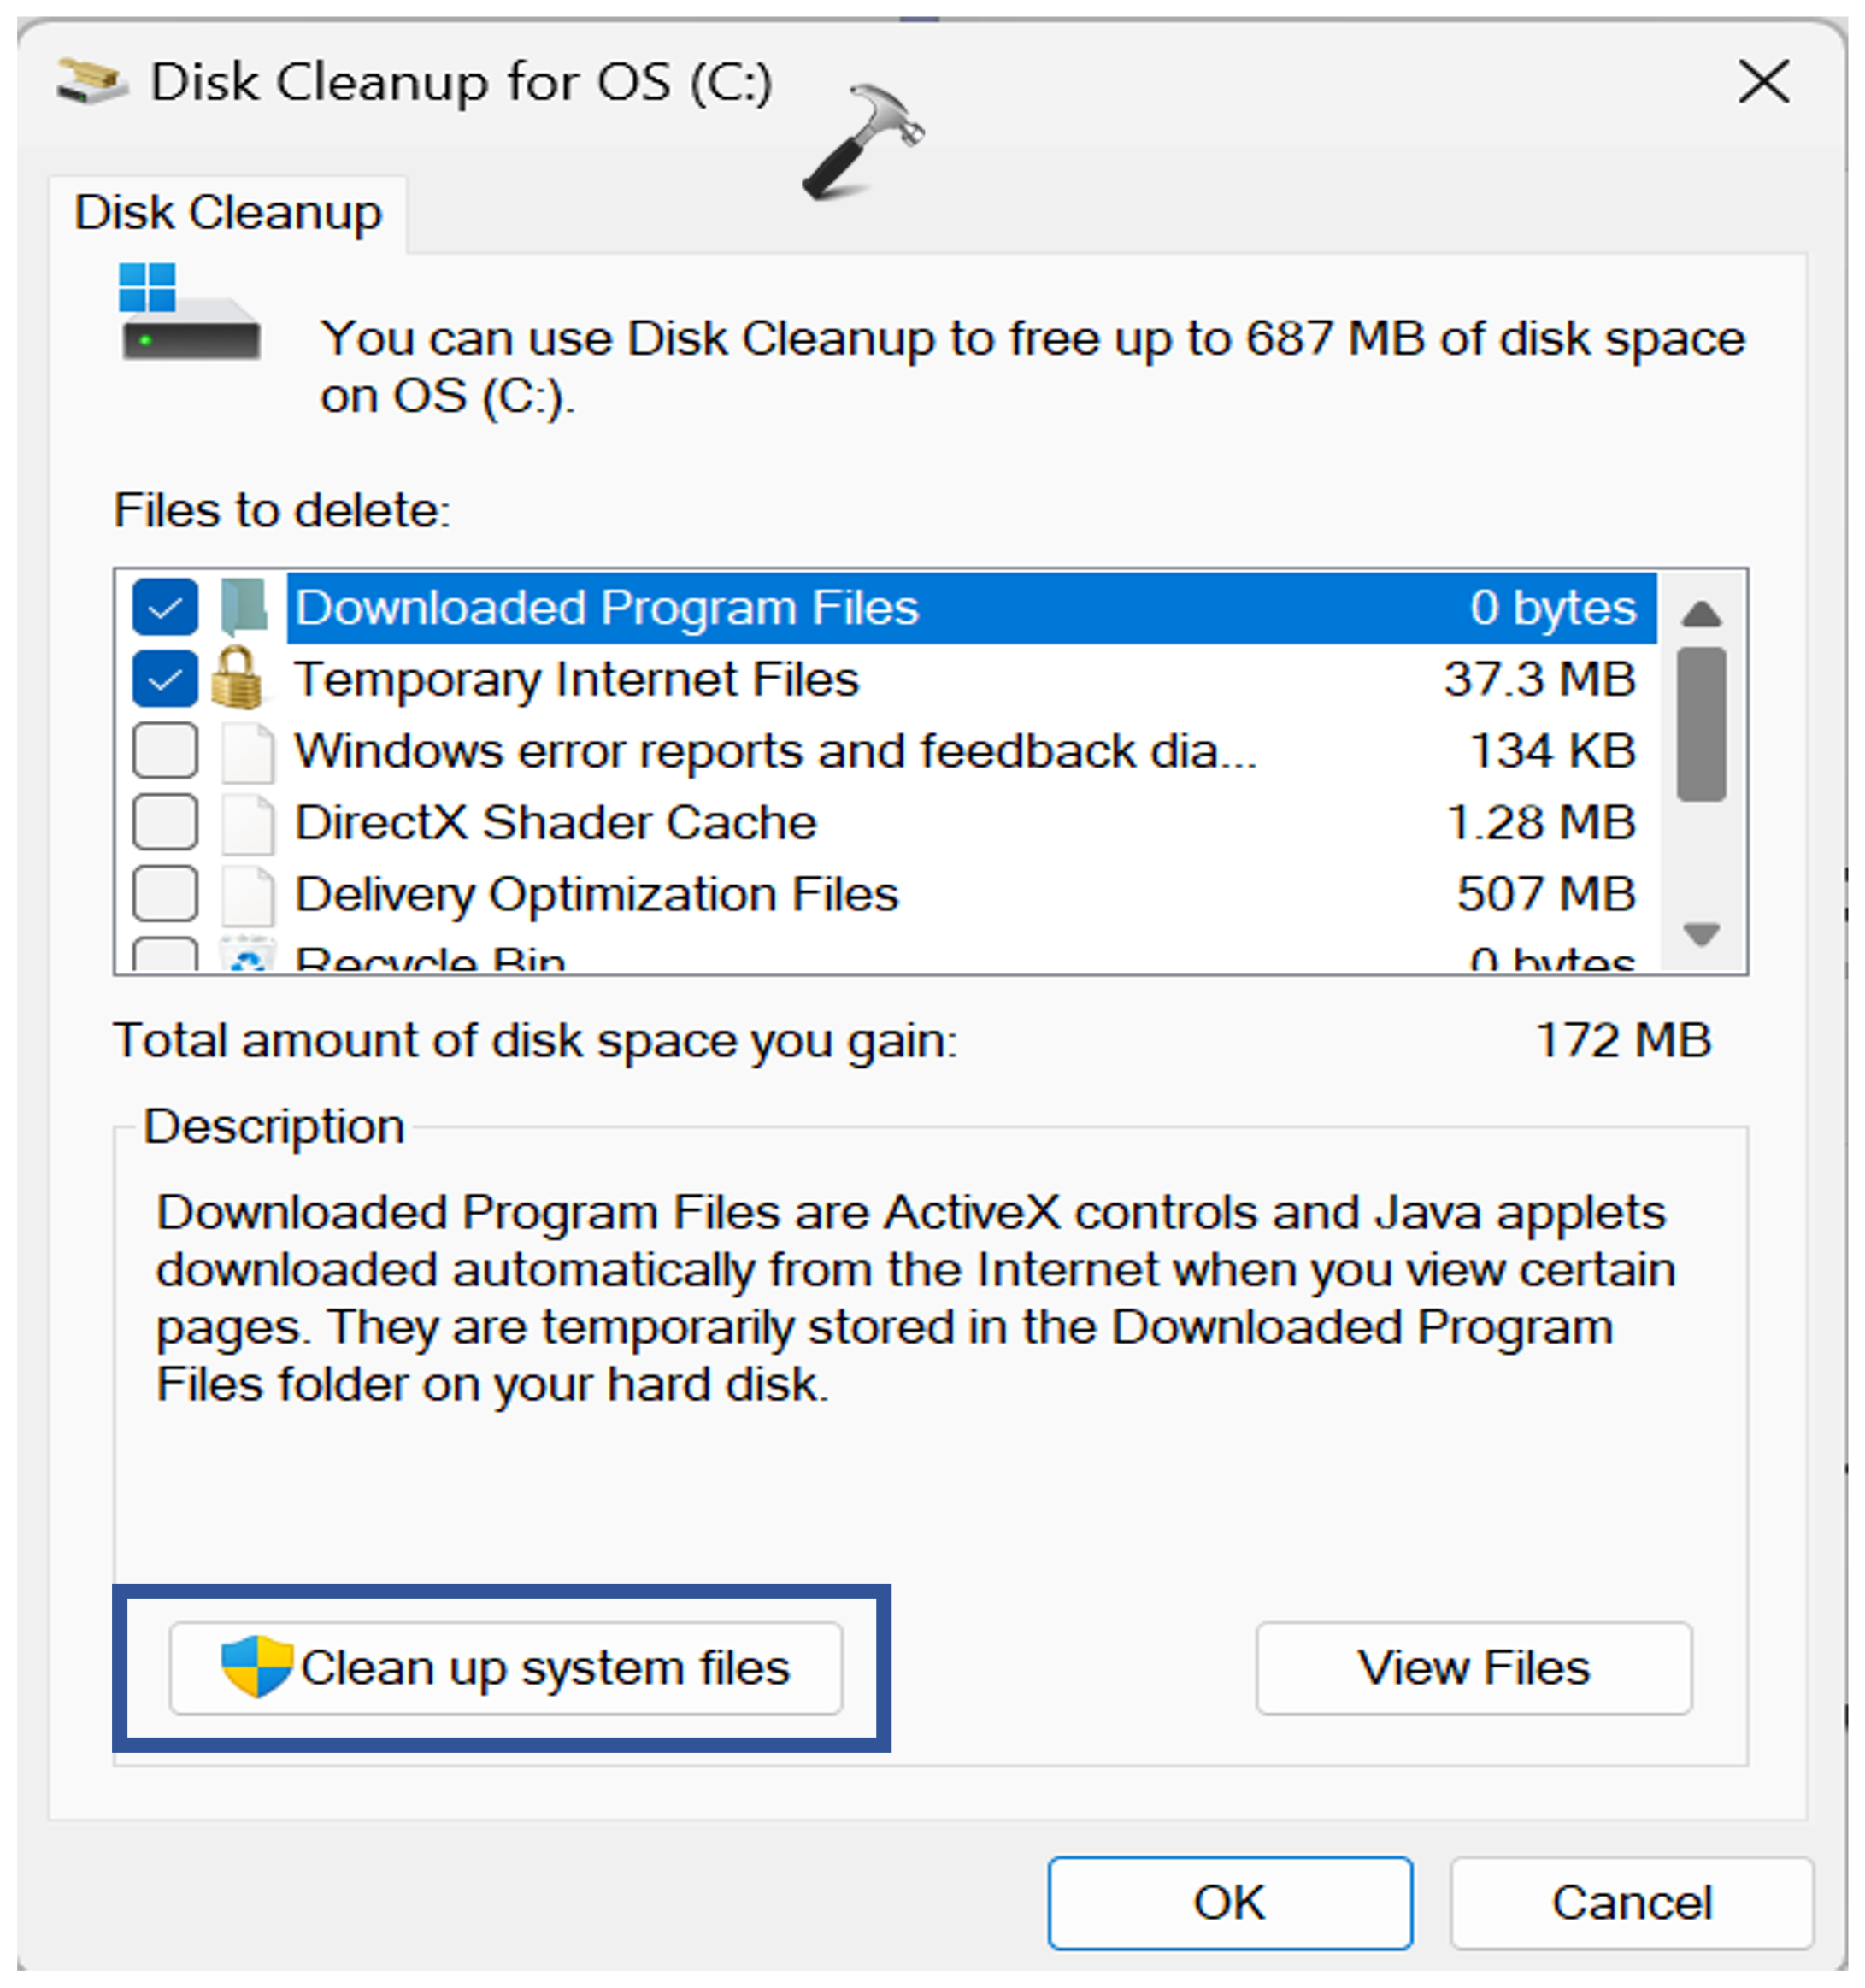
4. Under the “Files to delete” section, check all the options. Click OK.
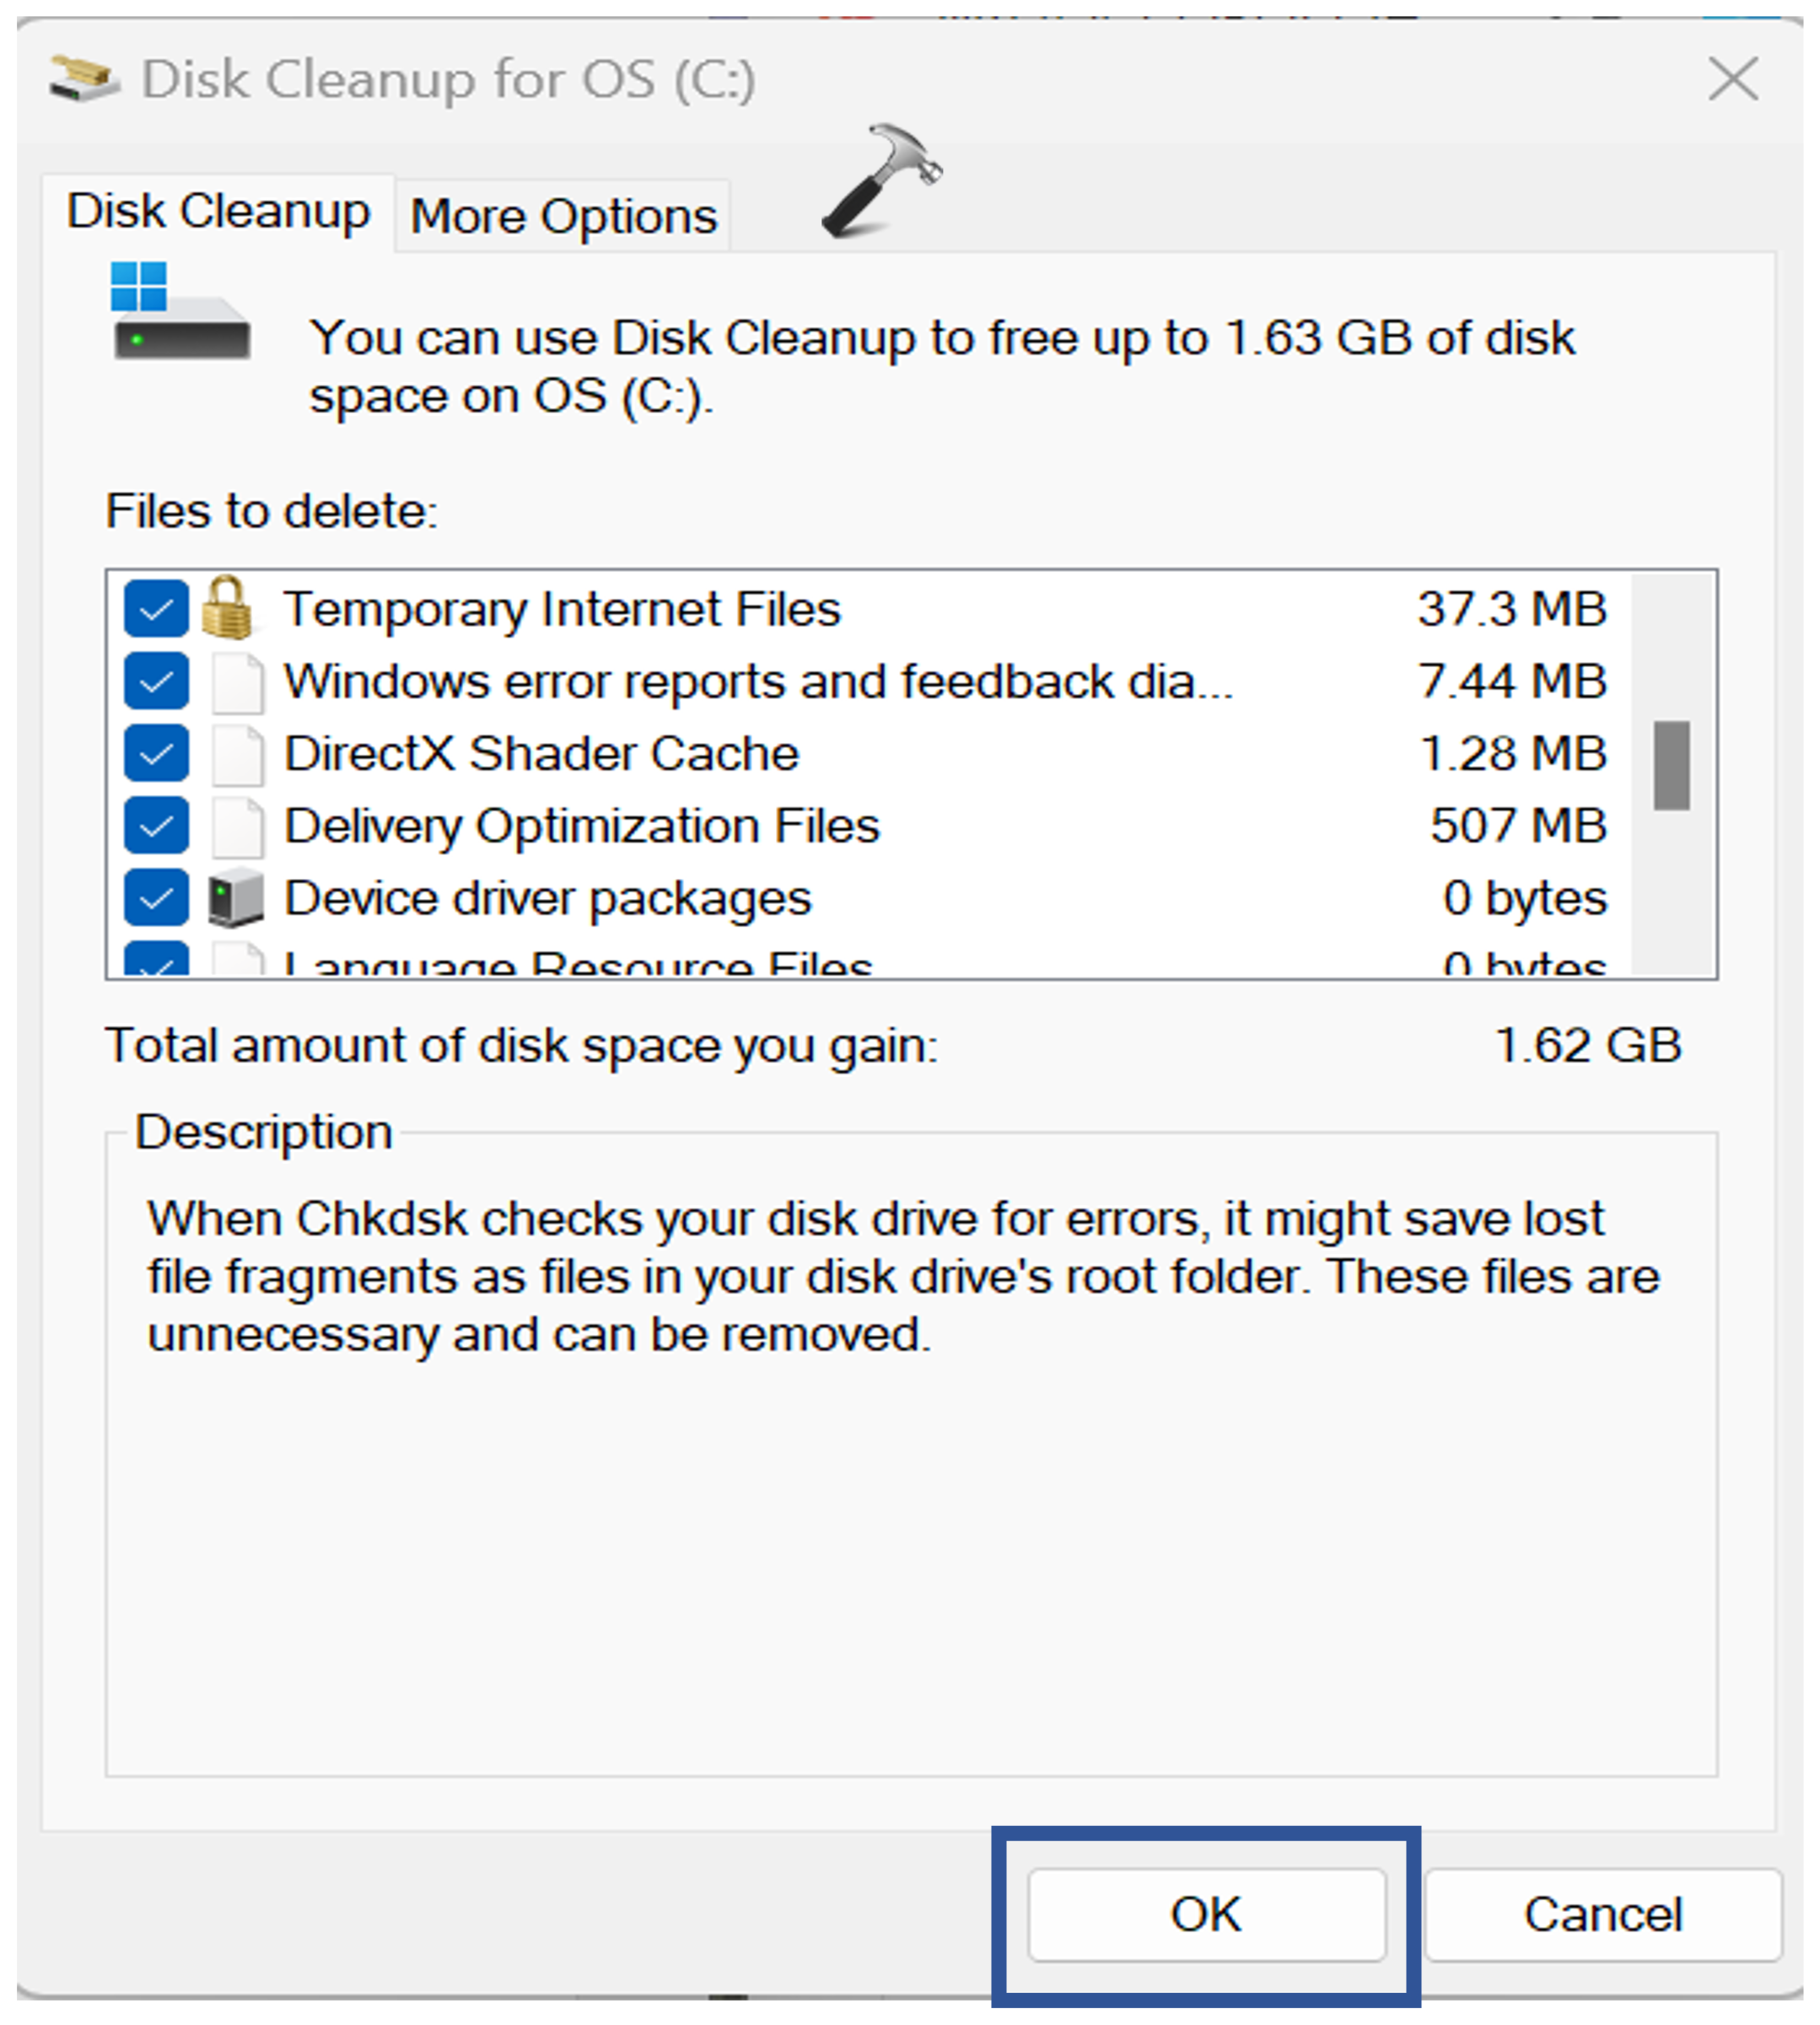
5. A prompt box will appear. Click “Delete Files“.

6. Now, restart the PC to apply the changes.
Fix 4: Reset Windows Update Component
Resetting Windows Update components can help to fix a variety of Windows Update errors, including error code 0x80248014. To reset Windows Update components, you can use the following steps:
1. Open the Command Prompt and run as administrator.
2. Copy and paste the following command. One by one press “Enter” after each command:
net stop wuauserv
net stop cryptSvc
net stop bits
net stop msiserver
ren C:\Windows\SoftwareDistribution SoftwareDistribution.old
net start wuauserv
net start cryptSvc
net start bits
net start msiserver
ren C:\Windows\System32\catroot2 Catroot2.old
These commands will stop the Windows Update service, the Background Intelligent Transfer Service (BITS), and the Cryptographic Service. They will then rename the SoftwareDistribution and catroot2 folders. These folders contain temporary files that are used by Windows Update. Renaming the folders will force Windows Update to recreate them and download fresh files.
3. After executing the commands, restart the PC.
Check whether the error 0x80248014 is solved or not.
Fix 5: Scan for Virus
Malware can sometimes interfere with Windows Update and other system processes. If you are getting error code 0x80248014, it is a good idea to scan your computer for viruses and other malware.
You can use the built-in Windows Defender antivirus software to scan your computer. To do this, follow these steps:
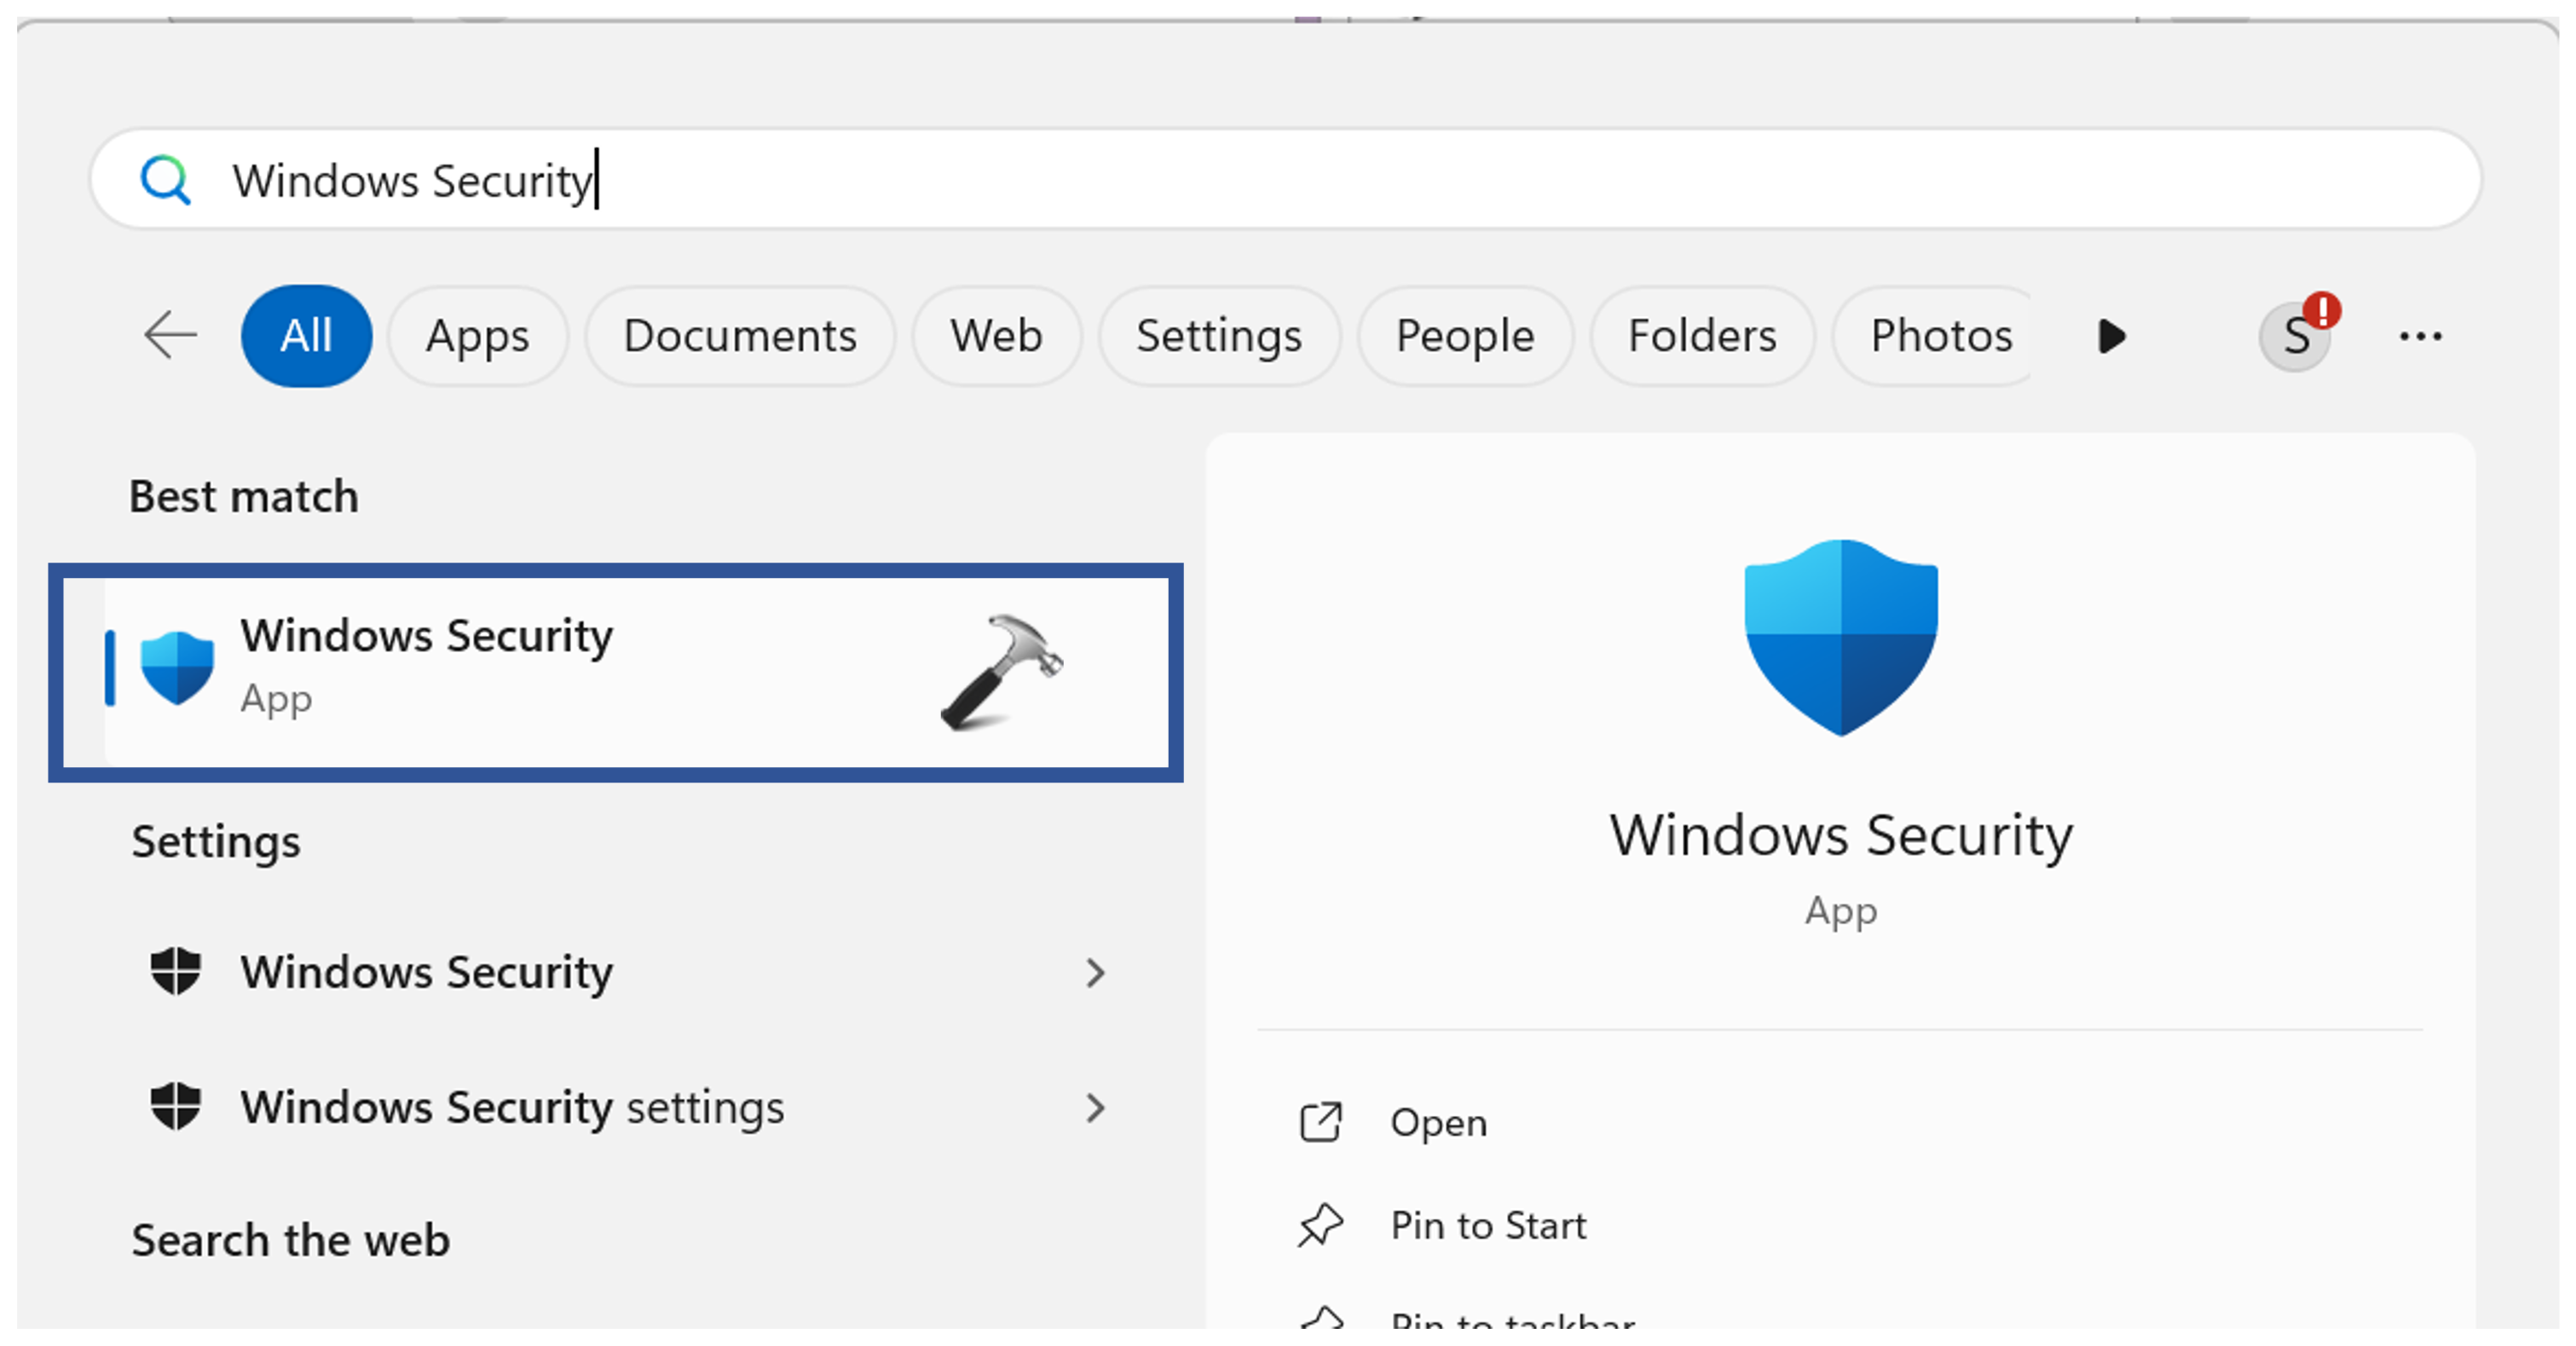
1. Open the “Windows Security” App.
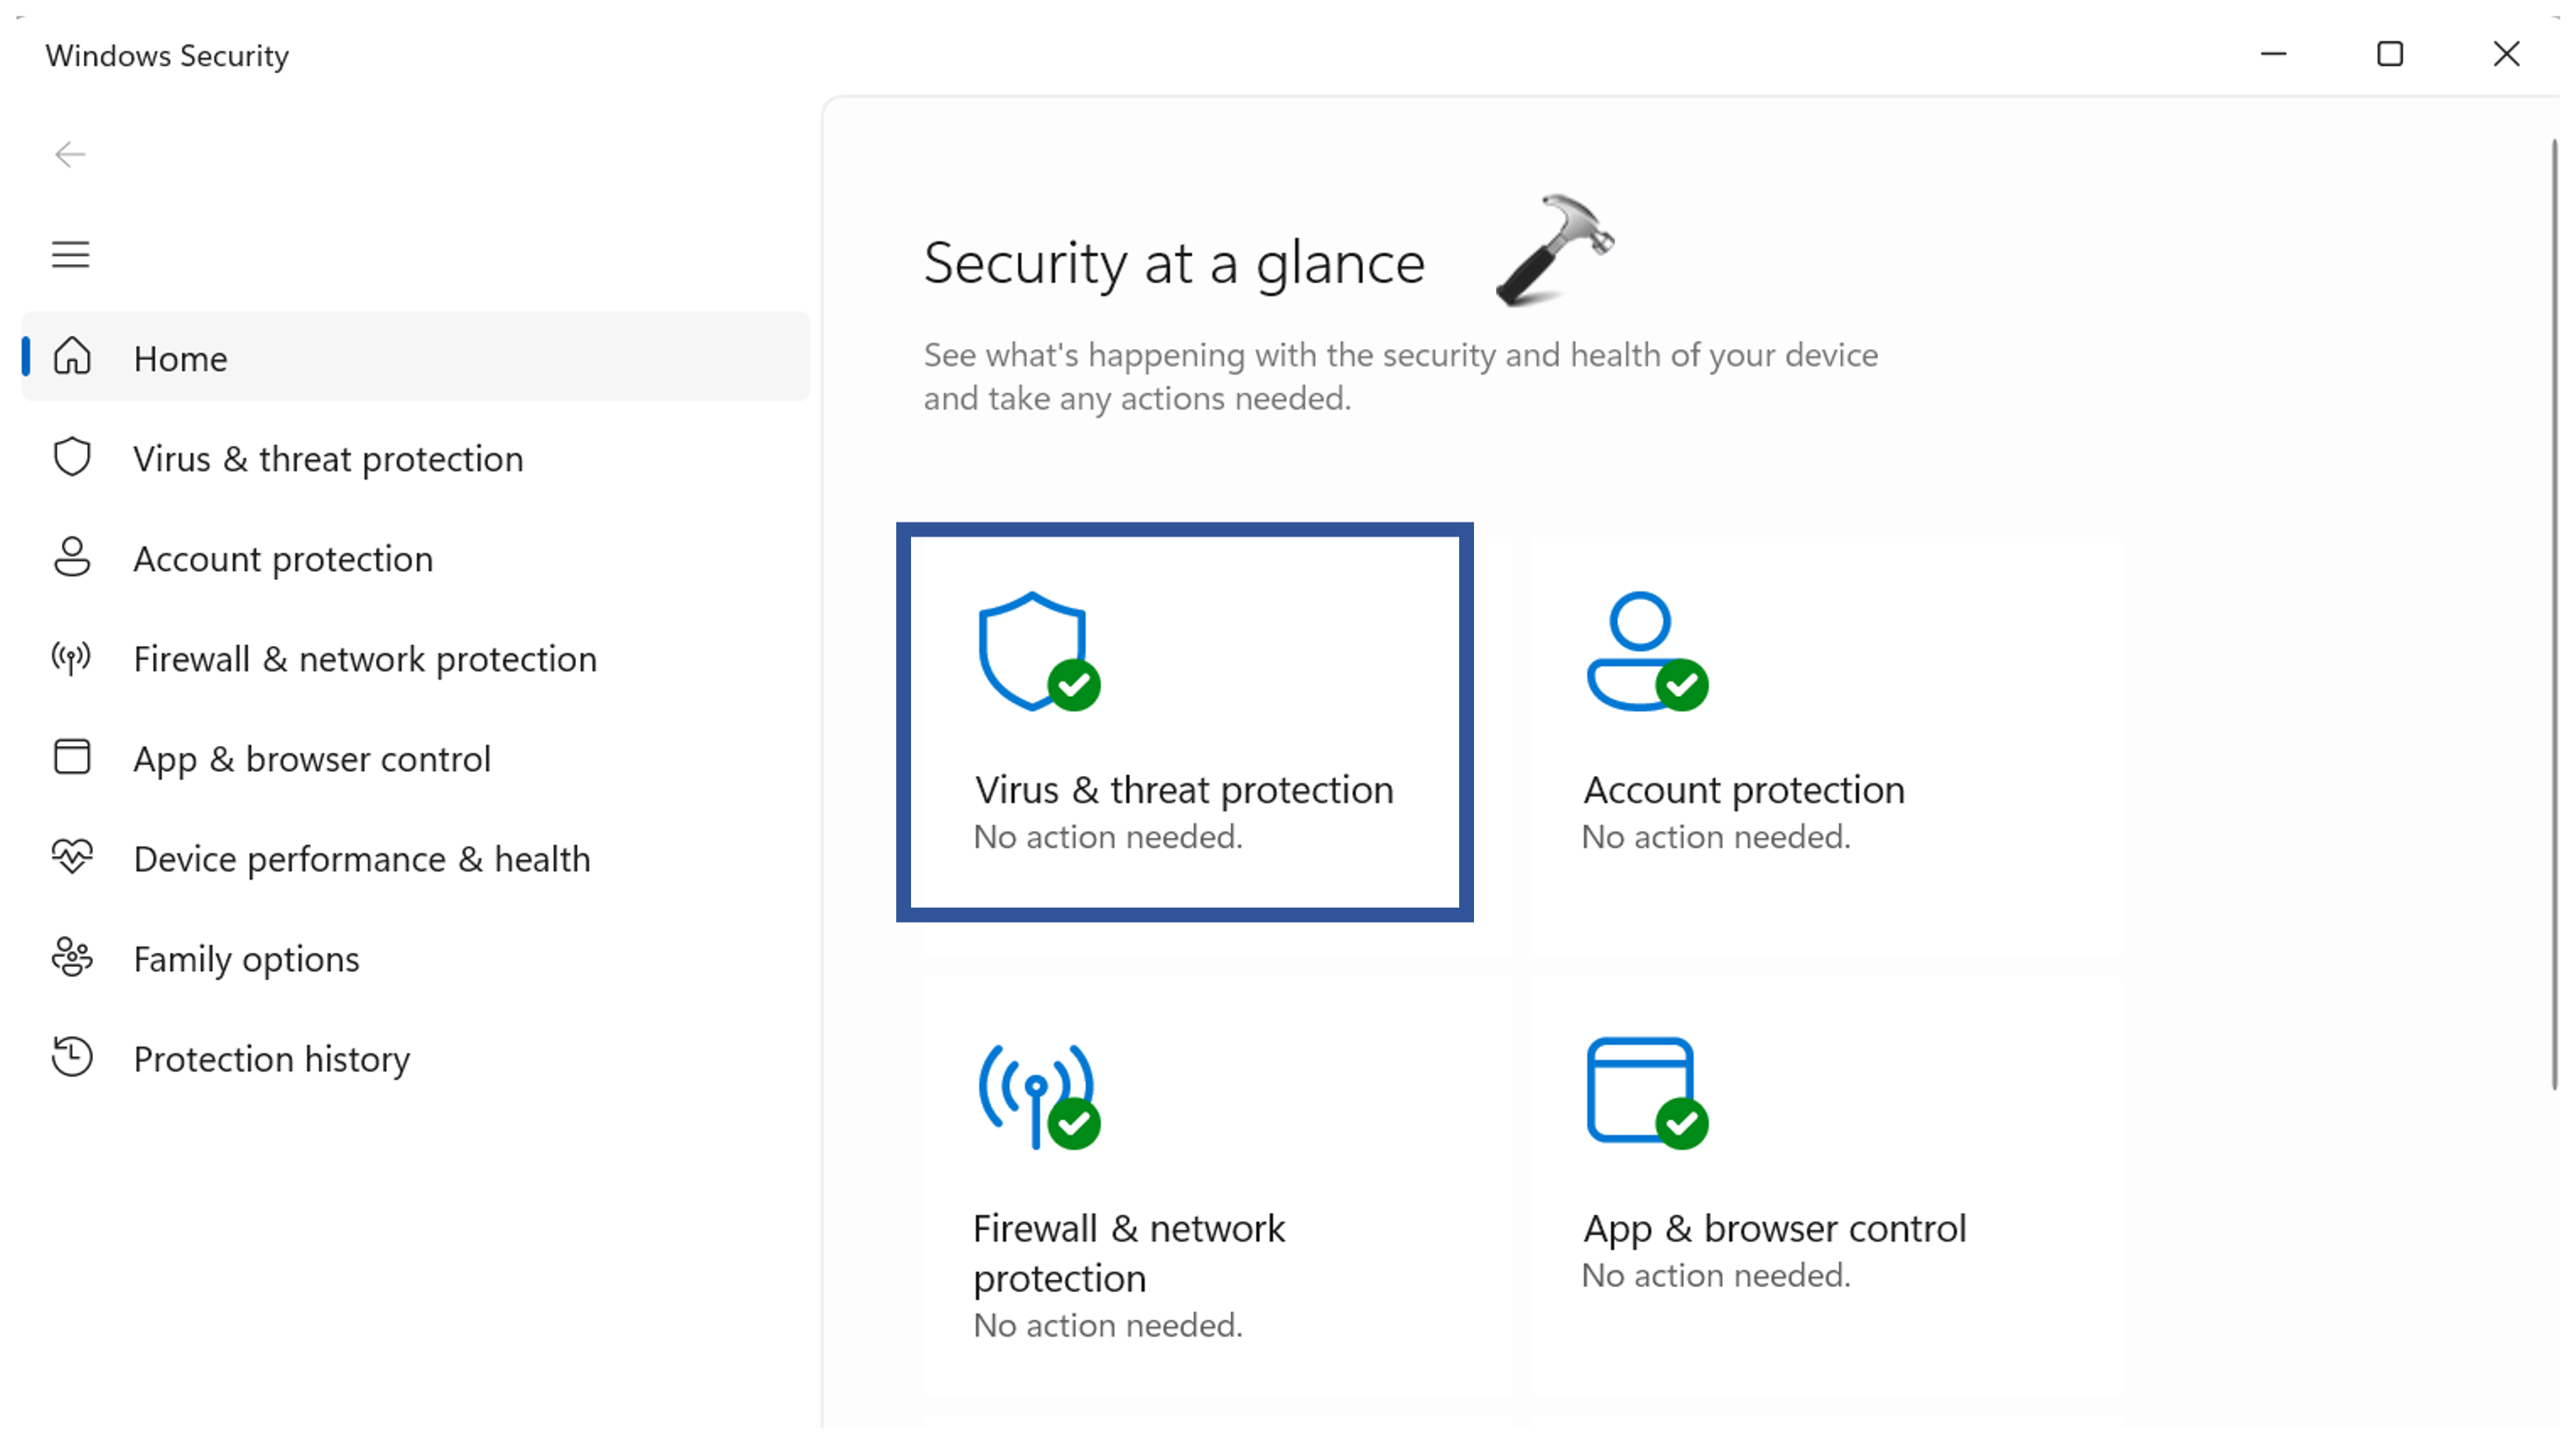
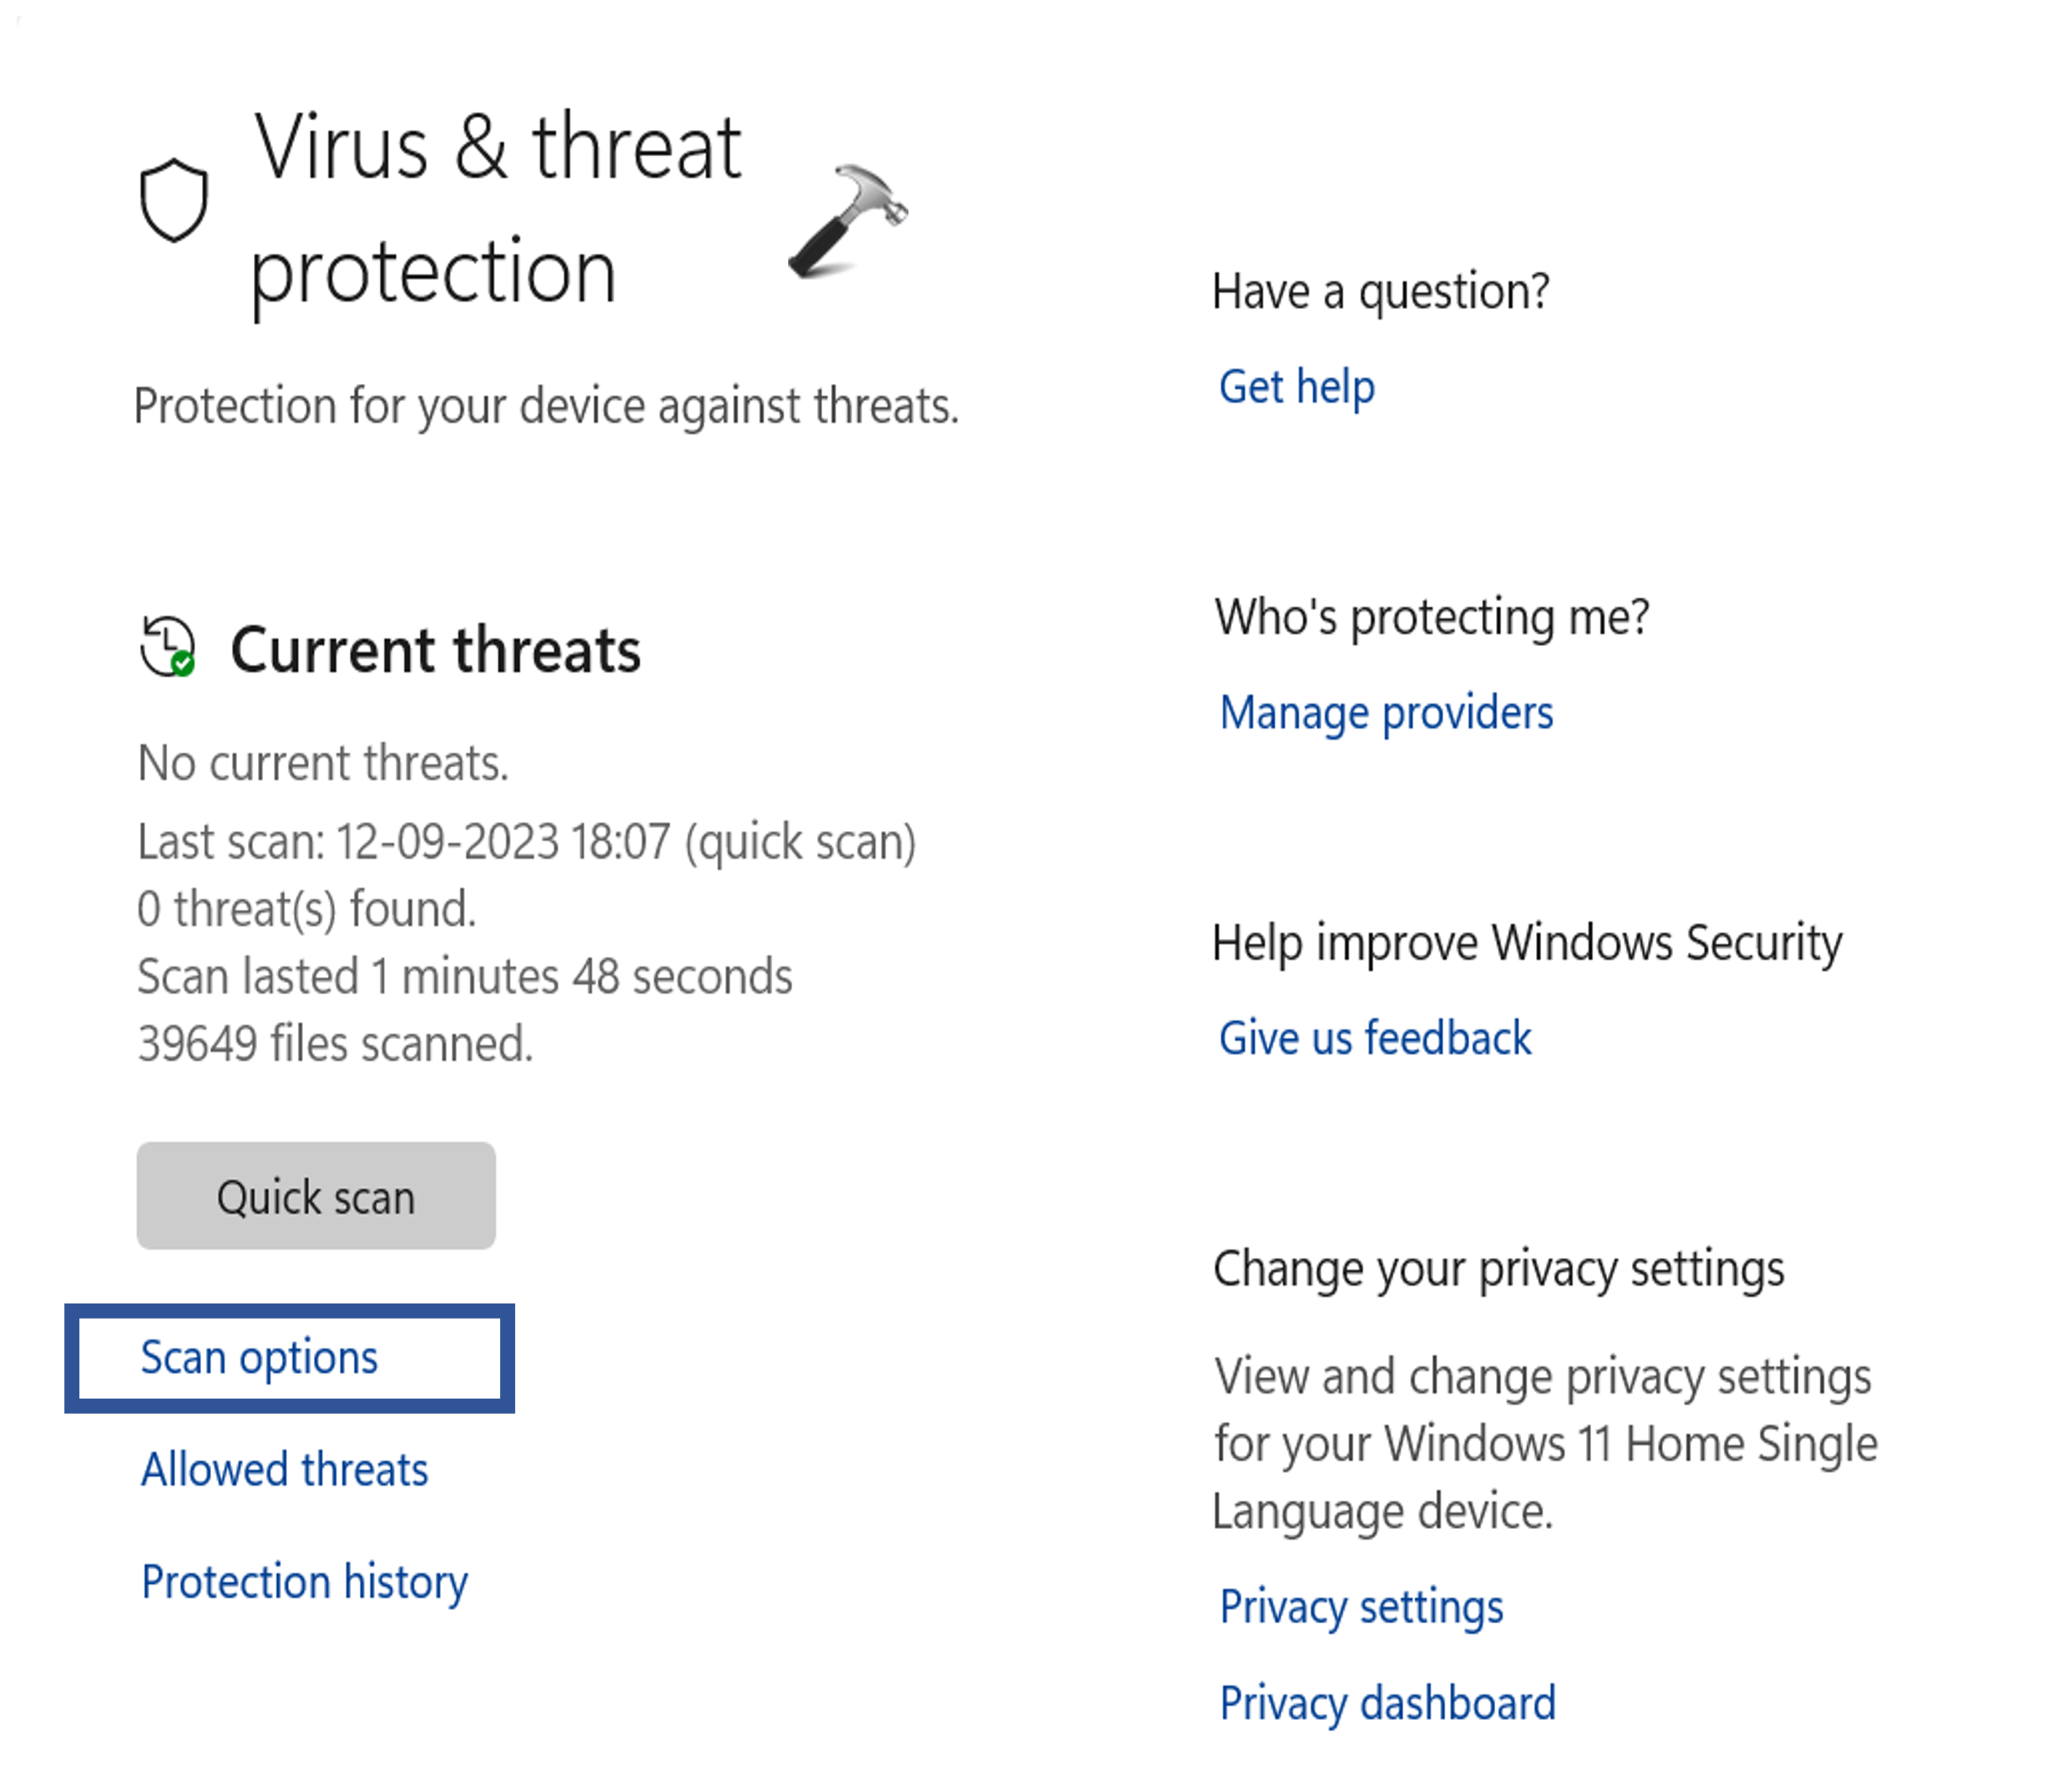
2. Now, select the “Virus & threat protection” option.
3. Click on “Scan options“.
4. Then, click on “Full scan“.
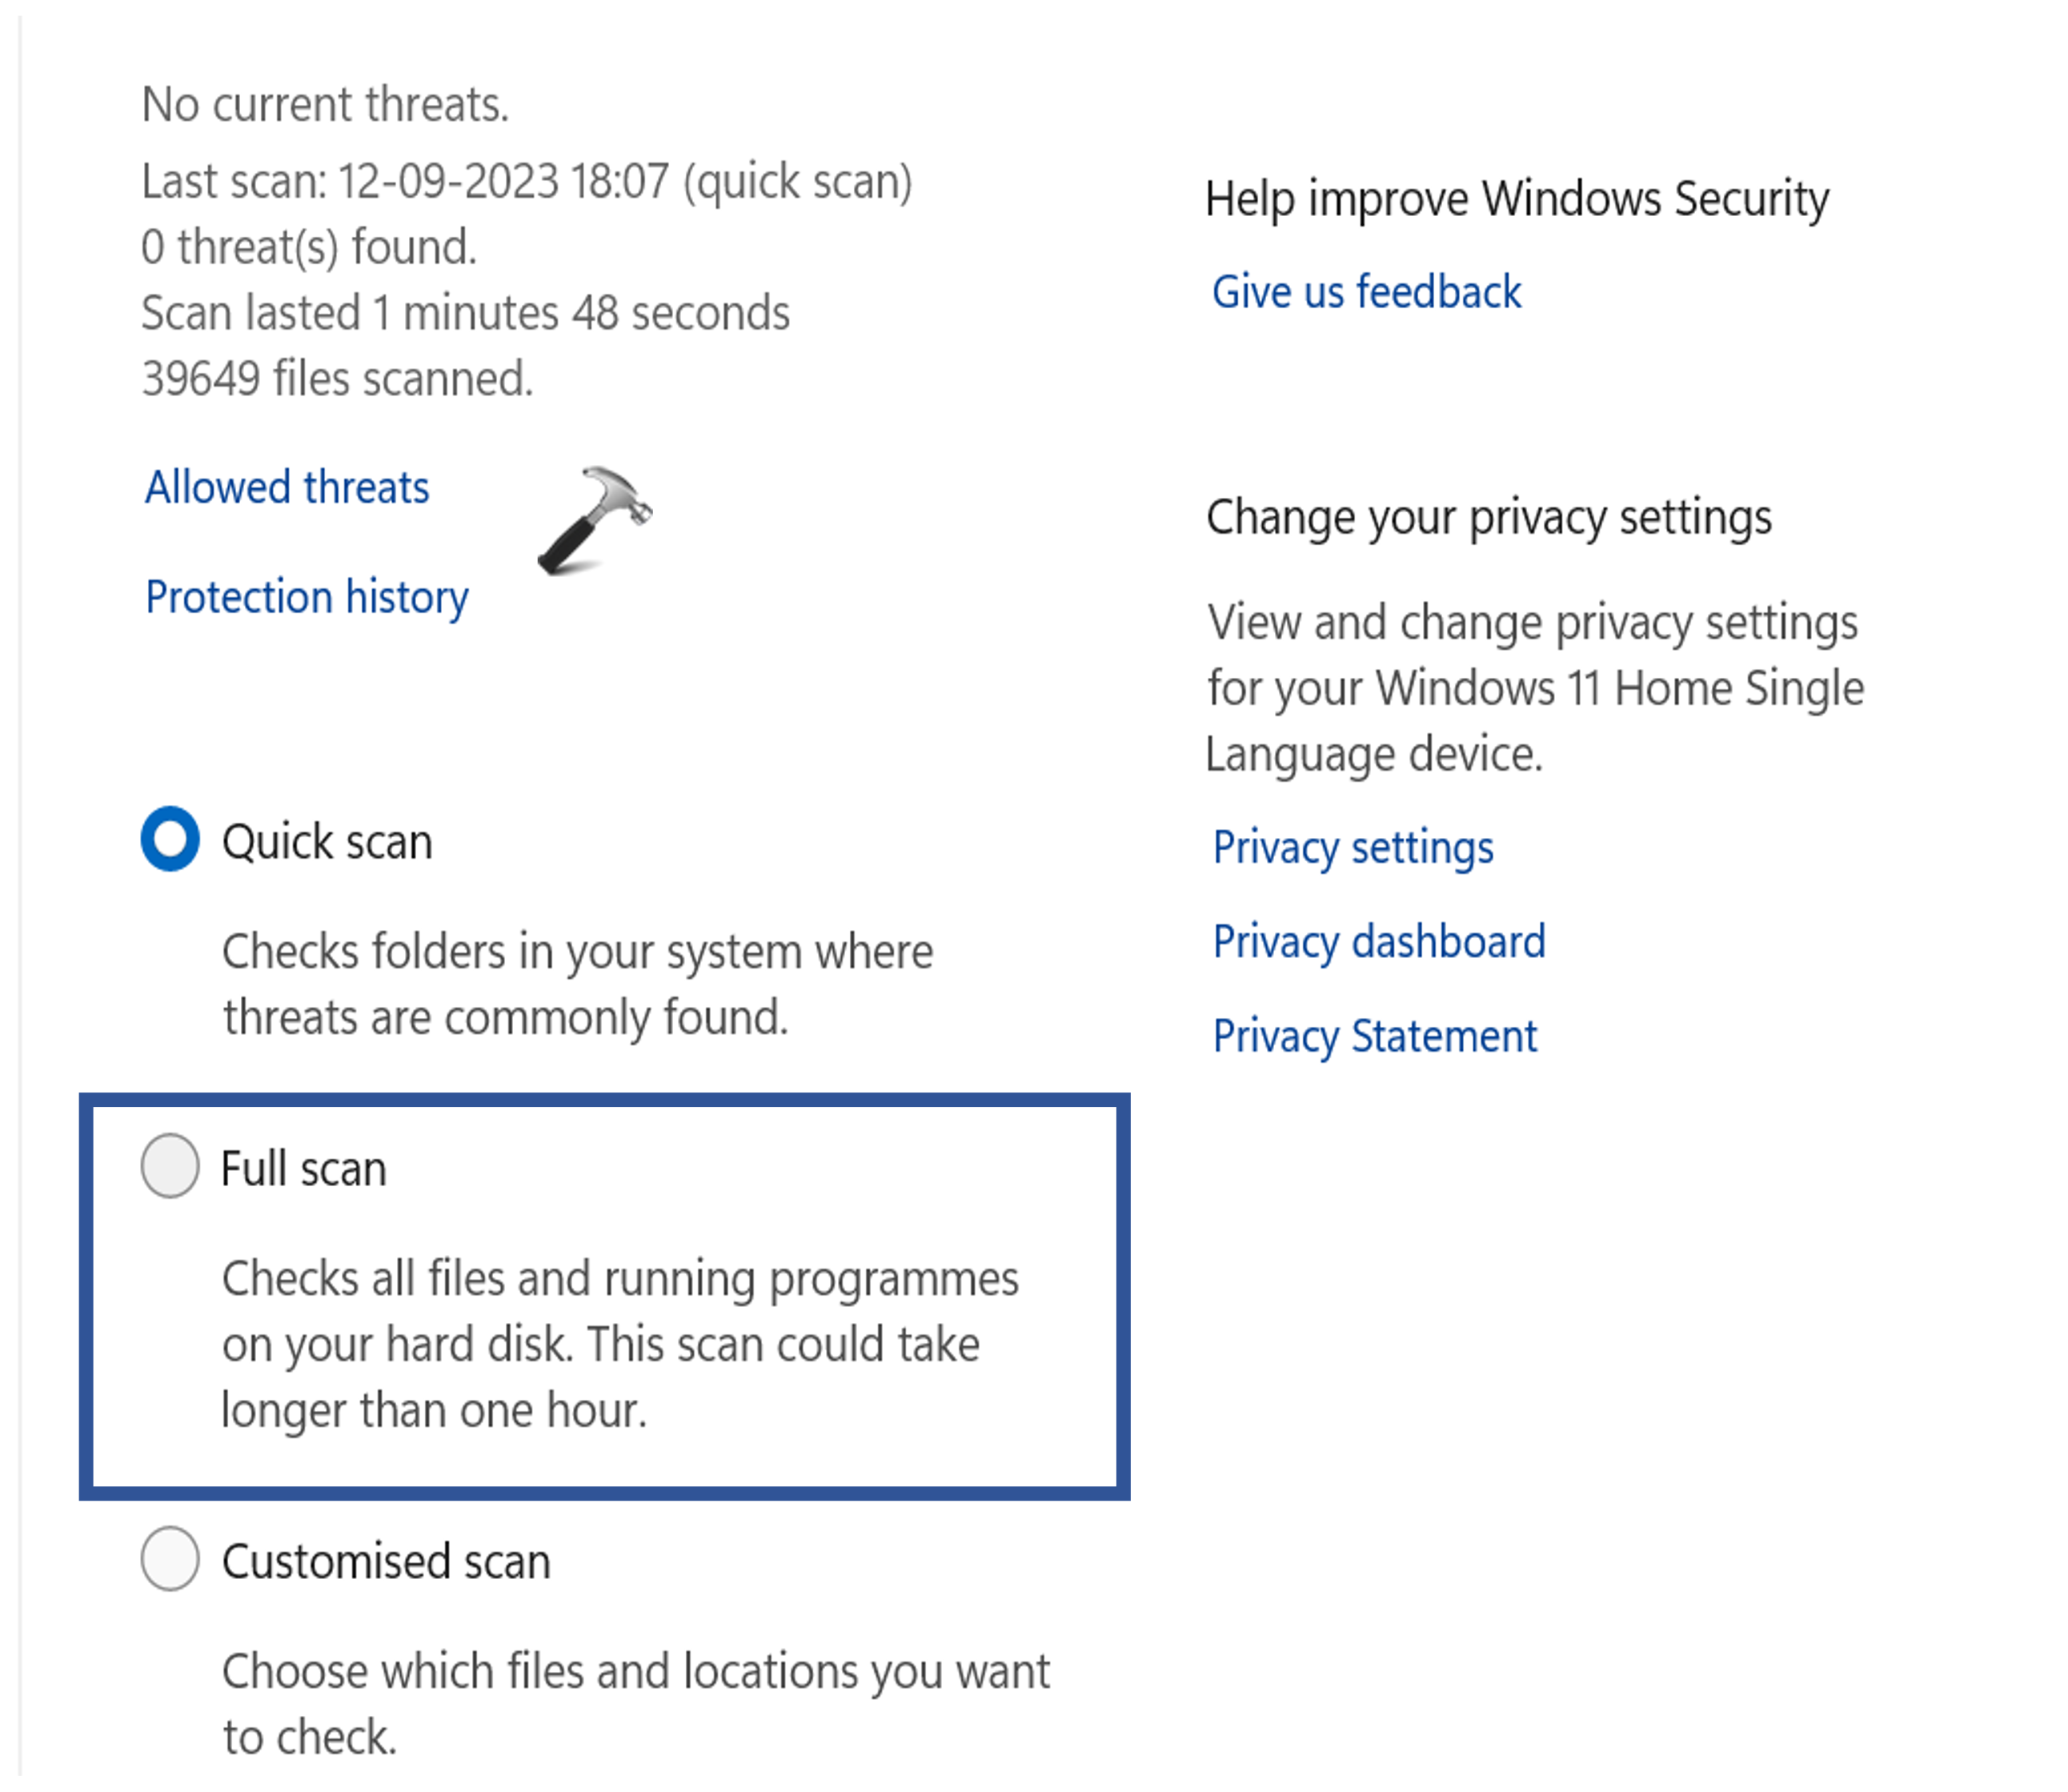
4. Finally, click on “Scan now“.
In the end, restart your PC and check if the issue is resolved or not.
Fix 6: Verify Windows Update Services Status
Windows Update relies on a number of services to function properly. If any of these services are not running or are not running correctly, it can cause Windows Update errors, including error code 0x80248014.
To verify the status of the Windows Update services, follow these steps:
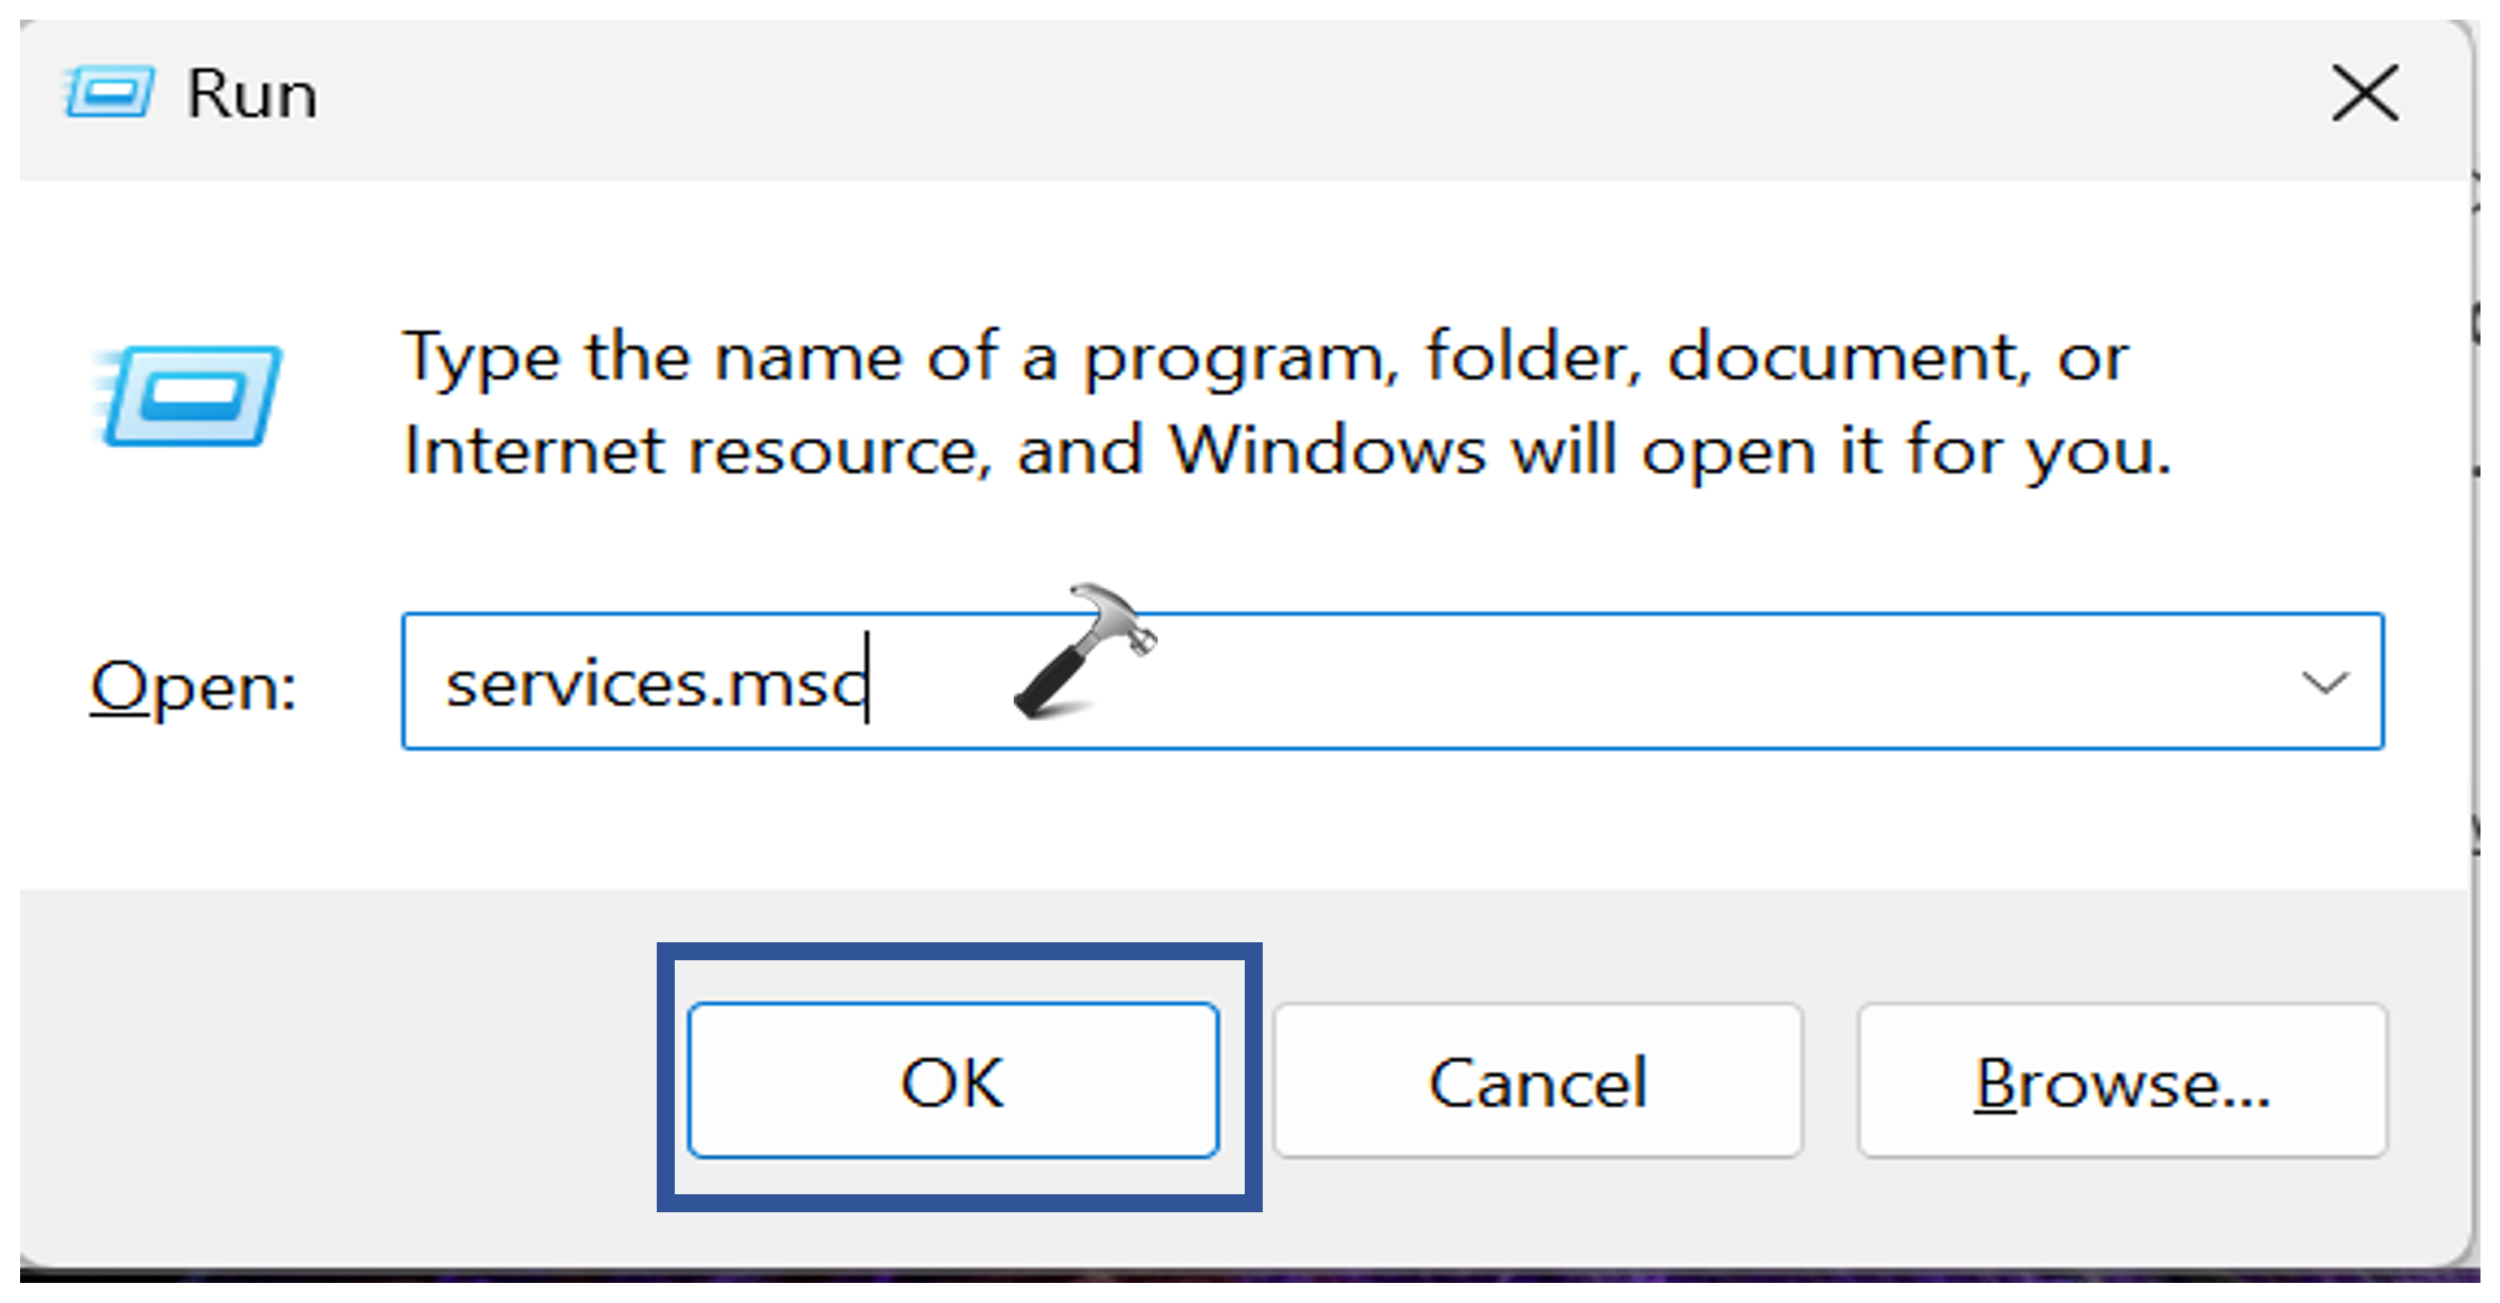
1. Press the Windows Key + R. Type “services.msc“. Press Enter.
2. Now, set the services startup types as given in the below list:
- “Windows Update Service or wuauserv (Triggered)” set to Manual.
- “Services for Windows Update Medic or WaaSMedicSvc” set to Manual.
- “Cryptographic Service or CryptSvc” to Automatic.
- “Background Intelligent Transfer Service or BITS” set to Manual.
- “DCOM Server Process Launcher or DcomLaunch” to Automatic.
- “RPC Endpoint Mapper or RpcEptMapper” set to Automatic.
- “Windows Installer or msiserver” set to Manual.
If any of the services are not running, right-click on the service and select “Start”.
To set the startup type, follow the below steps:
1: Double-click on “Windows Installer“.

2: Under the Startup type, select “Manual“.

3: Click OK followed by Apply.
Fix 7: Recreate Software Distribution Folder
The Software Distribution folder is a temporary storage location for files that are downloaded by Windows Update. If this folder becomes corrupted or damaged, it can cause Windows Update errors, including error code 0x80248014.
To recreate the Software Distribution folder, follow these steps:
1. Press the Windows key + R. Type “services.msc“.
2. Search for “Windows Update service“.
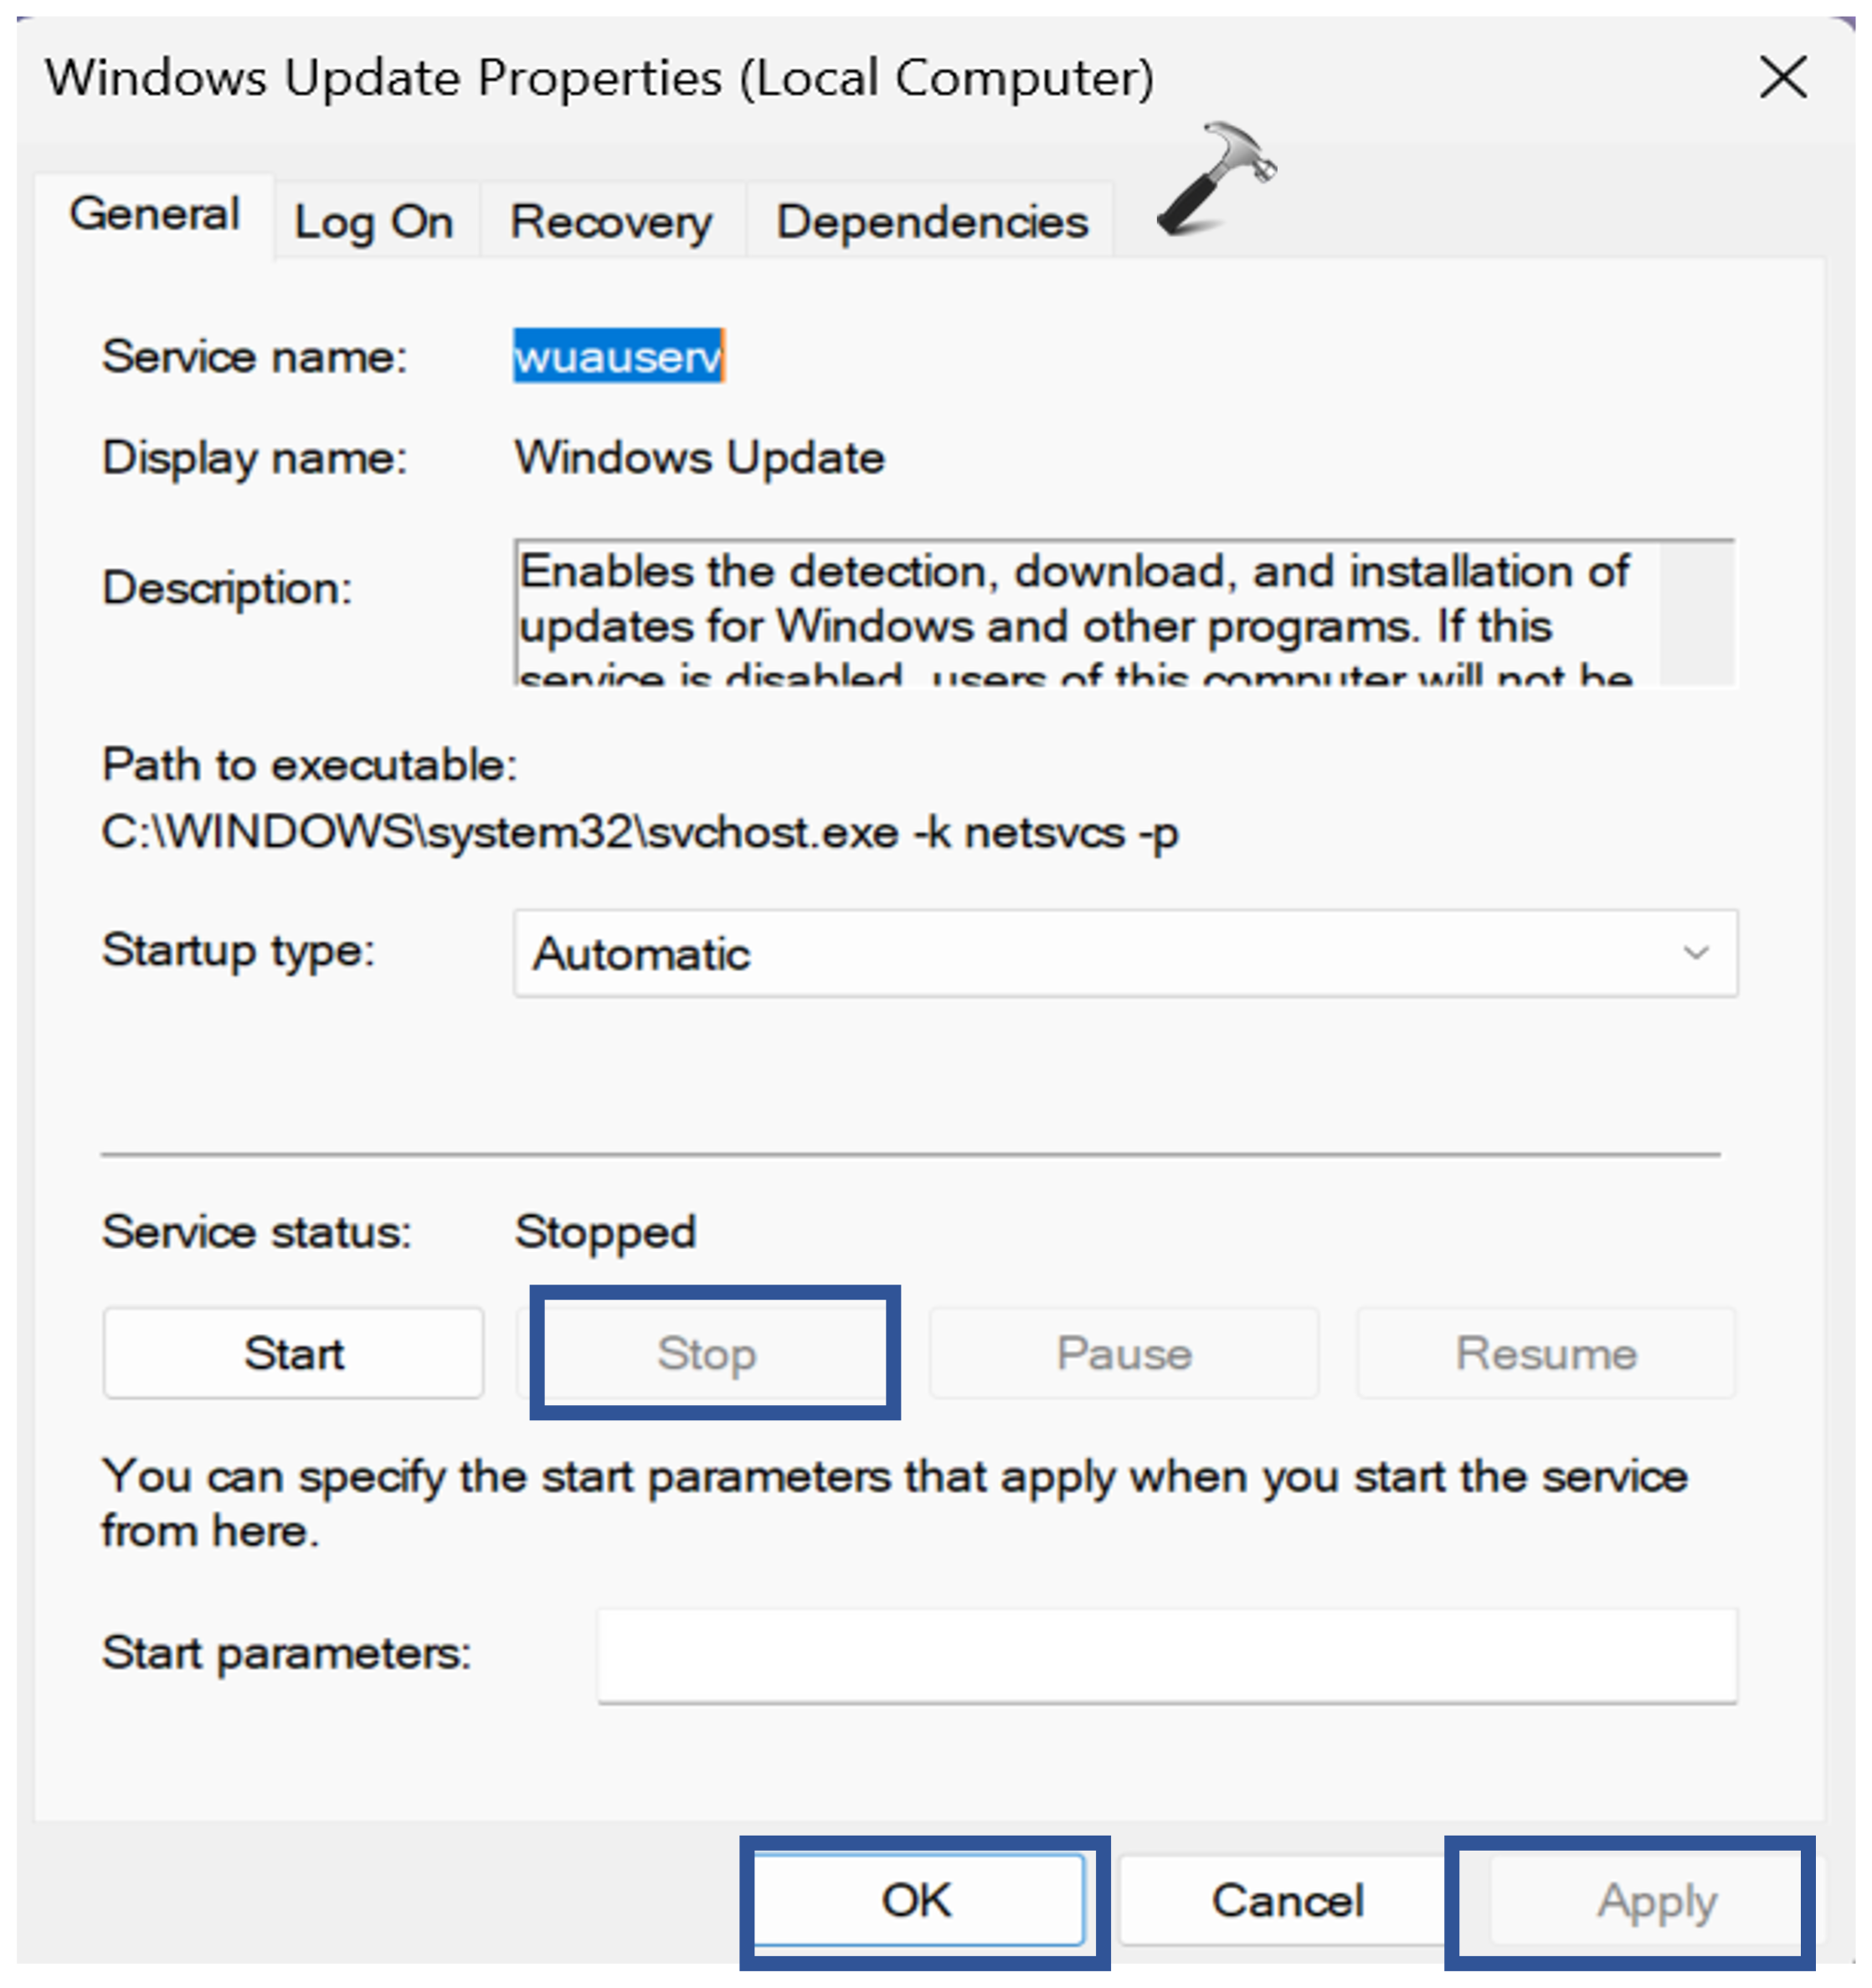
3. Now, right-click on “Windows Update service” and select “Properties“.

4. Click on “Stop“.
5. After that, open “Windows Explorer” by pressing the Windows key + R. Type “C:/Windows/” and press Enter.
6. Now, search for the “SoftwareDistribution” folder and remove it.

7. At the end, restart the PC to apply the changes.
Fix 8: Clear Catroots2 Folders’ Contents
The Catroot2 folder is a system folder that stores certificates and other information that is used by Windows Update and other system processes. If this folder becomes corrupted or damaged, it can cause Windows Update errors, including error code 0x80248014.
To clear the contents of the Catroot2 folder, follow these steps:
1. Open the “Windows Explorer” and go to “C:/Windows/”.
2. Go to “C:\Windows\System32\”.

Now, click on “catroot2“. Select all the files and press “Delete”.

3. Now, similarly go to “C:\Windows\System\catroot2“. Select the files and folders. Press “Delete“.
4. After deleting all the files, restart the PC.
That’s It!
![KapilArya.com is a Windows troubleshooting & how to tutorials blog from Kapil Arya [Microsoft MVP (Windows IT Pro)]. KapilArya.com](https://images.kapilarya.com/Logo1.svg)


![[Latest Windows 10 Update] What’s new in KB5055612? [Latest Windows 10 Update] What’s new in KB5055612?](https://www.kapilarya.com/assets/Windows10-Update.png)


Leave a Reply