

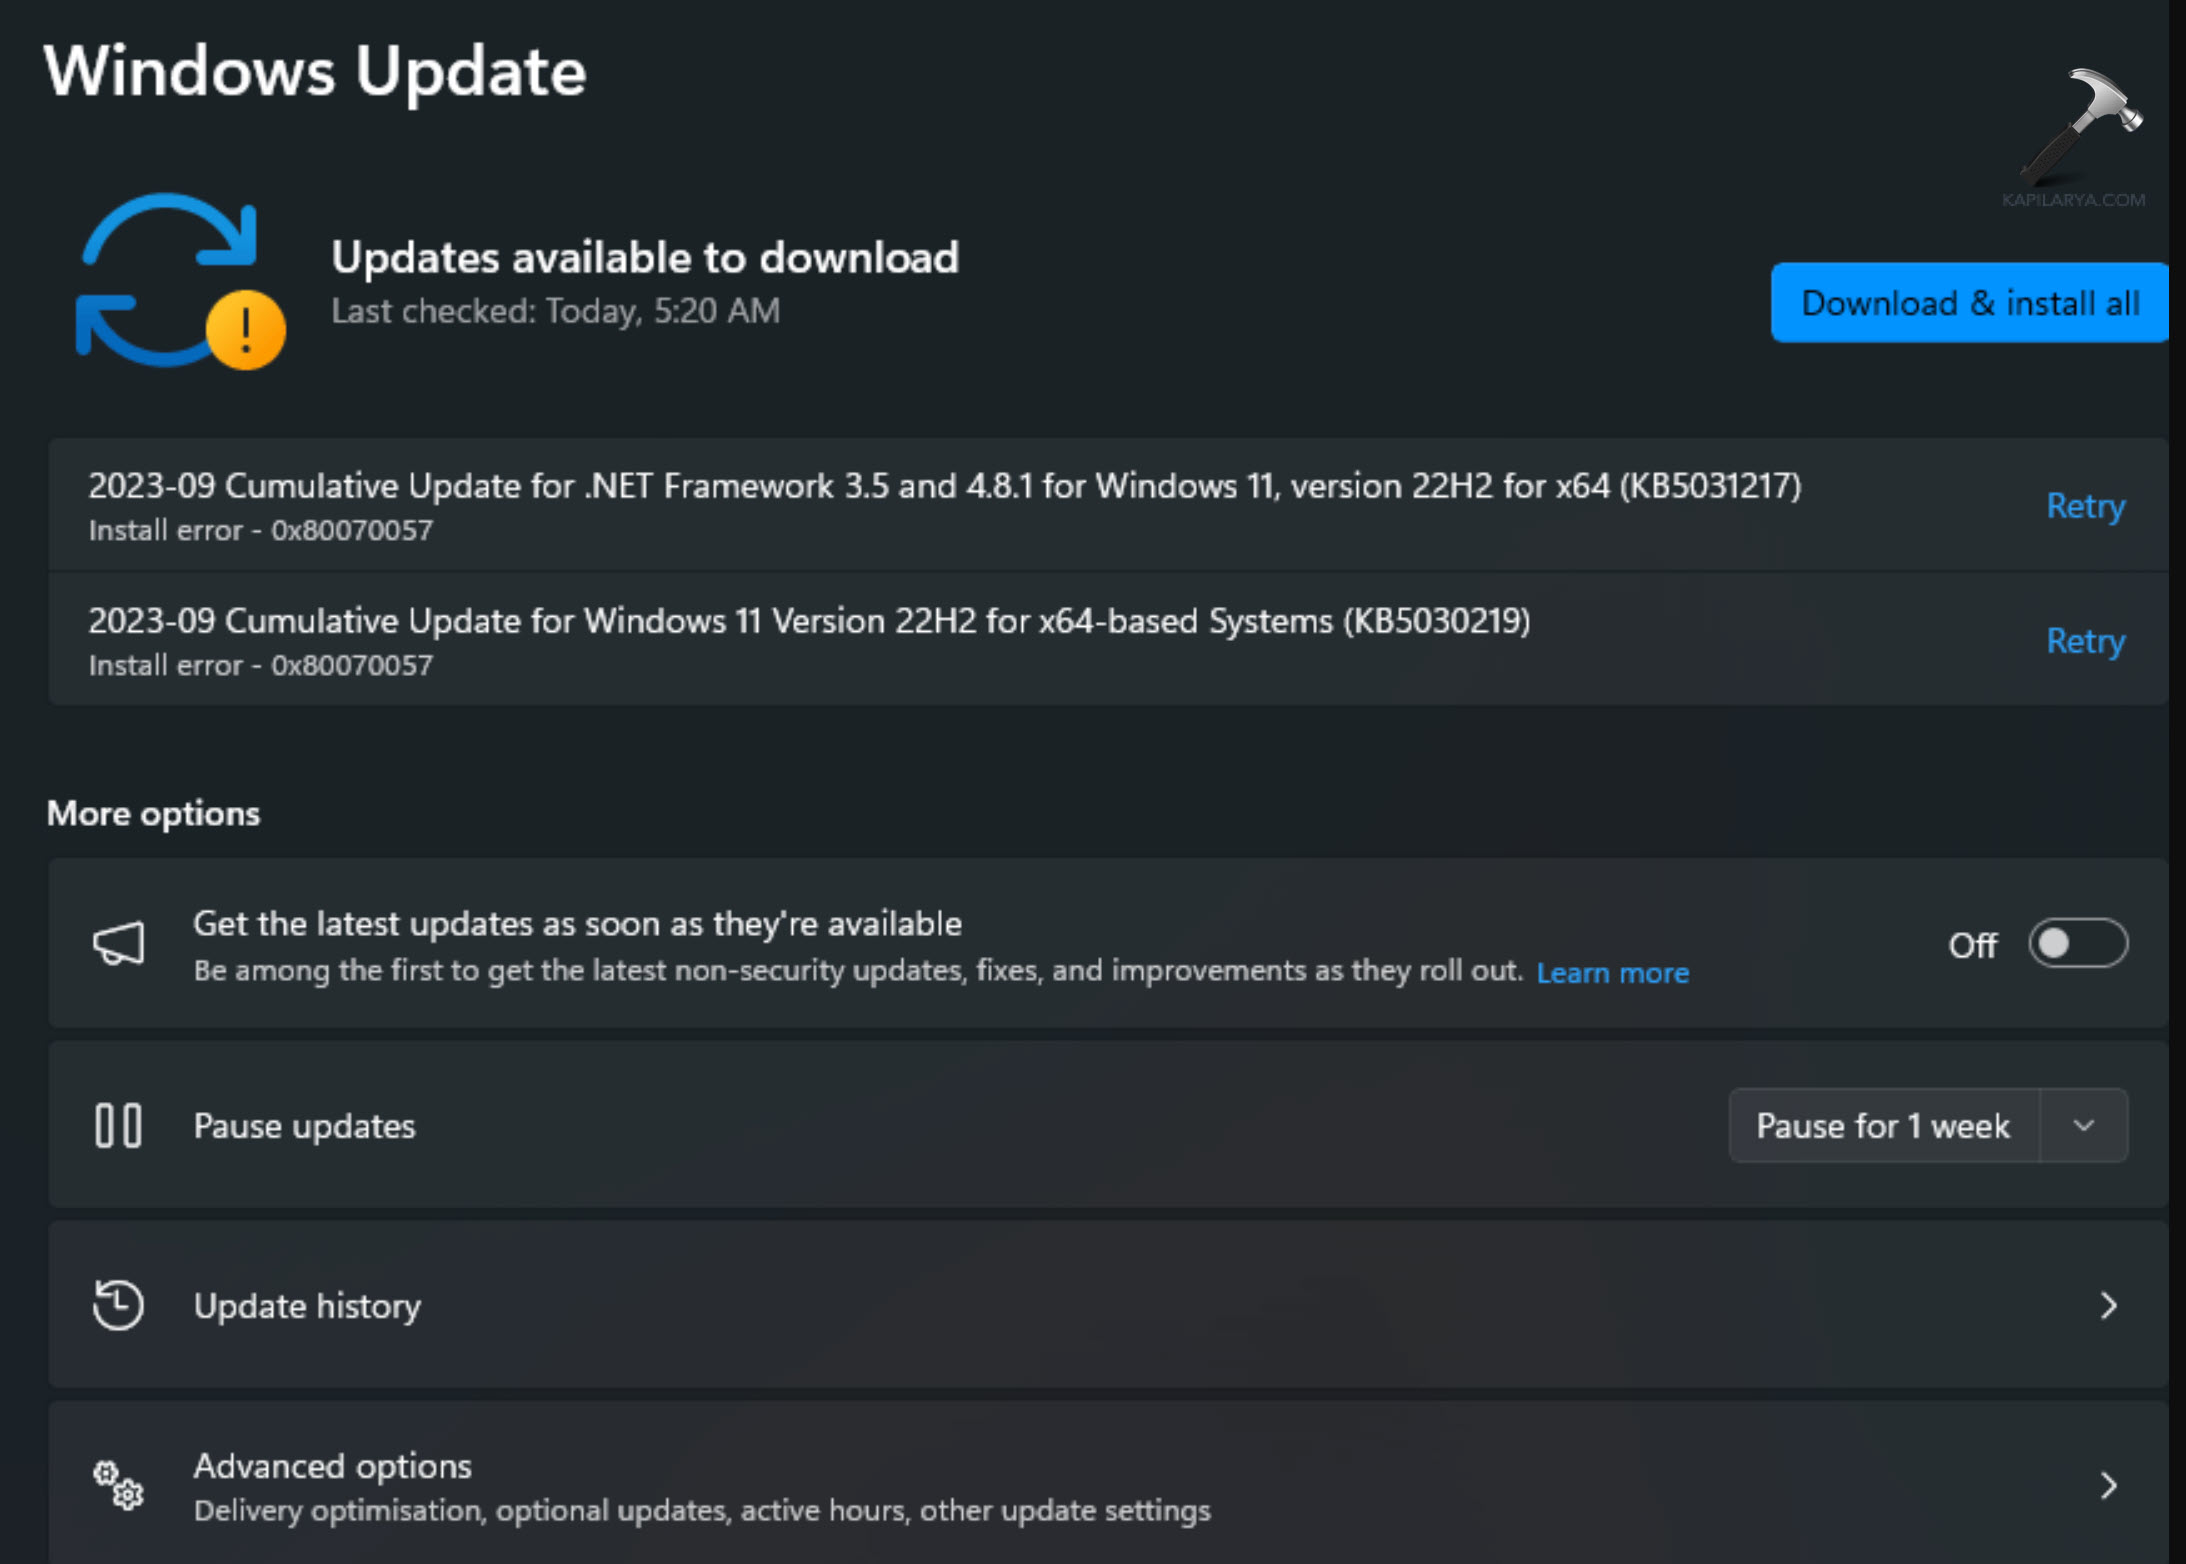
The error code 0x80070057 may happen when you’re trying to install/update Windows. When it appears, it could prevent you from updating and installing the apps. This error is actually pretty common and its easy to fix! We can walk you through the steps to get things working again in no time.
Page Contents
Fix: Windows Update Error Code 0x80070057 in Windows 11/10
Method 1: Windows Update Troubleshooter
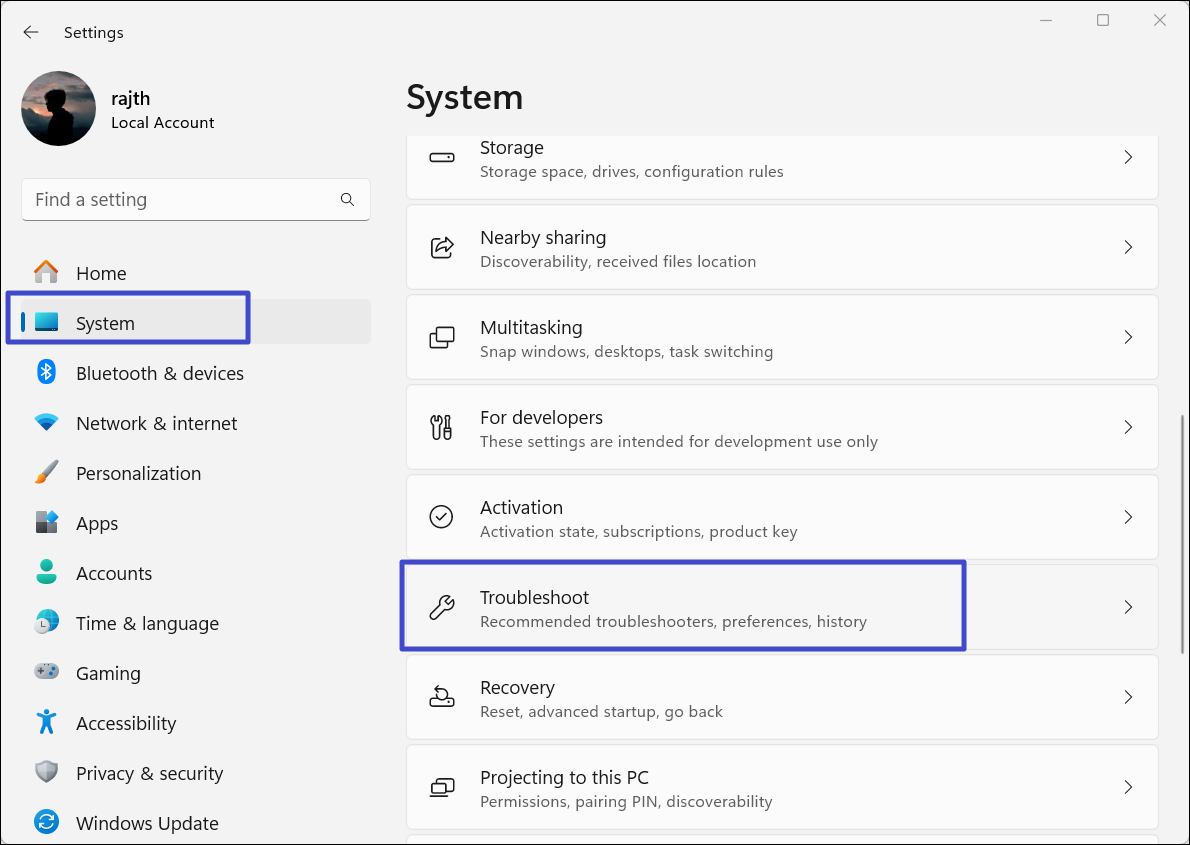
1. Open Windows Settings and head to “System” > “Troubleshoot”.
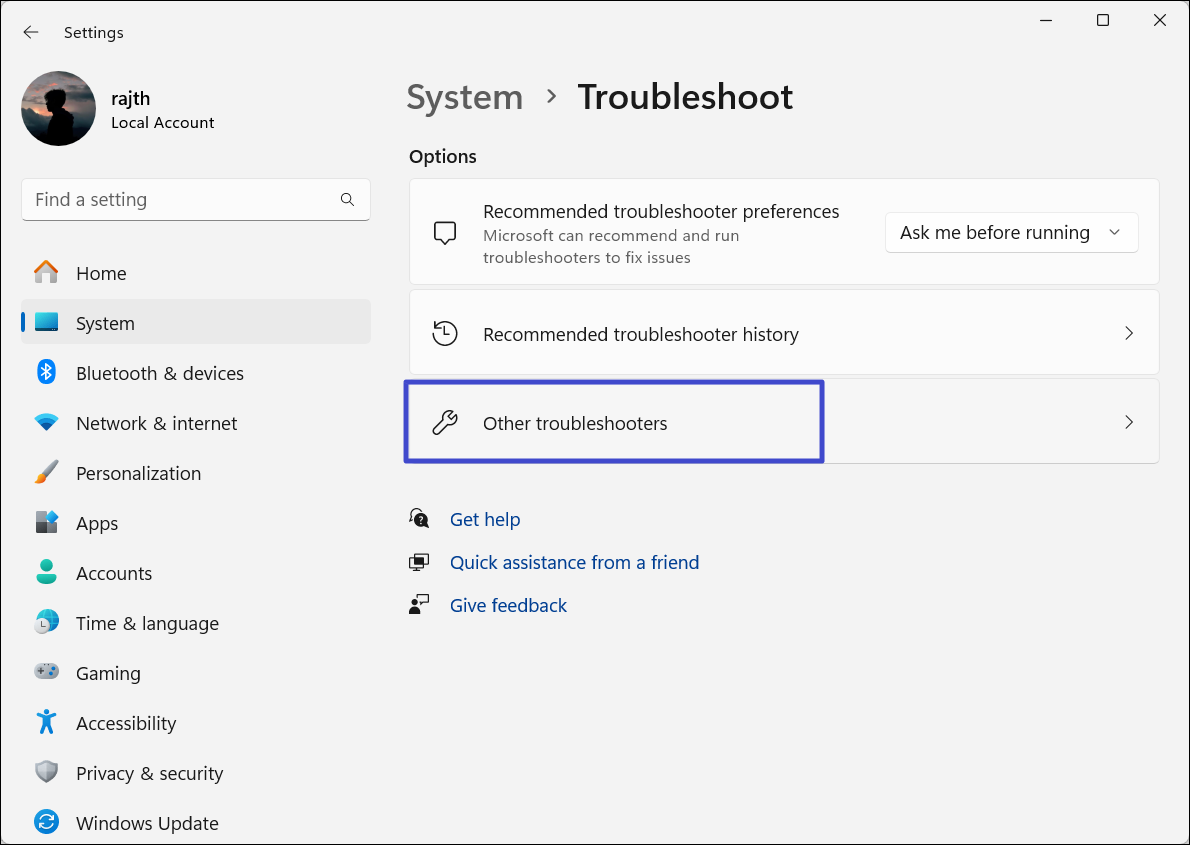
2. Select “Other troubleshooters“.
3. Click the “Run” button next to Windows update.

4. Then, follow the on-screen instructions to troubleshoot the Windows update service.
Method 2: Check for Windows Update
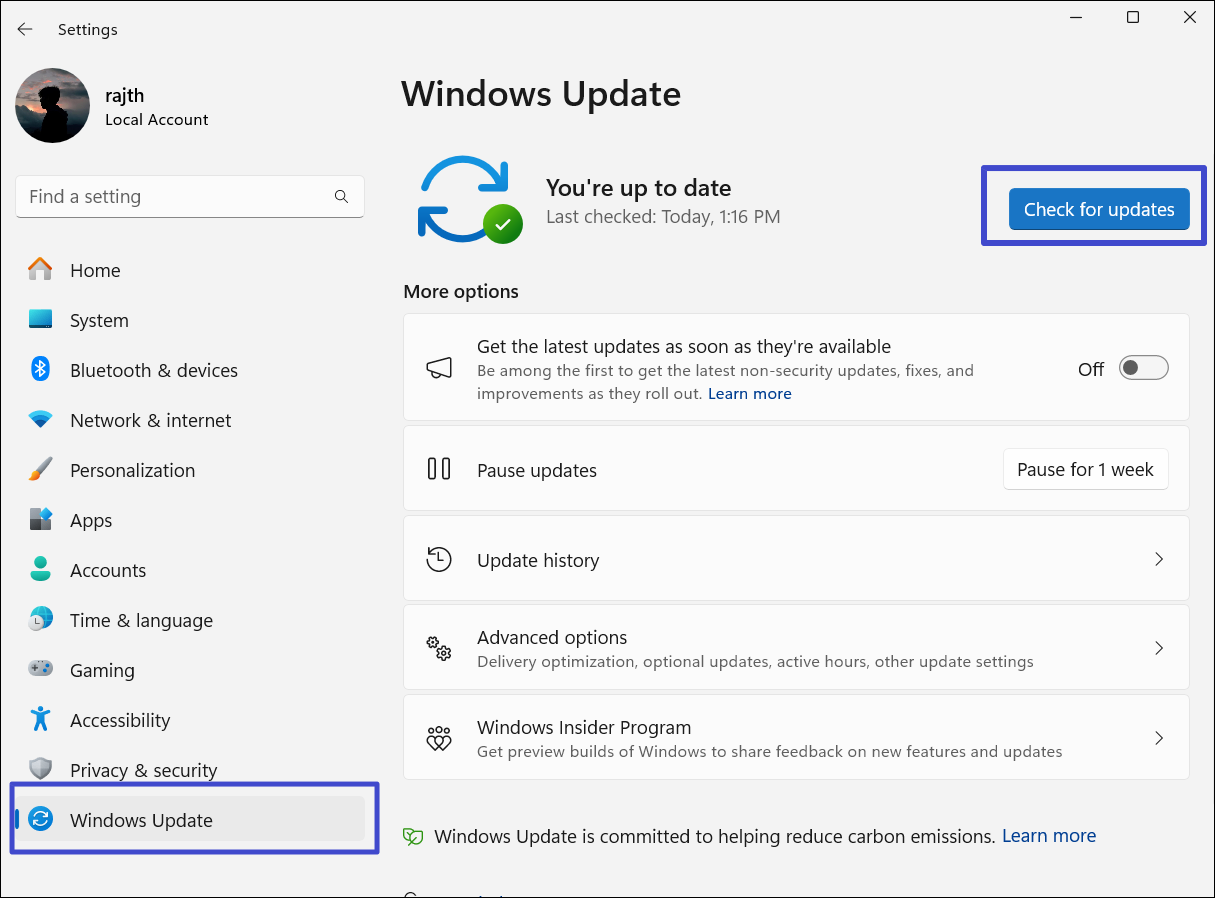
1. Open Windows Settings and select “Windows update” or “Update & Security” (for Windows 10).
2. Click the “Check for updates” button.
3. If you have any pending updates, download and install them.
Method 3: Run Chkdsk Scan
1. Open File Explorer and click the “This PC” on the left navigation panel.
2. Right-click the system drive and select “Properties“.

3. In the Properties window, go to the “Tools” tab, and click the “Check” button.

4. Then, click “Scan drive“.

Method 4: Run DISM Command
1. In the Start menu, type “CMD“, and select “Run as administrator“.
2. In the Command Prompt window, run the following DISM command:
DISM /Online /Cleanup-Image /RestoreHealth
3. After the process is complete, restart your computer.
Method 5: Sync Windows Time
1. Open the Windows settings app and select “Time & language“.
2. Then, click “Date & time“.
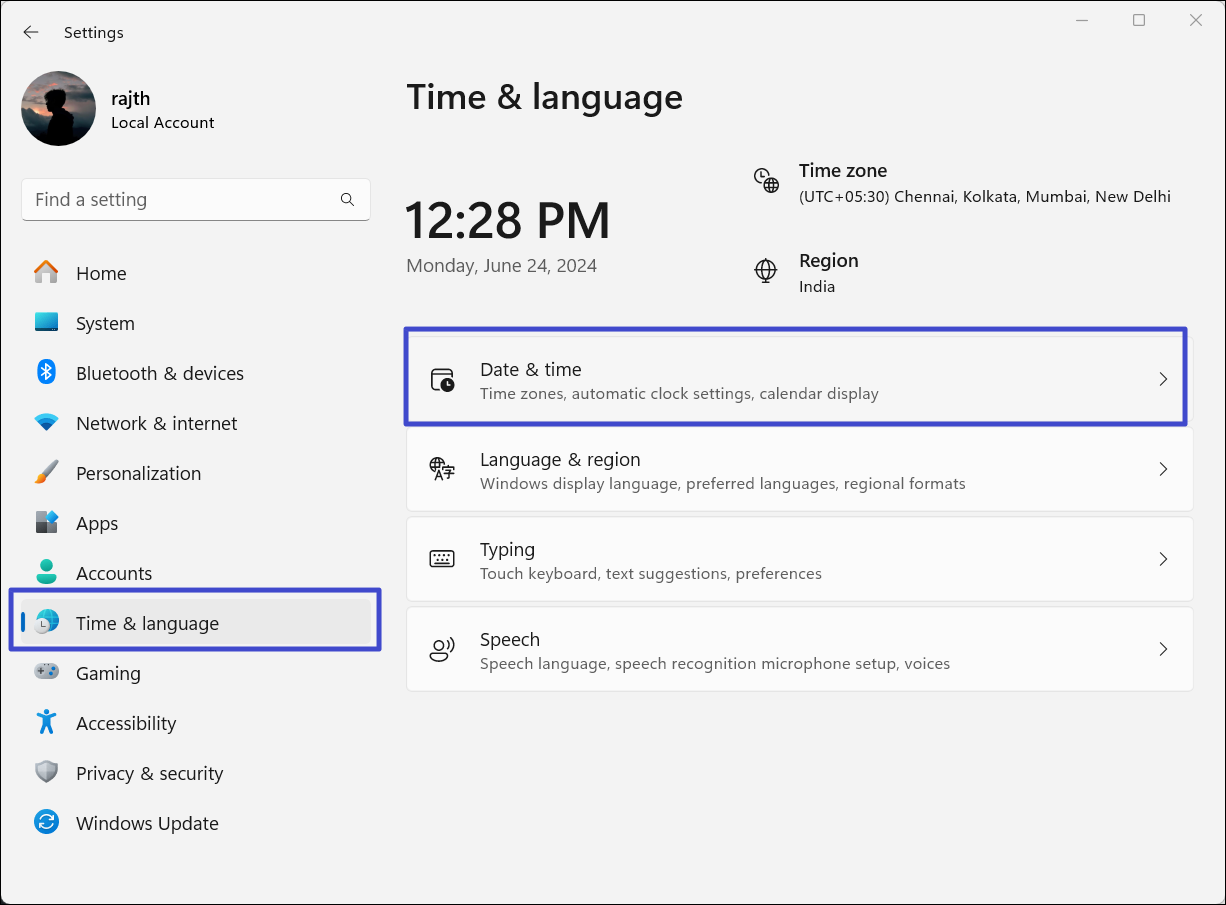
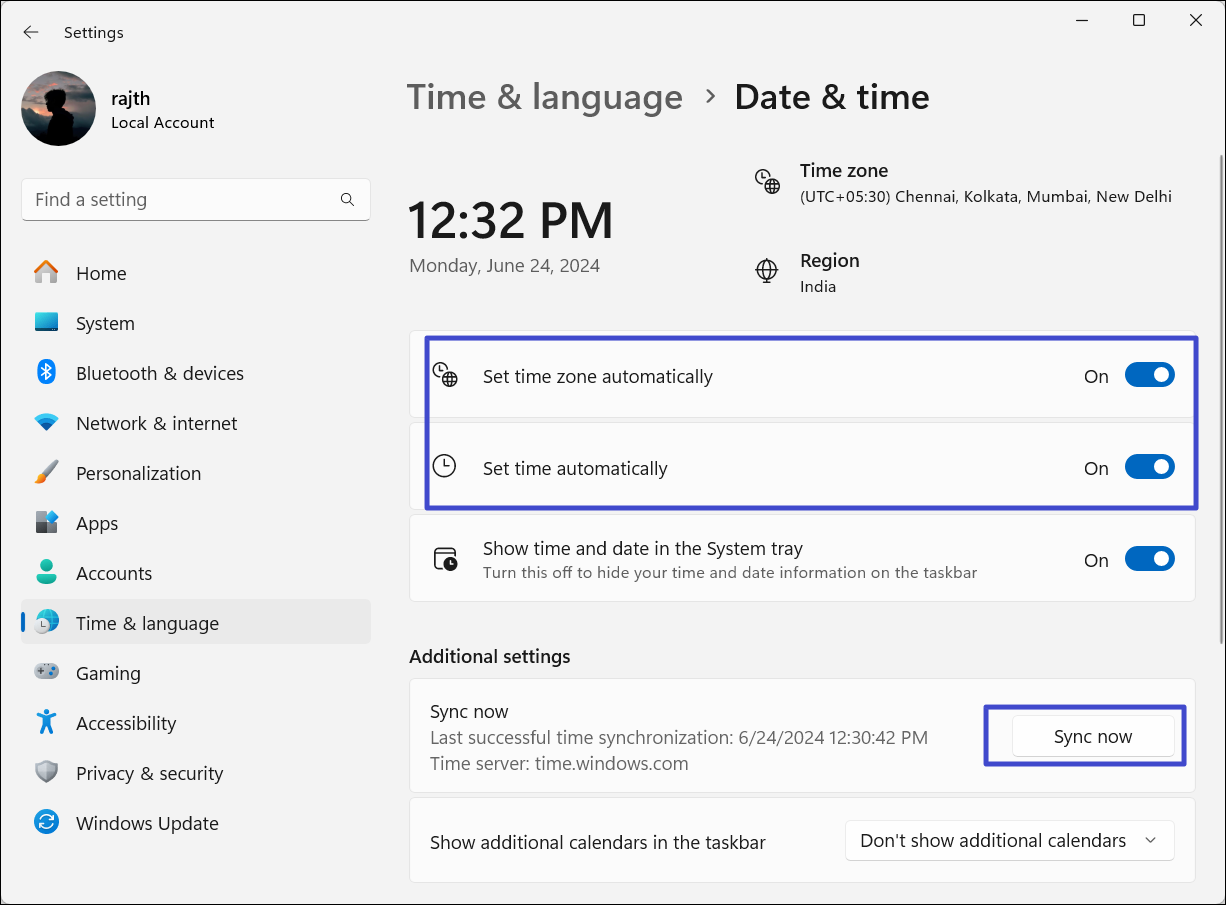
3. Under Date & time settings, make sure the following options are enabled:
- Set time automatically
- Adjust for daylight saving time automatically (if applicable)
- Set time zone automatically
4. After enabling the above settings, click the “Sync now” button.
Method 6: Run SFC Scan
1. Open Command Prompt or Windows PowerShell as administrator.
2. Then, run the following command:
sfc /scannow
3. If the System File Checker finds no corruption, you should see the ‘Windows Resource Protection did not find any integrity violations‘ message.

Method 7: Reset Windows Update Repository
Another way to resolve the problem is resetting the Windows Update components. Here’s how you can do this:
1. Open Command Prompt as administrator, type the following commands, and press Enter after you type each command.
net stop bits
net stop wuauserv
net stop cryptsvc
Del "%ALLUSERSPROFILE%\Application Data\Microsoft\Network\Downloader\qmgr*.dat"
Ren %Systemroot%\SoftwareDistribution\DataStore DataStore.bak
Ren %Systemroot%\SoftwareDistribution\Download Download.bak
Ren %Systemroot%\System32\catroot2 catroot2.bak
sc.exe sdset bits D:(A;CI;CCDCLCSWRPWPDTLOCRSDRCWDWO;;;SY)(A;;CCDCLCSWRPWPDTLOCRSDRCWDWO;;;BA)(A;;CCLCSWLOCRRC;;;IU)(A;;CCLCSWLOCRRC;;;SU)
sc.exe sdset wuauserv D:(A;;CCLCSWRPLORC;;;AU)(A;;CCDCLCSWRPWPDTLOCRSDRCWDWO;;;BA)(A;;CCDCLCSWRPWPDTLOCRSDRCWDWO;;;SY)
cd /d %windir%\system32
regsvr32.exe atl.dll
regsvr32.exe urlmon.dll
regsvr32.exe mshtml.dll
regsvr32.exe shdocvw.dll
regsvr32.exe browseui.dll
regsvr32.exe jscript.dll
regsvr32.exe vbscript.dll
regsvr32.exe scrrun.dll
regsvr32.exe msxml.dll
regsvr32.exe msxml3.dll
regsvr32.exe msxml6.dll
regsvr32.exe actxprxy.dll
regsvr32.exe softpub.dll
regsvr32.exe wintrust.dll
regsvr32.exe dssenh.dll
regsvr32.exe rsaenh.dll
regsvr32.exe gpkcsp.dll
regsvr32.exe sccbase.dll
regsvr32.exe slbcsp.dll
regsvr32.exe cryptdlg.dll
regsvr32.exe oleaut32.dll
regsvr32.exe ole32.dll
regsvr32.exe shell32.dll
regsvr32.exe initpki.dll
regsvr32.exe wuapi.dll
regsvr32.exe wuaueng.dll
regsvr32.exe wuaueng1.dll
regsvr32.exe wucltui.dll
regsvr32.exe wups.dll
regsvr32.exe wups2.dll
regsvr32.exe wuweb.dll
regsvr32.exe qmgr.dll
regsvr32.exe qmgrprxy.dll
regsvr32.exe wucltux.dll
regsvr32.exe muweb.dll
regsvr32.exe wuwebv.dll
netsh winsock reset
net start bits
net start wuauserv
net start cryptsvc
Method 8: Free Up Drive Space
1. Open Windows Search, type “Disk Cleanup”, and select the top result.

2. In the Disk Cleanup box, select the system drive.

3. Click “Clean up system files” and choose the drive again.

4. Wait till Disk Clean scans your drive.
5. Select unnecessary files you want to clear out such as the downloads folder, recycle bin, caches, temporary files, etc. Then, click “OK“.
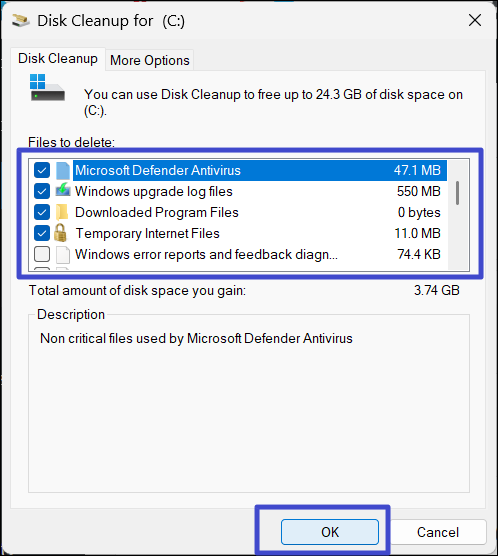
6. On the prompt box, click “Delete Files“.

Method 9: Check Group Policy Editor
1. Press Win + R to open the Run dialogue box. Type “gpedit.msc” and press Enter.
2. Navigate to the following path:
Computer Configuration > Administrative Templates > Windows Components > Windows Update > Manage end user experience
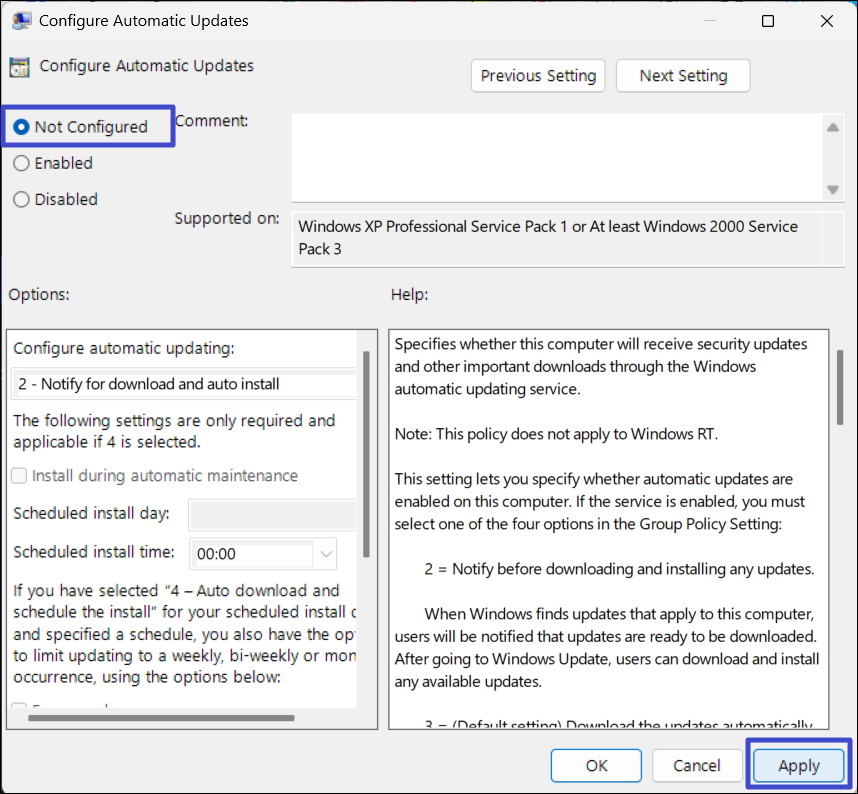
3. Double-click the “Configure Automatic Updates” settings.
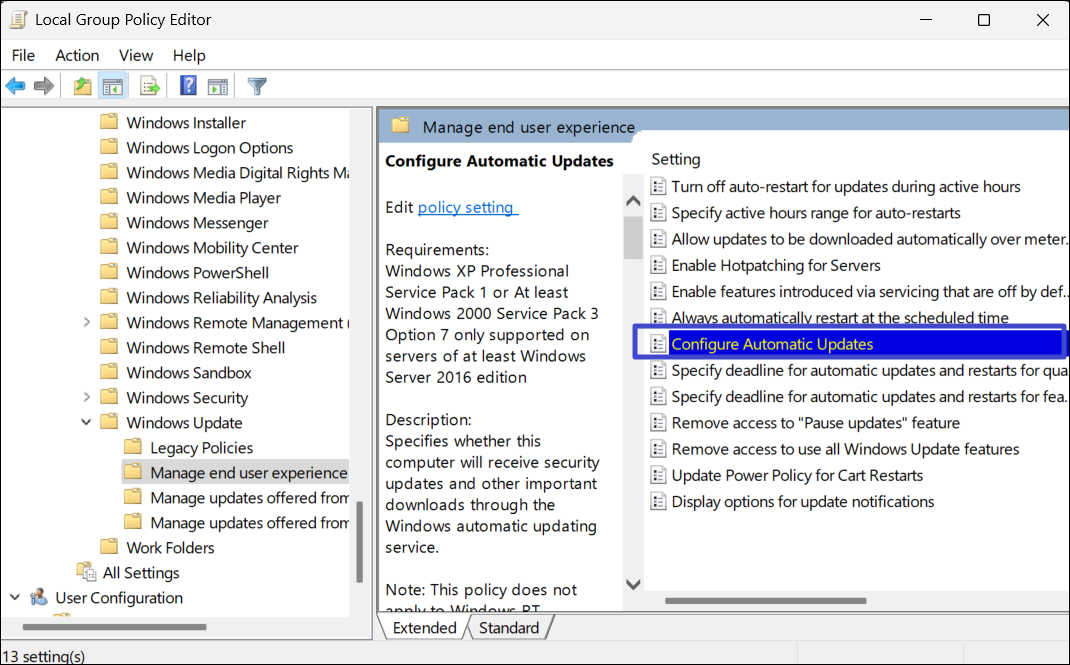
4. Now, select “Not configured” and click “Apply“. Then, “OK“.
Method 10: Install a New Drive
If you’ve tried everything and the error keeps occurring, it might be a hardware issue. As a last resort, you could try replacing your old hard drive with a new solid-state drive (SSD).
Method 11: Reset your PC
If these steps don’t solve the problem, you might have to reset your computer to fix the issue. You can choose to reset your computer either without data loss or with data loss based on your preference. But, you’ll either lose any changes you’ve made since the last restore point, or you’ll have to start completely fresh by setting everything up again.
That’s it.
![[Latest Windows 10 Update] What’s new in KB5055612?](https://www.kapilarya.com/assets/Windows10-Update.png "[Latest Windows 10 Update] What’s new in KB5055612?")


Leave a Reply