Windows Update is a crucial component of the Windows operating system that ensures users receive the latest security patches, bug fixes, and feature enhancements. However, encountering error codes during the update process can be frustrating. One such error code is 0x8007000d, which has troubled numerous Windows 11 users. This error typically occurs when Windows Update encounters a problem with the installation or configuration of updates. Resolving the error requires a systematic approach to diagnosing and fixing the underlying issues. In this article, we will provide effective solutions to help users overcome this obstacle and successfully update their Windows system.
Page Contents
Fix: Windows Update error code 0x8007000d
Fix 1: Run SFC
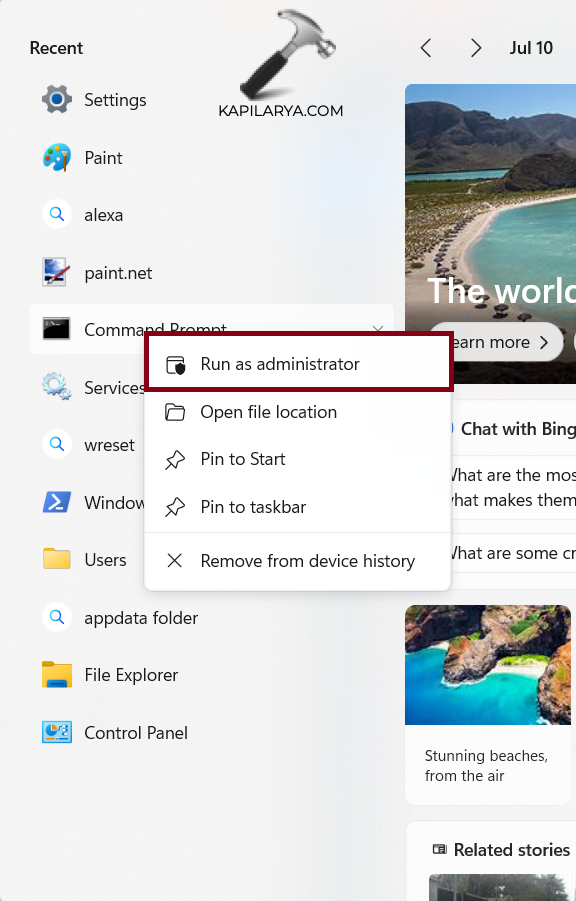
1. Open Command Prompt as an administrator.
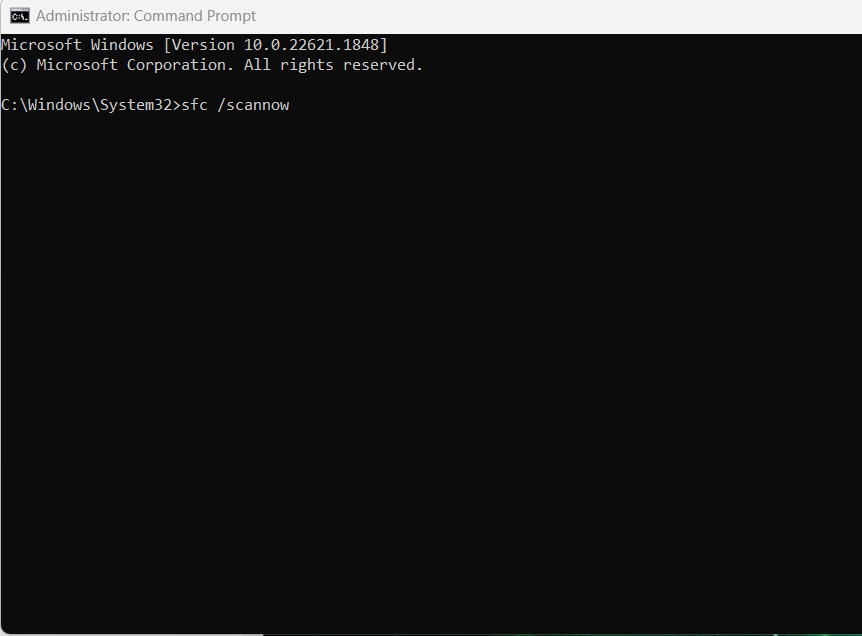
2. Type the below command and press Enter key:
sfc /scannow
Fix 2: Use Windows Update Assistant
1. Through your browser go to Windows 11 Update Assistant download (https://www.microsoft.com/en-us/software-download/windows11) website.
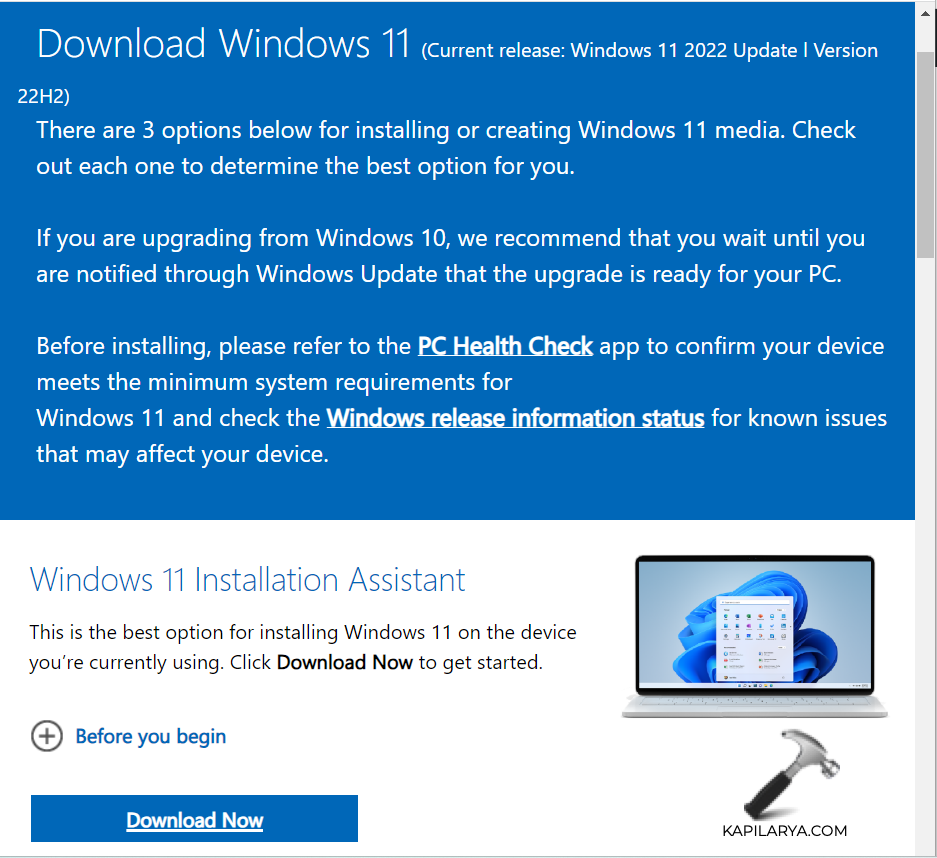
2. Click on “Download Now”.
3. Follow the on-screen instructions.
4. Restart your computer after the process completes.
Fix 3: Run Troubleshooter to fix Windows Update error code 0x8007000d
1. Open Settings by pressing the Windows + I keys.
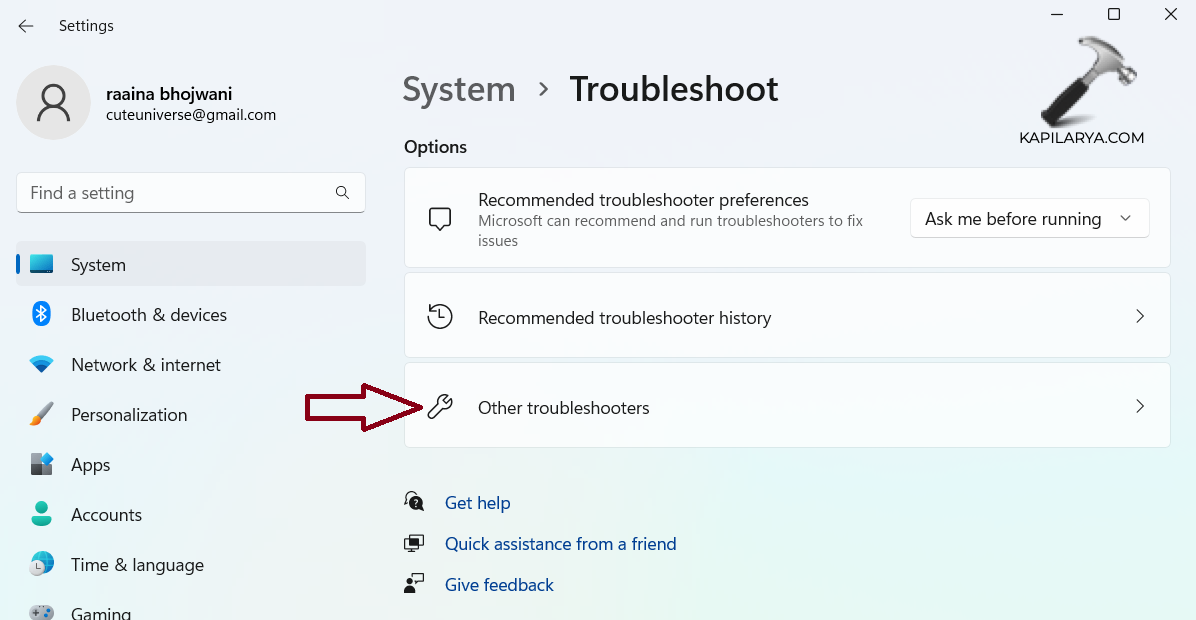
2. Click on “Troubleshoot”.
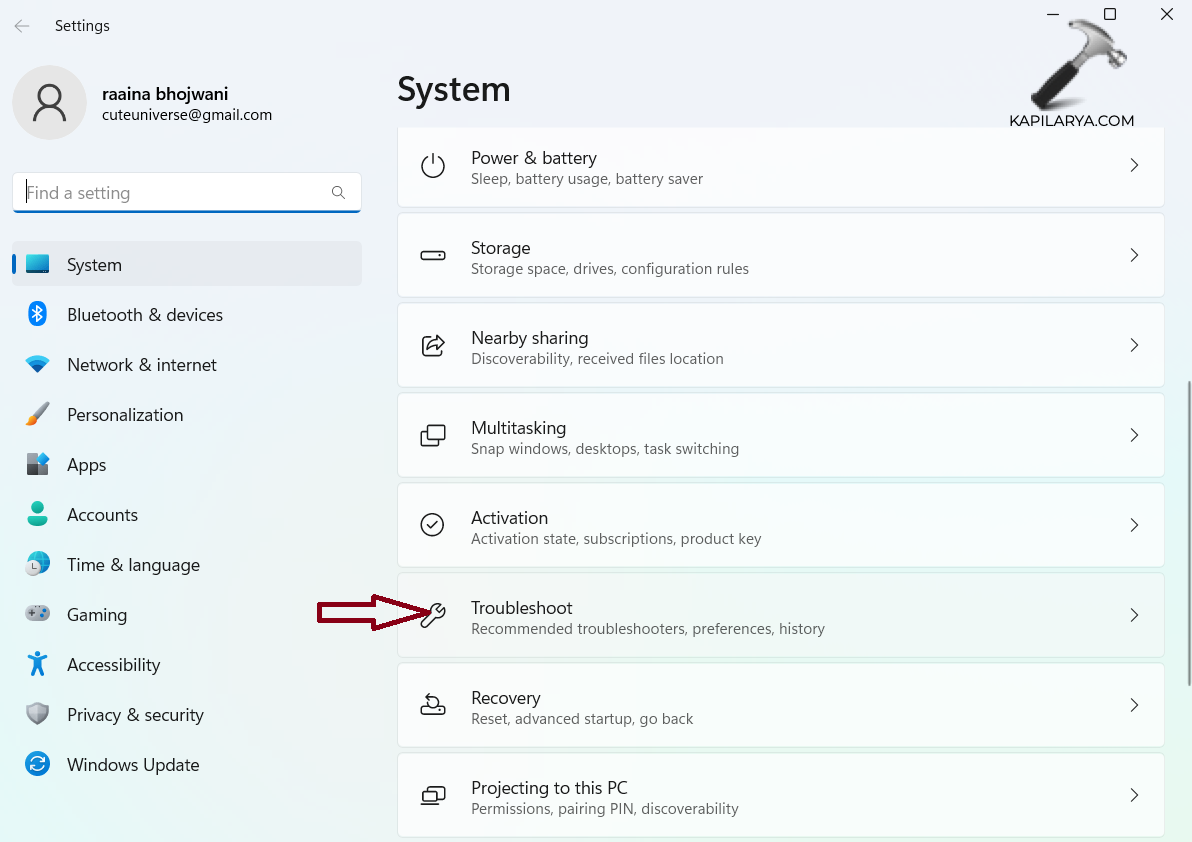
3. Click on “Other troubleshooters”.
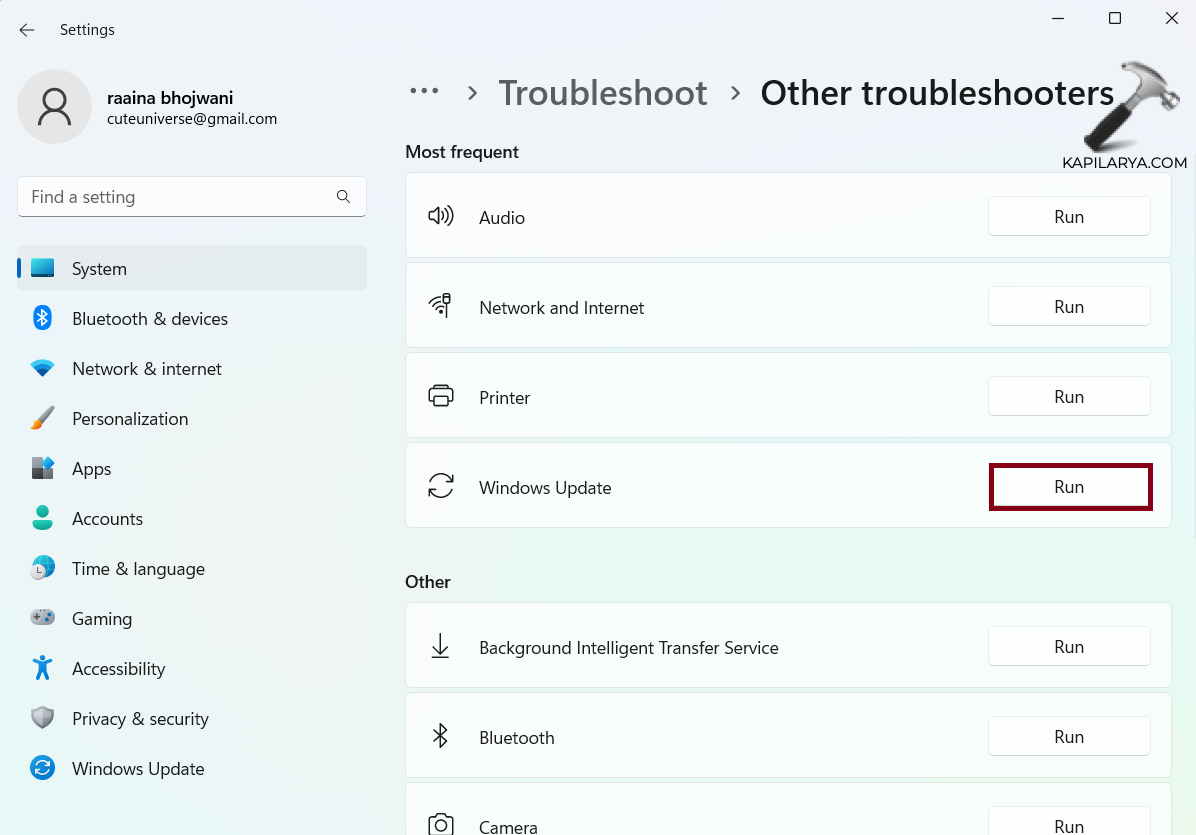
4. Click on “Run” next to Windows Update.
Fix 4: Configure Group Policy Setting
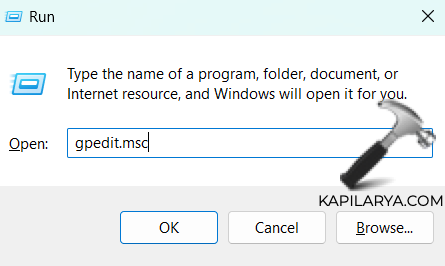
1. Open Run by pressing Windows + R keys.
2. Type gpedit.msc and press Enter key.
3. Navigate through the following path:
Computer Configuration > Administrative Templates > System
4. Right-click on the “Specify settings for optional component installation and component repair” and choose “Edit”.
5. Select the “Enabled” option and click “OK”.
6. Reboot your computer.
Fix 5: Reset Windows Update Components Manually
1. Open Command Prompt as an administrator and type the below commands. Press Enter after each command:
net stop bitsnet stop wuauservnet stop cryptsvc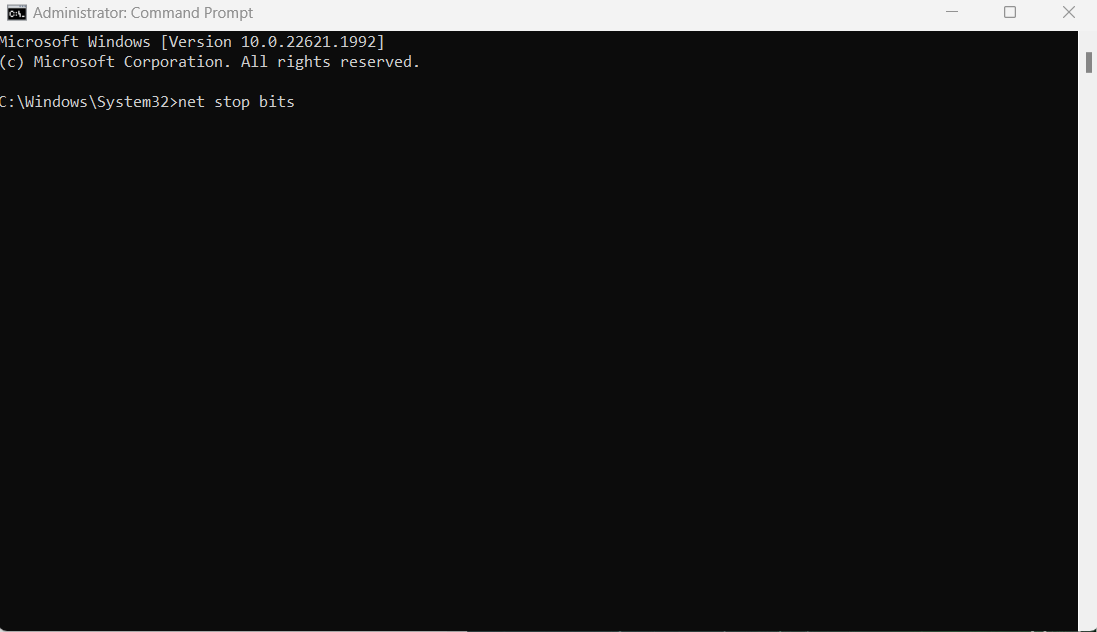
2. Next, execute this command:
Del “%ALLUSERSPROFILE%\ApplicationData\Microsoft\Network\Downloader\qmgr*.dat
3. Execute the below commands to rename folders:
renC:\Windows\SoftwareDistribution SoftwareDistribution.bakren C:\Windows\System32\catroot2 catroot2.bak4. Next execute this command to enter in System32 folder:
cd /d %windir%\system32
5. Now, type below commands and press Enter key after each command:
regsvr32 /s wuapi.dllregsvr32 /s wuaueng.dllregsvr32 /s wucltui.dll6. Next execute this command:
netsh winsock reset
7. Lastly, execute these commands to restart services that we stopped initially:
net start bitsnet start wuauservnet start cryptsvc8. Finally, reboot your system.
Fix 6: Run DISM utility
1. Open Command Prompt as an administrator and type the below commands. Also, press Enter after each command.
Dism /Online /Cleanup-Image /CheckHealth
Dism /Online /Cleanup-Image /ScanHealth
Dism /Online /Cleanup-Image /RestoreHealth
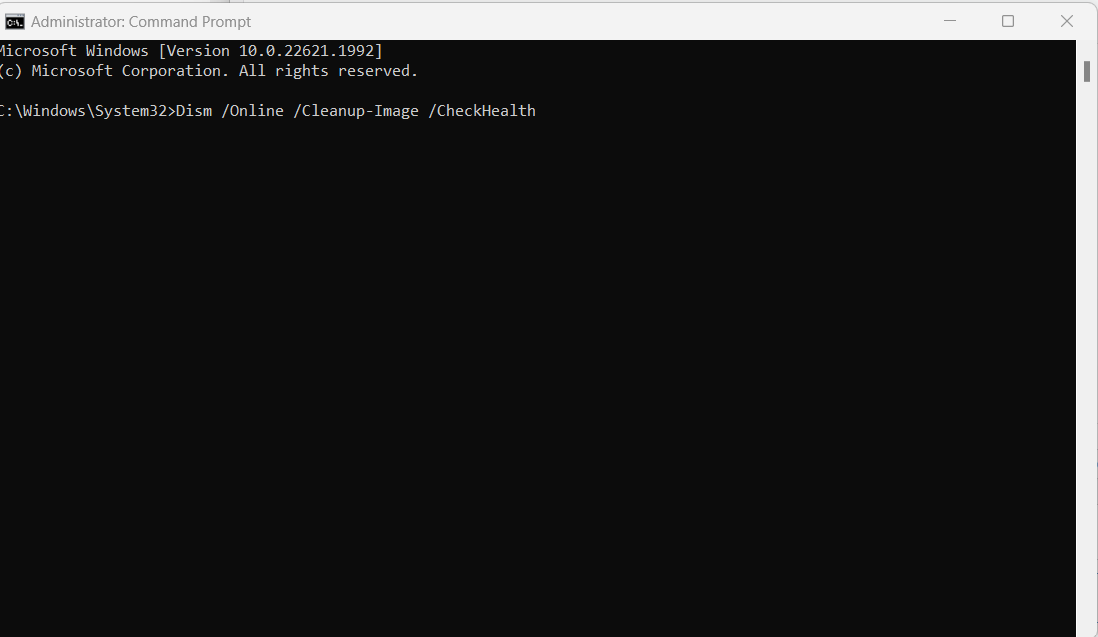
2. As all 3 commands are executed, restart your computer.
Fix 7: Manually Download and Install Update Packages
1. Visit Microsoft Catalog (https://www.catalog.update.microsoft.com/home.aspx) webpage.
2. Enter the KB (Knowledge Base) number of the update you want to download in the Search bar.
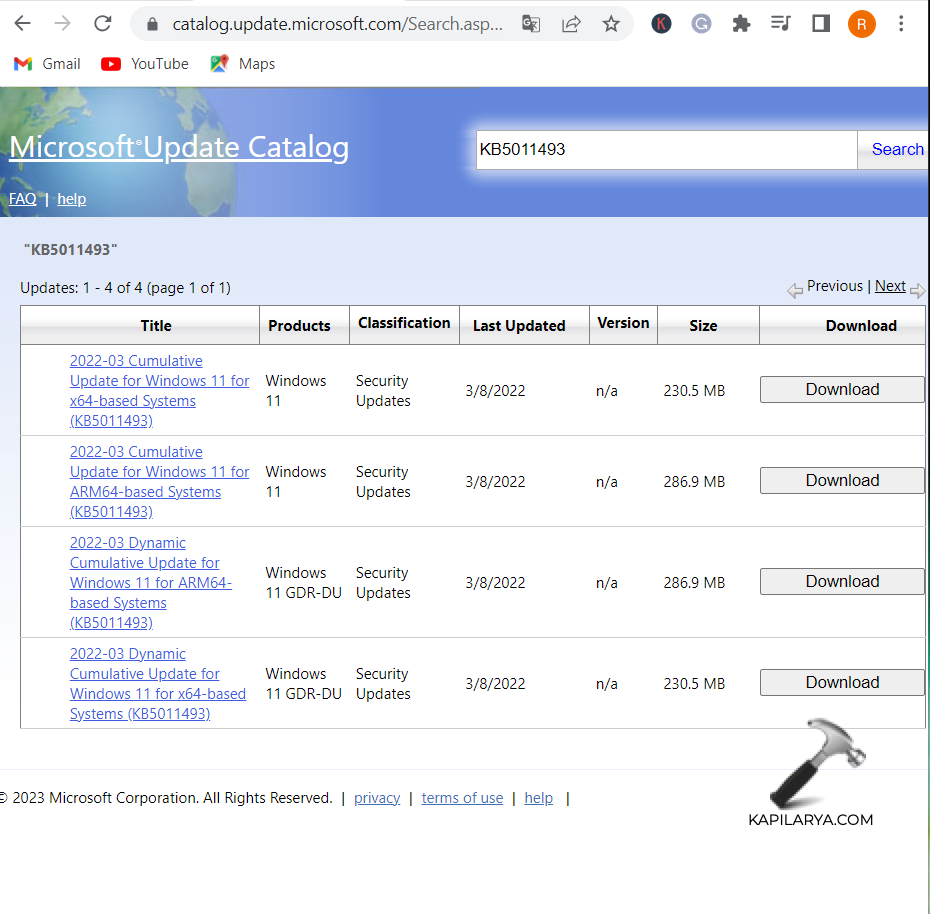
3. Find the Correct package and Click “Download”.
4. Next, click on the link to start downloading.
5. Go to Downloads and double-click on the update package.
6. Click “Next” and follow the instructions.
Fix 8: Edit Registry to fix Windows Update error code 0x8007000d
1. Open Run by pressing Windows + R keys and type regedit. Press Enter.
2. In Registry Editor navigate to the following path:
HKEY_LOCAL_MACHINE\SOFTWARE\Microsoft\Windows\CurrentVersion\WindowsUpdate
3. Locate the “OSUpgrade” folder. If you can’t find it then create it manually with the next step.
4. Right-click on the WindowsUpdate and select “New” > “Key”. Name it “OSUpgrade”.
5. Now, right-click on the “OSUpgrade” and select “New” > “DWORD (32-bit) Value”, and name it “AllowOSUpgrade”.
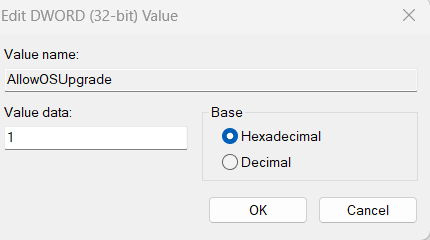
6. Right-click on AllowOSUpgrade and select “Modify”.
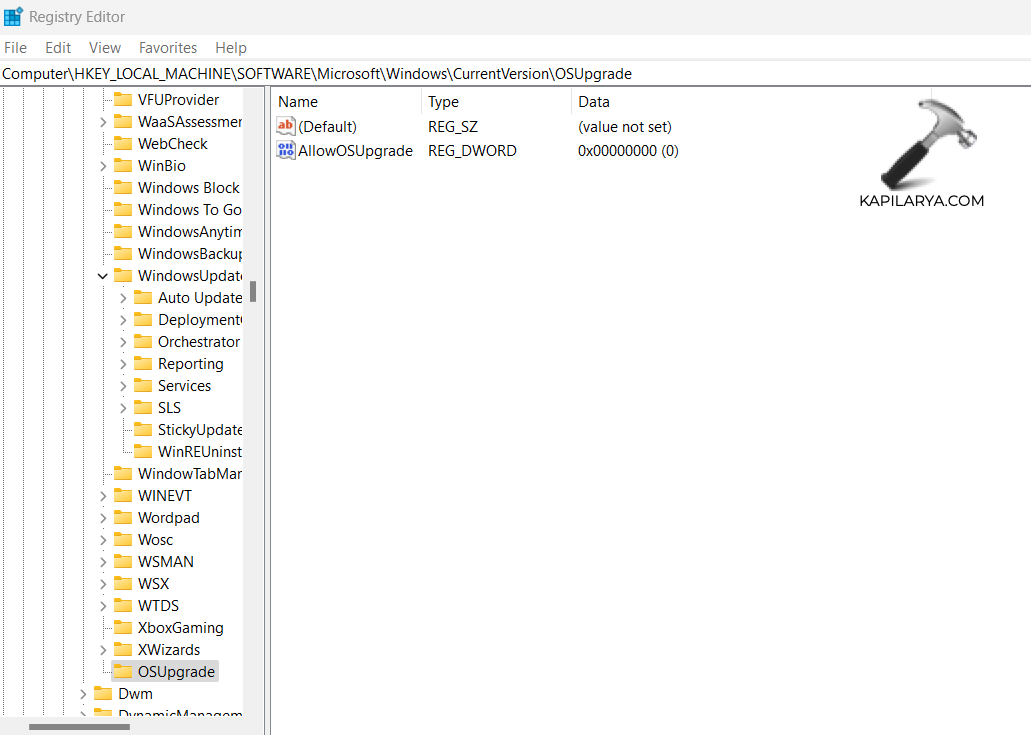
7. Change the Value data field to 1 and click “OK”.
8. Close Registry and restart your system.
That’s it!
![KapilArya.com is a Windows troubleshooting & how to tutorials blog from Kapil Arya [Microsoft MVP (Windows IT Pro)]. KapilArya.com](https://images.kapilarya.com/Logo1.svg)




Leave a Reply