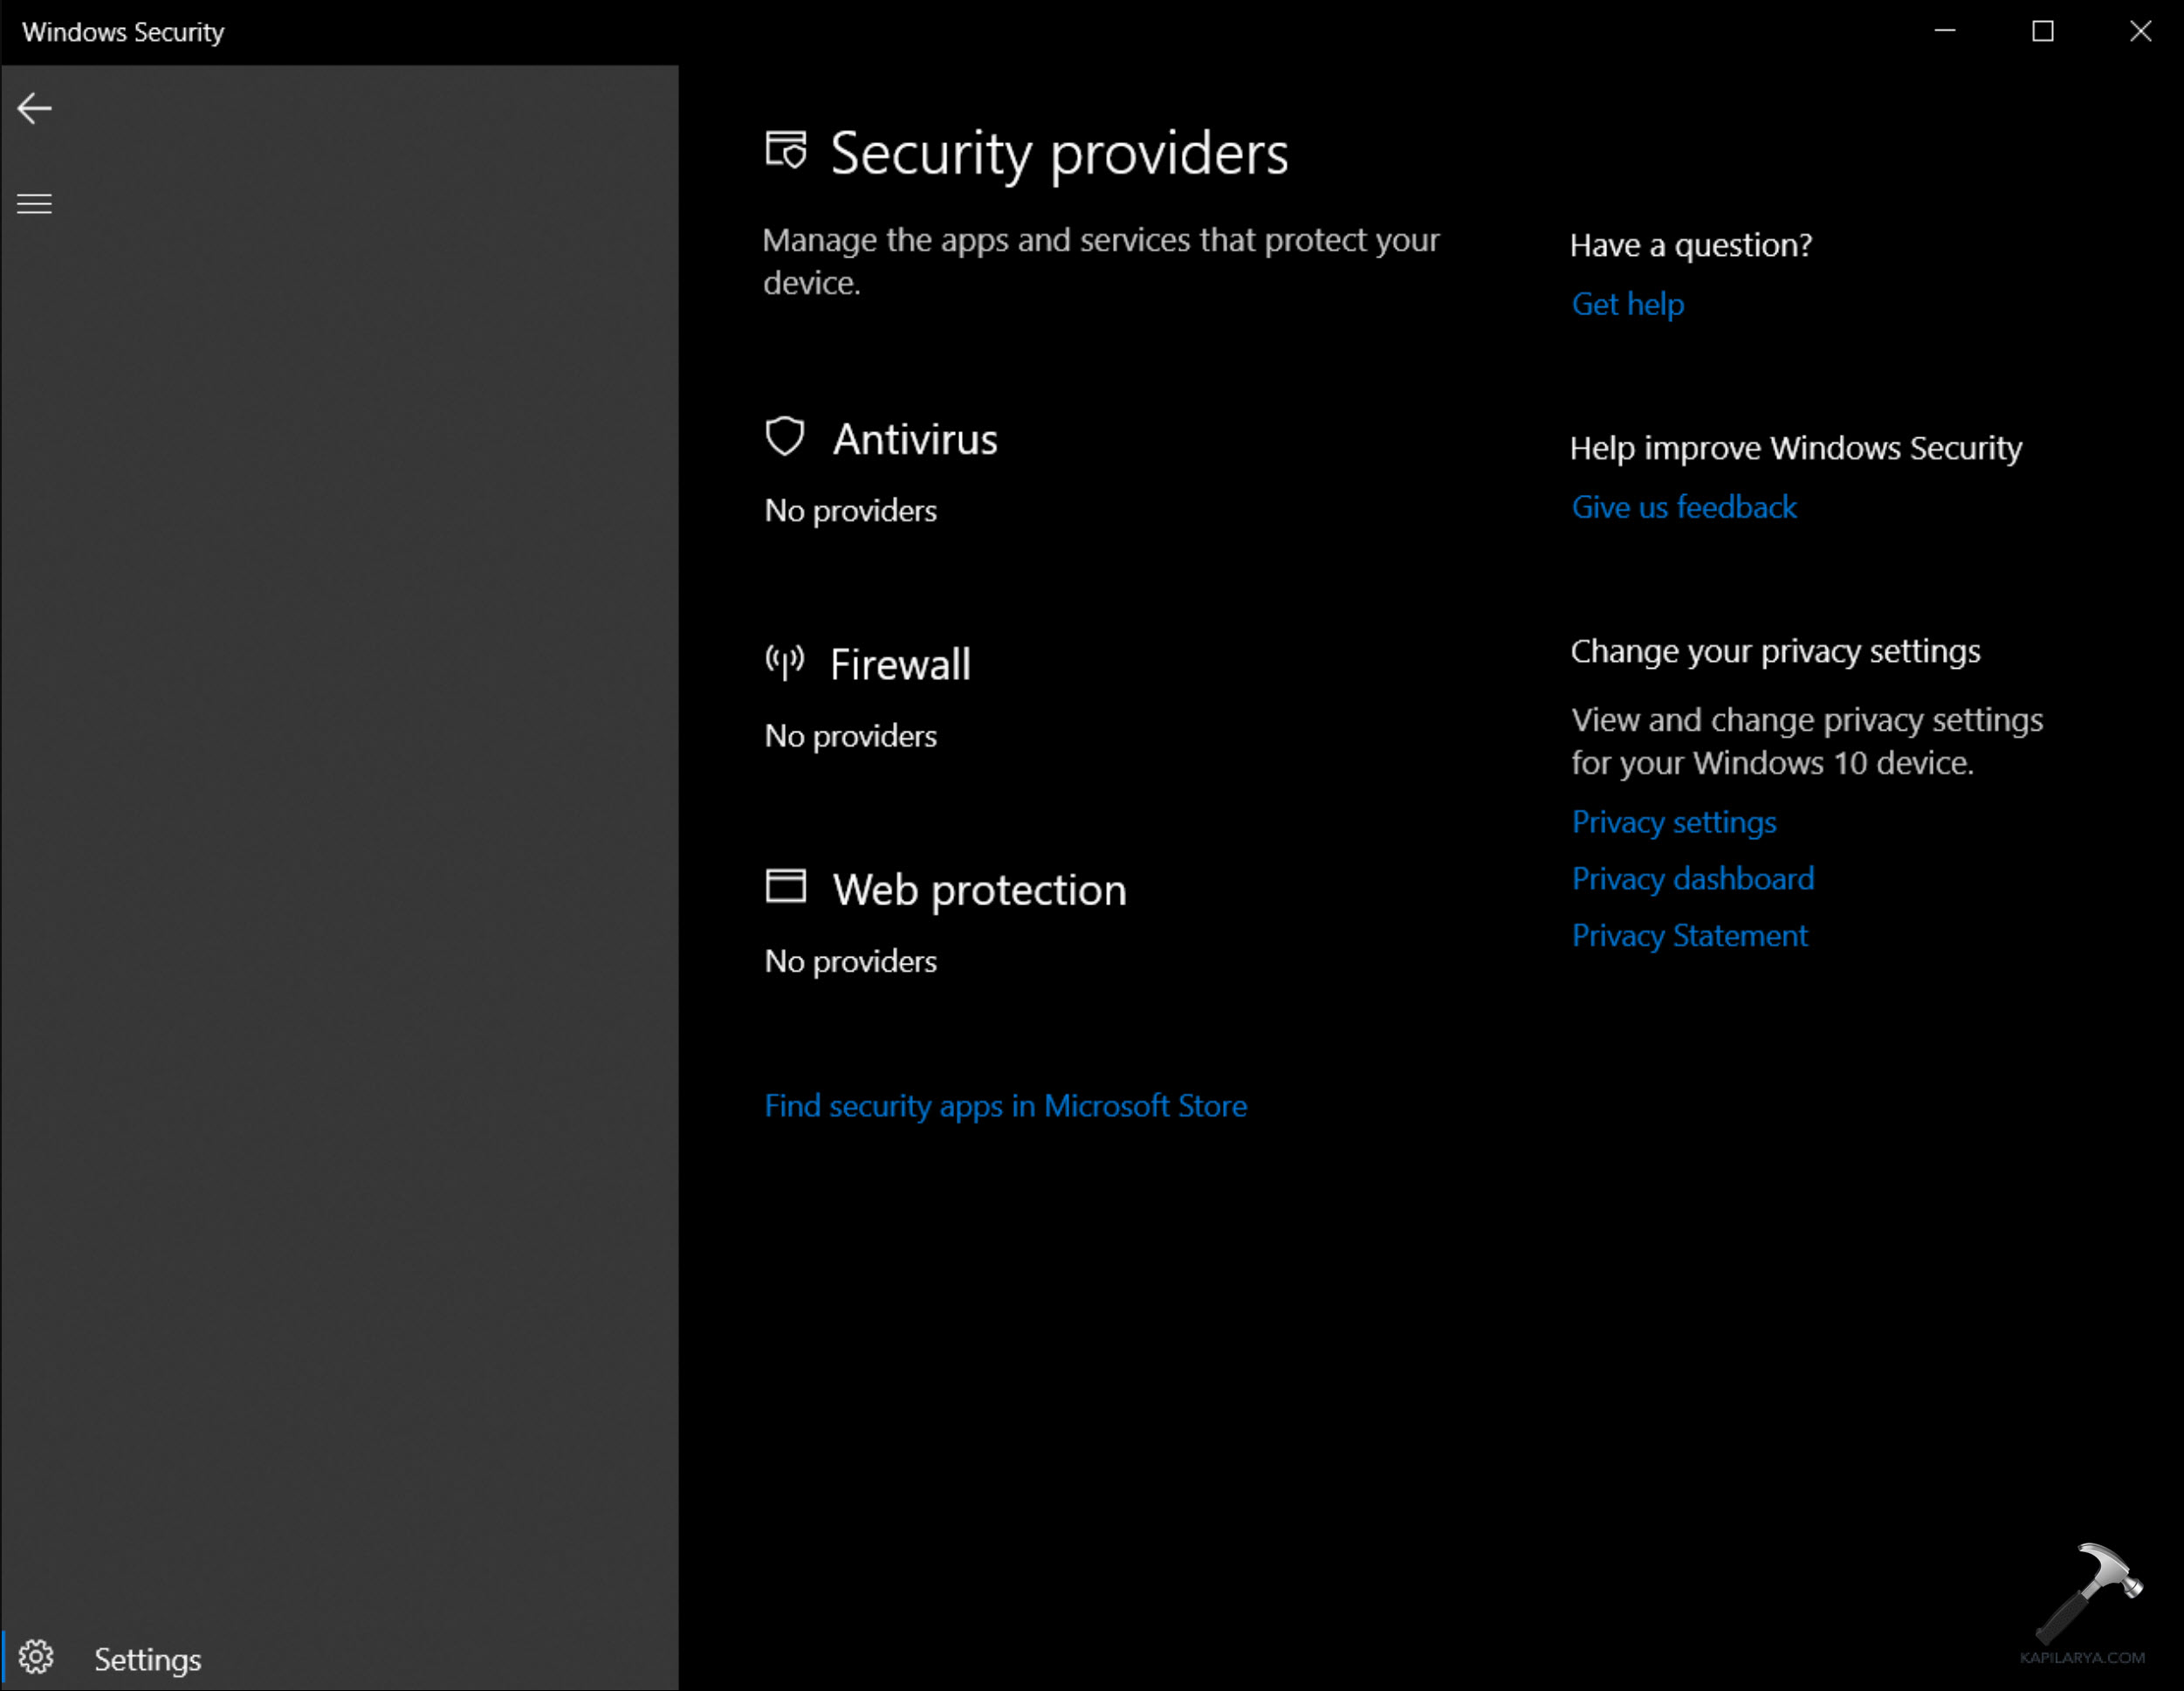
Windows Security is one of the most important aspects of protecting your PC from viruses and other threats on the internet. It plays a significant role as an anti-malware solution developed by Microsoft. However, most times this app will not work as expected in Windows 11, and this means that your system is open to attacks. This problem may become irritating and stressful, especially for users who have many important work, personal or financial affairs via computer. Here, we shall discuss some of the best to resolve this issue in the following methods.
Page Contents
Fix Windows Security – No Security Providers
Fix 1: Uninstall Third-Party Security Software
Having installed a third-party security software can conflict with pre-installed Windows 11 security software. So, it is advisable to uninstall the third-party software if any. After uninstalling, restart the PC and check if the problem is resolved.
Fix 2: Check Windows Security Service is Running
Windows Security service must be running to make sure it scans your PC to avoid malware attacks. For that, follow these below steps:
1. In the Windows search bar, enter “services” and click the best match result.
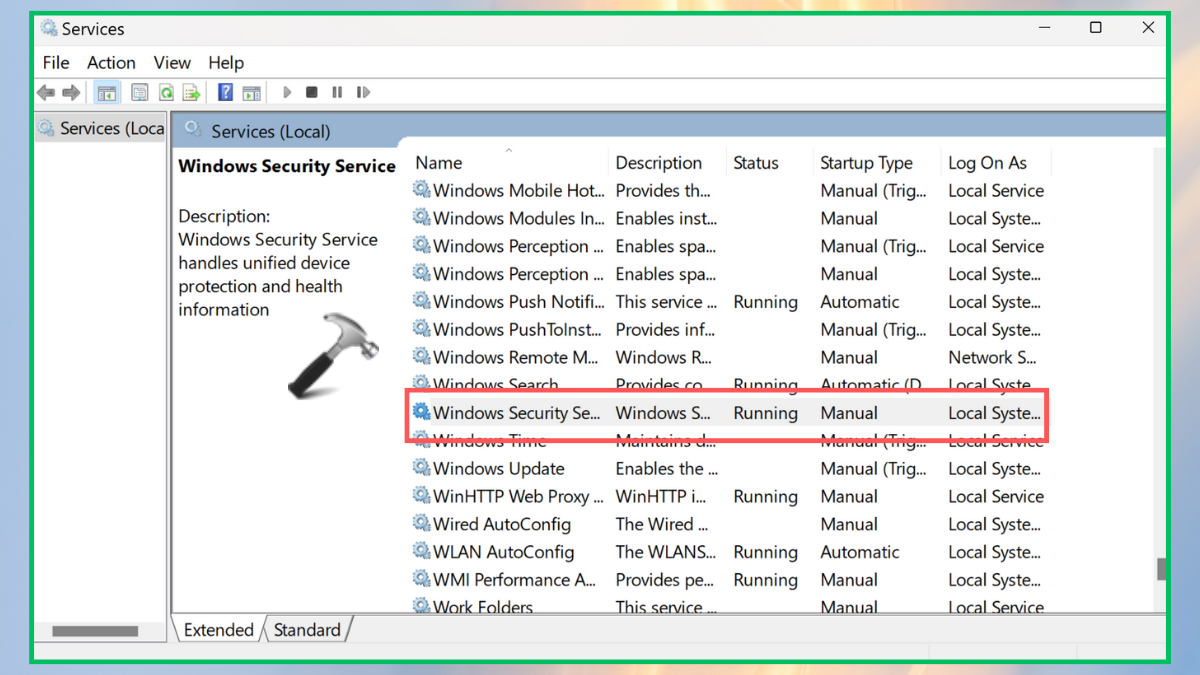
2. In the list, find the “Windows Security Service”. If “Running” does not appear on it, right-click on it and tap “Start”.
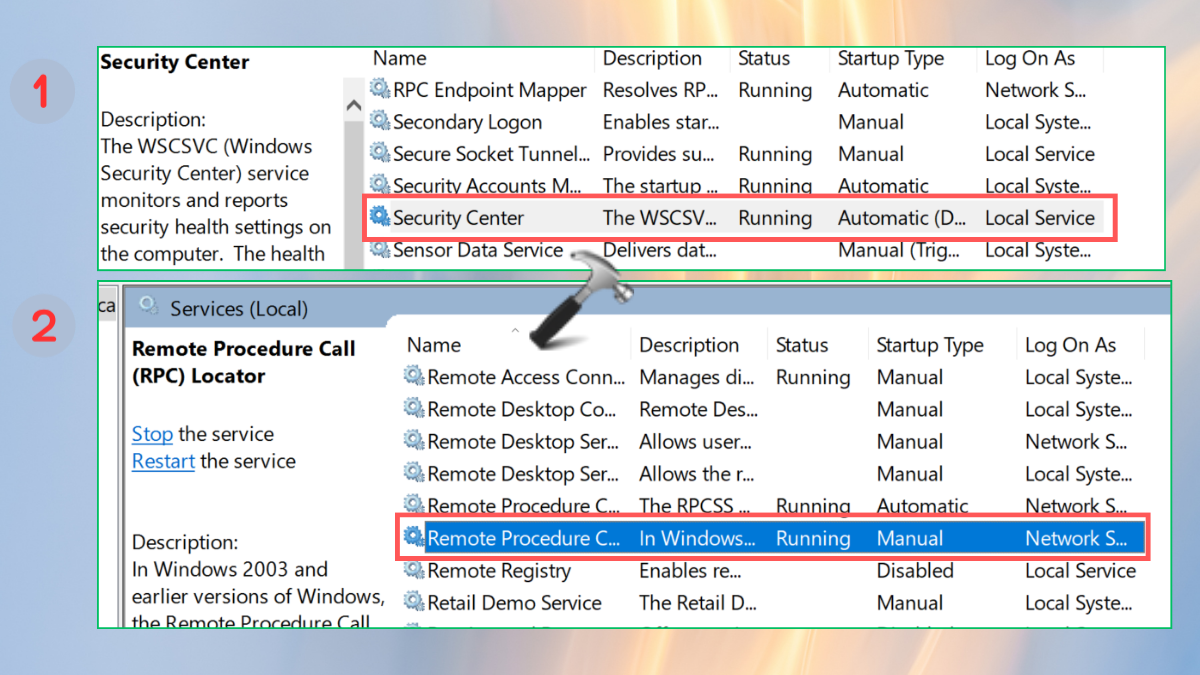
3. After that, locate “Security Center” and “Remote Procedure Call (RPC) Locator” in the list.
4. Make sure that they both are in “Running” state. If not, right-click on each and tap “Start”.
Fix 3: Run SFC and DISM scan
System file errors could also interrupt with Windows Security software. To solve it, go ahead with the following steps:
1. Open Notepad by searching it on Windows search bar.

2. Copy & paste the below to the Notepad new file:
@echo off
date /t & time /t
echo Dism /Online /Cleanup-Image /StartComponentCleanup
Dism /Online /Cleanup-Image /StartComponentCleanup
echo ...
date /t & time /t
echo Dism /Online /Cleanup-Image /RestoreHealth
Dism /Online /Cleanup-Image /RestoreHealth
echo ...
date /t & time /t
echo SFC /scannow
SFC /scannow
date /t & time /t
pause
3. Now, save the file with the extension “.bat”. For example, save it with “scm-dism.bat”.

4. Close the file and right-click the saved file and tap “Run as Administrator”.
Restart the PC and check if it is showing the Security Providers or not.
Fix 4: Delete Rogue Entries in The Registry
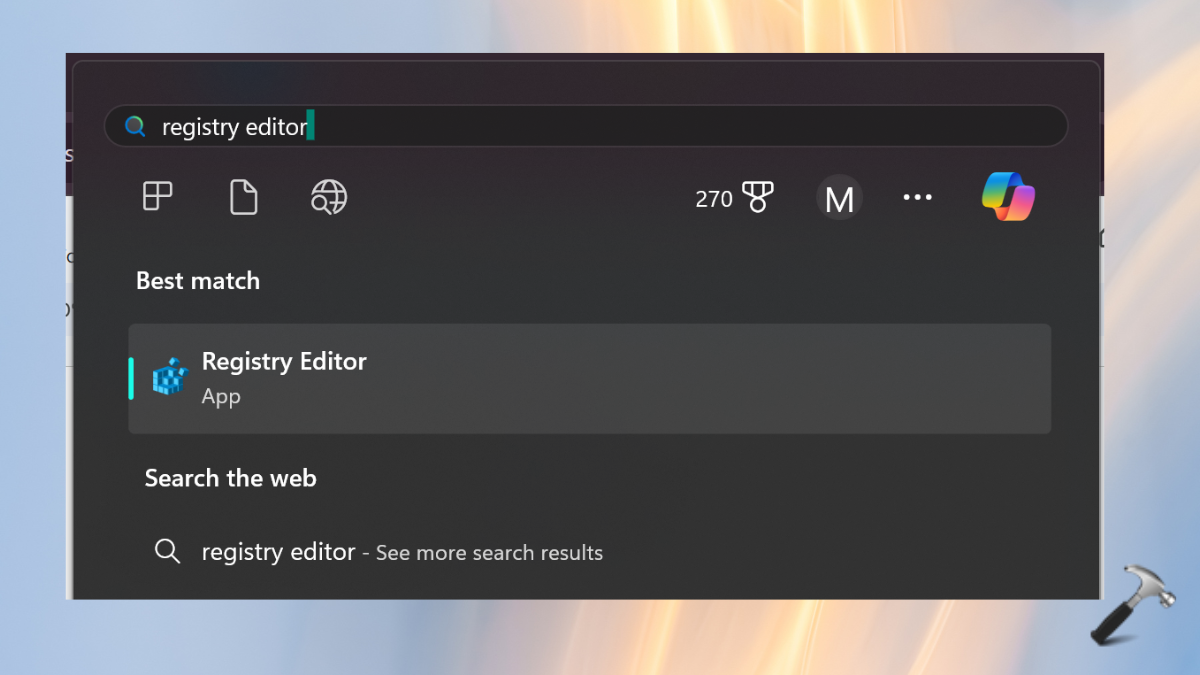
1. Open Registry Editor by searching it on Windows search bar.
2. Navigate to this path:
HKEY_LOCAL_MACHINE\Software\Microsoft\Windows NT\CurrentVersion\Image File Execution Options
3. Find the below entries:
- MSASCui.exe
- MpCmdRun.exe
- MsMpEng.exe
Right-click on each and tap “Delete”.

Fix 5: Perform Windows Defender Offline Scan at Boot Time
Windows Defender Offline Scan can help the PC to resolve the issue of Windows Security not showing Security Providers. To start the can, follow the below steps:
1. Go to Windows Settings > Privacy and security > Windows Security.
2. Click on the “Open Windows Security” button.

3. From the left-side panel, select “Virus and threat protection”. Tap on “Scan option”.

4. Choose “Microsoft Defender Antivirus (offline scan)” and tap “Scan now”.
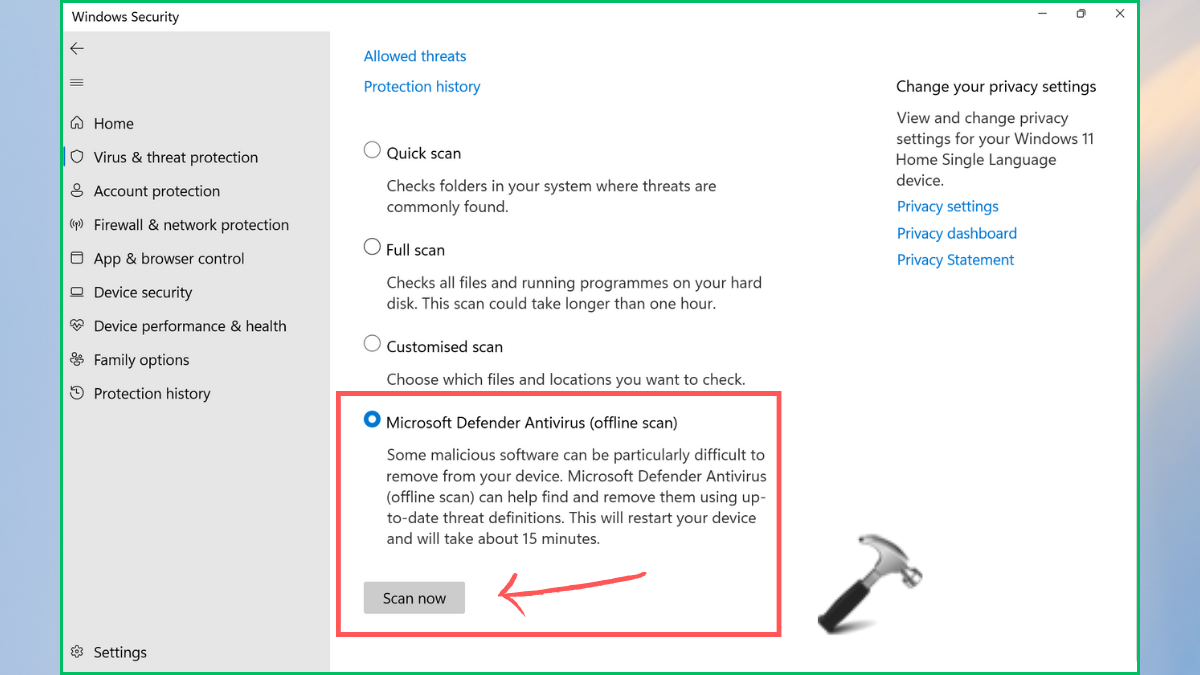
Wait for the scan to finish and restart the PC. Check if the issue is resolved or not.
Fix 6: Perform System Restore
System Restore will help restore Windows 11 up to date. To perform a System Restore:
1. Press Win+R keys to open Run dialog box. Enter the below command
rstrui

2. Click on “Next” to the screen that appears and check the “show more restore options”.

3. Now, follow the on-screen instructions to restore the system.

Fix 7: Perform an In-place Upgrade Repair
If none of the above solutions helps you, get ahead with Repair Windows 11. For this,
1. Go to Windows Settings > System > Recovery.
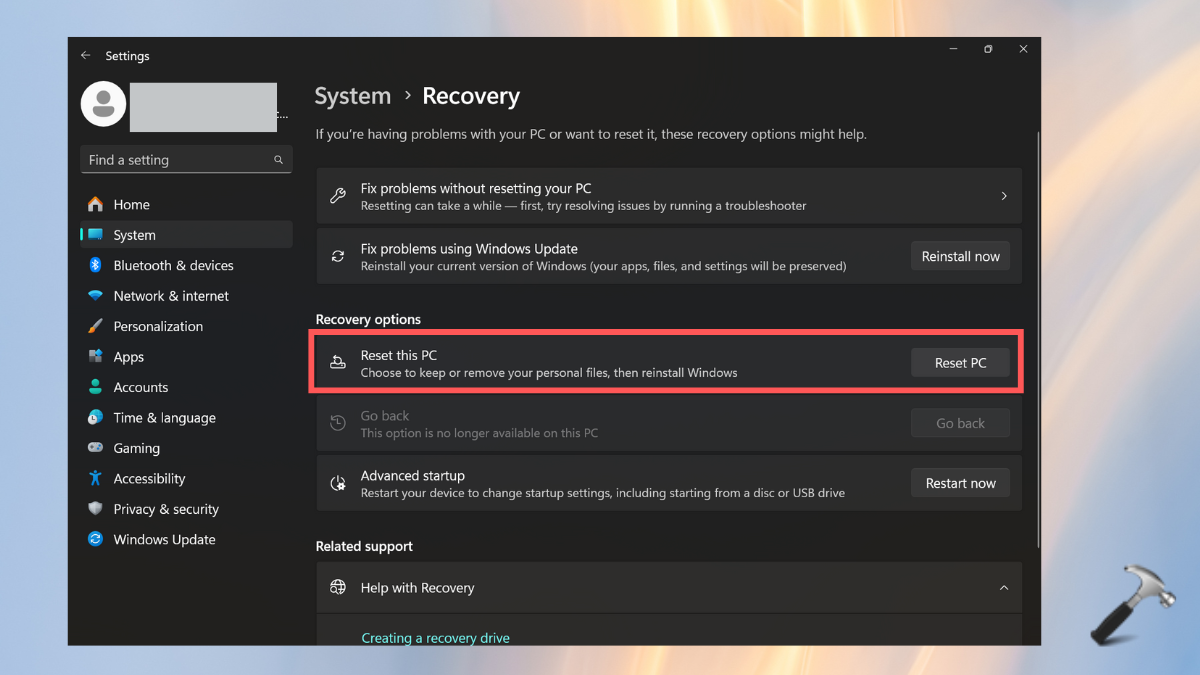
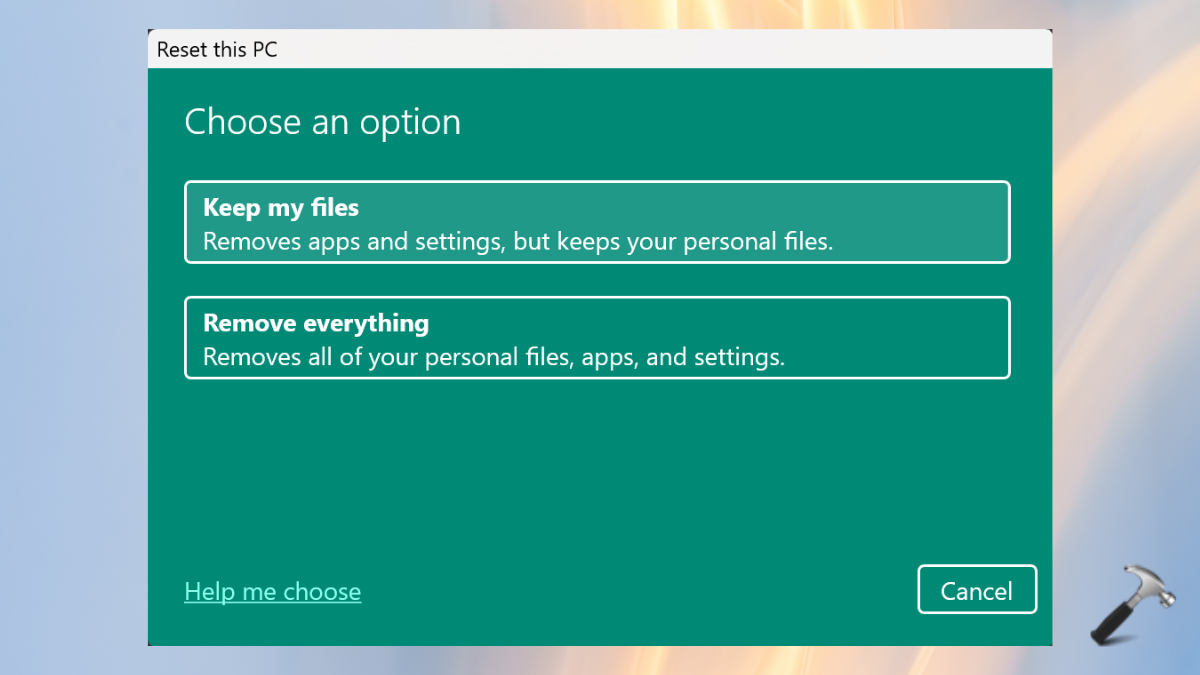
2. Click on “Reset PC” option and tap “Keep files”. After restart, check if the Windows Security is showing Security Providers or not. Follow details steps here.
Video fix
For further assistance, refer this video fix:
That’s it!
![KapilArya.com is a Windows troubleshooting & how to tutorials blog from Kapil Arya [Microsoft MVP (Windows IT Pro)]. KapilArya.com](https://images.kapilarya.com/Logo1.svg)


Leave a Reply