Is your Windows 11 login stuck on Please wait screen? “Please wait” screen during login in Windows 11 is a common problem that locks users out of their system. Basically, this kind of error may be caused by faulty files, services that are not set up right, or a failed attempt at system updates.
Fortunately, there are several methods so that it could be solved and work properly again without any hitch. This article will show you the detailed procedure on how to fix the problem of Windows 11 Please wait screen login stuck so as to help your system get back to normal.

Page Contents
Fix Windows 11 login stuck on Please wait screen
Fix 1: Run Windows Update Troubleshooter
In fact, the first root cause belongs to the world of known issues, which originates from an improper or even half-update carried out on the device. These problems can be solved by performing the Windows Update troubleshooter.
1. To open the Setting app, press Windows + I. Access through System > Troubleshoot > Other Troubleshooters.
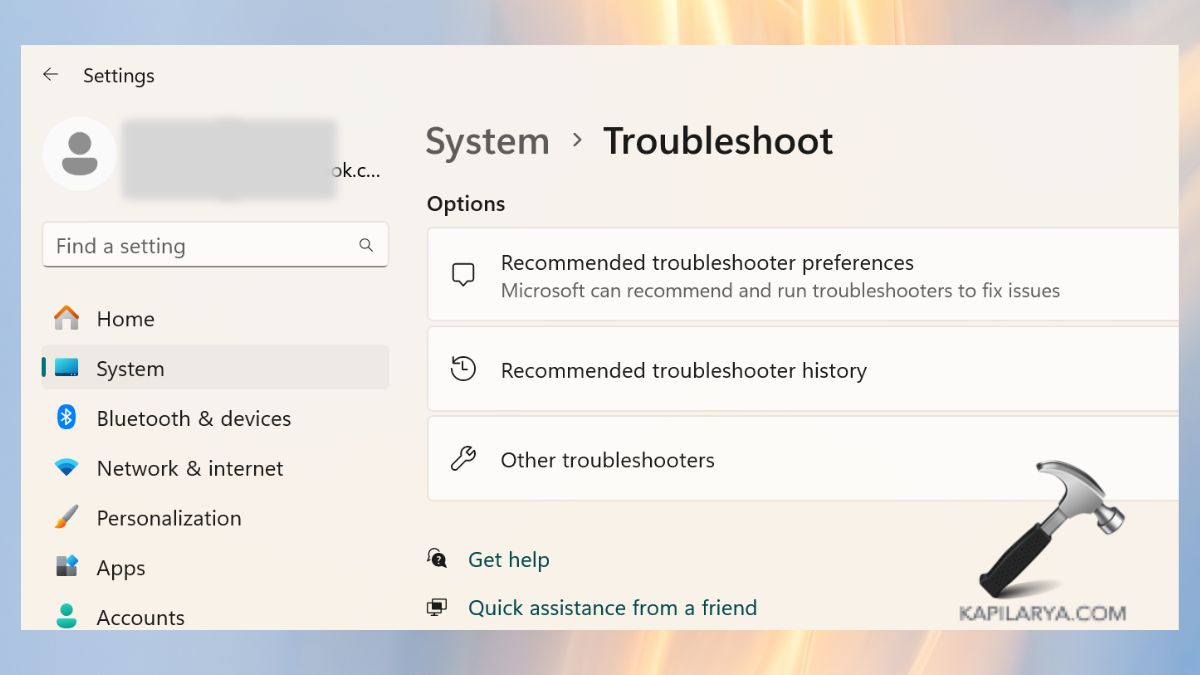
2. Locate “Windows Update”, and click on it then select “Run”.

Just allow the troubleshooter to scan and rectify any problem that is associated with the update. After that, turn off your computer and then back it up; you can then try to run it again to see whether the problem has been solved.
Fix 2: Disable Unnecessary Windows Services
Incorrect or unnecessary services leads to the login process being stuck. There is a way to correct it by disabling certain services.
1. Open the Run dialog box by pressing Windows + R then type and execute the following.
msconfig
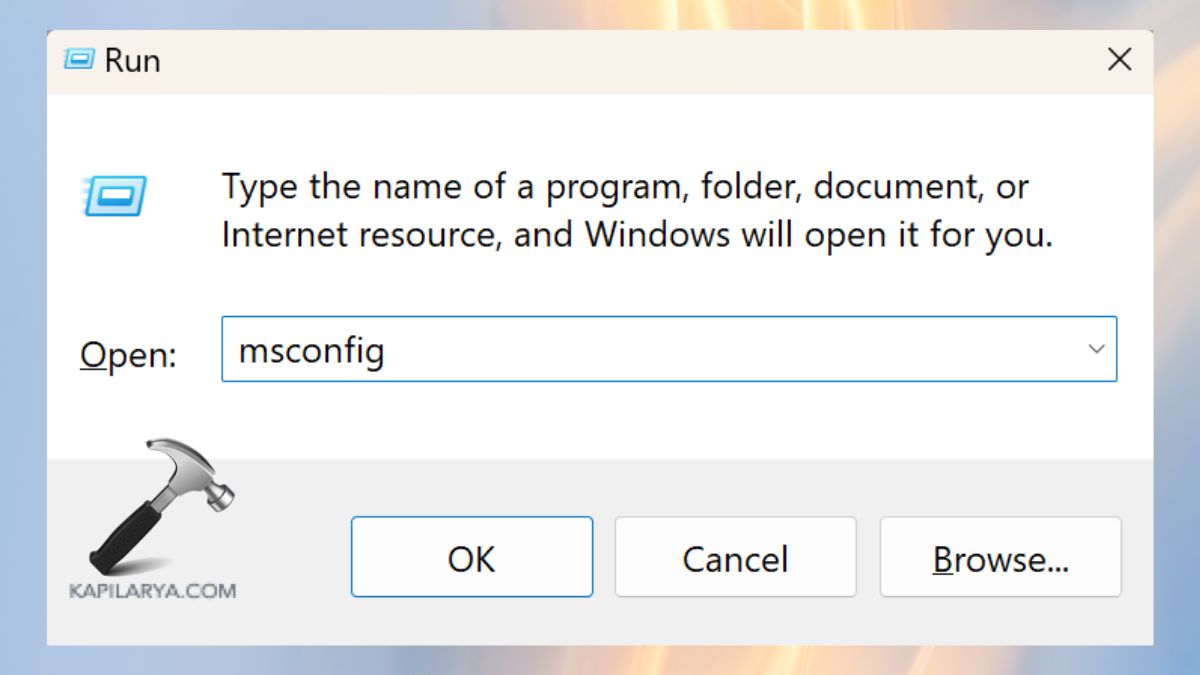
2. Under the General tab, please click on “Selective Startup” and untick the check box near “Load Startup Items”.

3. Click on the “Services” tab. Always check the option, “Hide all Microsoft services” to avoid any significant services being turned off. Click Disable All.

This will usually do the work for you, but to be more sure that you have solved the problem, restart your computer.
Fix 3: Perform a Windows Startup Repair
Windows 11 has the Startup Repair feature that will help address startup problems that won’t allow the user to log on.
1. Reboot your PC and immediately after you turn it on, keep pressing the power button until the recovery screen is displayed. Vice versa, right-click the Start menu, press and hold Shift, and then click Restart.
![]()
2. Go to the recovery screen then choose Troubleshoot > Advanced options > Startup Repair.

Windows will quickly search for such problems, and if found, it will be fixed by the program. You then perform a system restart after the process is done and see whether the issue is still there.
Fix 4: Run System Checks (DISM, SFC, and CHKDSK)
One of the common issues associated with the Windows operating system is the system files’ corruption or damage which makes formation start. These check files can be fixed by running system checks.
1. To do this you need to restart your system and press the Shift key on the keyboard when the option restarts appears. The process is easy- just restart the device, use the Windows key + X then Troubleshoot, then Advanced options, then Command Prompt.

2. Click the keyboard and type the following command-
DISM /Online /Cleanup-Image /RestoreHealth

3. When using the DISM command, complete the process and execute the following-
sfc /scannow

4. Indeed in order to check your disk for errors you should type-
chkdsk C: /f /r /x

After that is done, you should restart your computer and then check to determine whether the problem is solved.
Fix 5: Use System Restore to Roll Back
If the problem developed after you made some recent changes or received an update, then System Restore will help revert your system to the previous good state.
1. To help you get to the recovery screen you can use the following method in Solution 3. Click on Troubleshoot > Advanced options > System Restore.
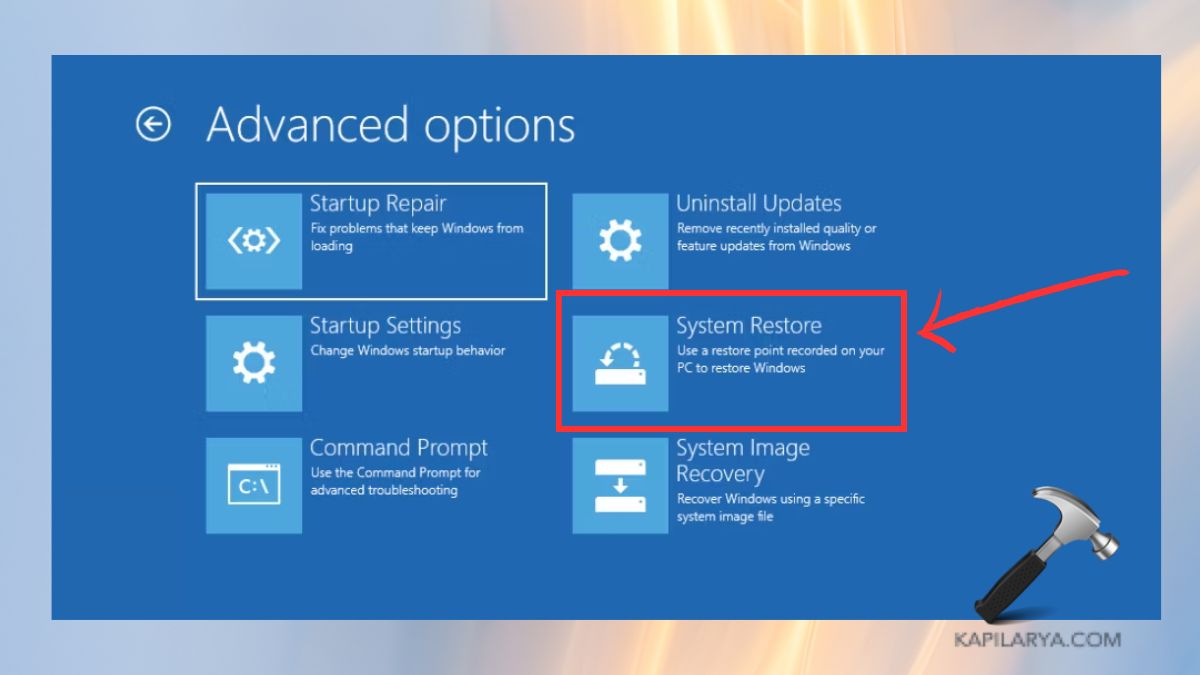
2. Choose a restore point that you have set prior to the development of the problem, and the wizard will help you try and fix it. Once the above process is over, the problem might be fixed; otherwise, reboot your computer to try and solve it.
Fix 6: Reset This PC to Fix Windows Please Wait Screen
The last resort for addressing existing problems in Windows 11 is to reset it.
1. Enter the System section in Settings. Head over to the Recovery options, then choose Reset this PC.
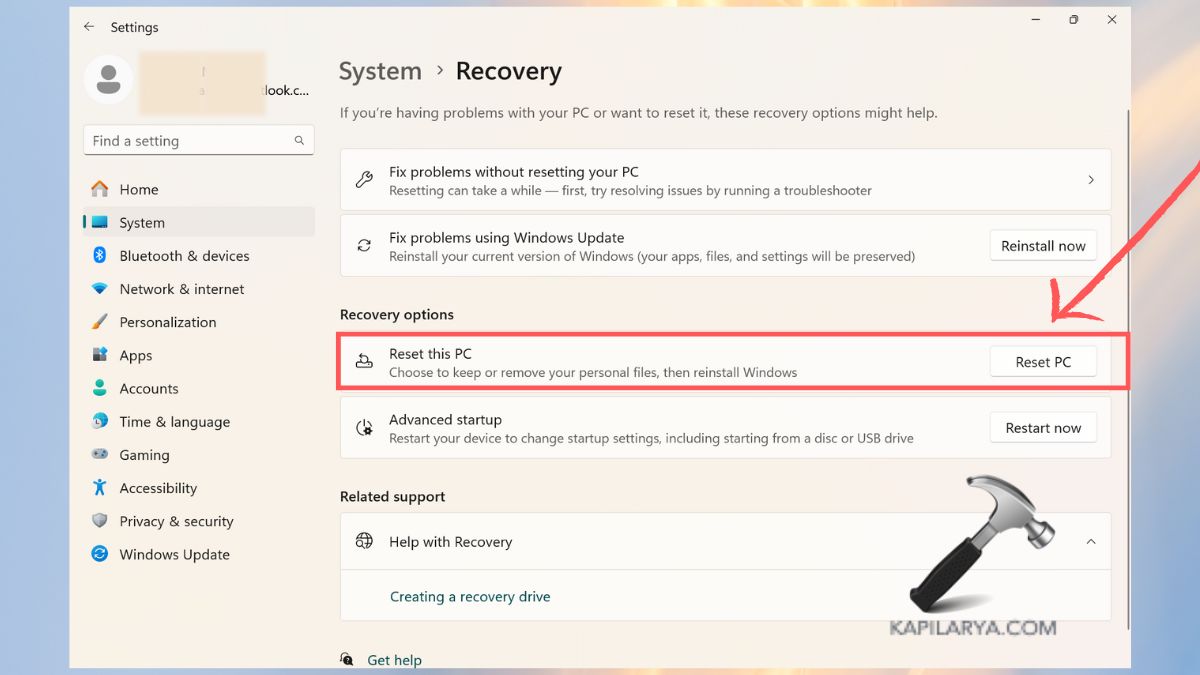
2. Choose an Option between –
a. Repair my files- It reforms Windows by reinstalling it but keeps users’ files.
b. Remove Everything- This deletes all of the user’s files, applications, and preferences.

3. Finish the reset procedure, after that, restart your computer.
#1 Why is my Windows 11 stuck on the “Please wait” screen?
Causes of this problem can be system file damage, problematic updates, or incorrect service configuration. The issue is usually solved by running troubleshooting tools and repairing system files.
#2 Can I fix this without resetting my PC?
Yes, most problems can be solved by Startup Repair, DISM, or System Restore before doing the reset.
#3 How do I access Safe Mode if I can’t log in?
If you are unable to get a login, there is still an option of entering the Safe mode. That way turn off your PC and press the power button several times to begin recovery mode. From the mentioned window, go to Troubleshoot> Advanced options > Startup settings and from there turn on Safe Mode.
#4 Will resetting my PC delete all my files?
If during the reset you have chosen the option “Keep my files”, then your files will not be erased. Nevertheless, apps and settings will be erased.
That’s it!
![KapilArya.com is a Windows troubleshooting & how to tutorials blog from Kapil Arya [Microsoft MVP (Windows IT Pro)]. KapilArya.com](https://images.kapilarya.com/Logo1.svg)



![[Latest Windows 10 Update] What’s new in KB5055612? [Latest Windows 10 Update] What’s new in KB5055612?](https://www.kapilarya.com/assets/Windows10-Update.png)


Leave a Reply