

When you insert a media device, such as a CD, DVD, or memory card, the AutoPlay feature should prompt you with options (like playing music, viewing images, etc.) based on the type of media. However, sometimes the AutoPlay feature might not be working in Windows 11 due to various reasons, such as network issues or incorrect settings. In this article, we’ll show a list of solutions that you can follow to fix the problem.
Page Contents
Fix: Windows 11 AutoPlay Not Working
Method 1: Re-Enable AutoPlay
1. Open Windows Settings from the Start menu.
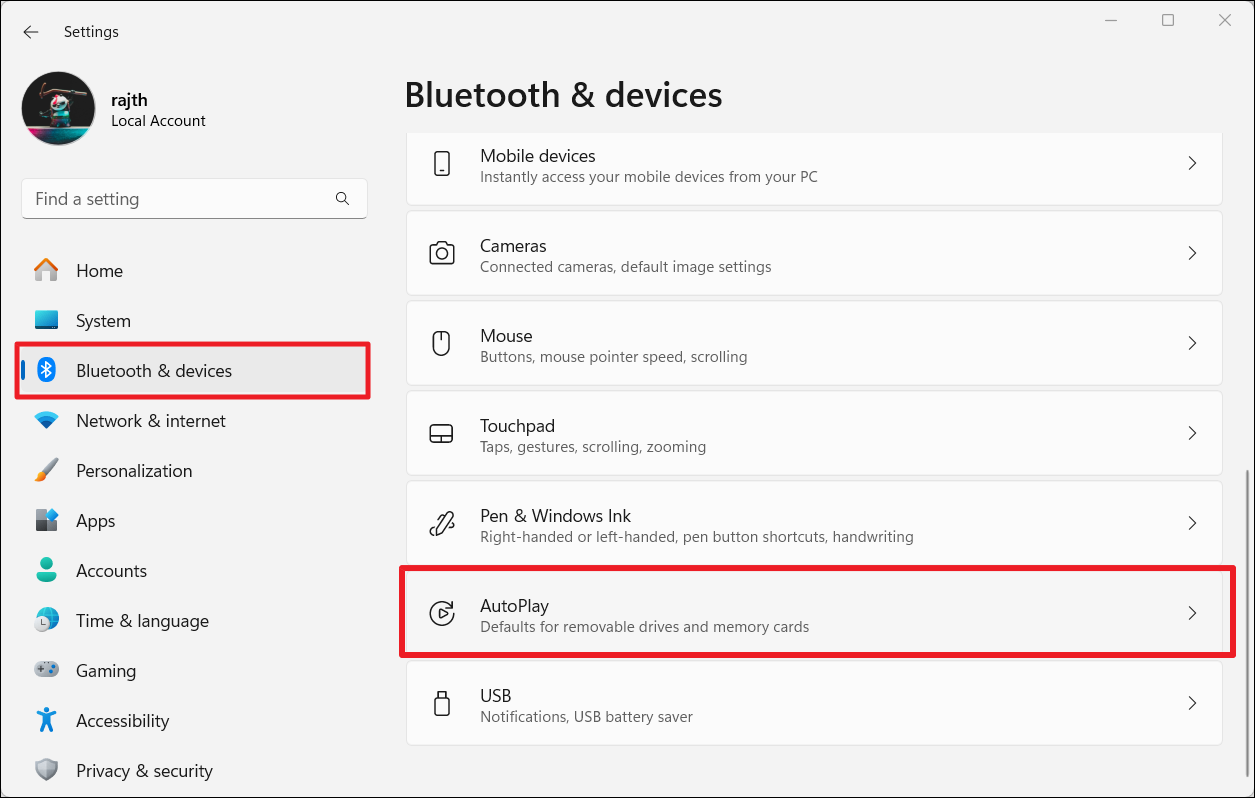
2. Navigate to “Bluetooth & devices” > “AutoPlay”.
3. Turn off the toggle under Use AutoPlay for all media and devices.
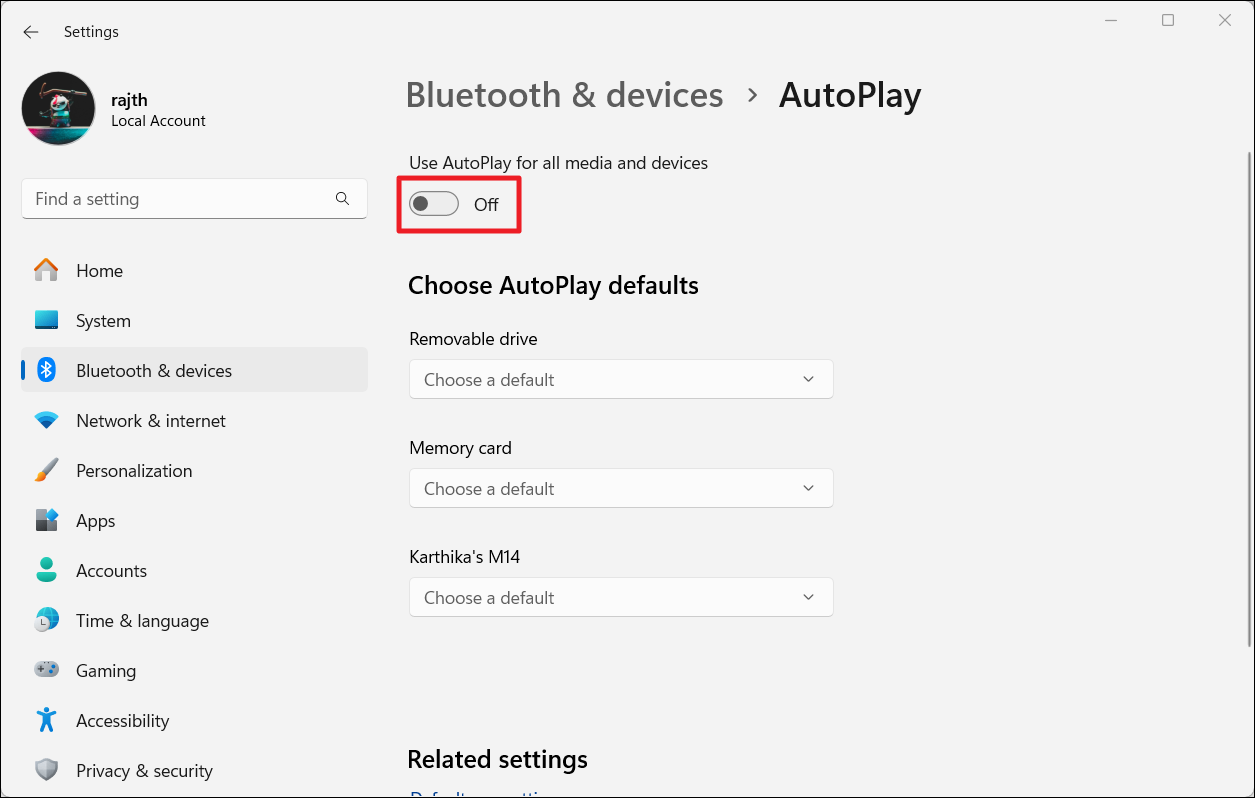
4. Then, turn it back on.

Method 2: Check the Notification Settings
1. In the Windows Settings, go to System > Notifications.

2. Ensure the “Notifications” toggle is turned on.

3. Then, scroll down and make sure the “AutoPlay” toggle is enabled as well.

Method 3: Remove All USB Devices
Sometimes, a connected USB device can interfere and cause the AutoPlay issue. In that case, try disconnecting all USB devices and then reconnecting them one at a time to see which one is causing the issue.
Method 4: Restart the Shell Hardware Detection service
1. Open Command Prompt as administrator.
2. Type the following command and press Enter:
net start shellhwdetection

3. Then, check if AutoPlay is still not working.
Method 5: Update Windows
1. Open the Run command box with Windows + R.
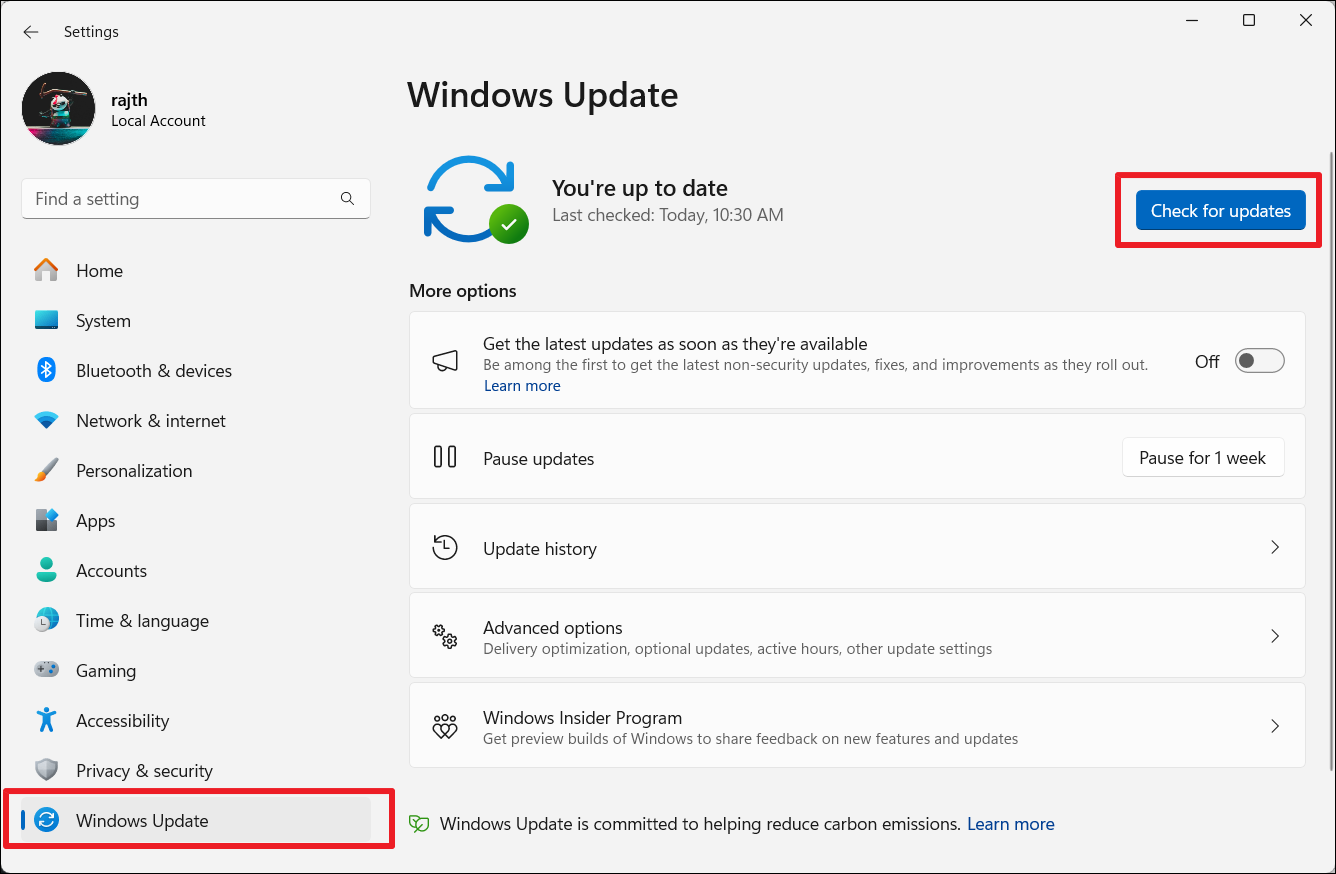
2. Type ms-settings:windowsupdate and press Enter.
3. Now, click “Check for updates” to check for any available updates.
4. Download and install the pending updates.
5. Restart your PC.
Method 6: Check AutoPlay Configurations
1. Open the Control Panel by searching for it in the Start menu.
2. Set the View type to “Large icons” and select “AutoPlay“.

3. The AutoPlay Control Panel page shows your current AutoPlay settings. You can make your desired changes and click “Save“.

Method 7: Change Shell Hardware Detection Service
1. Press Windows + R, type services.msc, and press Enter.

2. In the Services tool, find and double-click the “Shell Hardware Detection” service.

3. Choose “Automatic” from the Startup type drop-down menu.

4. Click “Start” if the service is not running and click “Apply“.

5. Click “OK” and close the Services app.
Method 8: Reset AutoPlay Settings
1. Open the Control Panel and search for AutoPlay settings. Then, select the result.
2. Scroll down to the bottom of the AutoPlay page and click “Reset all defaults“.

Method 9: Change Local Group Policy Editor
1. Open the Run command box and type “gpedit.msc” and click “OK“.
2. Navigate to Computer Configuration > Administrative Templates > Windows Components > Autoplay Policies.
3. Double-click on the “Turn off AutoPlay” policy to open it.

4. In the pop-up window, select “Disabled.”
5. Click “Apply” and then “OK” to save the changes.

6. Restart your computer and see if AutoPlay is still not working.
Method 10: Edit the Windows Registry
1. Type “regedit” in the Start menu and press Enter to launch the Registry Editor.
2. Navigate to:
HKEY_CURRENT_USER\Software\Microsoft\Windows\CurrentVersion\Policies\Explorer
3. If the folder Explorer doesn’t exist under Policies, create a new folder and name it Explorer.

4. Double-click on the “NoDriveTypeAutoRun” DWORD. If it doesn’t exist, right-click the Explorer folder and select New > DWORD (32-Bit) Value. Then, name the entry NoDriveTypeAutoRun.

5. Then, set the value data to “91″ and click “OK” to save the changes.

6. Close the Registry Editor and restart your PC.
That’s it.


1 Comment
Add your comment
Hi RajKumar, I Have tried all these methods and none work, can you please help me, i dont want to reinstall windows 11 because of this
Kind Regards
John