In today’s increasingly connected world, a stable and reliable internet connection is crucial for our daily tasks, whether it be work, entertainment, or staying in touch with loved ones. However, there’s nothing more frustrating than experiencing frequent WiFi disconnections, especially when using the new Windows 11 operating system. If you’ve been facing this issue, fret not! I’m here to provide you with some effective solutions to fix the problem and ensure a seamless online experience on your Windows 11 device. With a few simple troubleshooting steps, we can conquer the challenge of constantly disconnecting WiFi and get you back online in no time. So, let’s delve into the solutions and bid farewell to those troublesome WiFi interruptions.
Page Contents
Fix: WiFi keeps disconnecting on Windows 11
Fix 1: Forget and reconnect to the WiFi network.
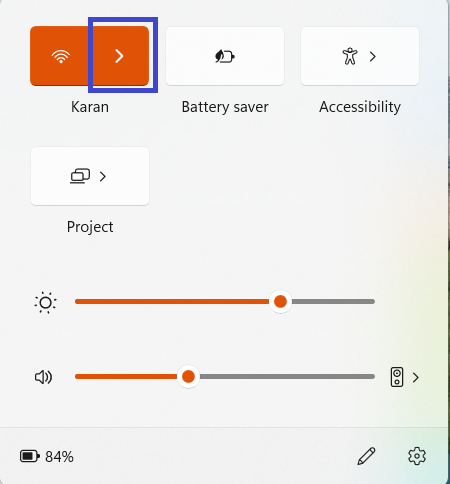
1. Press Win + A keys.
2. Click on the arrow next to WiFi.
3. Right-click on the WiFi network that you use usually. Select Forget.
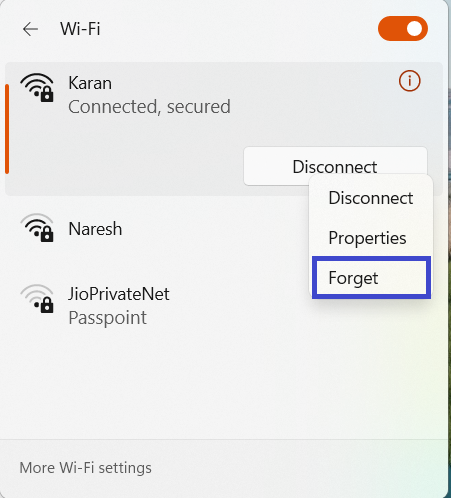
4. Now, reconnect to the same WiFi, and enter a password.
Fix 2: Set the WiFi network to private to fix the WiFi that keeps disconnecting on Windows 11.
1. Press Win + A keys.
2. Click on the arrow next to WiFi.

3. Right-click on the WiFi network that you use usually. Select Properties.

4. Click on Private Network.

5. Close the Window and check if the issue has been resolved.
Fix 3: Update the WiFi driver to fix WiFi keeps disconnecting on Windows 11
1. Open Device manager.
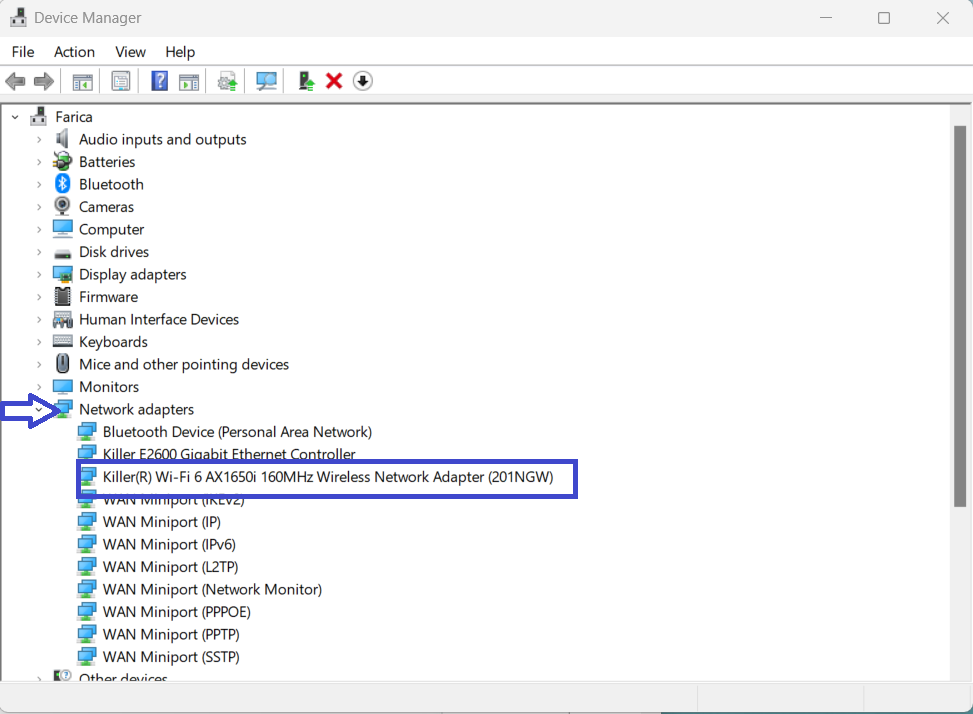
2. Click on the down arrow of “Network adapters” and right-click on your WiFi adapter. Choose “Update driver”.
3. Click on “Browse my computer for drivers”.
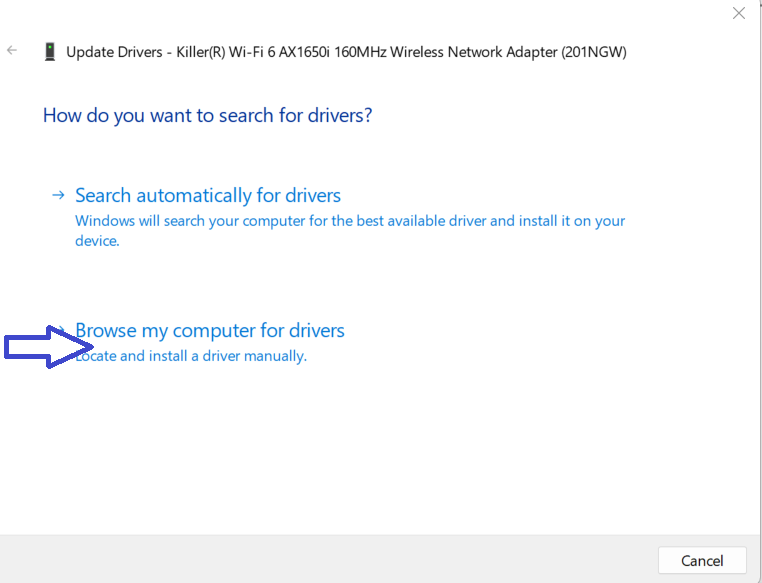
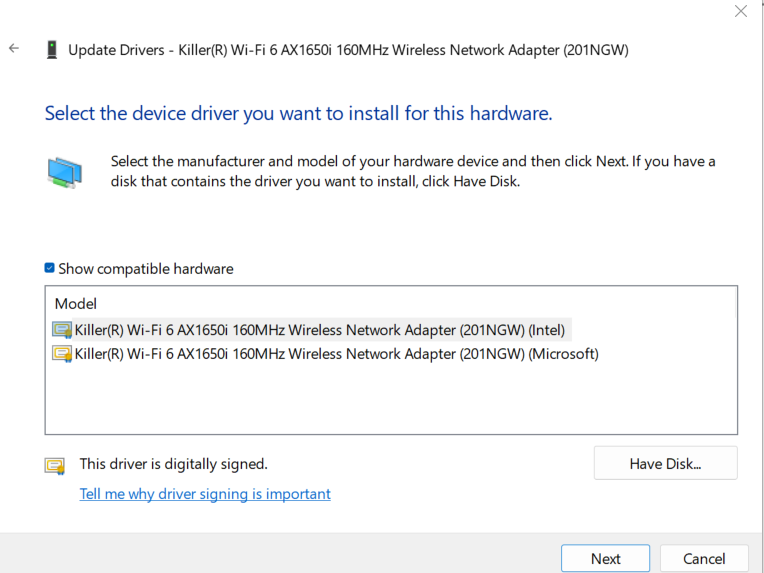
4. Click on “Let me pick from a list of available drivers on my computer”.

5. Click on the driver suitable for your WiFi adapter and click “Next”.
Fix 4: Run Network troubleshooter
1. Open Settings by pressing Win + I keys.
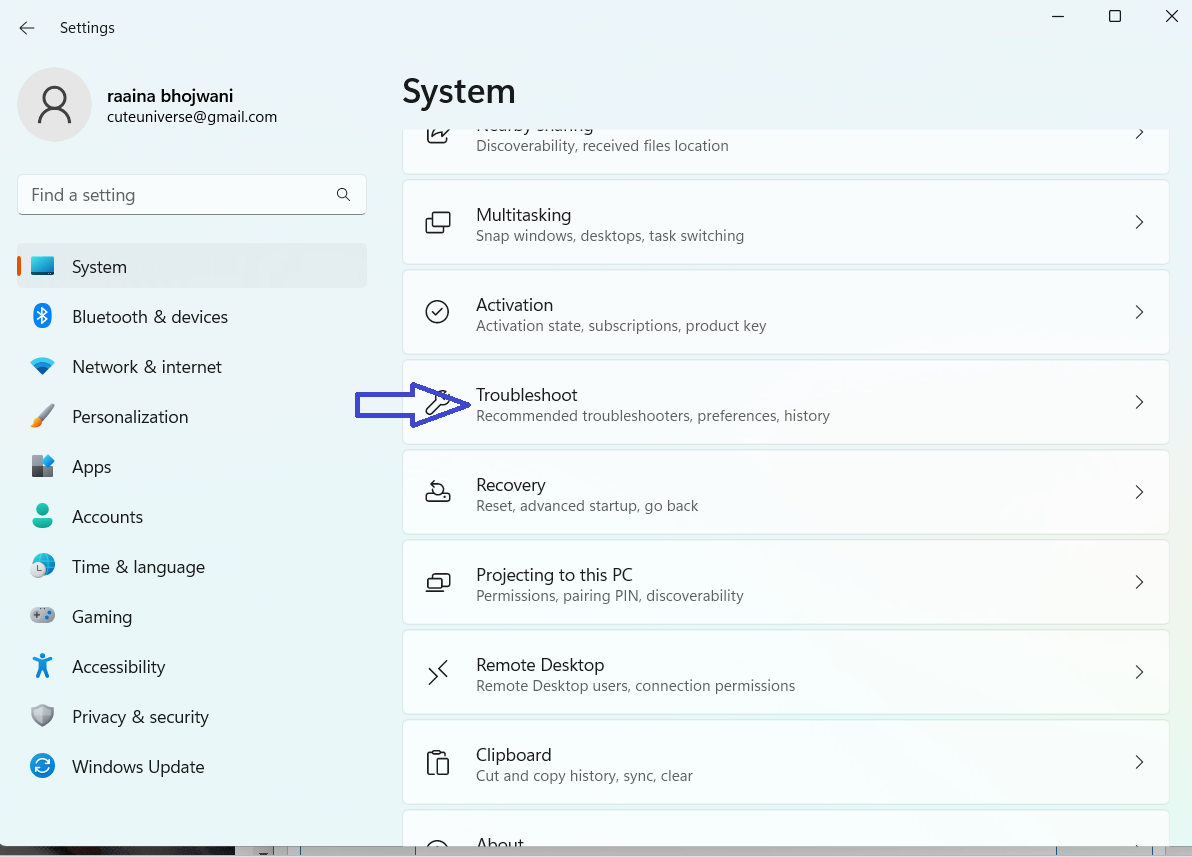
2. Click on “Troubleshoot”.
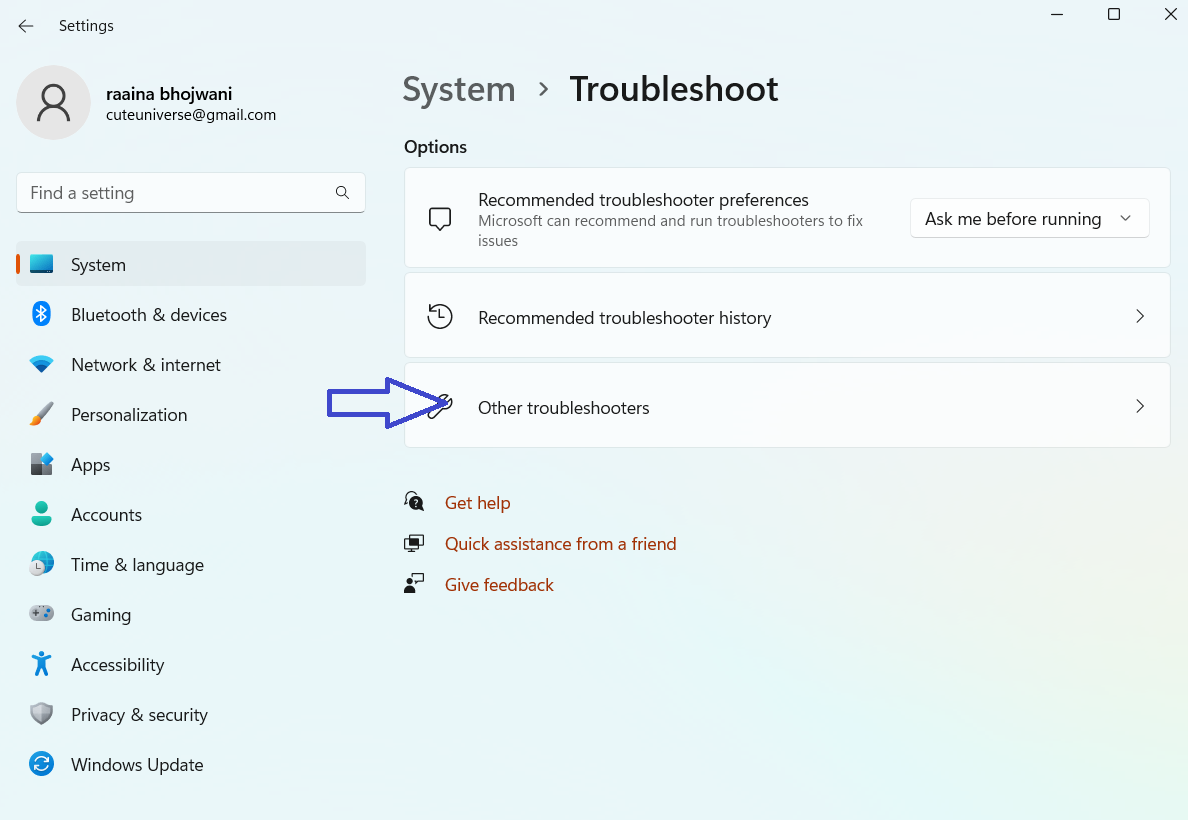
3. Click on “Other troubleshooters”.
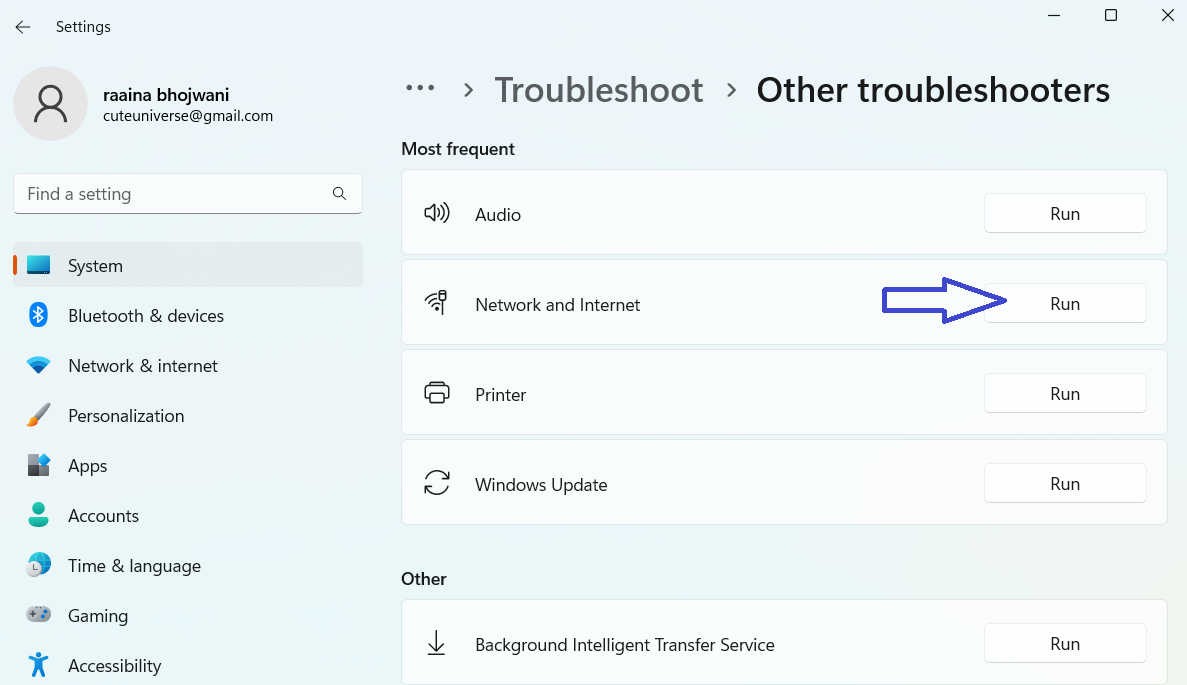
4. Click on “Run” of Network and Internet.
5. Follow the on-screen instructions.
Fix 5: Turn On/Off airplane mode
1. Press Win + A keys.
2. Click on “Airplane mode” to switch it on and in a few seconds do the same to switch it Off.

Fix 6: Connect automatically to WiFi
1. Click Win + A keys.
2. Click on the arrow near to WiFi.
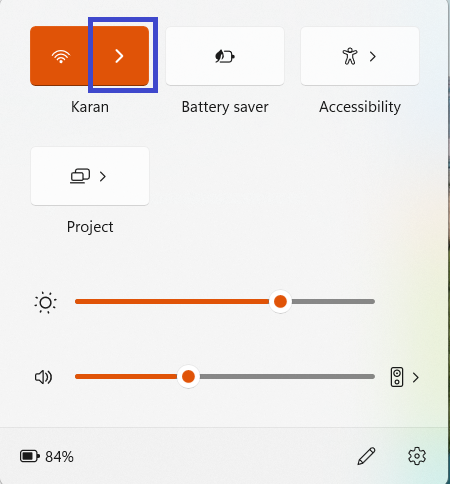
3. Right-click on the WiFi name usually connected to your system and choose “Properties”.

4. Check on the “Connect automatically when in range” checkbox.
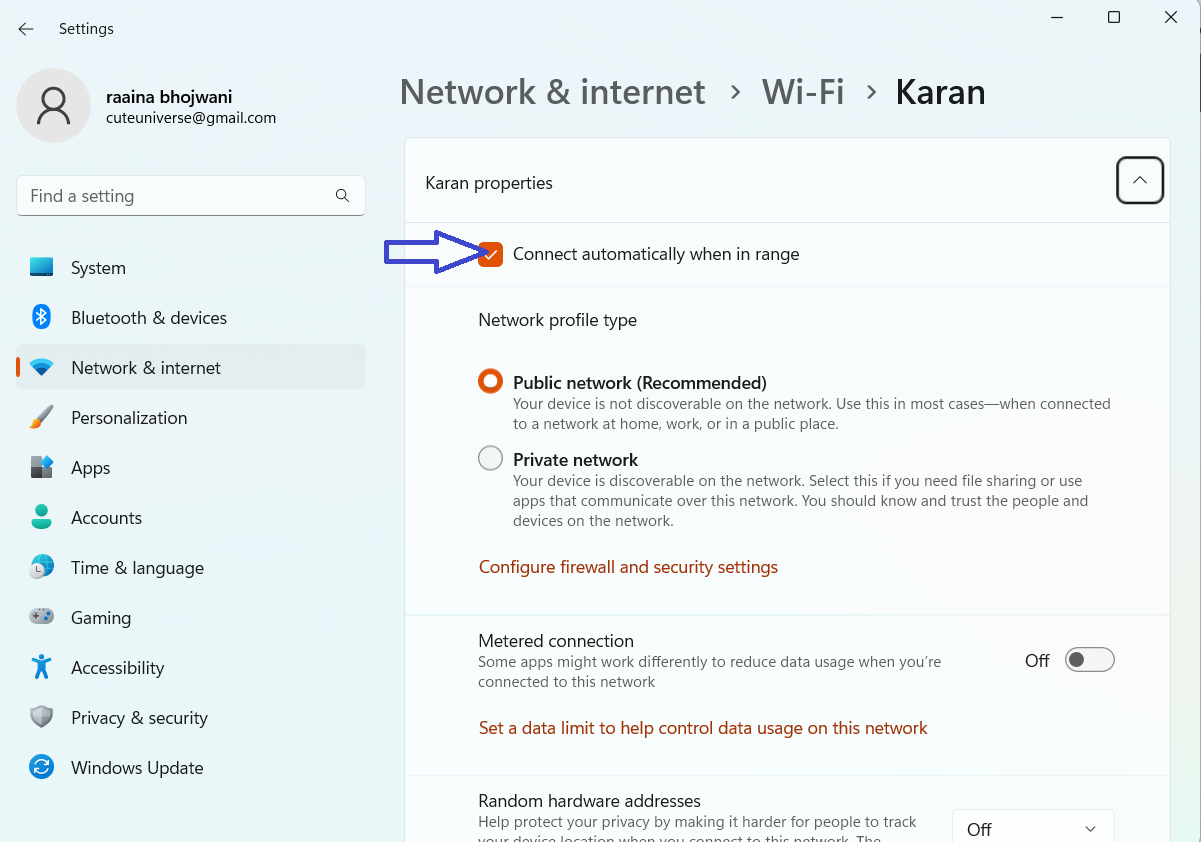
5. Close this Window.
Fix 7: Reset Network settings
1. Open Setting by pressing Win + I keys.
2. Click on “Network & internet” > click “Advanced network settings”.
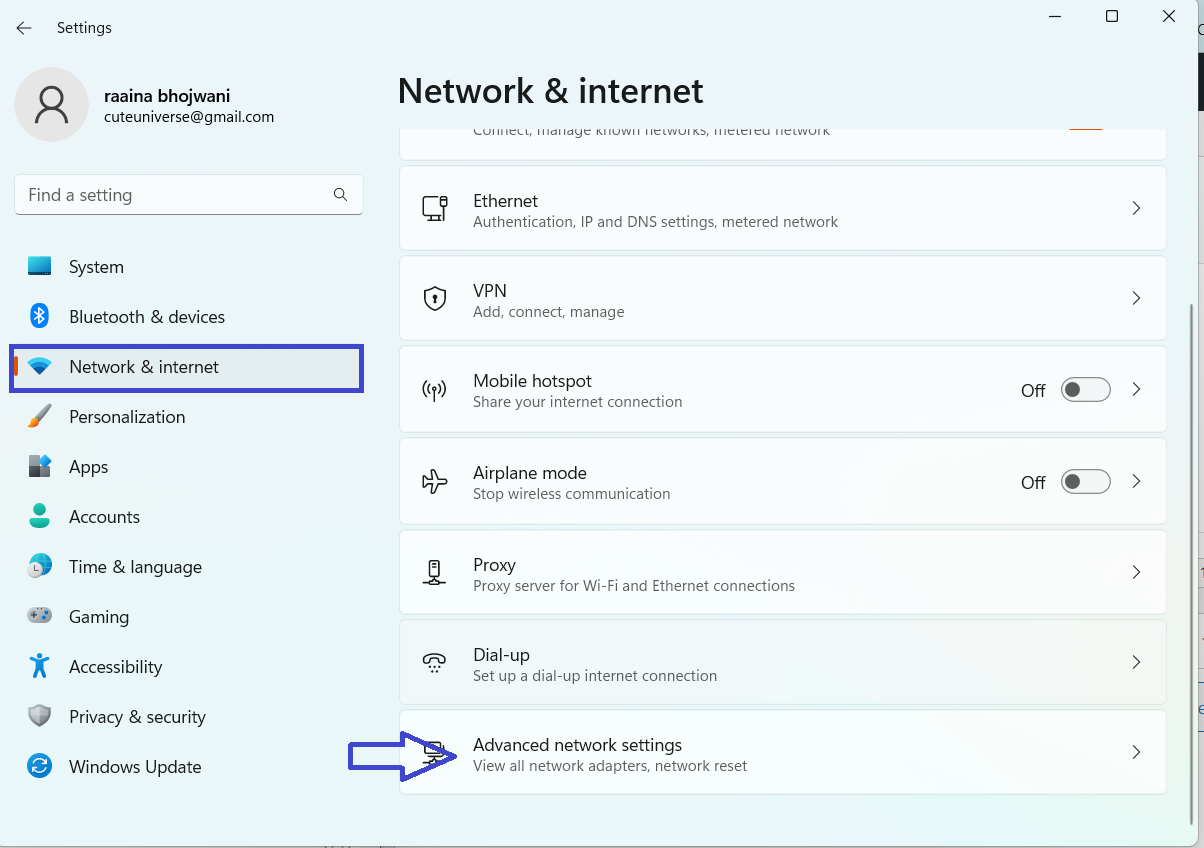
3. Click on “Network reset”.

4. Click “Reset now”.

Fix 8: Adjust the WiFi Power Management Settings
1. Open Device manager.
2. Click on the down arrow of Network adapters and right-click on your WiFi adapter. Choose Properties.
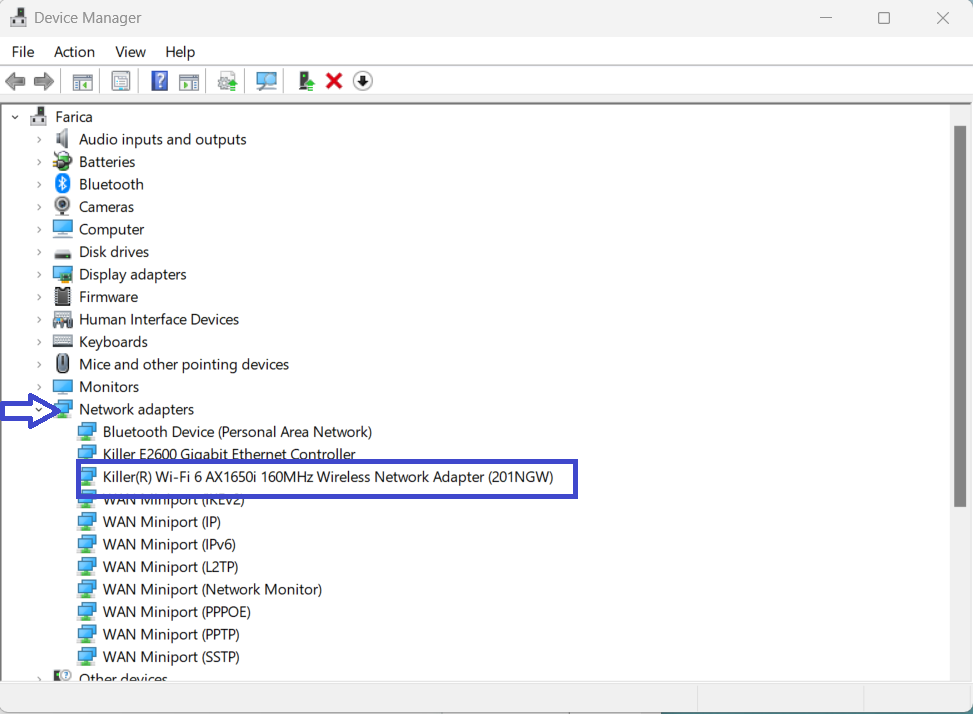
3. Select the “Power Management” tab and uncheck the “Allow the computer to turn off this device to save power” checkbox.

4. Click “OK”.
That’s it!
![KapilArya.com is a Windows troubleshooting & how to tutorials blog from Kapil Arya [Microsoft MVP (Windows IT Pro)]. KapilArya.com](https://images.kapilarya.com/Logo1.svg)



![[Latest Windows 10 Update] What’s new in KB5055612? [Latest Windows 10 Update] What’s new in KB5055612?](https://www.kapilarya.com/assets/Windows10-Update.png)


Leave a Reply