When you have your WiFi connected but no Internet access in Windows 11, it is the most frustrating issue. This situation can leave you bewildered and helpless as you are unable to perform essential online activities through a WiFi connection. In this context, it is essential to fix the causes of Wifi connected but no Internet access in Windows 11 and explore possible solutions to restore Internet connectivity.
Page Contents
Fix: WiFi connected but no Internet access in Windows 11
Fix 1: To start your Windows 11 Internet access restart your PC and WiFi router/modem
If there is no Internet access even if WiFi is connected, first restart your computer. If the problem persists, restart your connected modem or router. Check if the issue has been resolved.
Fix 2: Check your Internet connection
The basic step is to check your Internet connection. Check the WiFi signal on the taskbar. If the WiFi connection is on but still you can access the Internet, then there is the possibility that the Internet connection is down. Follow the below-given fixes to solve the problem.
Fix 3: To start your Internet access in Windows 11 run the network troubleshooter
Follow the steps to start Internet access even though WiFi is connected:
1. Go to settings from the Start menu.
2. Click on Systems and then click Troubleshoot.
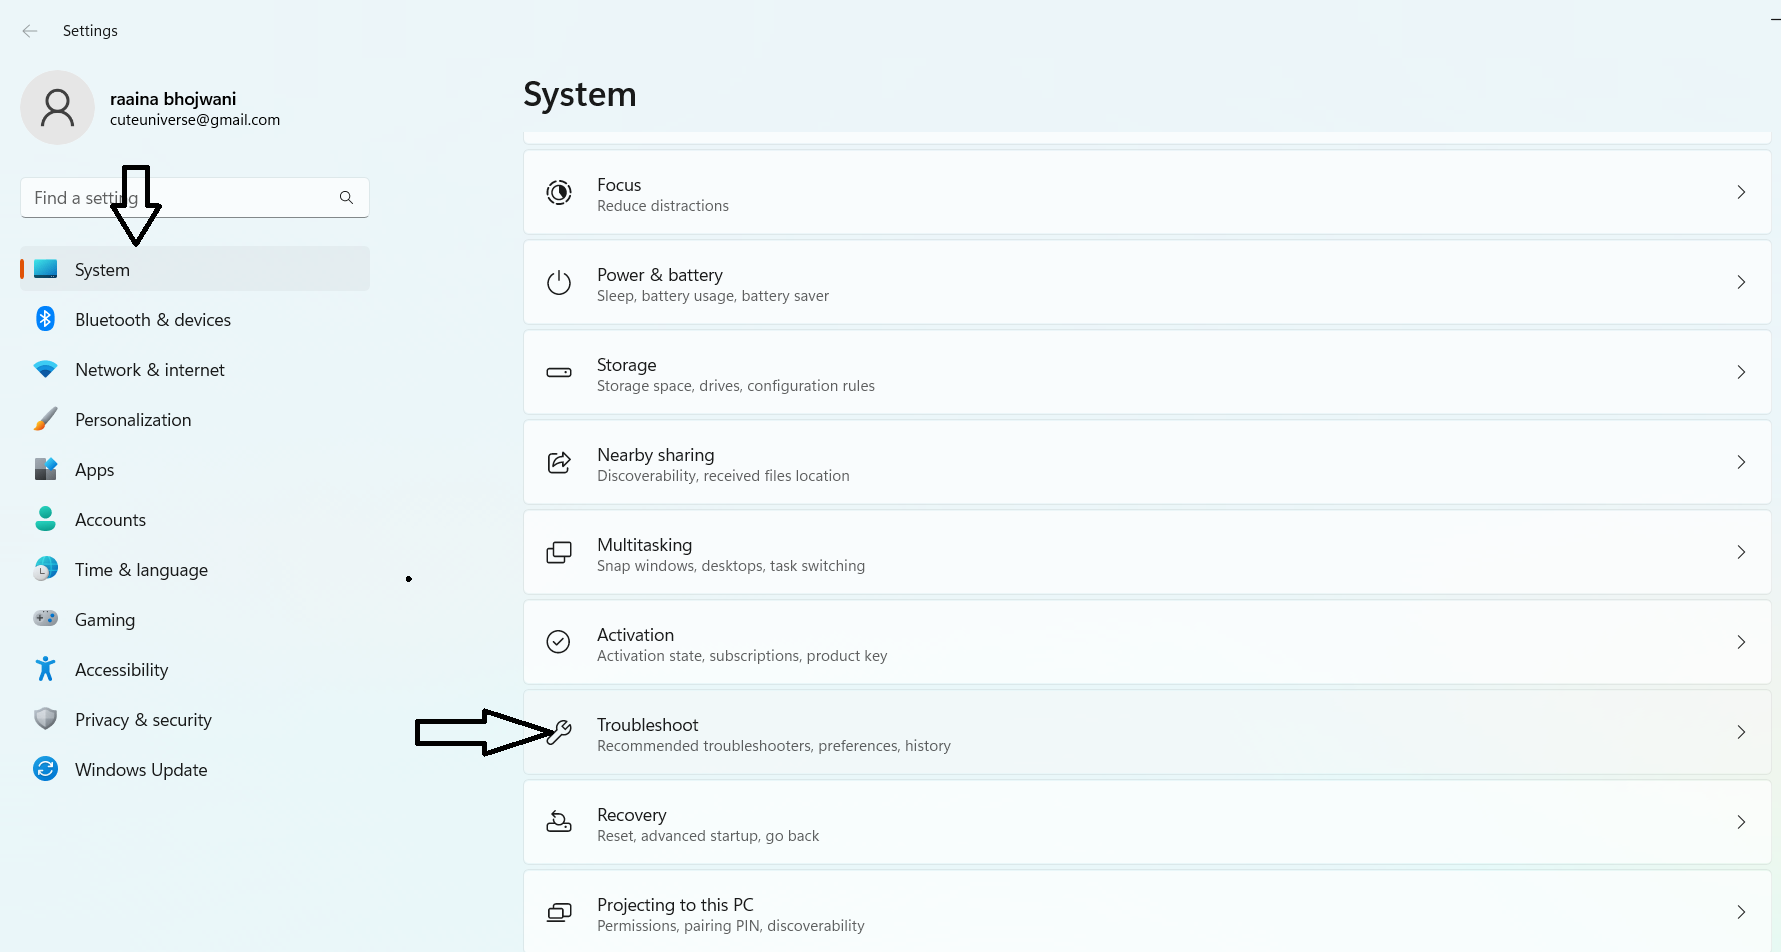
3. Next, click on Other Troubleshooter and search for Network Adapter, and click Run.

4. Follow the instructions, click on Close, and restart the system.
Fix 4: To start your Internet access in Windows 11 check Mac address filtering
Go to router setting. Then go to firewall>>Advanced settings. Find the settings tab called MAC Filtering. Your MAC address filtering is enabled if the checkbox is ticked.
Fix 5: Change the network IP address
Follow the given steps if Wifi is connected but no Internet access:
1. Go to Start Menu > Settings > Network and Internet > WiFi.
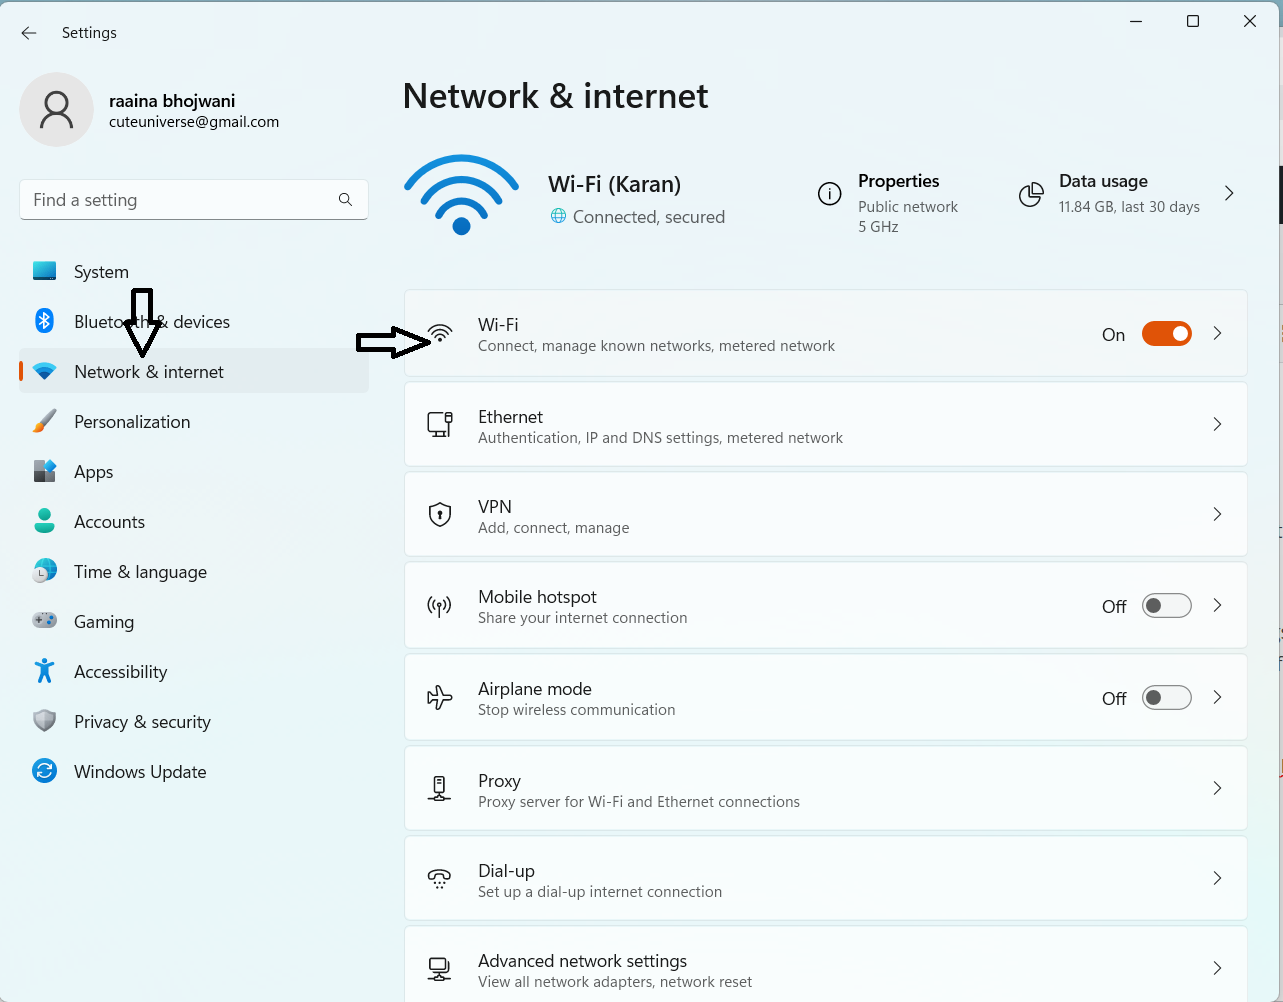
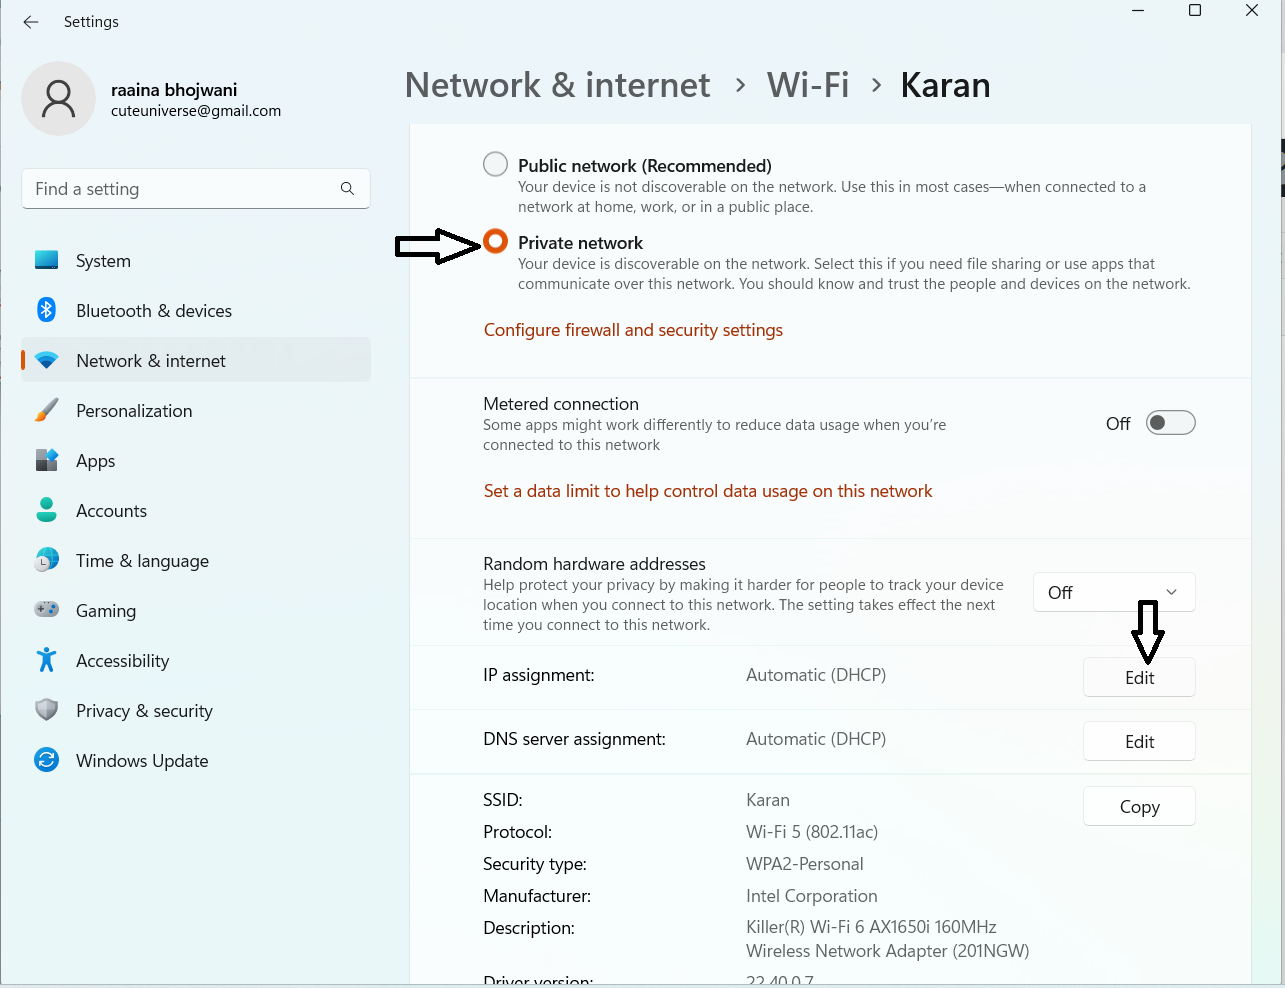
2. Select the name of the WiFi that you are using and set the Network Settings to Private.
3. Scroll down to IP assignment and click Edit.
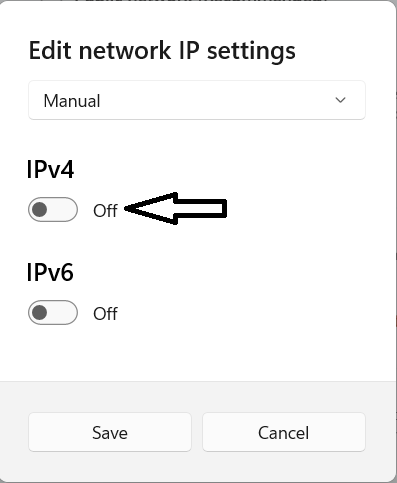
4. Set Automatic(DHCP) to Manual and toggle IPv4. Click Save.
5. Open the command prompt and give the command ipconfig /all

6. Locate the DHCP Server and copy the IP address from the command prompt.
7. Go to WiFi settings by following the above-given steps. Go to IP settings and click Edit.
8. Paste the IP address from the command prompt in the IP Address Fields. Delete the last digit and type any number between 5-30.

9. Similarly, copy Subnetmask, gateway, preferred DNS, and alternate DNS from the command prompt and paste them into the fields given in this window. Click Save.
Fix 6: To start your Internet access try to turn off other network-related tools
Network-related tools in Windows 11 can be turned off like disconnecting from the VPN server, shutting down the firewall or antivirus software, toggling off the metered connection setting in the Networks and Internet option, and disabling the airplane mode.
Fix 7: Update your OS Windows 11 for Internet access with Wifi Connected
Go to Start Menu > Settings > Windows updates > Check for Updates.
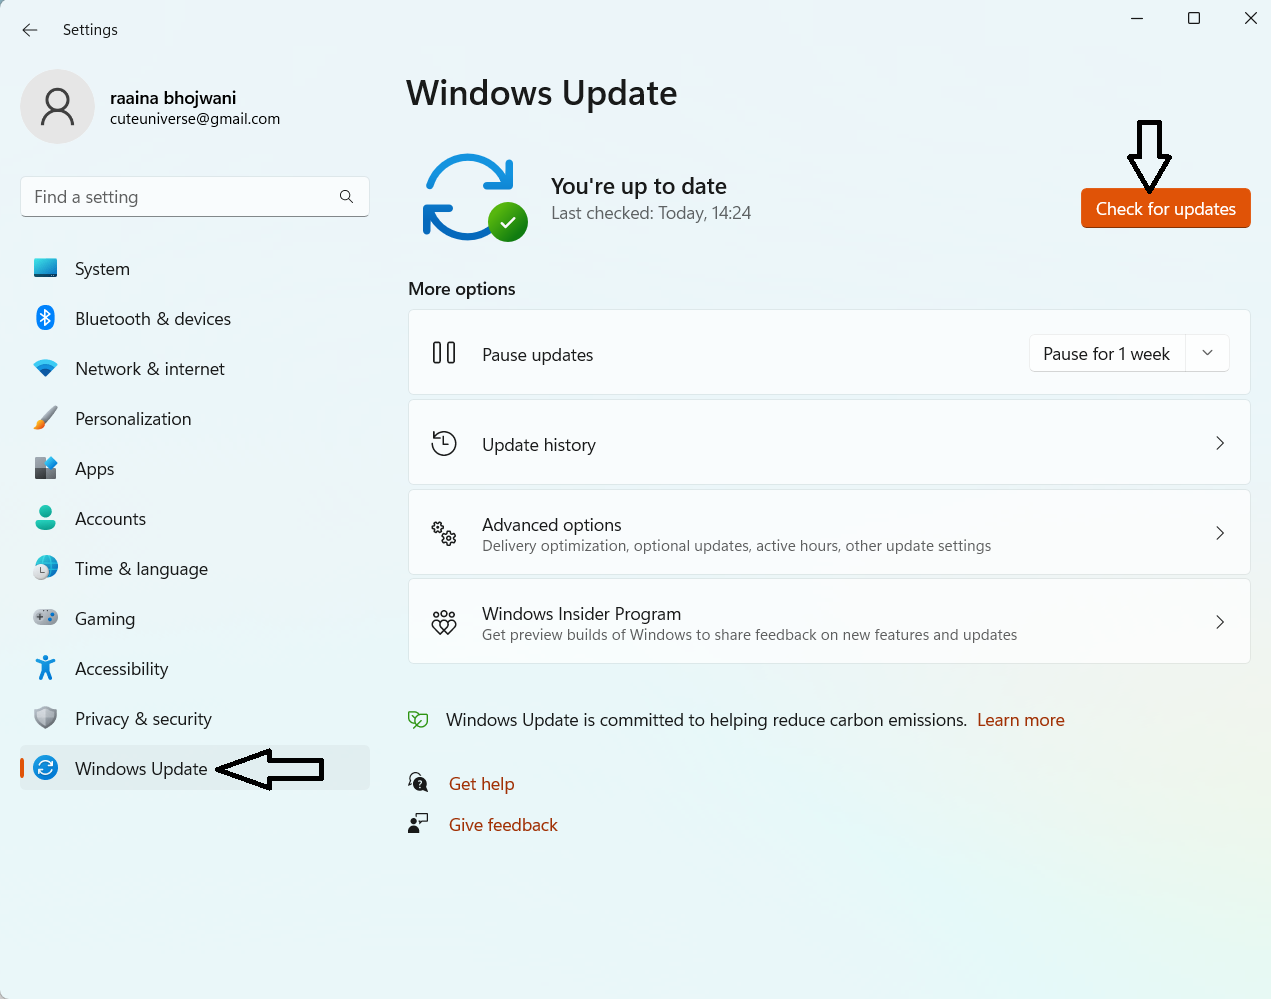
Windows will look for updates and install them automatically. Once completed, restart your PC.
Fix 8: Reset network adapter and DNS using the command prompt
Type cmd in the search menu. Right-click on CMD and run as admin. Type the following commands and then restart your computer.

Fix 9: Reinstall the network adapter
1. Go to Start menu > device manager > network adapters.
2. Right-click on the WiFi Wireless Network Adapter and select Uninstall.

3. Click Yes and restart your computer.
Fix 10: Call your Internet service provider
If any of the above fixes do not start your Internet access in Windows 11, call your Internet service provider as your Internet connection must be down.
That’s it!
![KapilArya.com is a Windows troubleshooting & how to tutorials blog from Kapil Arya [Microsoft MVP (Windows IT Pro)]. KapilArya.com](https://images.kapilarya.com/Logo1.svg)




![[Latest Windows 10 Update] What’s new in KB5055612? [Latest Windows 10 Update] What’s new in KB5055612?](https://www.kapilarya.com/assets/Windows10-Update.png)


Leave a Reply