Are you facing an issue with the voice typing? In this post, learn how to fix voice typing not working in Windows 11 issue. These troubleshooting tips will help you in using voice typing properly in any app or the browser.
Now, let’s have a look at different fixes to resolve the issue effectively!
Page Contents
Fix: Voice Typing not working in Windows 11
Fix 1: Examine Microphone Settings
1. Open Settings and go to the Privacy & security tab. After that, click on Microphone.
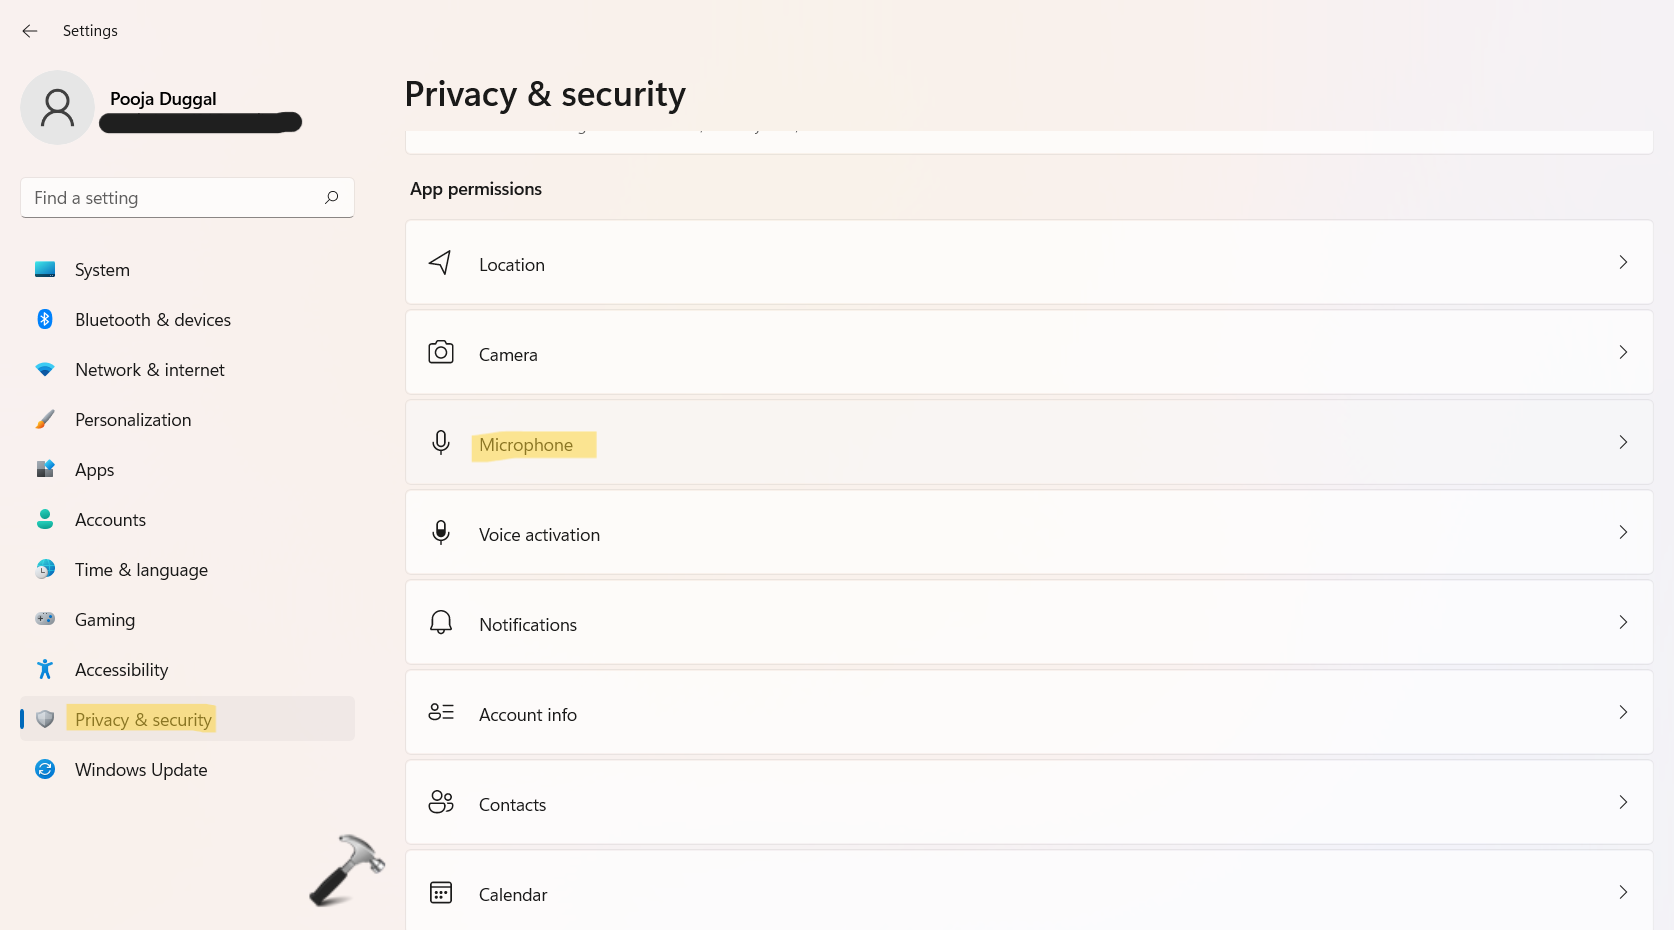
2. Now, toggle the switch On present next to Microphone access.

3. Once done, check if Voice typing is working properly now.
Fix 2: Verify Keyboard Shortcut
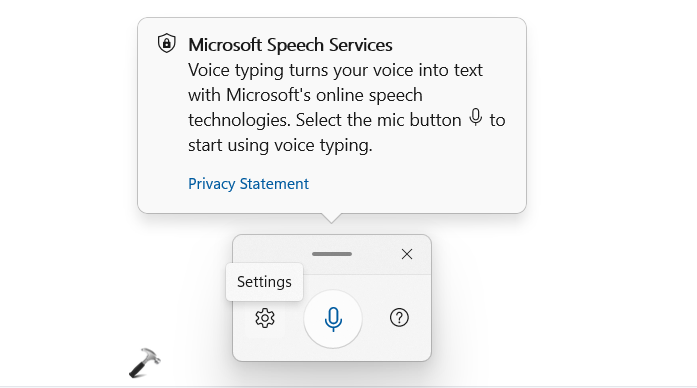
By default, the Windows + H keyboard shortcut opens the Voice typing panel in Windows 11. If you have assigned this keyboard shortcut to something else, Voice typing will not work. So, it is recommended to verify the keyboard shortcut.
Fix 3: Select Speech Language
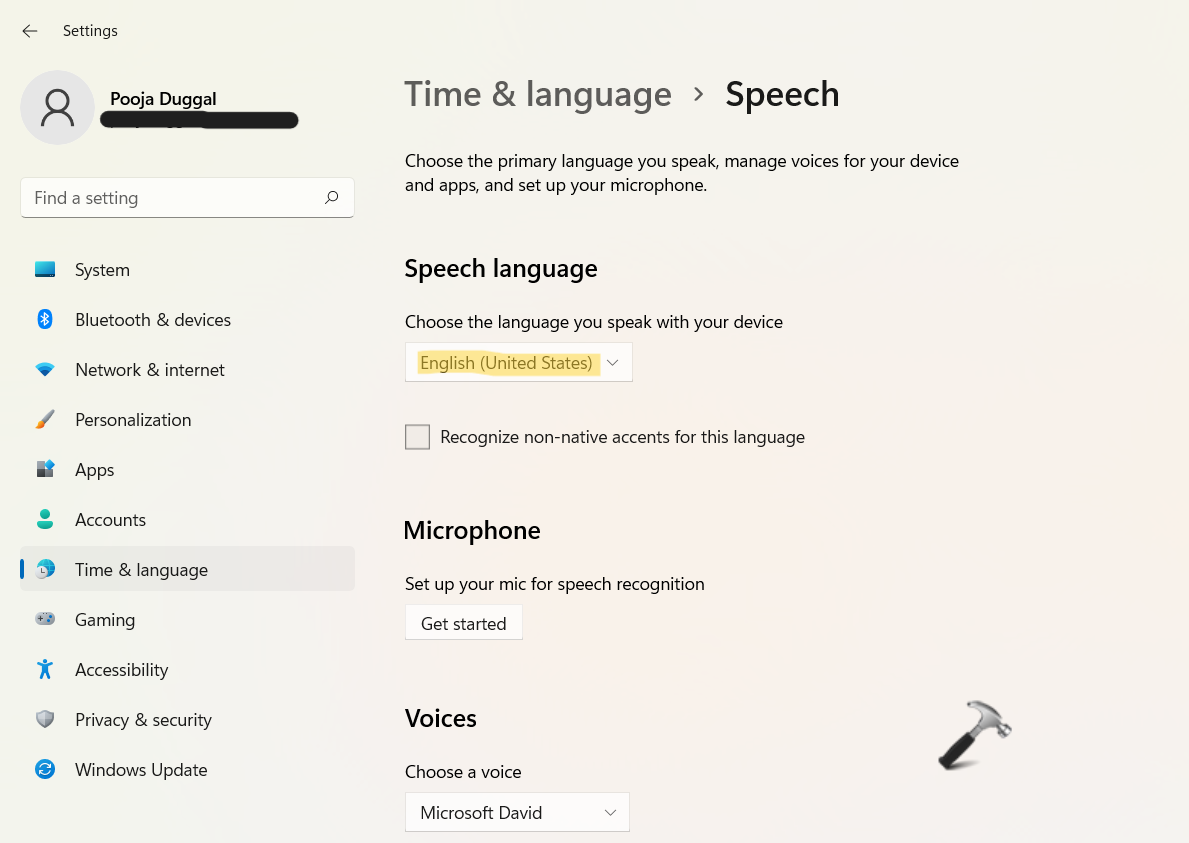
1. Firstly, open Settings and then, go to the Time & language In the right pane, click on Speech.

2. After that, select English (United States)from the drop-down menu present below Choose the language you speak with your device.
Fix 4: Install Microphone Driver
If you are using an external or third-party microphone for voice typing, you have to install the microphone driver. So, install the corresponding microphone driver if you are using an external microphone. However, it is not required on your Windows PC if you are using the in-built microphone.
Fix 5: Run Troubleshooter
If nothing works for you, you can try using the Playing Audio Troubleshooter. To do so, follow the given instructions below:
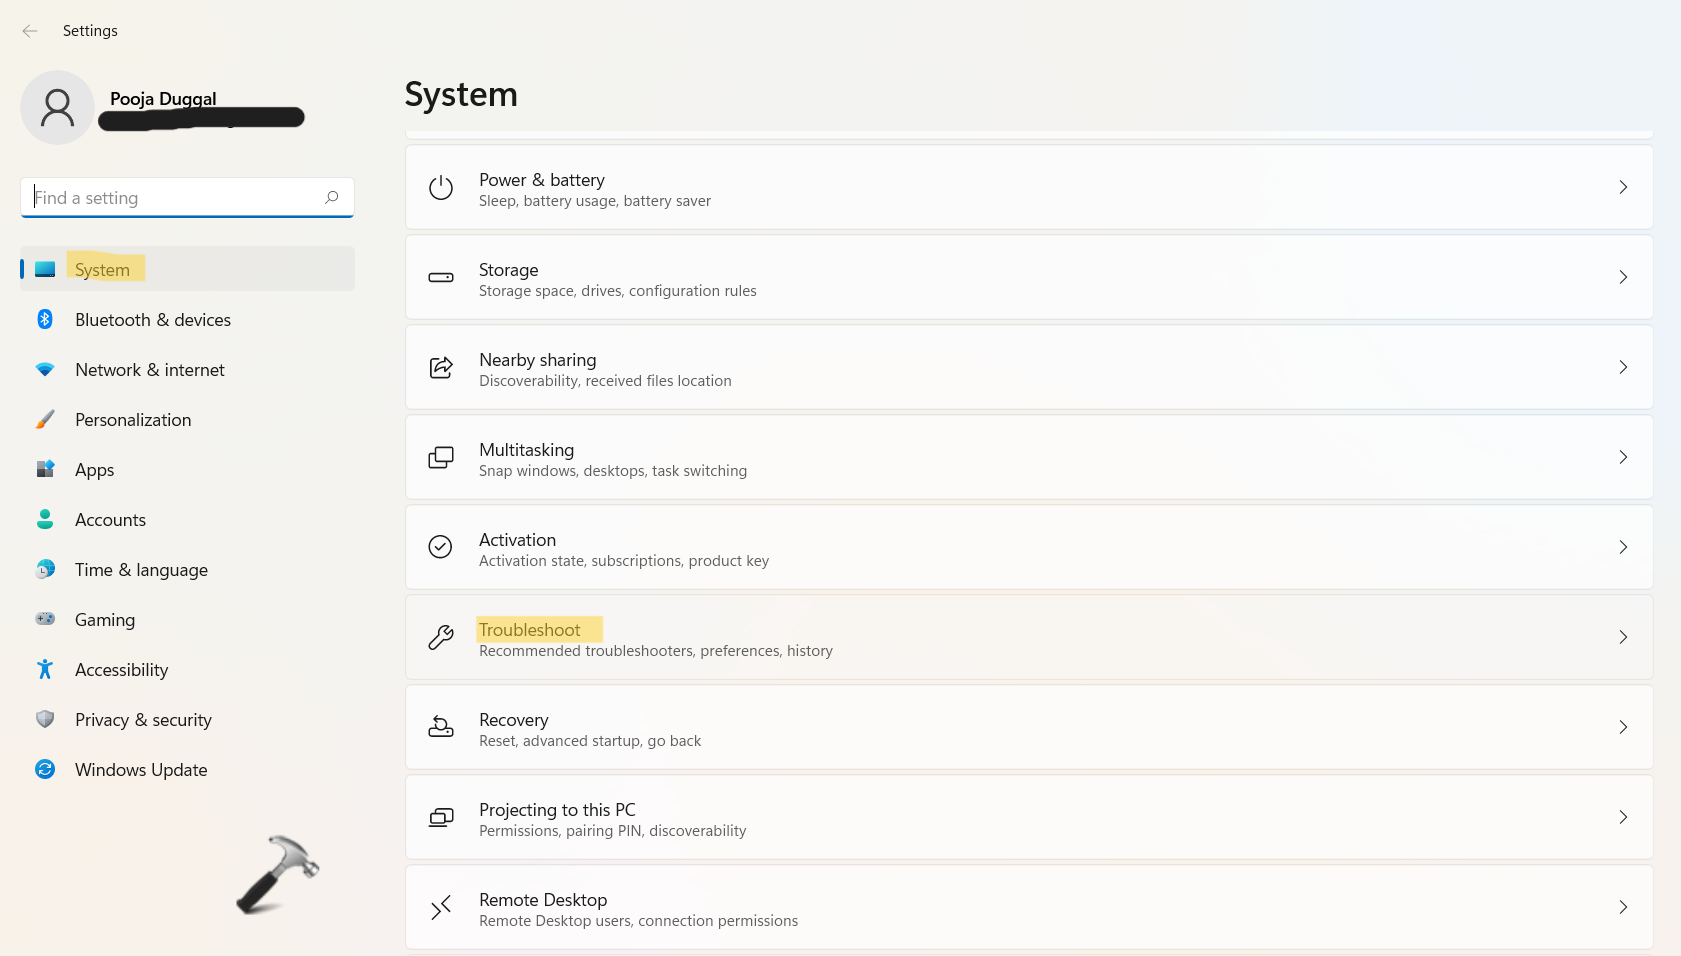
1. Open Settings and go to the System tab. Next, click on Troubleshoot.
2. After that, click on Other troubleshooters.
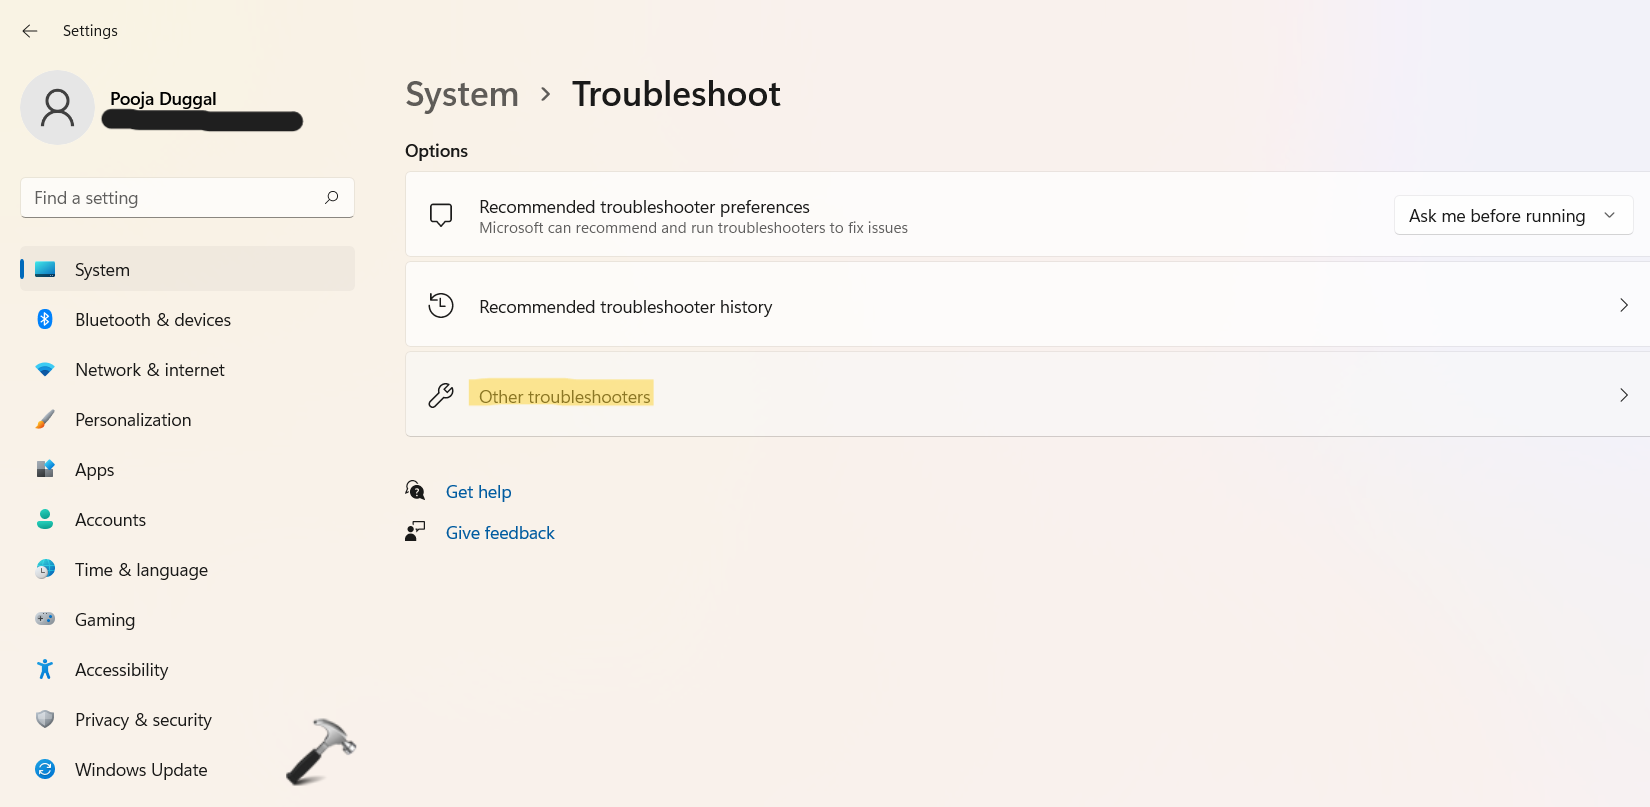
3. Then, look for the Recording Audio troubleshooter and click on the Run tab present next to it.

So, this is how to fix Voice typing not working in Windows 11. Try these fixes one by one until you find the best solution that works for you. Now, try them out and fix the voice typing issue hassle-free!
![KapilArya.com is a Windows troubleshooting & how to tutorials blog from Kapil Arya [Microsoft MVP (Windows IT Pro)]. KapilArya.com](https://images.kapilarya.com/Logo1.svg)




Leave a Reply