Undergoing issues with USB ports on your Windows 11 system can be a source of frustration, disrupting the seamless connectivity of your external devices. This guide aims to provide comprehensive solutions and troubleshooting steps to fix USB ports not working in Windows 11. From basic checks to more advanced fixes, we will guide you through the process of restoring the proper functionality of your USB ports, ensuring a smooth connection with your external devices.
Page Contents
Fix USB ports not working in Windows 11
Here, you’ll find the top 11 solutions to resolve the issue.
Solution 1: Try Different Port
If you think your device is fine but it’s not working on one USB port, it might be a problem with that port. Try unplugging your USB device from the current port and plug it into another one.
If Windows 11 recognizes the device and it works well, then the issue might be with the first port. You can then focus on figuring out what’s going on with that specific port.
Solution 2: Restart Windows 11
1. Keep the USB device plugged in and press the Windows key.

2. Click on the “Power” icon and click “Restart“.
Solution 3: Re-install USB Drivers
1. Press the Windows Key + X. Select “Device Manager“.
2. Expand the “Universal Serial Bus Controller” option.
3. Right-click on “USB Root Hub (USB 30)” and click “Uninstall device“.
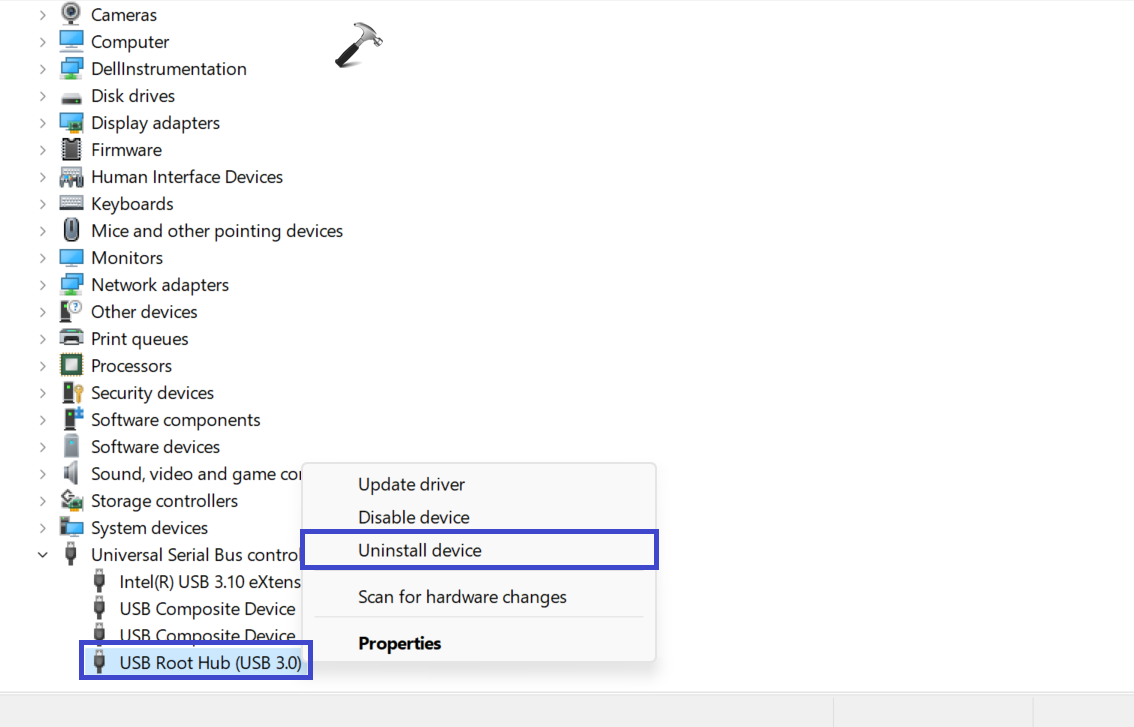
4. Restart the PC. Windows will automatically re-install the latest driver for your device.
Solution 4: Inspect your USB Port and your device
Before you do anything major to fix your PC’s USB ports, take a look for any possible issues.
First, unplug your USB device and inspect the cables and the USB port. If you find a broken cable, consider getting a new one. If there’s dust in the USB port, use canned air to clean it out.
Once you’ve checked for damage and cleaned the USB port, plug your device back in and see if it solves the problem of the USB not working on Windows 11.
Solution 5: Check for Software Updates using OEM Tools
1. Open the Search bar and type “Dell update“. If you have Lenovo, then type “Lenovo update”.
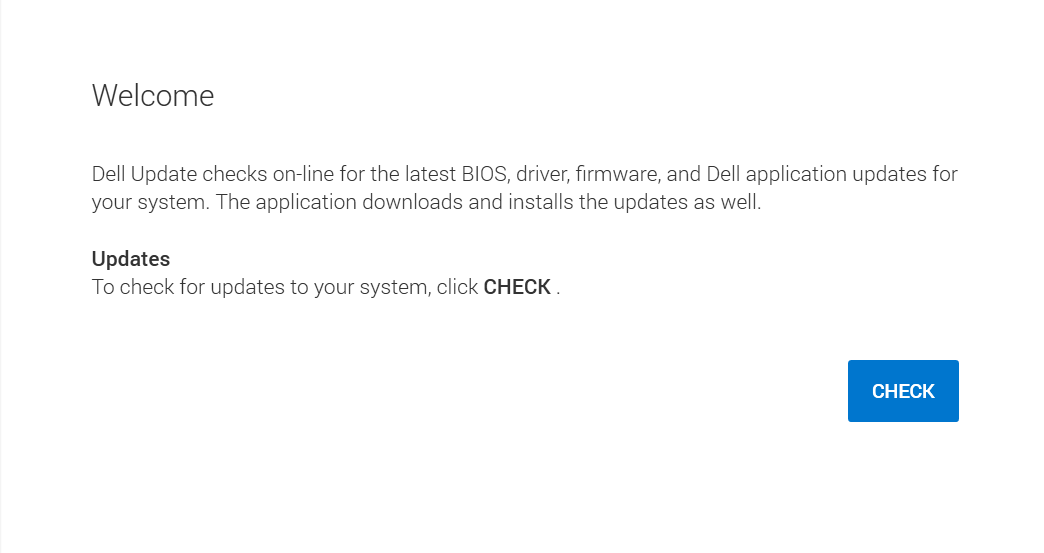
2. Click on the “Check” option.
Find and launch the manufacturer’s update tool and install hardware updates if needed.
Solution 6: Change Power Management Settings
1. Press the Windows key + R. Type “devmgmt.msc” and click OK.
2. Expand the “Universal Serial Bus controller“.
3. Right-click the “USB Root Hub (USB 30)” and click “Properties“.
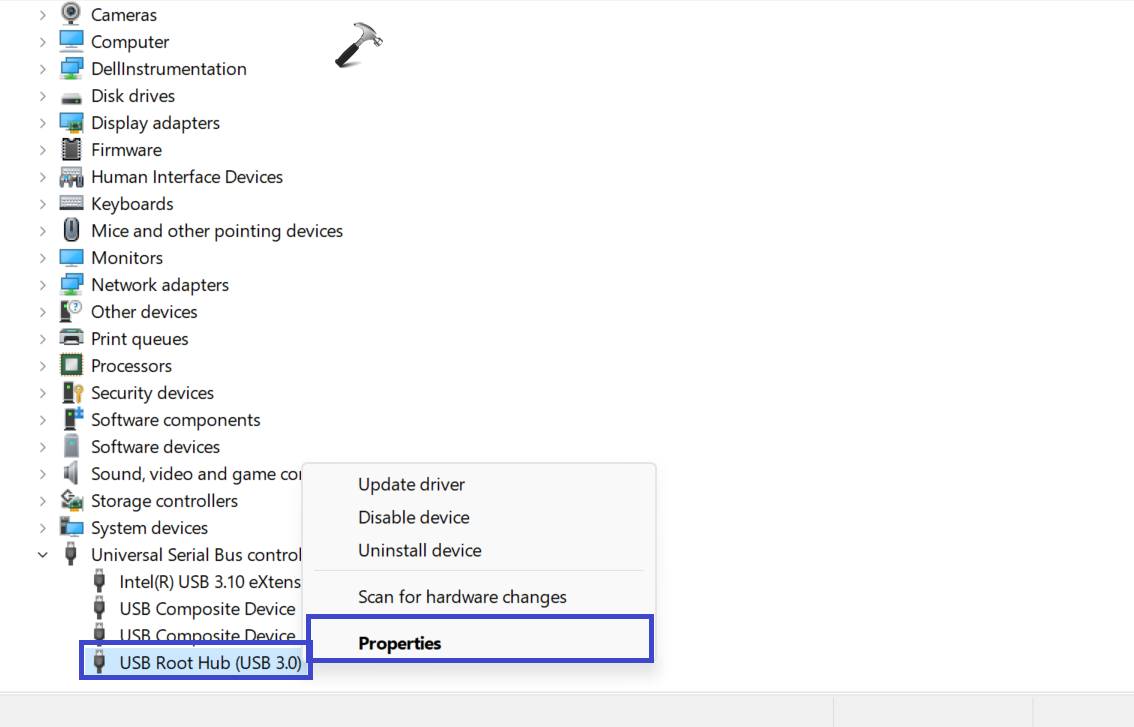
4. Under the Power Management tab, uncheck the “Allow the computer to turn off this device to save power” box.

Solution 7: Replace USB Device
If your USB port is okay but your device still isn’t recognized by Windows, the problem might be with the device itself. Try using a different device temporarily to see if Windows recognizes it.
For instance, if you’re having trouble with a USB hard drive, check if it works on another computer before thinking about getting a new one. This helps figure out if the issue is with the device or something else.
Solution 8: Run SFC and DISM Scan
1. Open the Command Prompt and run as administrator.
2. Copy and paste the below command:
sfc /scannow

Press Enter.
3. After executing the above command, copy and paste the below command:
DISM /Online /Cleanup-Image /RestoreHealth

Press Enter.
4. Restart the PC after executing the commands.
Solution 9: Check for Windows Update
1. Open Settings App and go to “Windows Update”.
2. Click on “Check for Update“.

3. If updates are available, proceed accordingly.
Solution 10: Check for Software and Driver Updates Manually
1. First download the latest USB device or software driver.
2. Press the Windows key + R. Type “devmgmt.msc” and click OK.
3. Expand the Device Manager and find your USB device from the list.
4. Right-click on the driver and click “Update driver“.
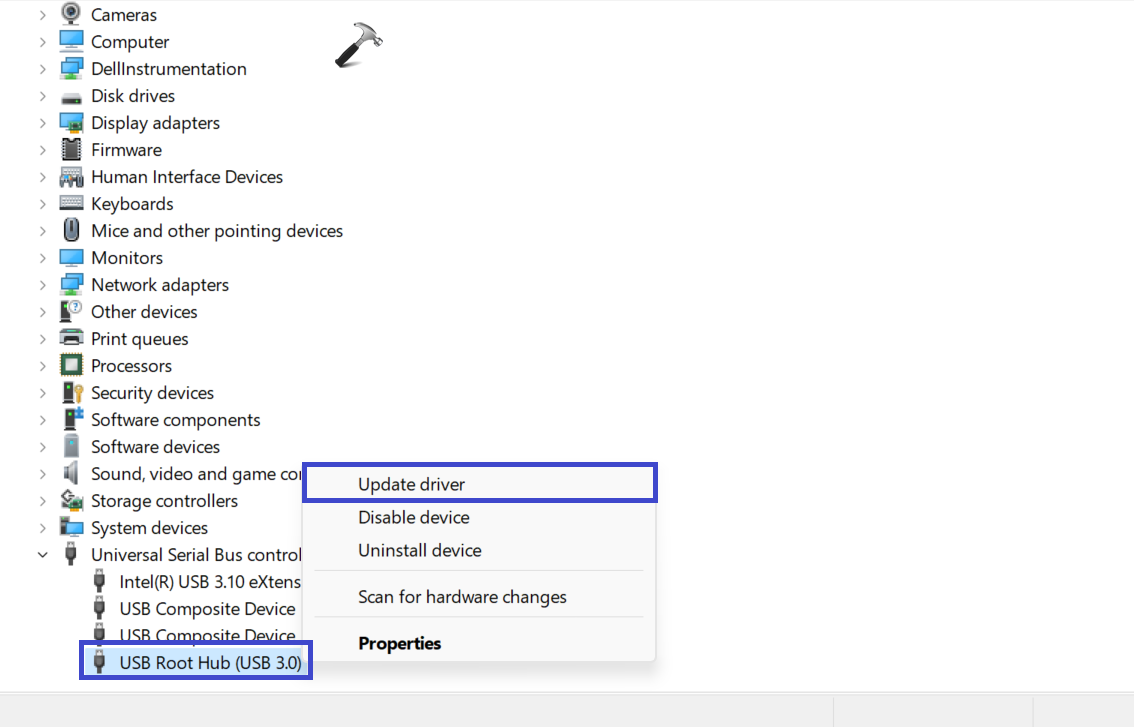
5. A prompt box will appear. Select the “Browser my computer for drivers” option.

6. Follow the on-screen instructions to update the driver.
Solution 11: Disable USB Selective Suspend Power Option
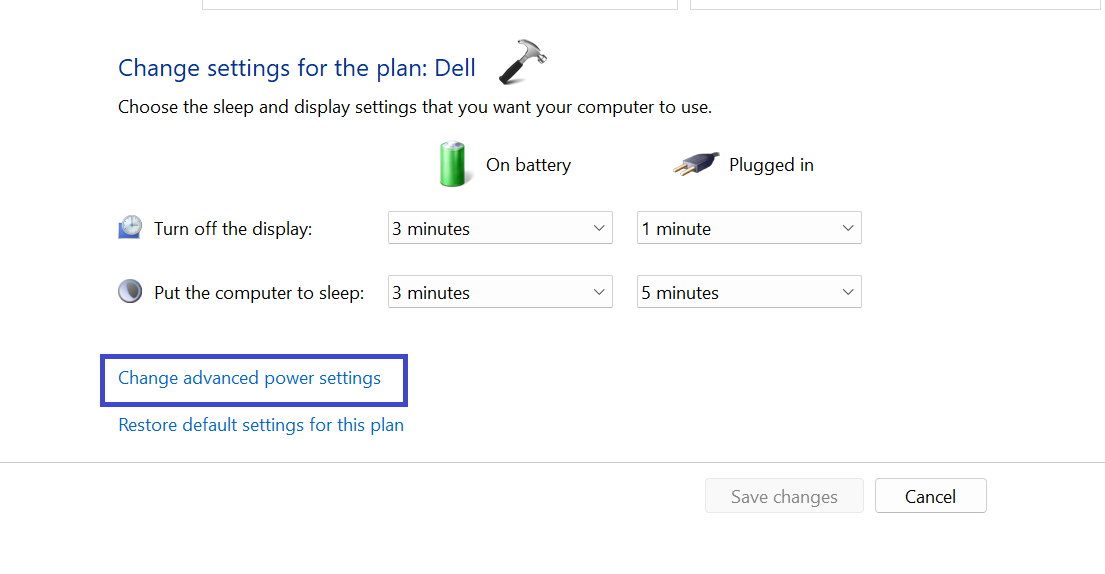
1. Open the Search bar and type “Edit power plan“. Click “Open“.
2. Now, click on the “Change advanced power settings” option.
3. Under the Power Options, expand “USB settings“.

4. Disable the “USB selective suspend setting”.
5. Click OK followed by Apply.
That’s It!
![KapilArya.com is a Windows troubleshooting & how to tutorials blog from Kapil Arya [Microsoft MVP (Windows IT Pro)]. KapilArya.com](https://images.kapilarya.com/Logo1.svg)




Leave a Reply