In the modern era of computing, the visual appeal of operating systems has become increasingly vital, offering users a captivating and immersive experience. Windows 11, the latest iteration of Microsoft’s renowned operating system, introduces a range of captivating features, including transparency effects, designed to enhance the overall user interface. However, some users may encounter the issue of transparency effects not working as intended. Whether it’s missing transparency, glitchy visuals, or outright non-functionality, this problem can detract from the overall aesthetic and user experience. In this article, we will delve into effective solutions to fix these captivating visual elements and ensure a seamless computing journey.
Page Contents
Fix: Transparency Effects not working on Windows 11
Fix 1: Disable Power Saver Mode
1. Open Setting by pressing the Windows + I keys.
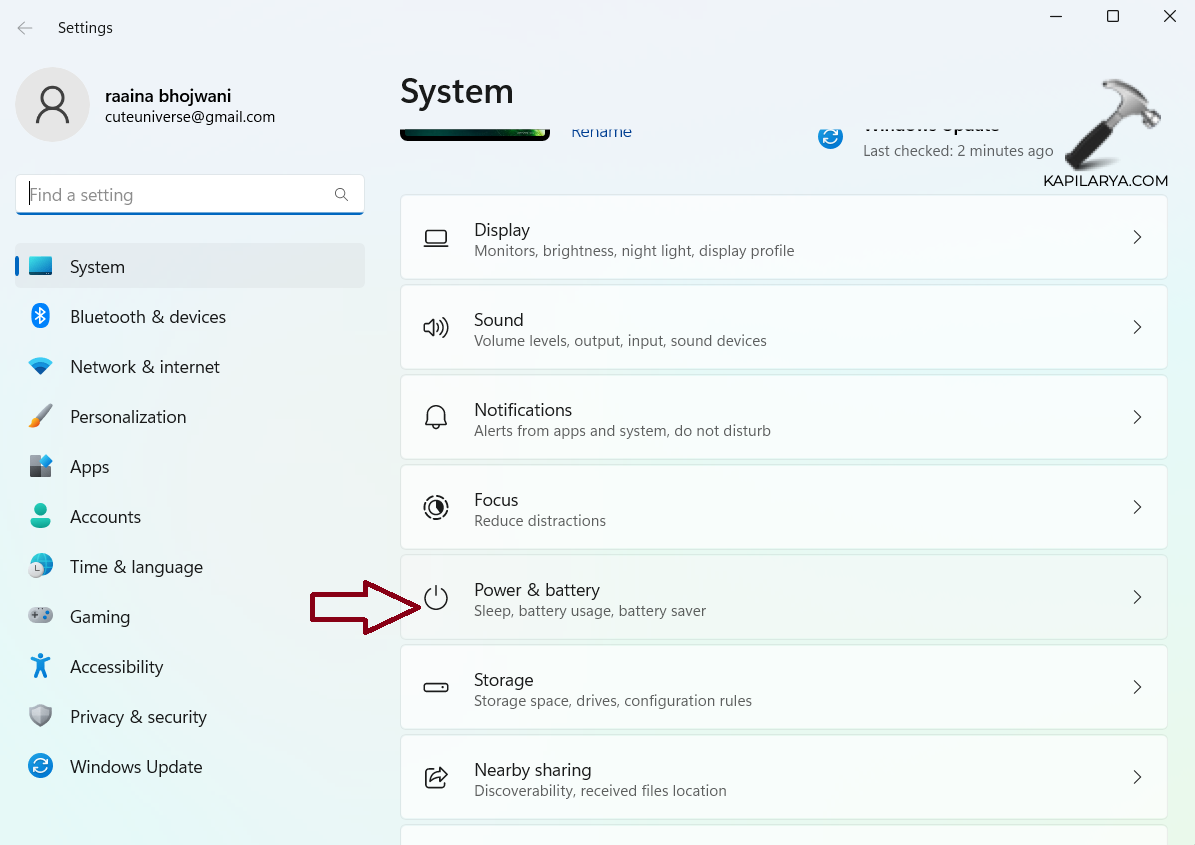
2. Click on “Battery saver”.

3. Choose the option “Never” from the menu.
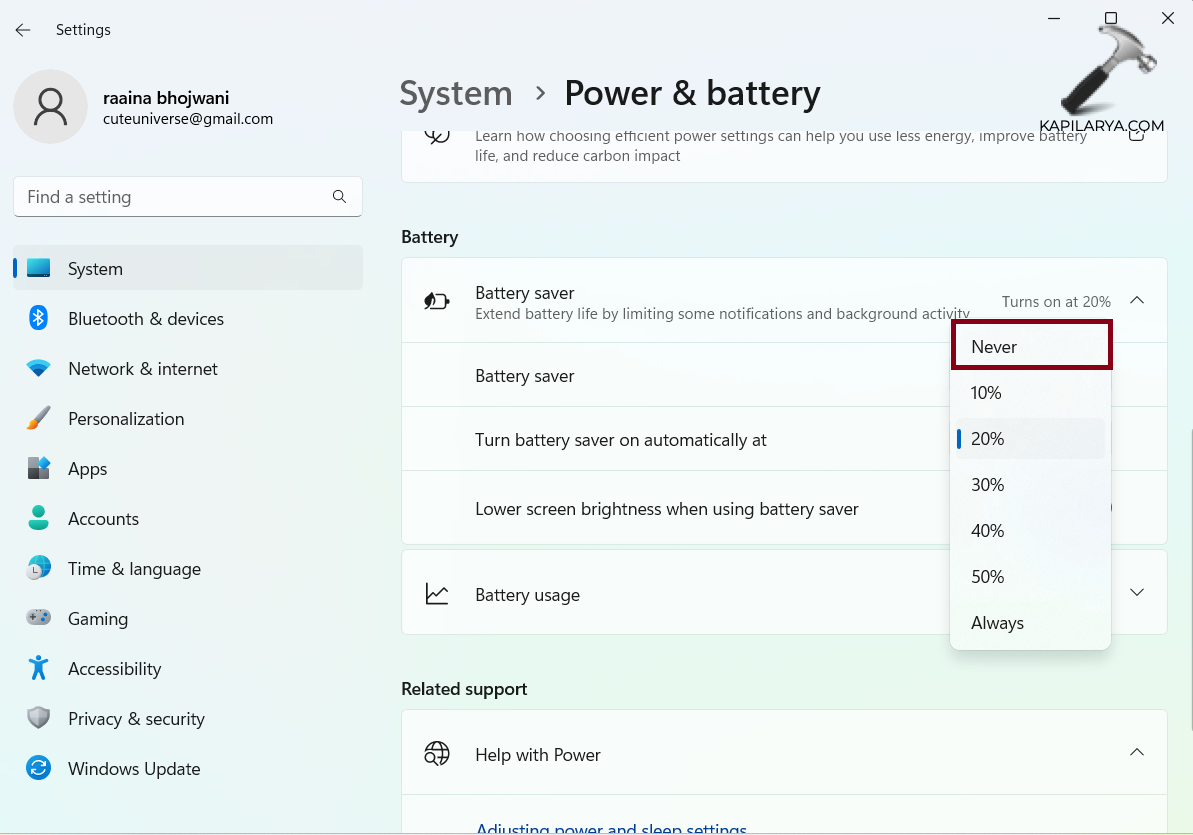
4. Check if the issue has been resolved.
Fix 2: Enable Transparency Effect Using Registry Editor
1. Open the Registry editor as an administrator from the Start menu.
2. Navigate to the path :
Computer\HKEY_CURRENT_USER\Software\Microsoft\Windows\CurrentVersion\Themes\Personalize
3. Click on “Enable Transparency” and change its value to “1”.


4. Click on the “OK” button.
Fix 3: Clean Boot your PC to fix Transparency Effects not working on Windows 11
1. Open Run by pressing Windows + R keys.
2. Type msconfig and press Enter.

3. Select the “Services” tab.
4. Then check on “Hide all Microsoft services”.
5. Next click on the “Disable all” button > “OK” button.

6. Now, click on the “Startup” tab.
7. Click on “Open Task Manager”.

8. Click “Details” and then click on the apps you think can interfere with the operation.
9. Next click on “End task”.

10. Press OK after you have ended all the interfering tasks/apps.
11. Restart your computer.
Fix 4: Turning On the Transparency effect from Personalization Settings
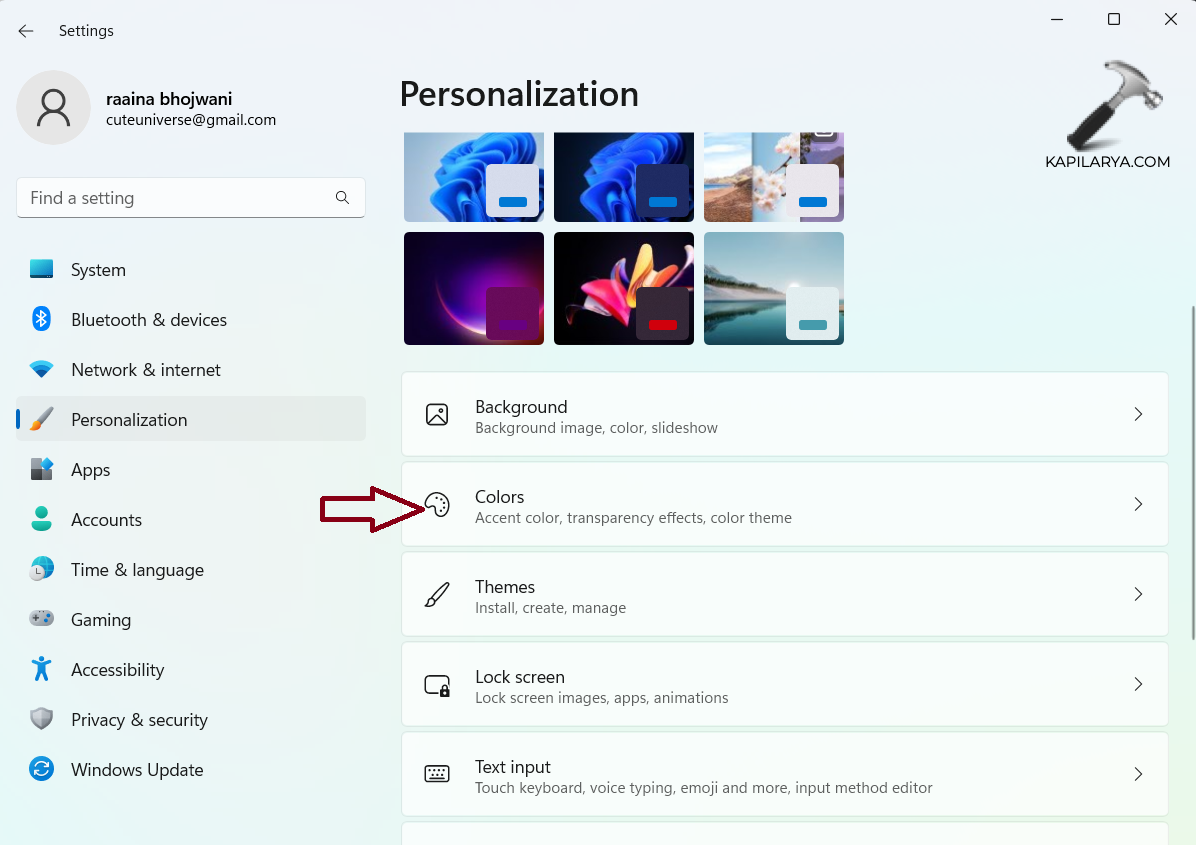
1. Open Settings and go to “Personalization”.
2. Click on “Colors”.
3. Toggle the “Transparency effects” option button to “On”.
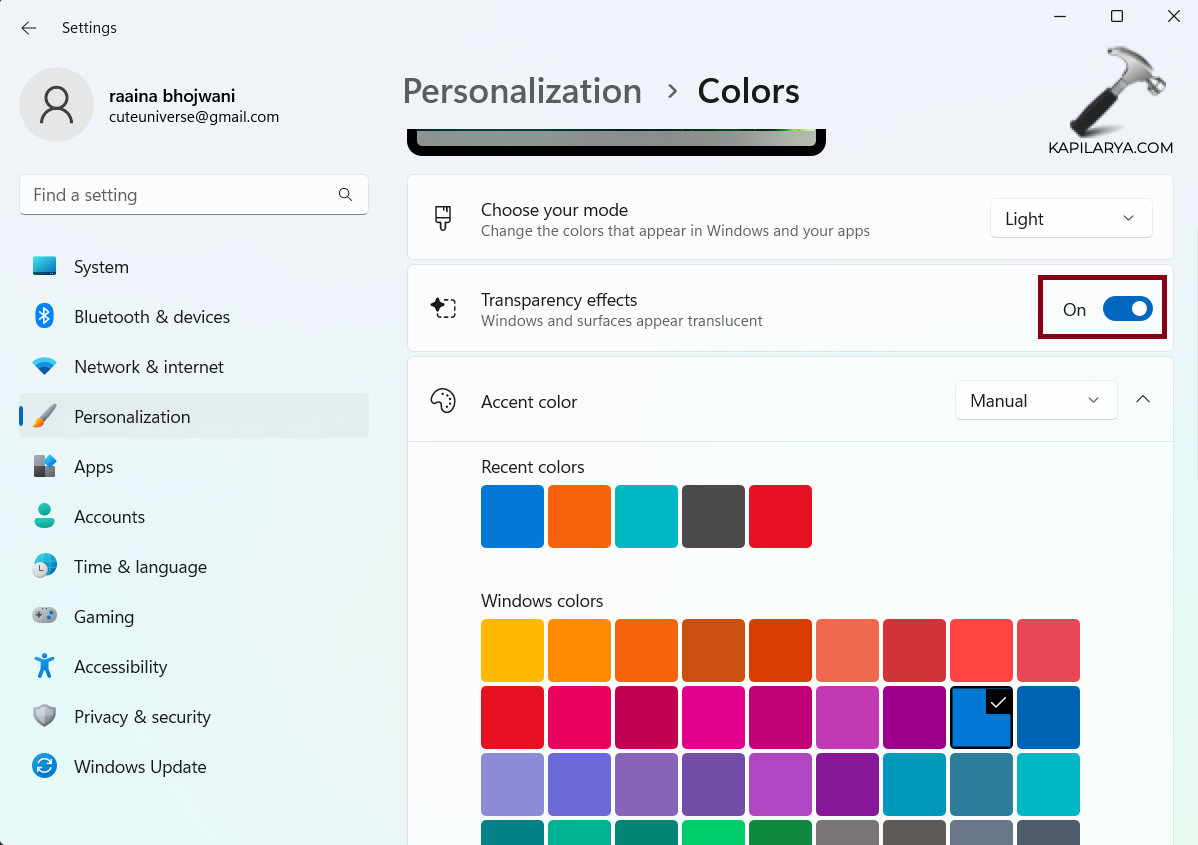
4. Close the Window.
Fix 5: Change Power Settings to fix Transparency Effects not working on Windows 11
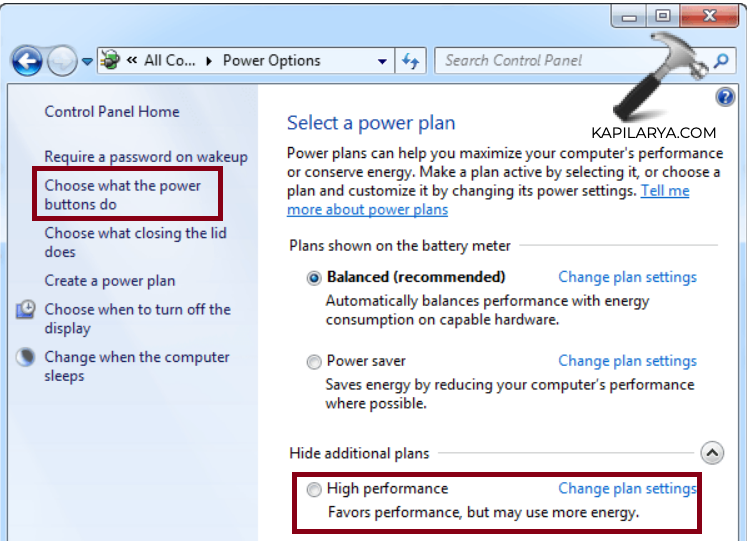
1. Open the Control panel.
2. Click on “Hardware and Sound”.

3. Next, click on “Power Options”.

4. Then click “Choose what the power buttons do” > click “High performance”.
Fix 6: Update Windows
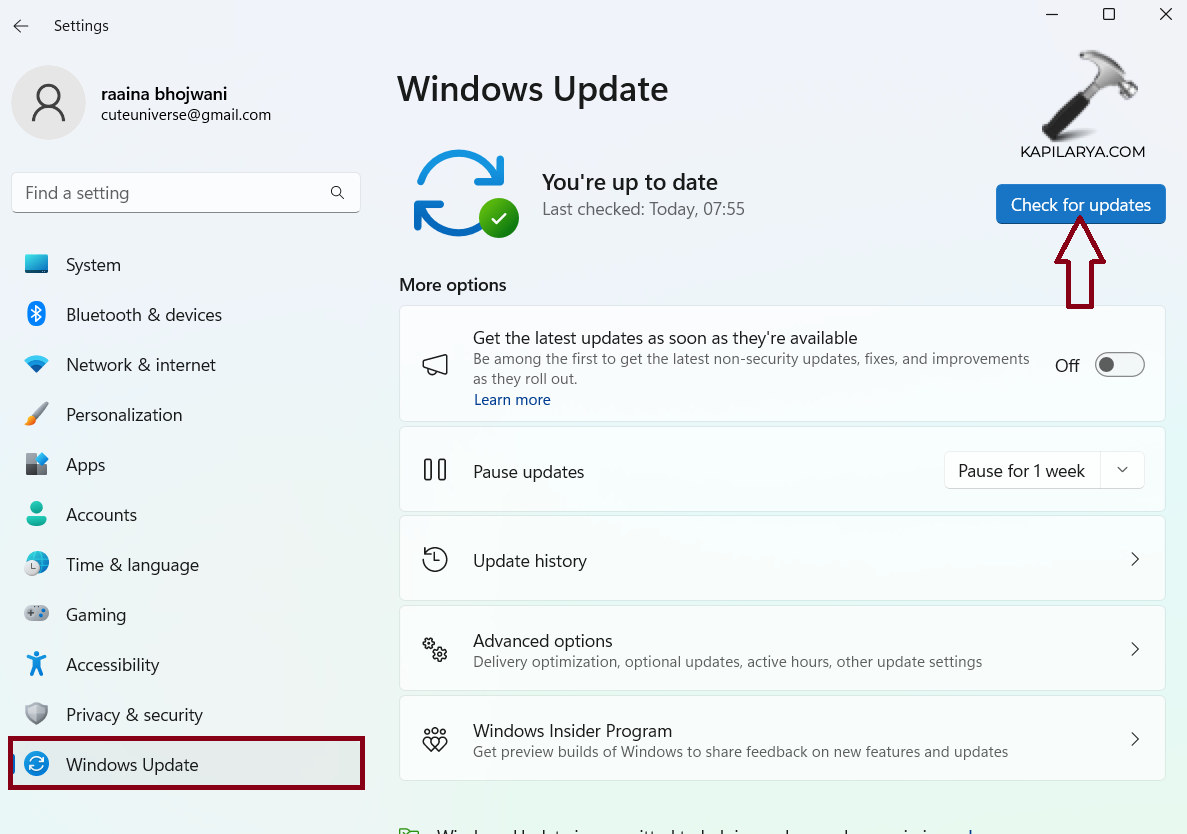
1. Open Settings by pressing the Windows + I keys.
2. Click on “Windows Update”.
3. Click on “Check for updates”.
4. Restart your computer after the process completes.
Fix 7: Upgrade to Genuine Windows Product
Transparency effects play a crucial role in enhancing the visual aesthetics and user experience of the operating system. By upgrading to an authentic Windows version, you ensure that your system receives essential updates and patches, which may resolve any bugs or compatibility issues causing the transparency effects problem. Additionally, using a legitimate Windows product ensures you have access to comprehensive support resources from Microsoft, enabling you to troubleshoot and resolve such issues effectively, thereby ensuring a seamless and visually appealing computing experience.
That’s it!
![KapilArya.com is a Windows troubleshooting & how to tutorials blog from Kapil Arya [Microsoft MVP (Windows IT Pro)]. KapilArya.com](https://images.kapilarya.com/Logo1.svg)




Leave a Reply