TPM is a security chip built into your motherboard that helps protect your computer hardware and carry out cryptographic operations. Most modern CPUs and laptops come with an inbuilt TPM module. However, some older motherboards might not have a built-in TPM chip. If that’s the case, you might need to upgrade your CPU or purchase a separate TPM chip and install it. If you’re getting the ‘TPM Device Not Detected’ error in Windows 11, this step-by-step guide can help you fix it.
Page Contents
Fix: TPM not detected in Windows 11
Method 1: Enable TPM Device
Before you try anything, you should check whether TPM is present and enabled on your computer.
1. Press Windows + R to open the Run Command box. Type “tpm.msc” in it and press Enter.
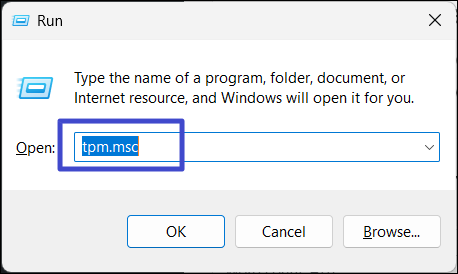
2. If you see the ‘Compatible TPM cannot be found’ message in the TPM Management console, it means either the TPM is disabled or not present in the motherboard.
If you believe the TPM is turned off, here’s how you can enable it.
1. Restart your computer and press the specific you see on the boot screen to enter the BIOS utility.
2. Go to the “Advanced” or “Security” section, search for the TPM configuration and enable it. If you can’t find it, you can check your motherboard manual for instructions.
3. Then, restart your PC and check the TPM Management (tpm.msc) console again to see if the TPM feature is enabled.
Method 2: Update the BIOS
This is general instruction for updating BIOS/UEFI firmware. You can also follow the specific instructions provided by your product manual to update the firmware.
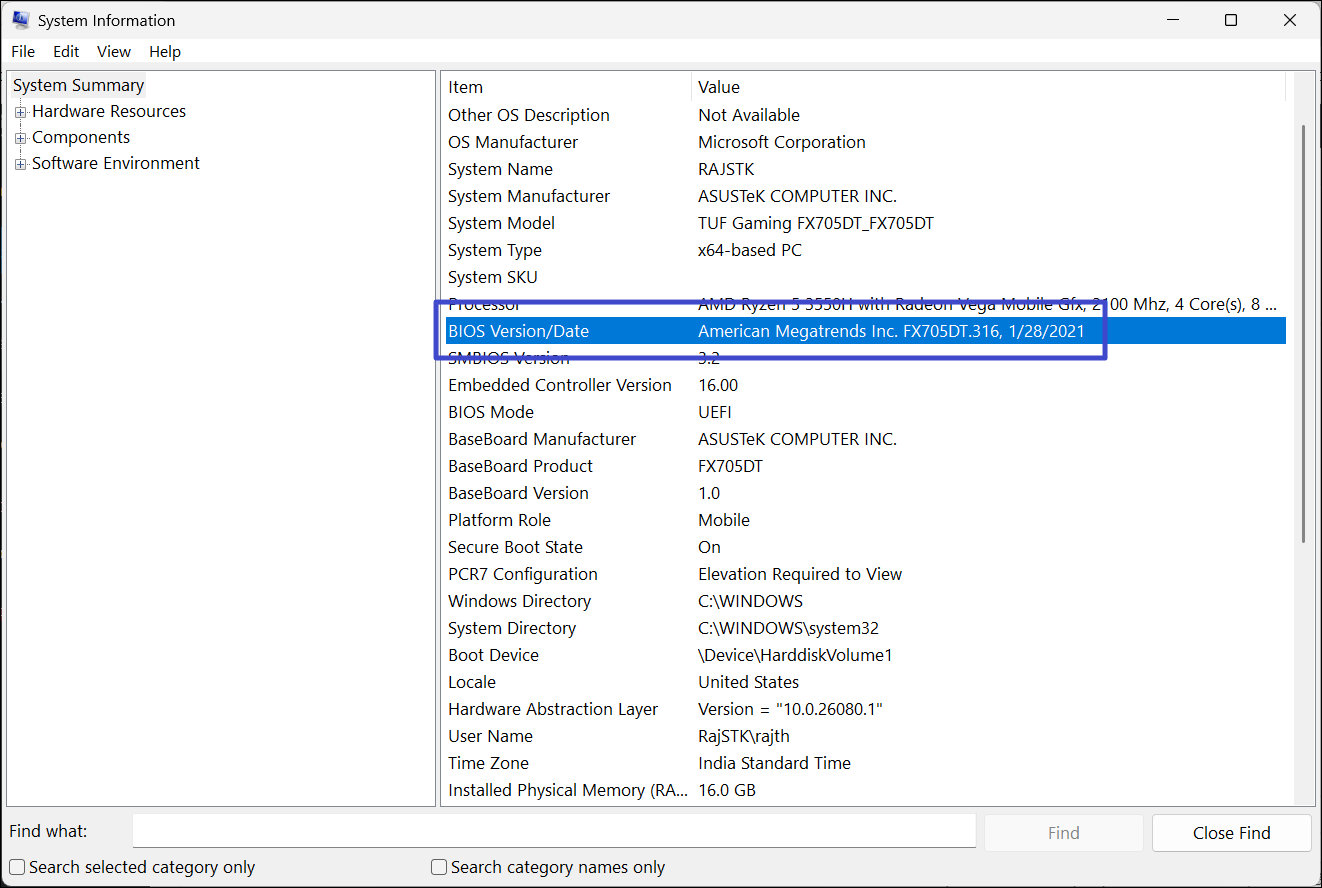
1. Press Windows + R, type “msinfo32″ in the Run box, and press Enter.

2. Check the BIOS version and when it was updated at the “BIOS Version/Date” line.
3. Head to your computer manufacturer’s website (OEM) and download the latest BIOS update for your specific model.
4. Save the update file to a USB flash drive.
5. Restart your PC and enter the BIOS setup utility (usually by pressing a specific key during startup, like Delete or F2).
6. Find and select the BIOS update option in the BIOS settings (this will vary between different motherboard models).
7. You can then choose the update file from the USB drive to update the BIOS version.
8. Restart your PC when it’s complete (if it doesn’t automatically).
Method 3: Update TPM Driver
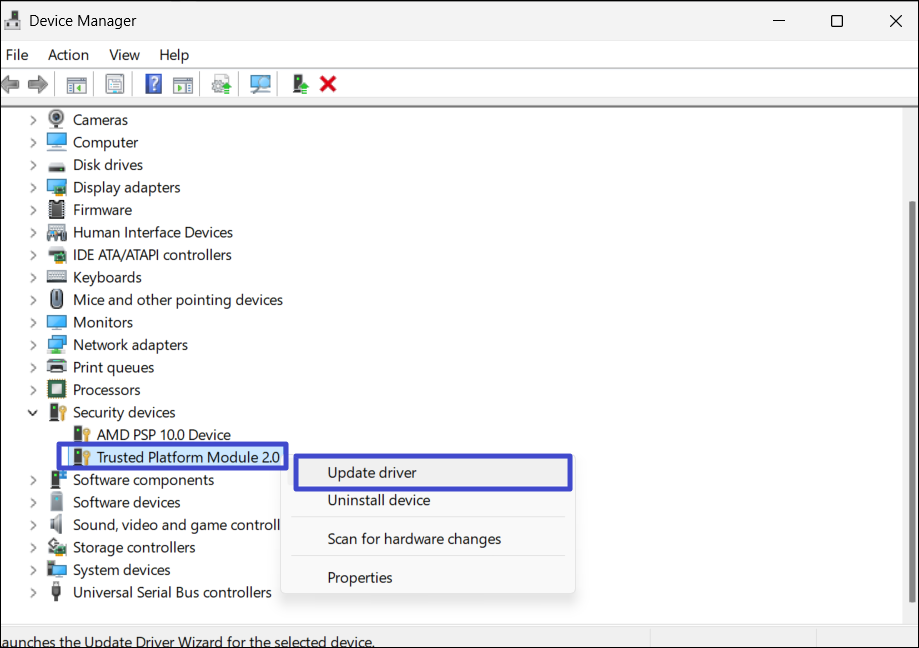
1. Right-click the Start menu and select “Device Manager“.
2. Click on “Security Devices” to expand.
3. Then, right-click the “Trusted Platform Module” and select “Update Driver“.
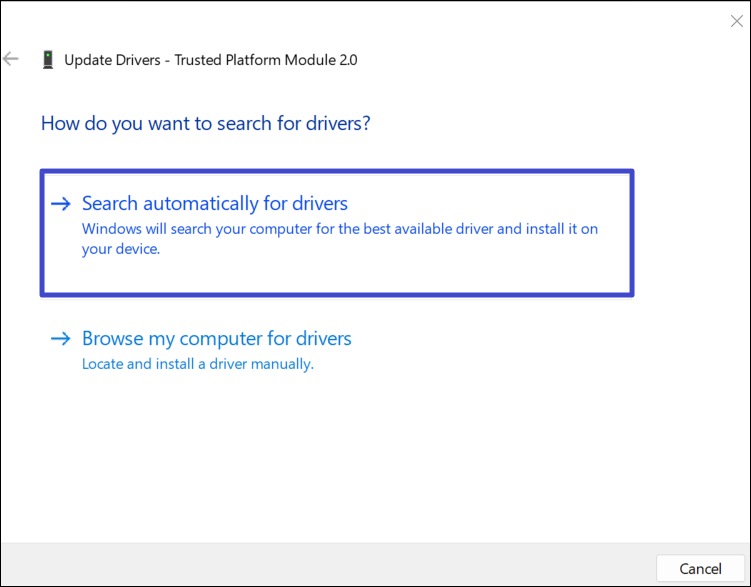
4. Select “Search automatically for drivers“.
5. Restart your computer and see if you still get the error.
Method 4: Clear the CMOS Settings
1. Turn off your computer and unplug it from the power outlet.
2. Open the computer case and find the CMOS battery. It’s a small, coin-shaped battery usually near the motherboard’s edge.
3. Carefully, remove the battery from its slot and wait about 15 seconds for the CMOS settings to clear.
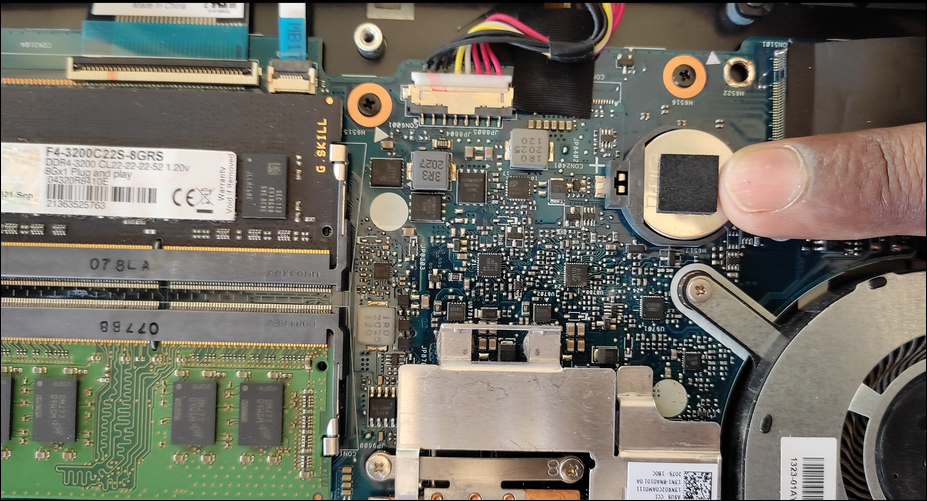
4. Then, gently put the battery back into its slot and close the case.
5. Reconnect the power and turn on your computer.
That’s it.
![KapilArya.com is a Windows troubleshooting & how to tutorials blog from Kapil Arya [Microsoft MVP (Windows IT Pro)]. KapilArya.com](https://images.kapilarya.com/Logo1.svg)


![[Latest Windows 10 Update] What’s new in KB5055612? [Latest Windows 10 Update] What’s new in KB5055612?](https://www.kapilarya.com/assets/Windows10-Update.png)


Leave a Reply