Trying to upgrade your operating system becomes limited when you face the “This upgrade path is not supported for Windows 11/10” error. Compatibility issues, unsupported installation techniques, and out-of-date software program versions can regularly trigger this error. Users can successfully proceed with the upgrade the latest Windows 11 version after resolving this error using effective solutions. In this article, we present four easy methods to solve “This upgrade path is not supported for Windows 11/10” issue in detail.
Page Contents
Fix This upgrade path is not supported for Windows 11/10
Solution 1: Run the Windows Update Troubleshooter
The Windows Update Troubleshooter provides an easy solution to fix common update-related problems. The upgrade procedure works well for solving basic conflicts that stop updates from proceeding correctly. Here’s how to do it-
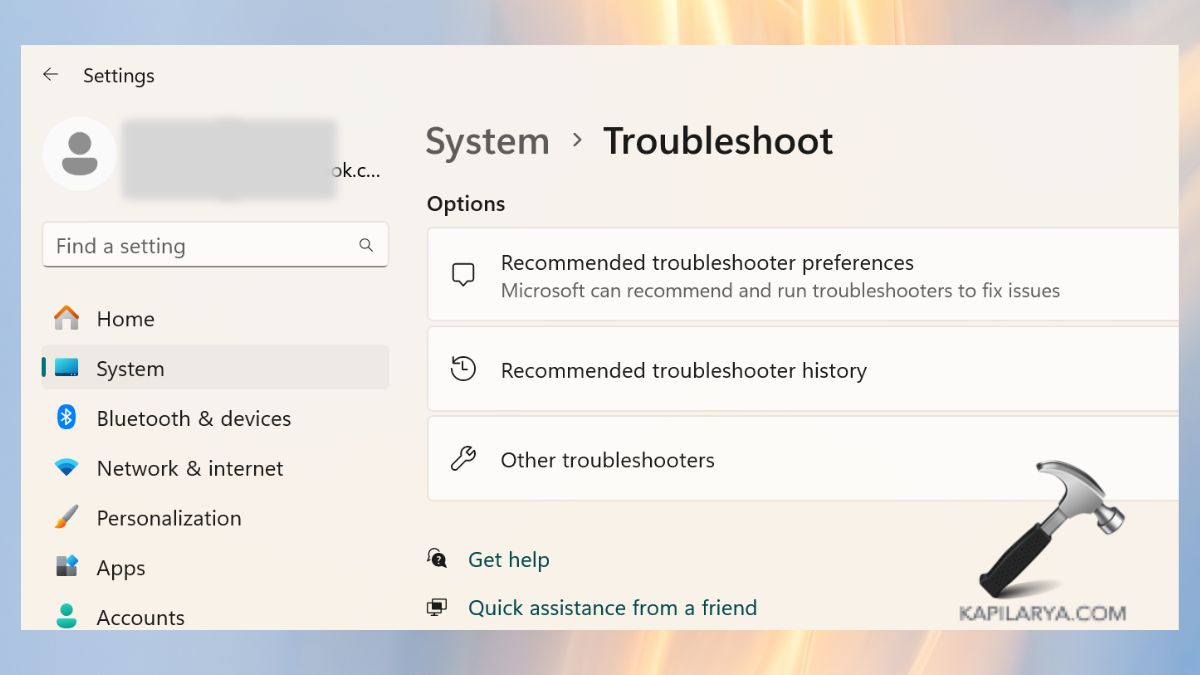
1. Press Windows + I to open the Settings app. Then, choose System > Troubleshoot > Other troubleshooters.

2. Select the Windows Update option and activate the “Run” button.

The troubleshooter conducts a system-wide update-related evaluation before continuing. Windows Update detects problems during scanning. Follow the instructions displayed to solve detected issues. Before another attempt at the upgrade process begin by restarting your computer.
Solution 2: Verify and Update System Compatibility
Upgrade errors arise through the combination of outdated system components and hardware that Windows Compatibility Software does not recognize. When your computer has the necessary requirements for upgrading it will fix the problem. Here’s what to do.
1. Check your hardware support by consulting the official system requirements pages from Microsoft Windows 11 and Windows 10.
An outdated firmware system can generate compatibility problems with hardware. Now, find BIOS/UEFI updates on your PC manufacturer’s website using their visit instructions to implement these updates.
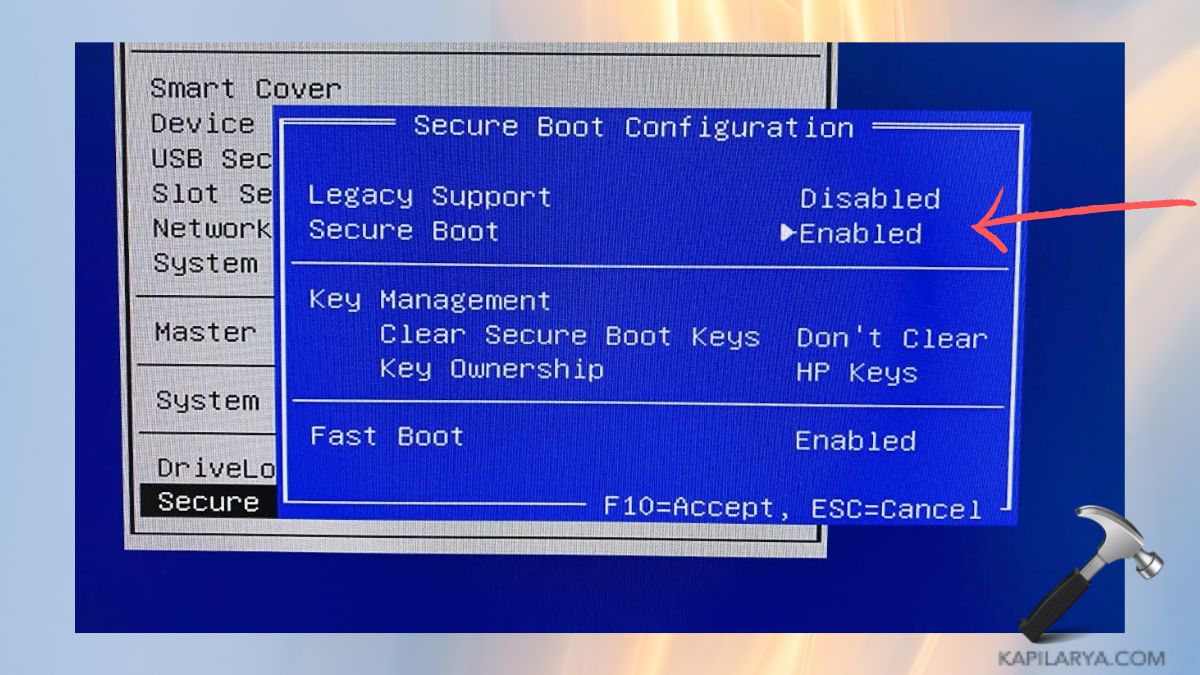
2. When your PC begins startup press F2 or DEL or the BIOS/UEFI entry key to access the settings. Secure Boot should be enabled in combination with TPM 2.0 (Trusted Platform Module) when they have not been activated previously.

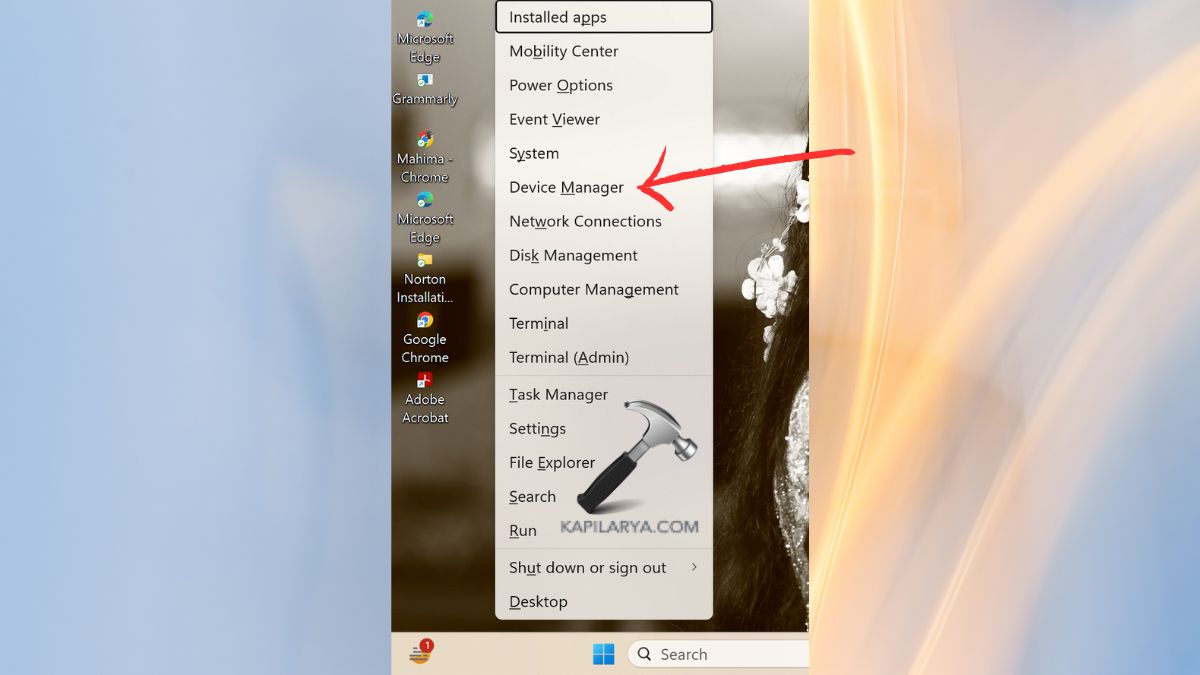
4. From the Windows + X menu go to Device Manager to confirm that all drivers are running in their latest versions.

5. In the “Firmware”, right-click the driver with yellow warning sign and tap “Update driver”. If no warning sign is there, right-click the system’s name and choose “Scan for hardware changes”.


Make sure to keep your drivers up to date because outdated drivers create compatibility problems. The verification and system-wide upgradation of your hardware compatibility help you eliminate problems that stop the software update process.
Solution 3: Use installprep.exe from the Sources Folder
You can avoid upgrade errors by starting the installation manually with the “installprep.exe” file because upgrade errors persist. Running the installation manually allows you to resolve setup compatibility problems resulting in “unsupported upgrade path” errors. Here’s how to do it-
Note: This solution is for those who are using USB drive/DVD/ISO file to install Windows 11/10.
1. Insert your Windows 11/10 USB drive or DVD or use the mounted ISO file. Open File Explorer with the Windows + E keyboard combination while accessing the installation media then locate the Sources folder.
2. To begin the manual upgrade process double-click on the “installprep.exe” executable file. You can continue setup using the wizard instructions.

Solution 4: Perform a Clean Installation of Windows 11/10
A clean system installation provides a certain resolution to this problem by establishing a fresh operating system. It helps remove every error on the system before Windows restarts with a fresh operating system version. A clean installation should follow these instructions.
Note: Store your vital files on either cloud storage or an external drive because doing so will protect your data from loss.
1. The Microsoft Media Creation Tool in Windows 11/10, helps you transform a USB or DVD into an operational boot media. You can access Microsoft’s official website to download and installation of the tool. To download this tool in Windows 11 click here and Windows 10 here.

2. Now, you should open the downloaded file. To install Microsoft Media Creation Tool in Windows 11/10, accept the terms and conditions and proceed further.

2. To reach the boot menu you must restart your computer and hit F12 or DEL depending on your system. Choose USB or DVD as your boot device when prompted.
3. After loading the installer select the “Custom Install” option along with the provided instructions. You need to format the storage device that you selected to install Windows into. Complete installation then customize Windows settings.

That’s it!
![KapilArya.com is a Windows troubleshooting & how to tutorials blog from Kapil Arya [Microsoft MVP (Windows IT Pro)]. KapilArya.com](https://images.kapilarya.com/Logo1.svg)


Leave a Reply