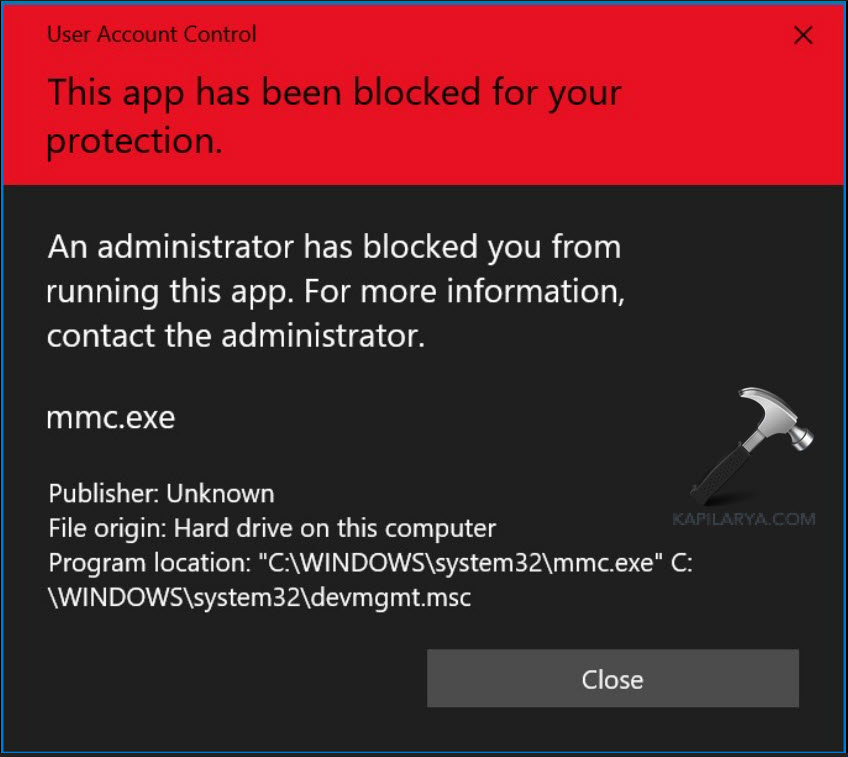
Sometimes, Windows can be overly protective and block an app you trust, displaying the error message “This app has been blocked for your protection.” If you’re seeing this error in your Windows 11 PC, don’t worry, we can help you fix it.
Page Contents
Fix: This app has been blocked for your protection in Windows 11
Before you try anything, we advise you to restart your computer and see if you can access the blocked app. A simple restart will free up the RAM and restart all the processes, fixing minor glitches and errors that you may encounter.
After the restart, run the application with administrator privileges. Right-click the app, and select “Run as administrator“.
Method 1: Use Built-in Administrator Account
If you have already enabled the hidden Administrator account, you can log in to that account and try to launch the app from there. If you haven’t, follow these steps:
1. Type “cmd” in the Windows Search and select “Run as administrator” for the top result.
2. Run the following command in the Command Prompt:
net user administrator /active:yes
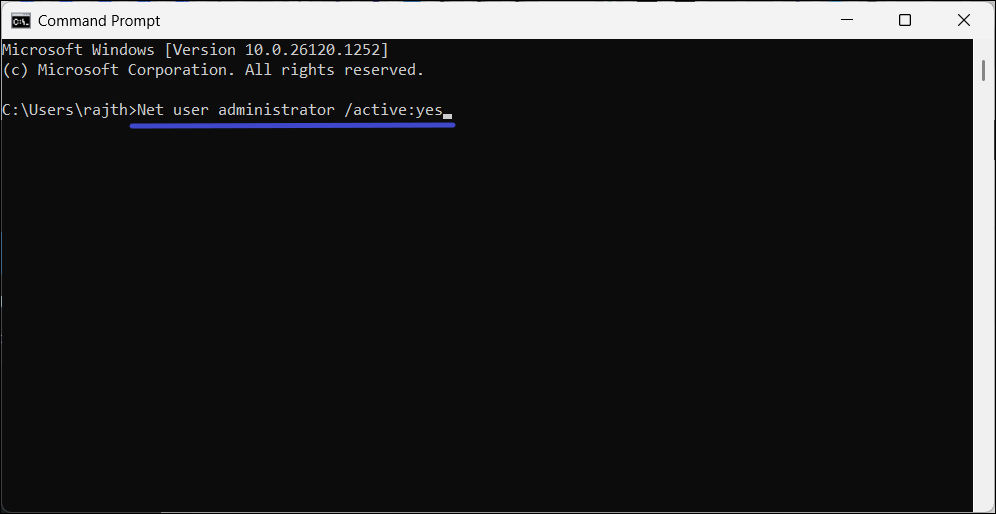
3. After enabling the built-in administrator account, you can sign in to see if the app launches.
Method 2: Unblock the App from the Anti-virus
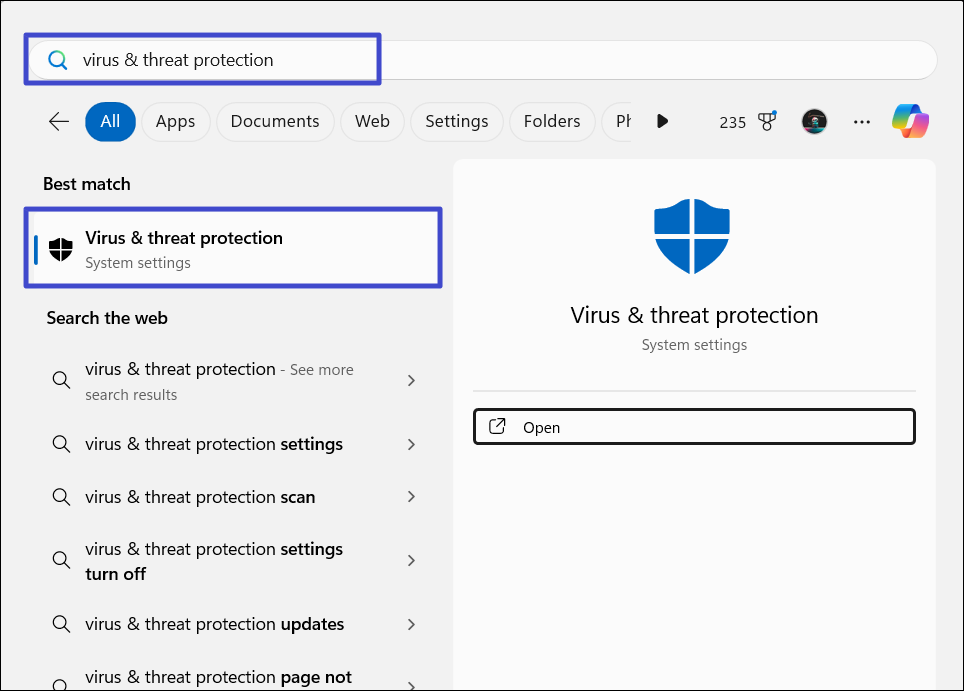
1. Press the Windows key, type “virus & threat protection“, and select the best-match result.
2. Click “Protection history” on the left sidebar.
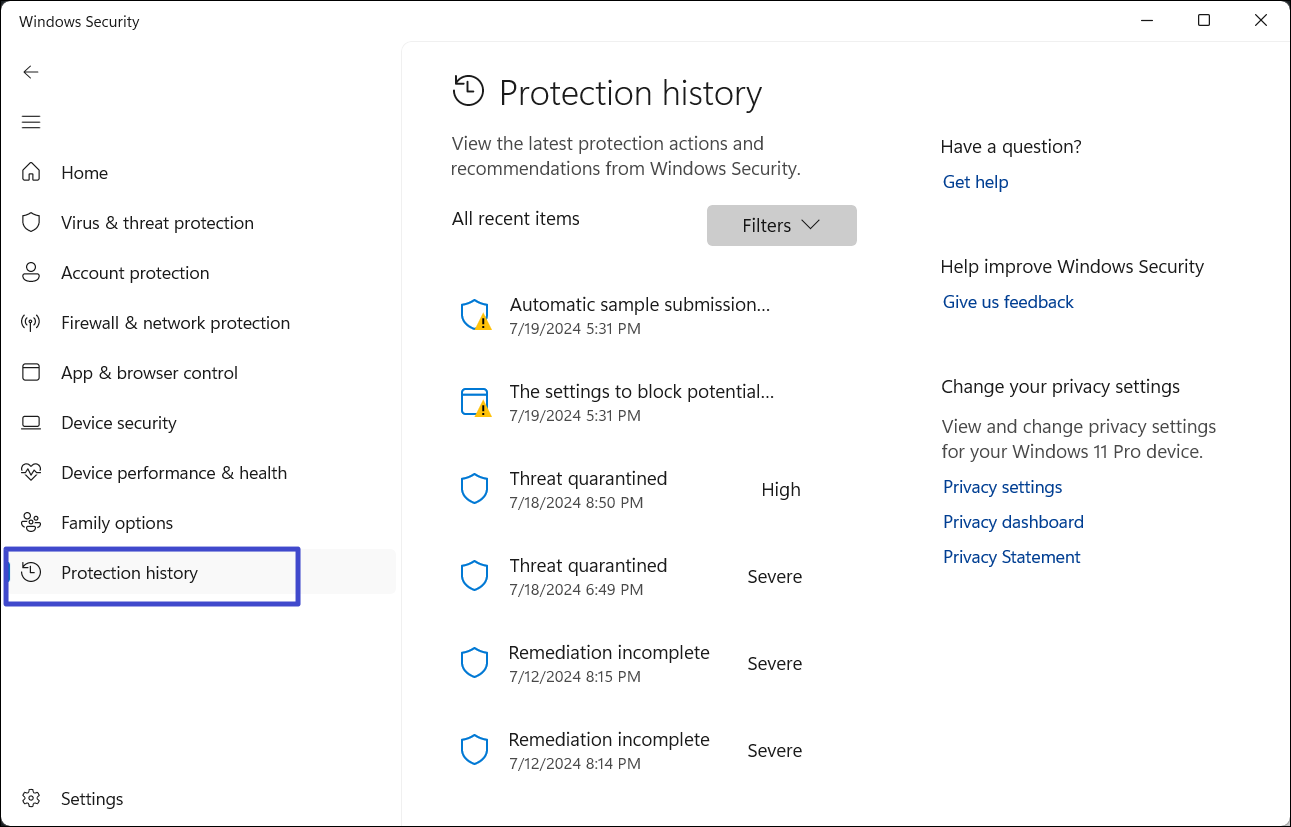
3. Look for the blocked app in the protection history. If you find the app, click the arrow button next to it.
4. Click “Yes” in the User Account Control window.
5. Then, click the “Action” button and select “Allow on device“.
Method 3: Remove a Third-Party Antivirus program
Sometimes, your antivirus program might be too aggressive, blocking legitimate apps or files you download. In that case, you’ll need to disable or uninstall the antivirus and then try launching the app.
Method 4: Disable User Account Control Temporarily
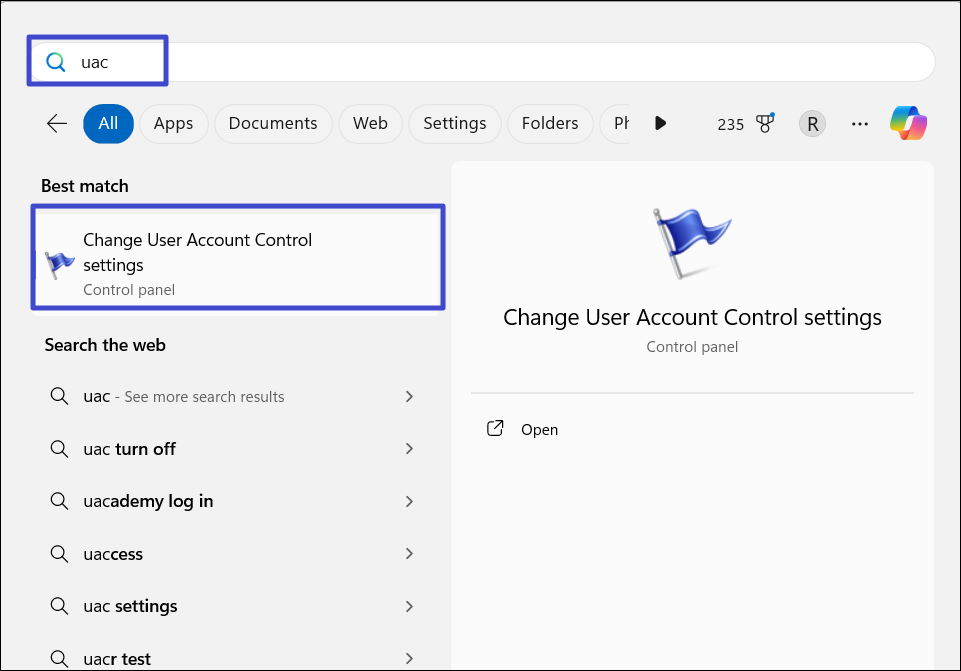
1. Type “UAC” in the Windows Search and press Enter.
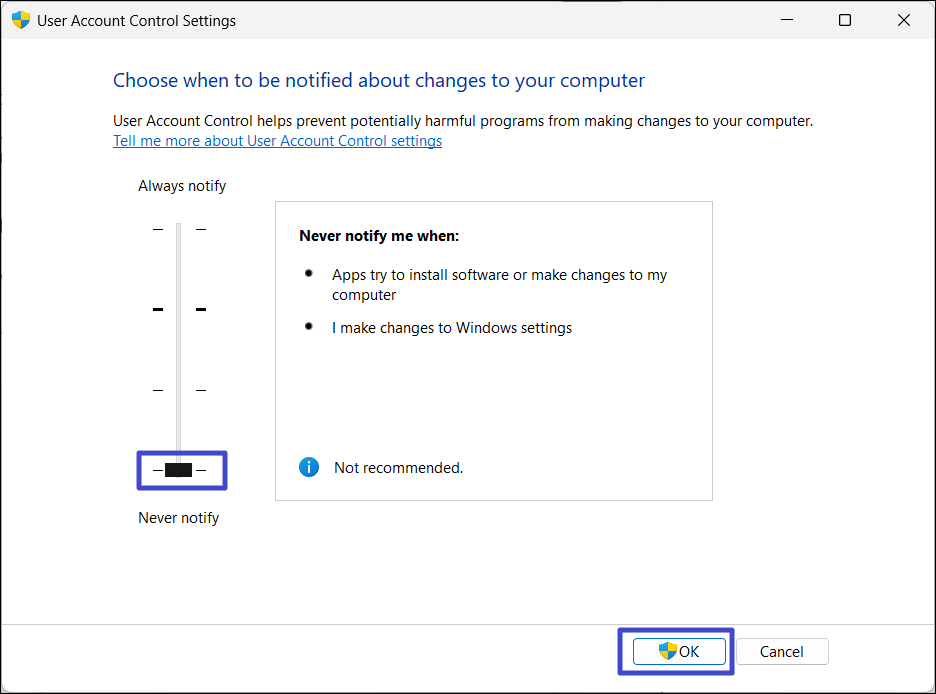
2. In the User Account Control Settings window, drag the slider to the bottom, and click “OK“.
3. Click “Yes” in the UAC dialog box to confirm.
Method 5: Adjust SmartScreen Settings
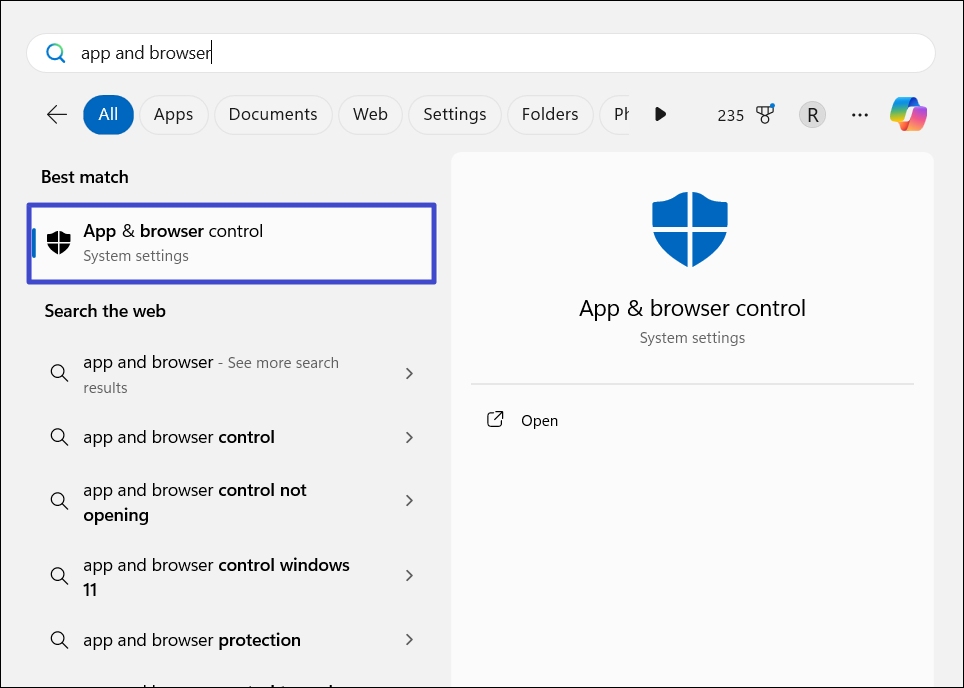
1. Type “App and browser control” in the Windows Search and select the “App & browser control” settings.
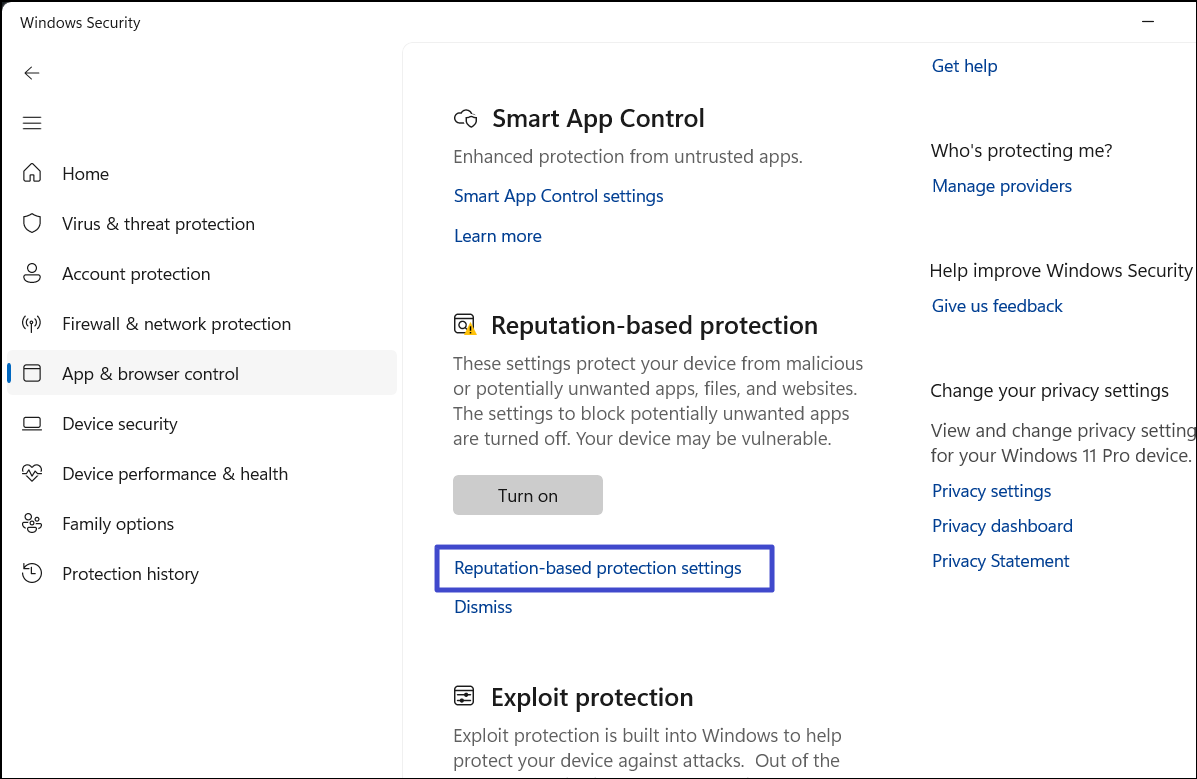
2. Then, click on “Reputation-based protection settings”.
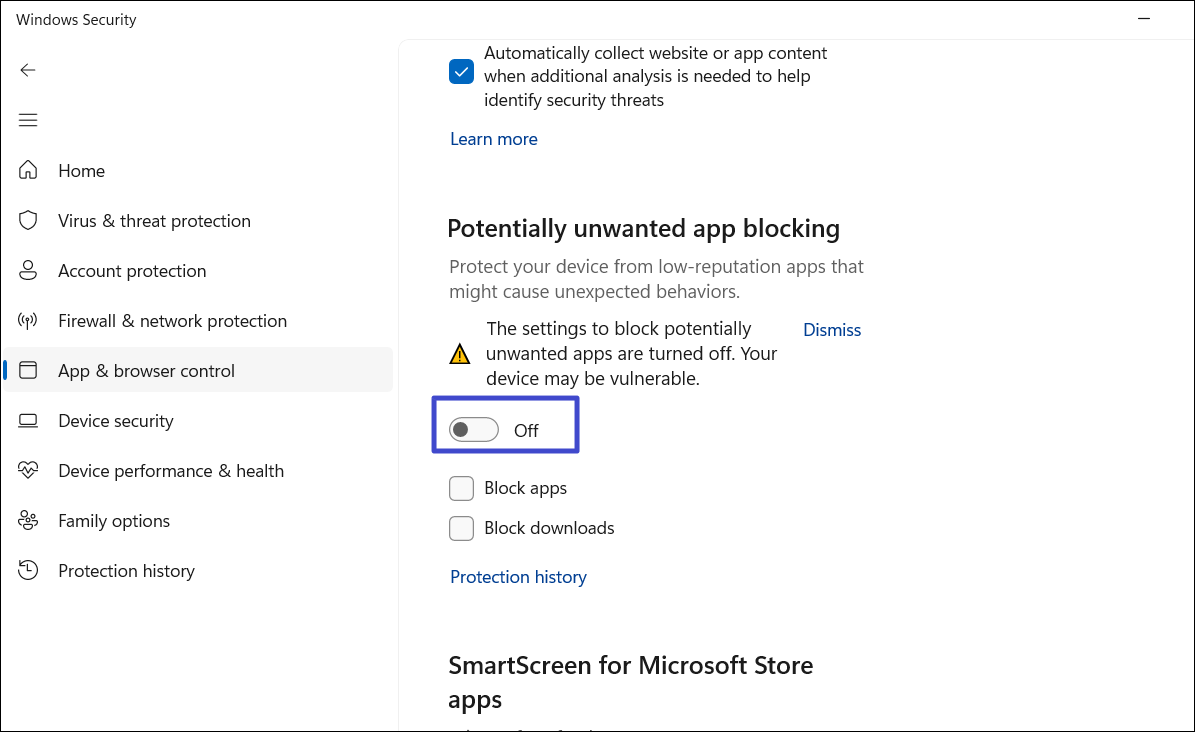
2. Scroll down to the “Potentially unwanted app blocking” section and turn off the toggle under it.
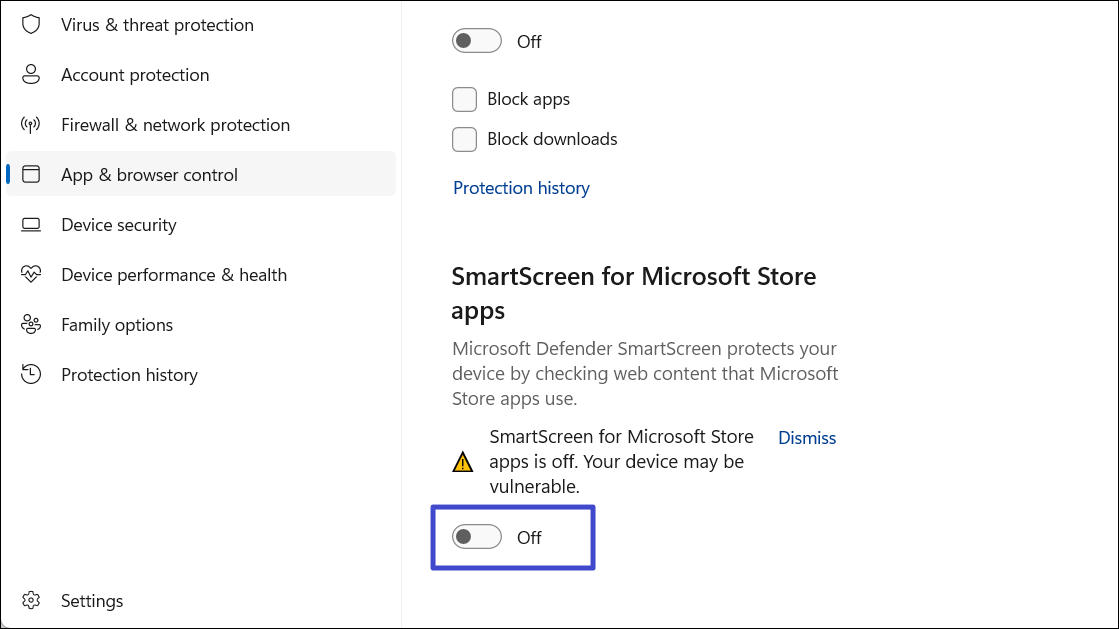
3. Then, turn off the “SmartScreen for Microsoft Store apps” toggle.
Method 6: Restart Cryptographic Services
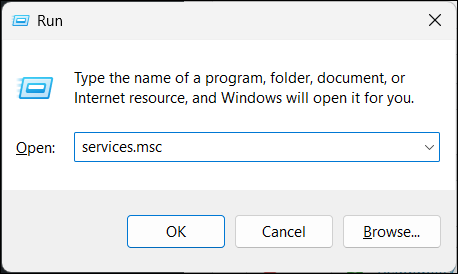
1. Press the Windows + R keys, type “Services.msc“, and press Enter.
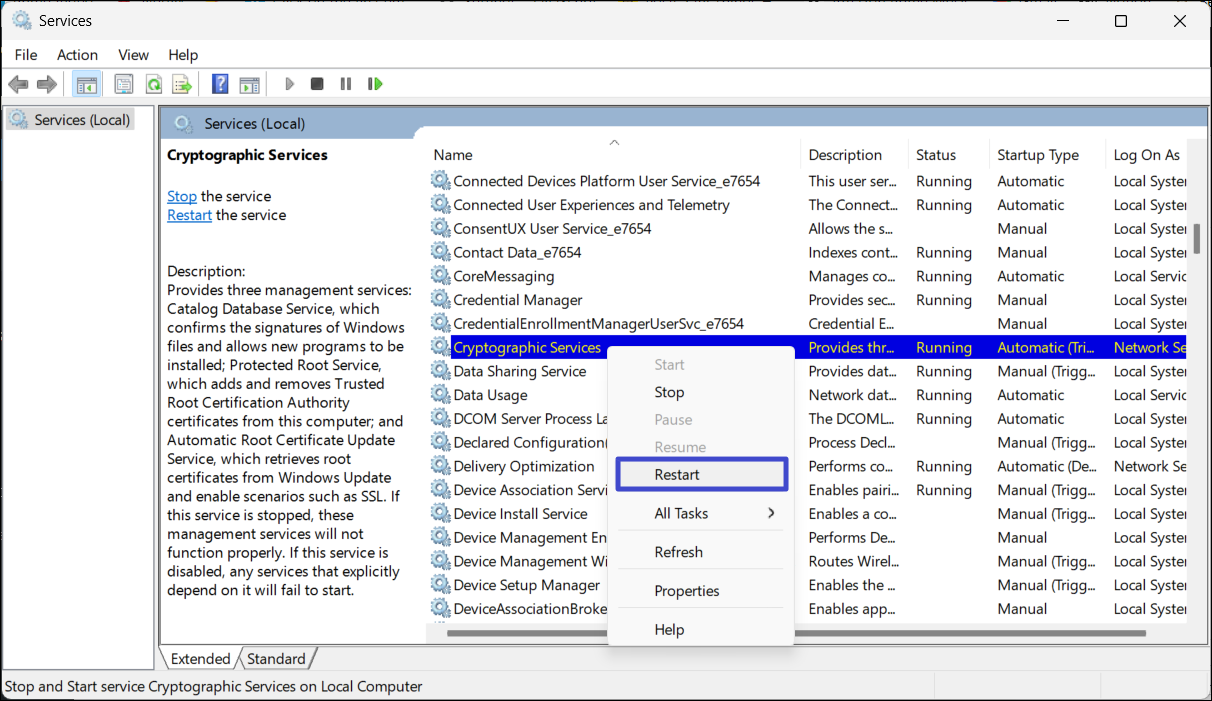
2. Find the “Cryptographic Services” in the list of services.
3. Right-click the service and select “Restart“.
Method 7: Reset Windows Update Components
1. Download Reset Windows update script using this link.
2. Then, right-click the downloaded file and select “Run as administrator“.

3. If prompted, click “Yes” in the UAC dialog box.
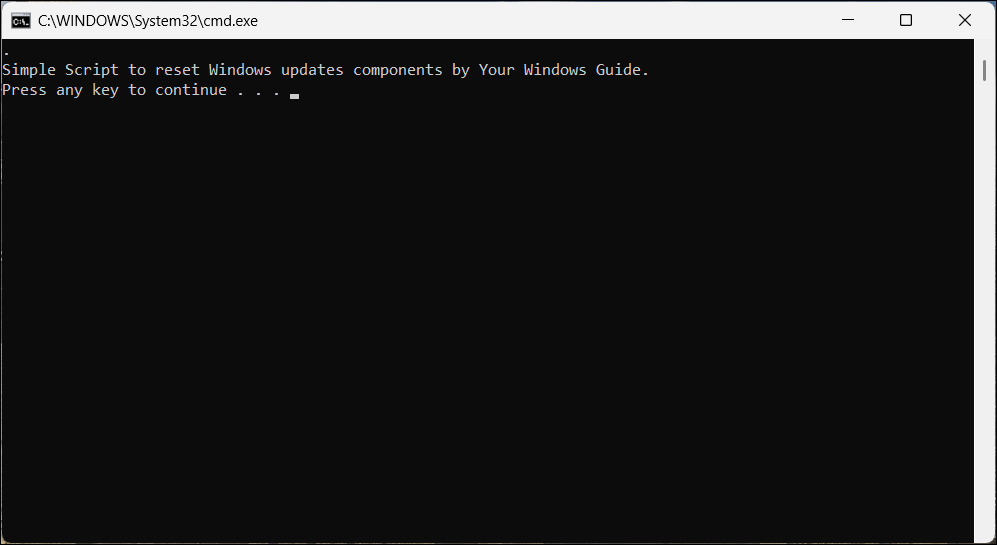
4. Once the Command Prompt opens, press any key to start the process.
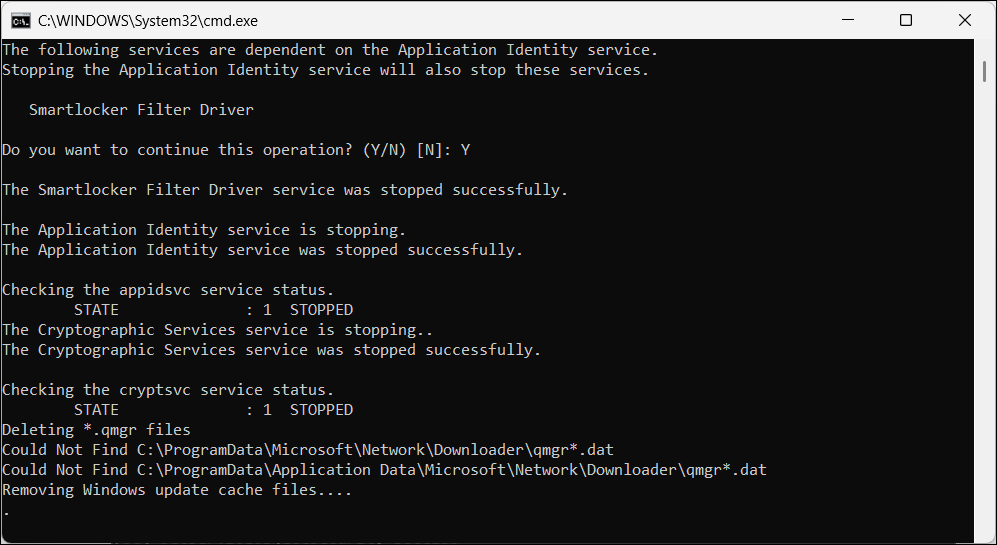
5. After it’s finished, restart your computer.
Method 8: Adjust Group Policy Settings
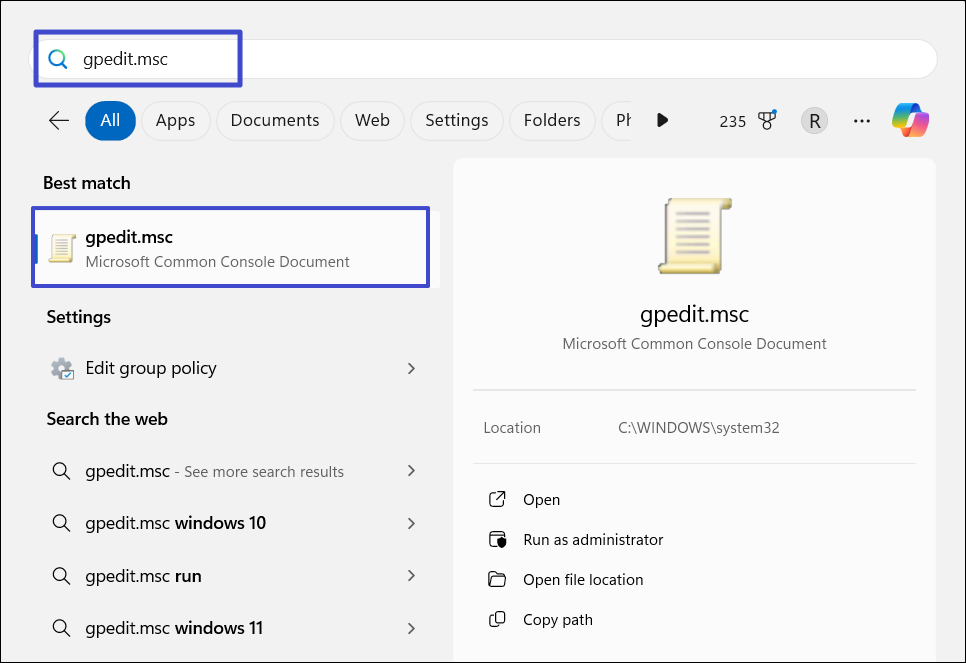
1. Open the start menu, type “gpedit.msc“, and press Enter.
2. In the Group Policy Editor, go to the following location:
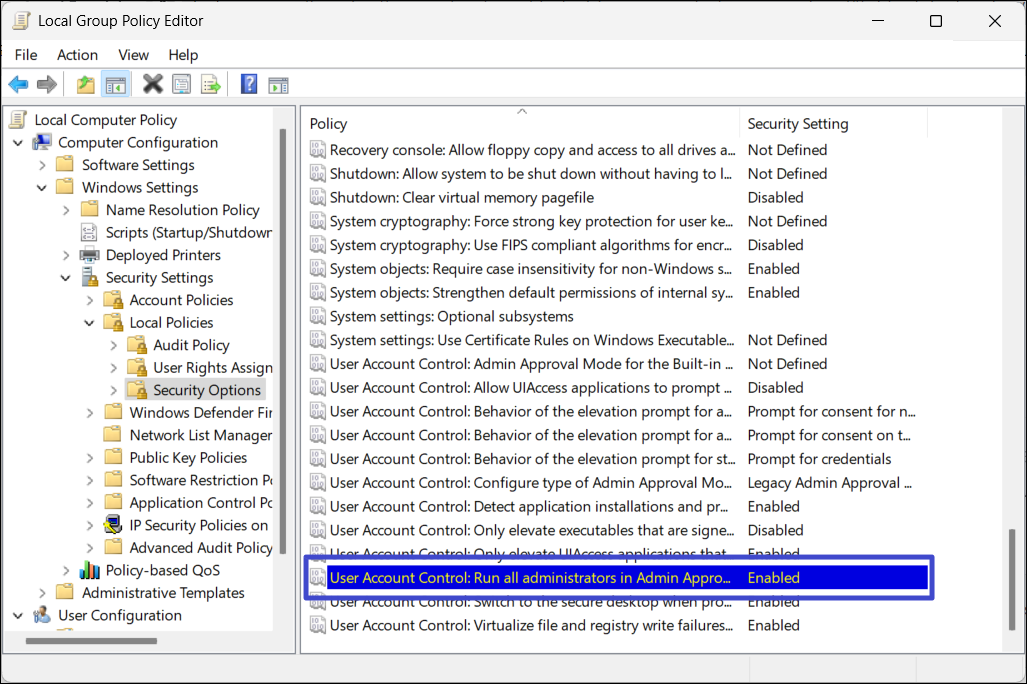
Computer Configuration > Windows Settings > Security Settings > Local Policies > Security Options
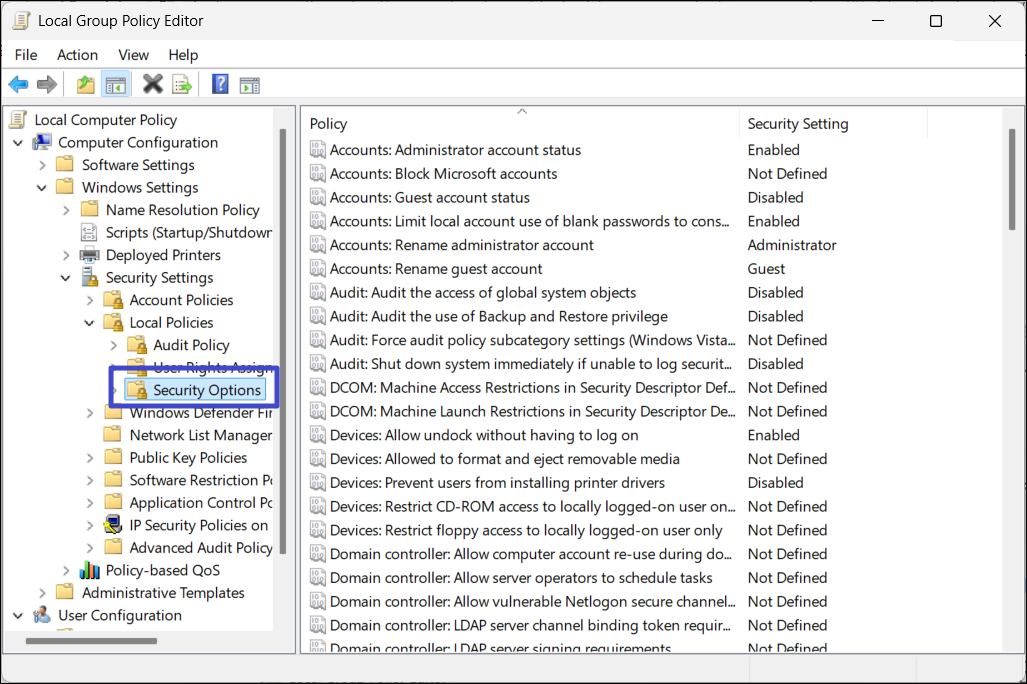
3. Find and double-click the “User Account Control: Run all administrators in Admin Approval Mode” policy.
4. Select “Disabled” and click “Apply“.
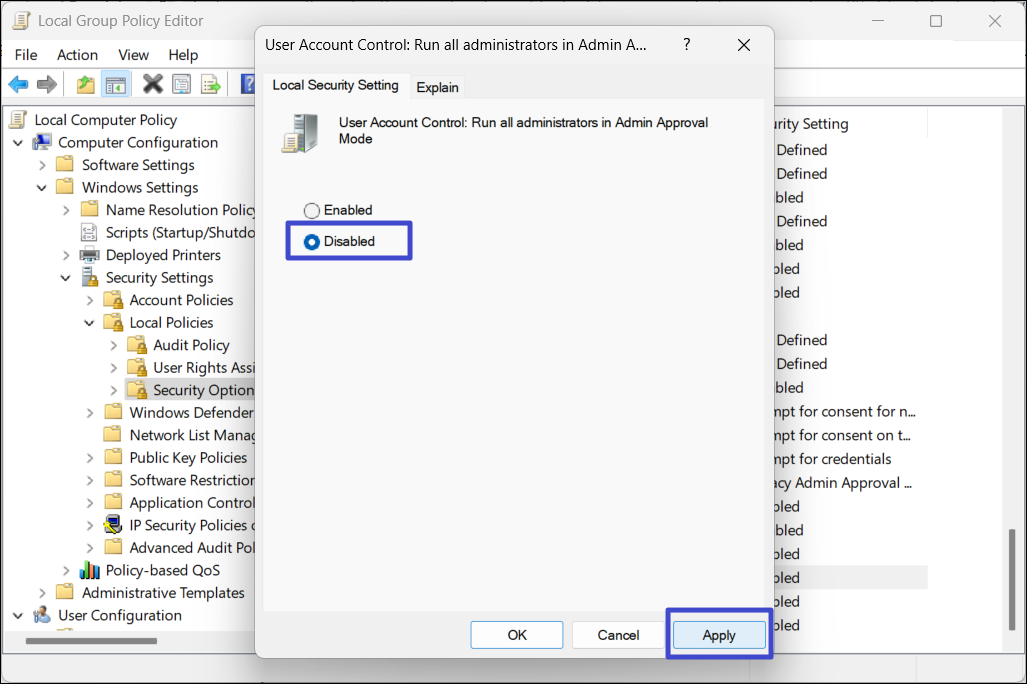
5. Then, click “OK” and close the Group Policy Editor.
6. Restart your PC and see if the “This app has been blocked for your protection” error is resolved.
Method 9: Run System Restore
1. In the Windows Search, type “rstrui” and hit Enter to open the System Restore tool.

2. Select “Choose a different restore point” (if applicable) and click “Next“.

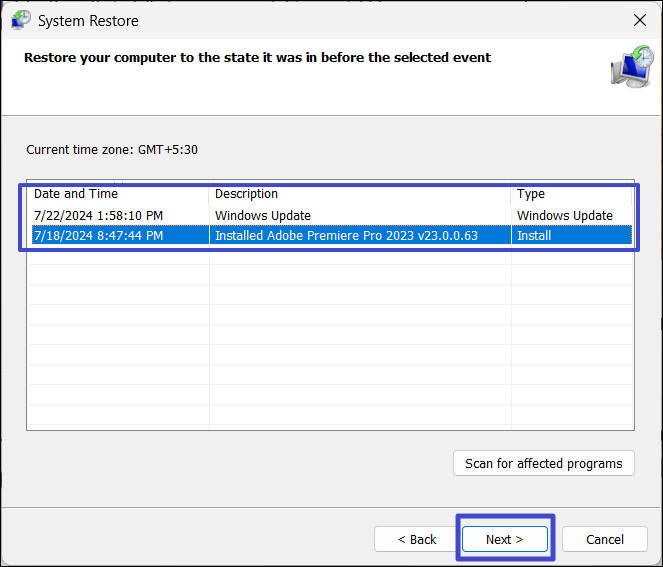
3. Select the restore point and click “Next“.
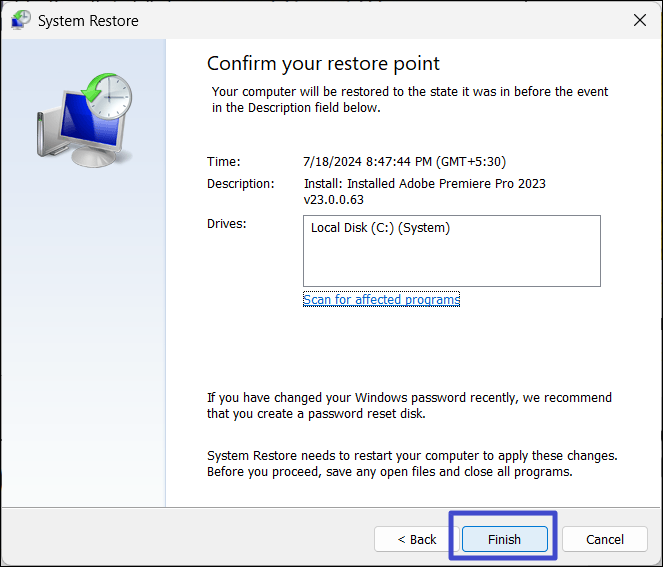
4. Click “Finish” to start.
Video fix
You can also checkout following video fix for further assistance:
That’s it.
![KapilArya.com is a Windows troubleshooting & how to tutorials blog from Kapil Arya [Microsoft MVP (Windows IT Pro)]. KapilArya.com](https://images.kapilarya.com/Logo1.svg)



![[Latest Windows 10 Update] What’s new in KB5055612? [Latest Windows 10 Update] What’s new in KB5055612?](https://www.kapilarya.com/assets/Windows10-Update.png)


Leave a Reply