

Secure Boot is a safety measure in Windows 11 that helps to prevent unauthorized software from running during boot time. However, users may face a problem where a ‘Secure Boot update’ occurs and fails, that can cause further boot or security problems. This sort of error may be attributable to new revisions or to the malfunctioning of certain applications, or related to BIOS settings.
In case, you are facing this issue, use the methods listed below to diagnose and solve the Secure Boot update issue on Windows 11.
Page Contents
Fix The Secure Boot Update Failed on Windows 11
Fix 1: Check the status of Secure Boot
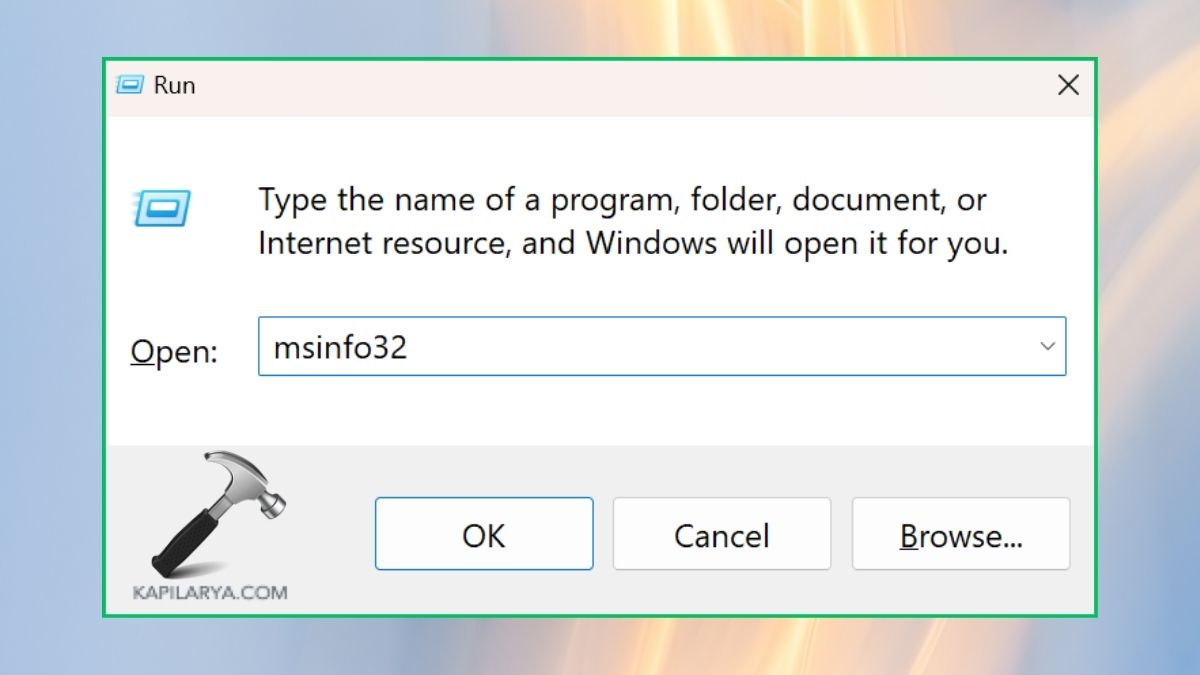
BIOS also needs to be checked whether Secure Boot is on or misconfigured. The status of Secure Boot can be observed in the System Information window.
1. Open the run window by pressing the Windows button and the R key at the same time, type this following command and press Enter.
msinfo32
2. Locate Setting options of the system in the window and find the “Secure Boot State”. If it says “Off”, then Secure Boot feature is not enabled in your computer.
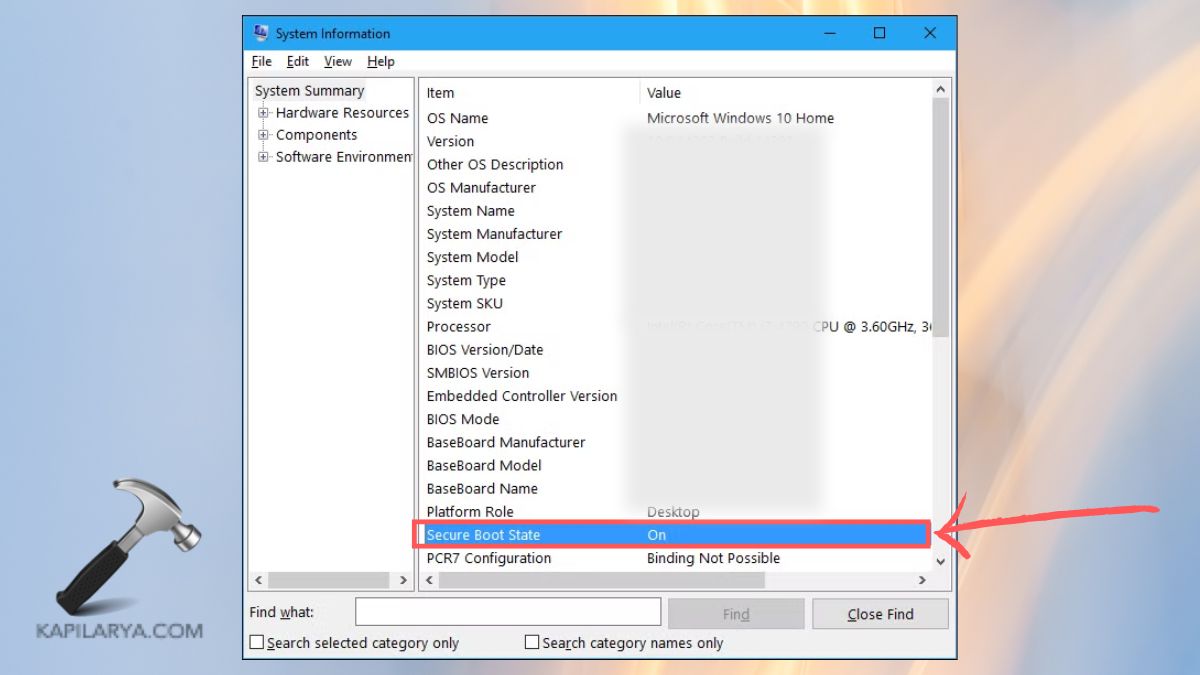
If it’s enabled and you wish it were disabled, follow the next solution to disable or enable Secure Boot in the BIOS section.
Fix 2: Disable and re-enable the Secure Boot
For every once in a while, the mere toggling of Secure Boot On and Off can rectify certain problems relating to it.
1. Press Restart and then press key that is usually F2, F10, Delete or Esc to go BIOS/UEFI settings. The key is different depending on the manufacturer.
2. When in BIOS setting, locate the “Secure Boot” setting. “Secure boot” should be set to “disabled” each time.
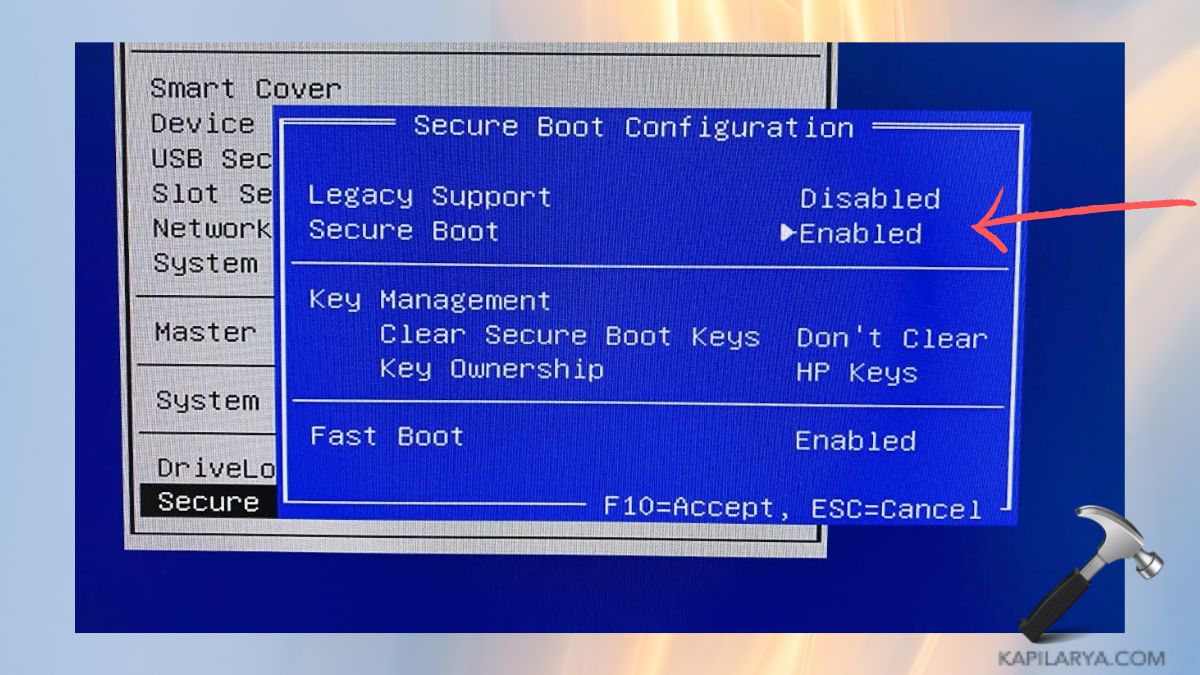
3. After restarting the computer, return to the BIOS Startup Settings again and enable the Secure Boot again with help of pushing it to the “Enabled” position. Save and exit again.
Check this article if the computer won’t boot again after enabling secure boot.
Fix 3: Uninstall and Reinstall the Problematic App
If the Secure Boot issue started itself after the installation of a particular application, or game, then that application or game might be the problem. Often, the simplest solution is to remove the software that was apparently causing the problem and then reinstall it again.
1. To check the details of your app, you need to press down the Windows and I keys together and then navigate to the “Apps” tab on the Windows Settings window.
2. Go to the “Installed apps” tab and scroll through the list of apps or search using the search bar for the app or the game that might be problematic.

3. Tap three lines that are located right next to the app’s name and click on the “Uninstall” button.

If needed, download the most recent version of that application or that game from a reputable source and examine whether the Secure Boot problem remains.
Fix 4: Uninstall a recent Windows Update
Perhaps the deletion of the causative update would rectify the situation.
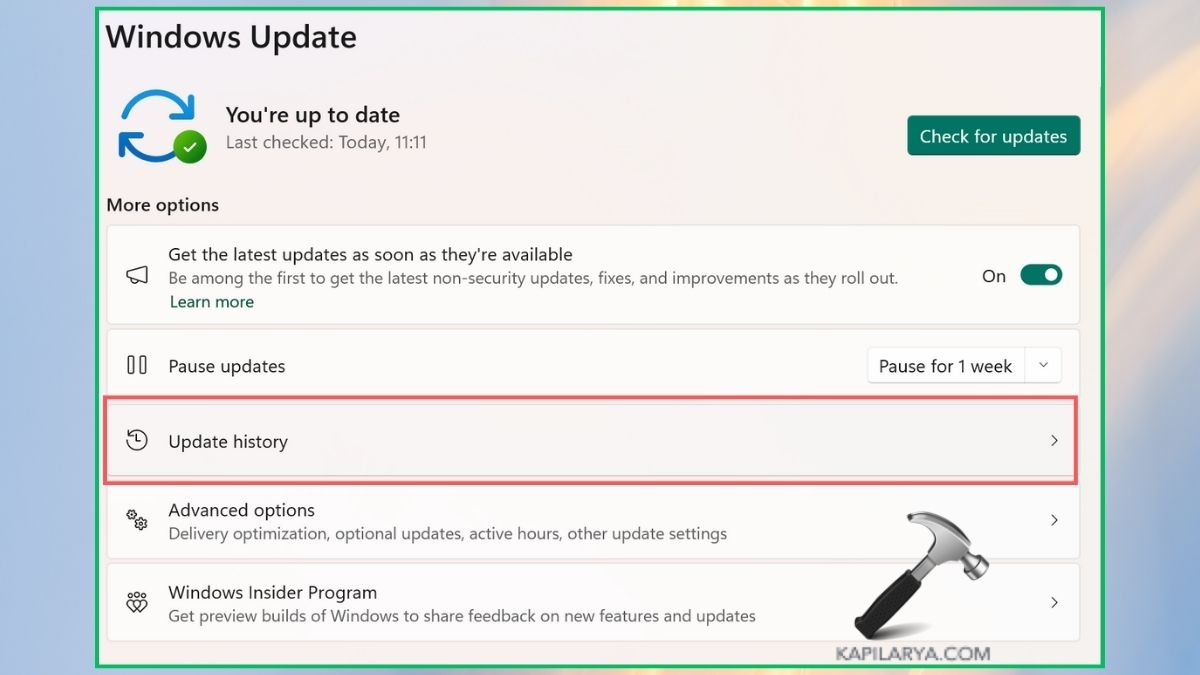
1. To do this, press the ‘Windows’ key present at the keyboard along with the ‘I’ key, and the Settings application opens. In the left panel, select “Windows Update”. To check the list of the updates, click ‘Update history’.
2. Move down to the “Uninstall updates” button and click on it. From the list of installed updates, search for the latest update and right click it to uninstall it.

3. If you have uninstalled the update, restart your PC and you might not encounter the Secure Boot problem anymore.
Check out here to update to the latest Windows 11 version.
Fix 5: Reset or Rollback BIOS
1. Turn off your PC and power it back on pressing F1 F2 F10 Del or ESC depending on your model BIOS.
2. In some instances you are able to revert back to a particular BIOS version. If possible, choose this one.

3. In the second case, go to BIOS settings, disable roll back option and reboot your computer; now you can check whether Secure Boot works correctly.
Check this article to know how to fix Windows 11 PC keeps booting into BIOS.
Though, if you experience any error while performing any of these methods on how to Fix Secure Boot Update Failed on Windows 11, leave a comment below so we can help you out.
That’s it!


Leave a Reply