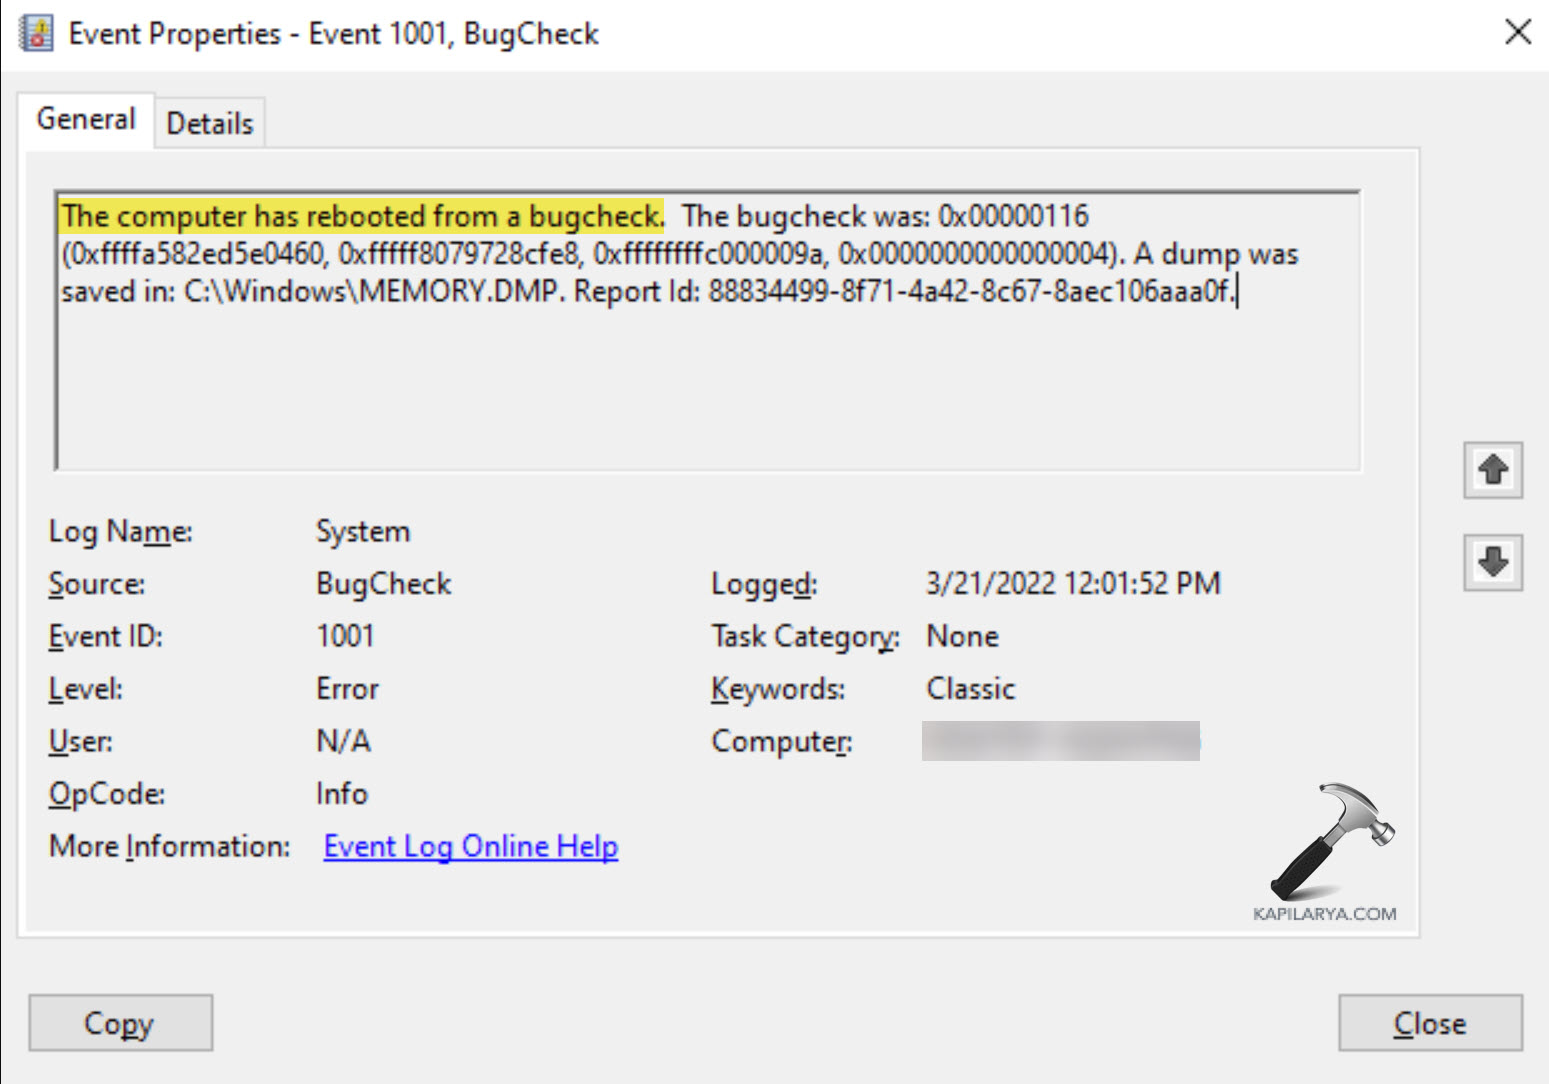
“Your computer has rebooted from a bugcheck” is a message you might see after your PC restarts from a Blue Screen of Death (BSOD) error. This is often the cause of a driver issue or a hardware issue. Follow the methods in this article to fix this error in Windows 11/10 computers.

Page Contents
Fix: The computer has rebooted from a bug check
Method 1: Run the Driver Verifier
More than often the ‘The computer has rebooted from a bugcheck’ error happens when there is something wrong with one of the computer drivers. It could be any driver, from network adapters to graphics cards (GPUs) to audio. Thankfully, Windows has a built-in tool called Driver Verifier Manager that can help you check for issues with all your installed drivers.
1. Press Windows + R to open the Run Command box. Then, type “verifier” and hit Enter.
2. In the Driver Verifier Manager, select “Create standard settings“, and click “Next“.

3. Select “Automatically select all drivers installed on this computer” and click “Finish“. Then, click “OK“.

4. Restart your computer and continue using it as usual. Driver Verifier will run stress tests on the drivers in the background.
5. If the Driver Verifier detects the driver causing the problem, it will crash the system with the BSOD error. When it does, note down the driver’s name which is displayed as a stop code.
6. Once you have the stop code, search it online to find the specific device causing the issue. For example, if the stop code is related to network adapters, you need to uninstall and reinstall the network drivers to fix the problem.
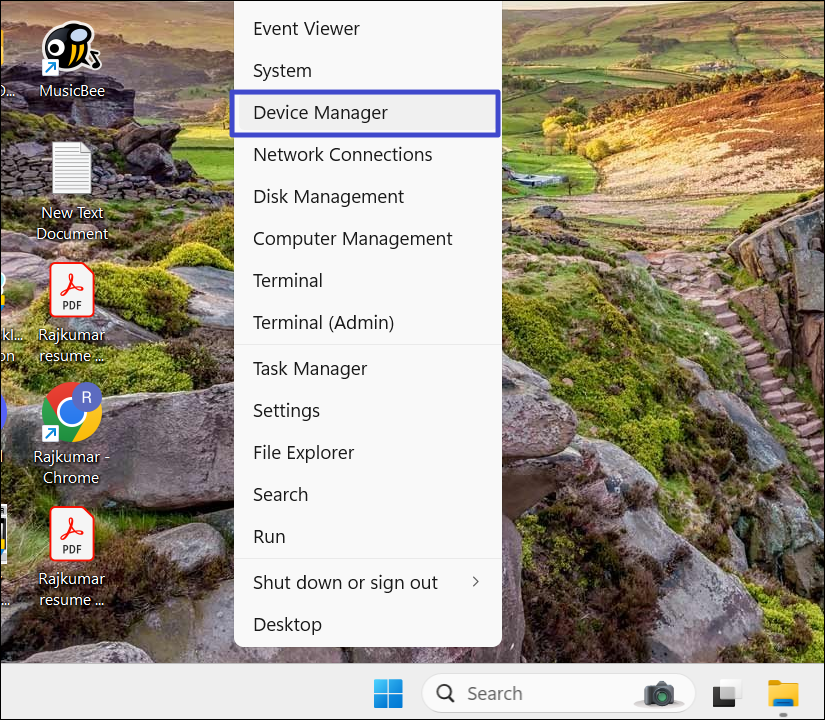
7. Right-click the Start menu and select “Device Manager“.

8. In the Device Manager, right-click the faulty device and select “Uninstall device“.

9. Click “Uninstall” again to confirm.
10. Open the Driver Verifier again.
11. Select “Delete existing settings” and click “Finish“.

12. Then, click “OK” and restart your PC and check if the bugcheck error message is fixed.
Method 2: Run the SFC Scan
1. Open the Start menu, type “Command Prompt”, and select “Run as administrator“.
2. In the Command Prompt, type the following command, and press Enter:
sfc /scannow

3. Once the scan is complete, restart your PC, and check if the bugcheck error message reappears.
Method 3: Reinstall the Game’s Anti-Cheat Program
Some video games, like Fortnite and VALORANT, use a kernel-level anti-cheat driver. This driver runs deep within the computer’s operating system to detect if players are using cheats to gain an unfair advantage.
If you’re consistently encountering this bug check error while playing a specific game, the anti-cheat driver might be causing the issue. To stop the BSOD error and prevent the bugcheck message, try updating or reinstalling anti-cheat drivers.
Method 4: Stop Overclocking the CPU, GPU, and RAM
Overclocking can push your components to their limits, but it can also lead to overheating and other issues on your PC. If you’re experiencing crashes or blue screens (BSODs), the first step is to reset your overclock settings. This can often be done directly through your overclocking software or by resetting your BIOS settings to default.
Method 5: Reinstall the GPU driver using Display Driver Uninstaller
GPU drivers can frequently cause Blue Screen of Death (BSOD) errors. Reinstalling them might fix the issue. We recommend using a third-party tool like Display Driver Uninstaller, which thoroughly removes the driver, including registry files and leftover data.
1. Download the Display Driver Uninstaller (https://www.guru3d.com/download/display-driver-uninstaller-download) and extract the DDU zip file.
2. After extracting the file, reboot your Windows 11 PC in safe mode.
3. Click the Select device type drop-down and choose “GPU“.

4. Next, select the GPU device you want to remove.

5. After making your selections, click the “Clean and restart” button to uninstall the driver.

6. After the restart, visit your GPU manufacturer’s website and download the latest GPU driver.

7. Then, install the driver and restart your PC again.
Method 6: Analyze the Minidump file and Reinstall the Corrupted Driver
Minidump files are lifesavers when it comes to troubleshooting computer crashes or Blue Screen of Death (BSOD) errors. These files capture the debugging data about the crash, helping you find the cause of the problem – a faulty driver, a problematic program, or even hardware issues. To enable minidump generation on Windows, follow these simple steps:
1. Open the Run command box, type “sysdm.cpl”, and click “OK“.

2. In the System Properties, go to the “Advanced” tab, and click “Settings” under Startup and Recovery.

3. Under Write debugging information, select “Small memory dump (256 KB)“, and click “OK“.

4. Click “OK” again and wait for the BSOD error or try to recreate the circumstance that triggered the BSOD last time.
Read the Minidump File
To read the minidump file, you’ll need Windows Software Development Kit. Here, how you can download and use the debugging tool to read the minidumpfile.
1. First, go to the Windows SDK site and download the installer.

2. Run the Windows SDK installer and click “Next“.

3. Click “Next” again to continue.

4. Check the “Debugging Tools for Windows” and uncheck the rest. Then, click “Install“.

5. Wait for the tool to download and click “Close“.

6. Then, navigate to the following location:
C:\ProgramData\Microsoft\Windows\Start Menu\Programs\Windows Kits
7. Open the “Debugging Tools for Windows (x64)” or “Debugging Tools for Windows (x86)”, based on your Windows architecture.

8. Inside that folder, right-click the WinDbg (x64) or (x86) program and select “Run as administrator“.

9. Click the “File” menu and select “Open Crash Dump“.

10. Navigate to “Local Disk (C:) > Windows” and select the “MEMORY.DMP” file. Then, click “Open”.

11. Let the memory dump file load properly in the Command window.
12. Click “!analyze -v” to view more debug information.

13. Scroll down to the bottom of the minidump information and locate the section labeled “IMAGE_NAME” or similar. Note the file name listed next to IMAGE_NAME. In my case, it was nvlddmkm.sys.

14. Search the file name online to find the associated device and get more information.
Reinstall the Problematic Driver
After locating the faulty driver, completely uninstall the driver from Device Manager. Then, download and install the latest driver for that device from the manufacturer’s website. This should fix the BSOD error and ‘The computer has rebooted from a bugcheck’ error message.
Method 7: Use System Restore
If the above methods don’t work, try running the system restore on your Windows. System restore can help you fix the BSOD errors by letting you rewind Windows to a previous stable state.
If the System Restore can’t help you, a Windows reset will also work by reinstalling everything and wiping out any corrupted drivers.
That’s
![KapilArya.com is a Windows troubleshooting & how to tutorials blog from Kapil Arya [Microsoft MVP (Windows IT Pro)]. KapilArya.com](https://images.kapilarya.com/Logo1.svg)


Leave a Reply