

System Restore Point in Windows 11 allows users to revert the system to its previous stable state. Creating a system restore point helps to perform system restore, resolve system conflicts and errors. But while implementing this solution, some more errors can arise.
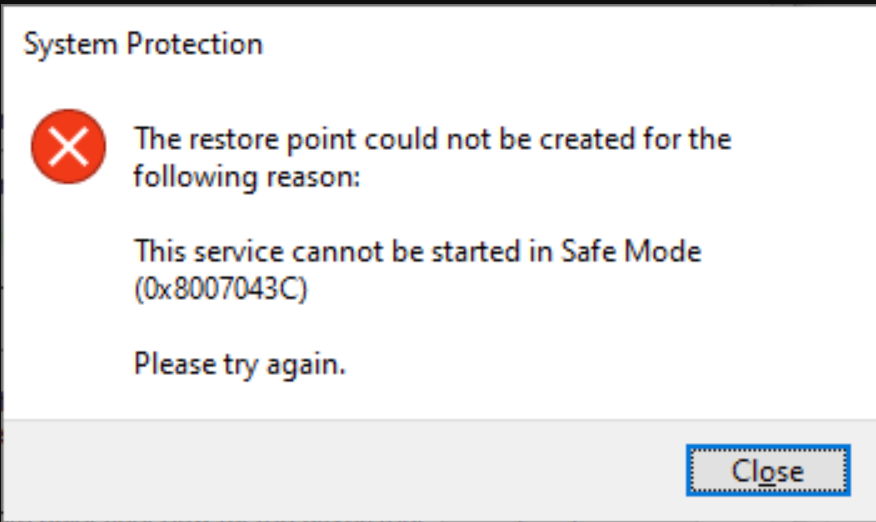
One error can be “The restore point could not be created for the following reason…”. This error can pop up due to antivirus software conflicts, damaged system file, previous system restore points, and more. If you got this error too, don’t worry! This article gathers 5 best solutions to help you out.
Page Contents
Fix: System Restore Point Cannot be Created in Windows 11
Fix 1: Run the System File Checker Tool
1. On the Windows search bar, enter “cmd”.
2. Right-click on the best match result and click on “Run as Administrator”.

3. Tap “yes” on the next screen prompt.
4. Now, type the below command on the Command Prompt and press Enter key:
sfc /scannow

5. After the command stops executing, restart the system.
Fix 2: Uninstall Antivirus in Windows 11
1. First, open the Windows search bar and type “add or remove program”.
2. Tap on the best match to open it.

3. Find the antivirus you have installed. Click on the three-dot icon beside it.
4. Click on “Uninstall”.

Fix 3: Clear Out All Previous System Restore Point Files
1. Press Win+R to open the Run Dialog box.
2. Type the below command and click “OK”:
sysdm.cpl

3. Go to the “System Protection” section and click “Configure”.

4. Make sure “Turn on System Protection” is clicked and tap “Delete”.
5. Click on Continue and let the process complete.

Fix 4: Restart the Volume Shadow Copy
1. Start the Run box by pressing Windows+R keys.
2. Enter the below command in it and press “Ok”.
services.msc
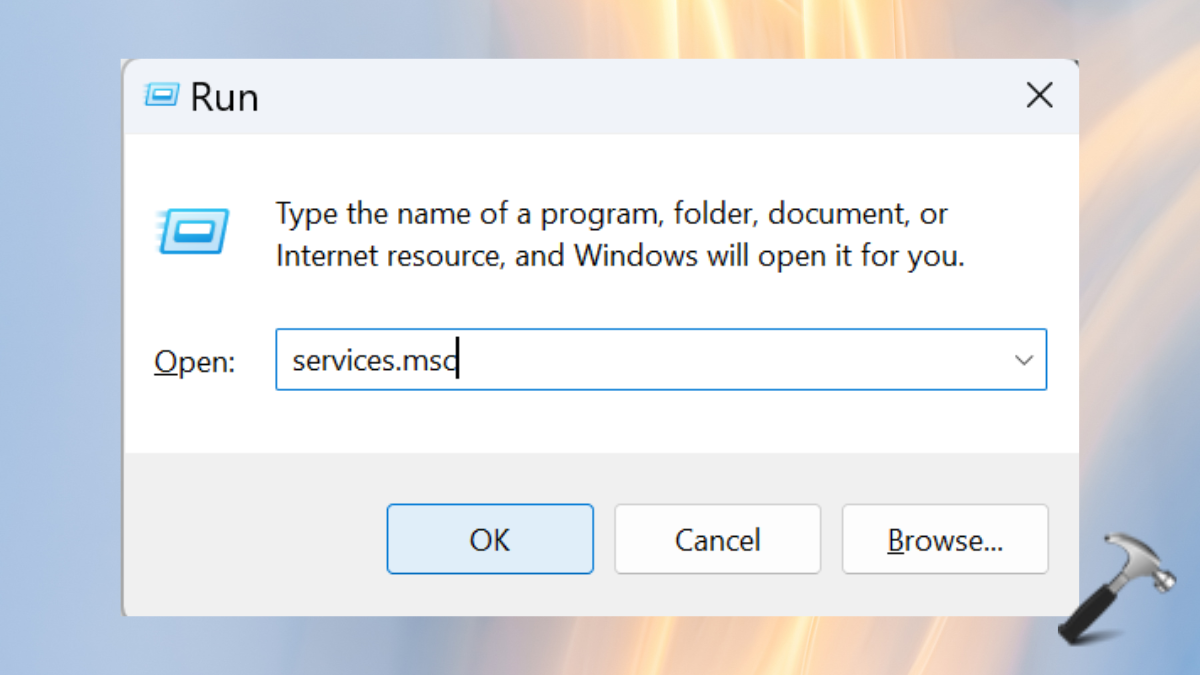
3. Find Volume Shadow Copy and see if it’s Running. If not, click on it and select “Start”.
4. Now, right-click on Volume Shadow Copy and click “Properties”.

5. In the “Start-up Type” option, select “Automatic” and “Ok”.

6. Again, restart the system.
Fix 5: Reset System Without Losing the Data
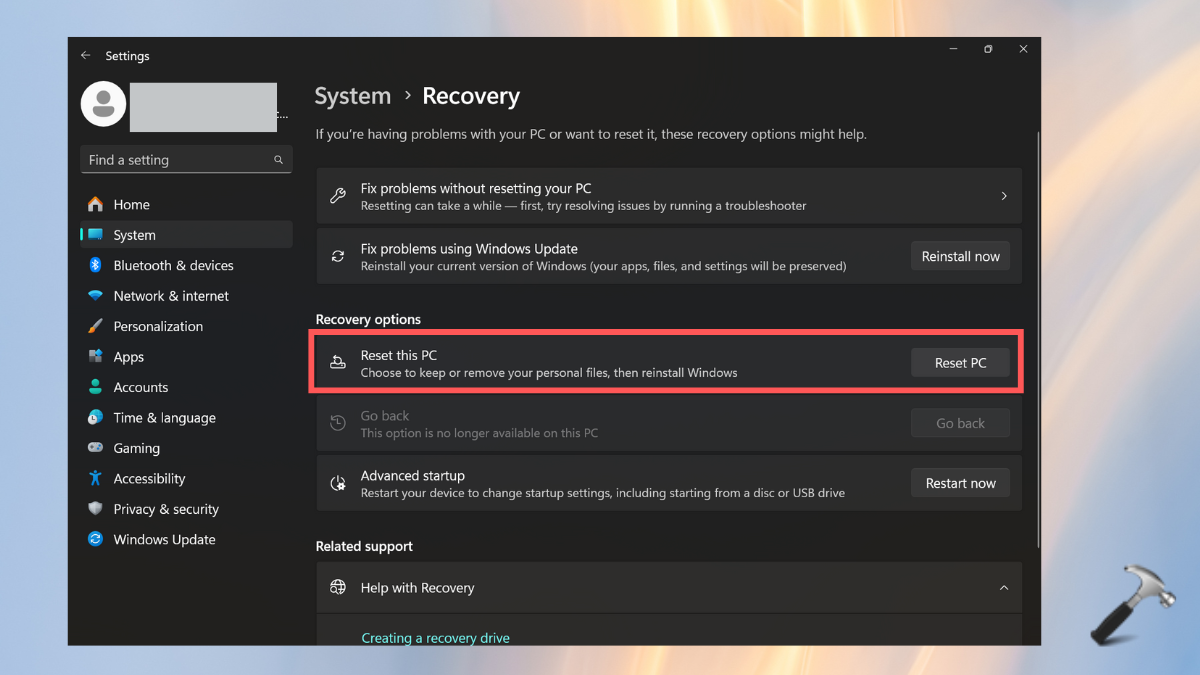
1. Open the Windows Settings and select the System section from the left-side panel.
2. Tap “Recovery” and then click on “Reset PC” option.
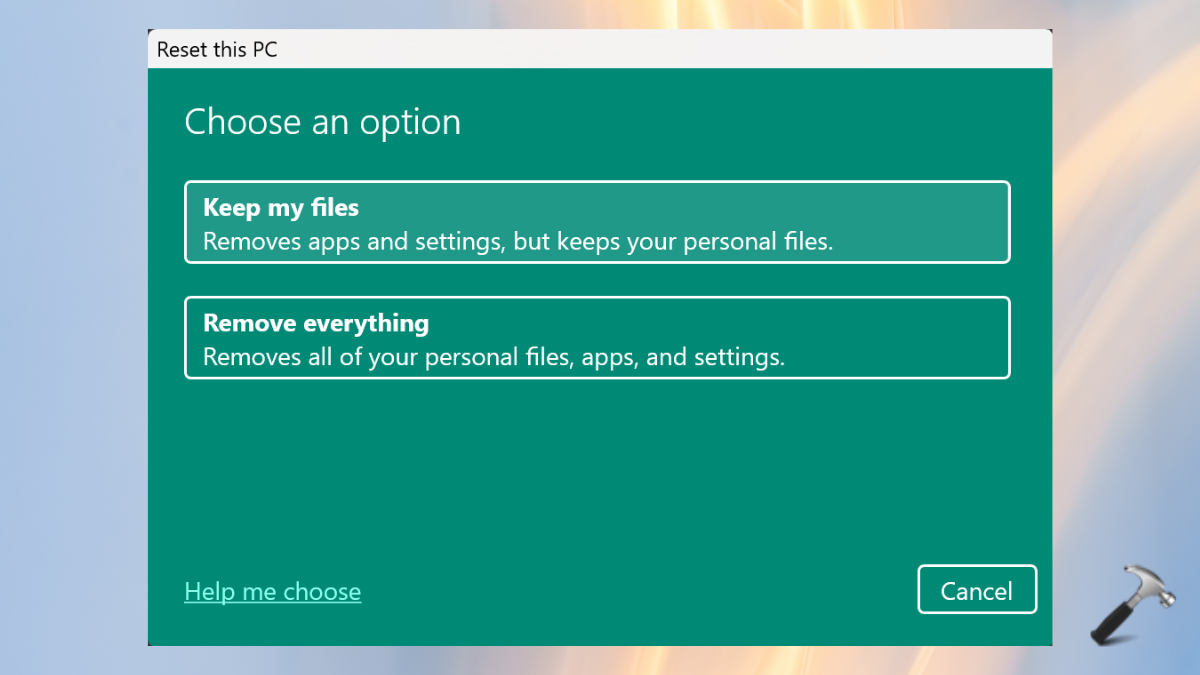
3. Choose the keep files option. Then, follow the on-screen instructions.
That’s it!


Leave a Reply