Windows 11, the latest iteration of Microsoft’s operating system, offers a multitude of features and improvements designed to enhance user experience and productivity. However, some users may encounter an issue where the “System Interrupts” usaprocess consumes 100% of the CPU, leading to sluggish performance and increased system resource usage. System Interrupts are a vital process responsible for managing hardware interrupts and ensuring smooth operation. In this article, we will provide effective solutions to resolve the issue. By implementing these fixes, users can regain optimal system performance and alleviate the burden on system resources caused by excessive CPU usage.

Page Contents
Fix: System Interrupts 100% CPU usage in Windows 11
Fix 1: Disable audio enhancements
1. Right-click on the sound icon in the Taskbar. Then select Sound settings.

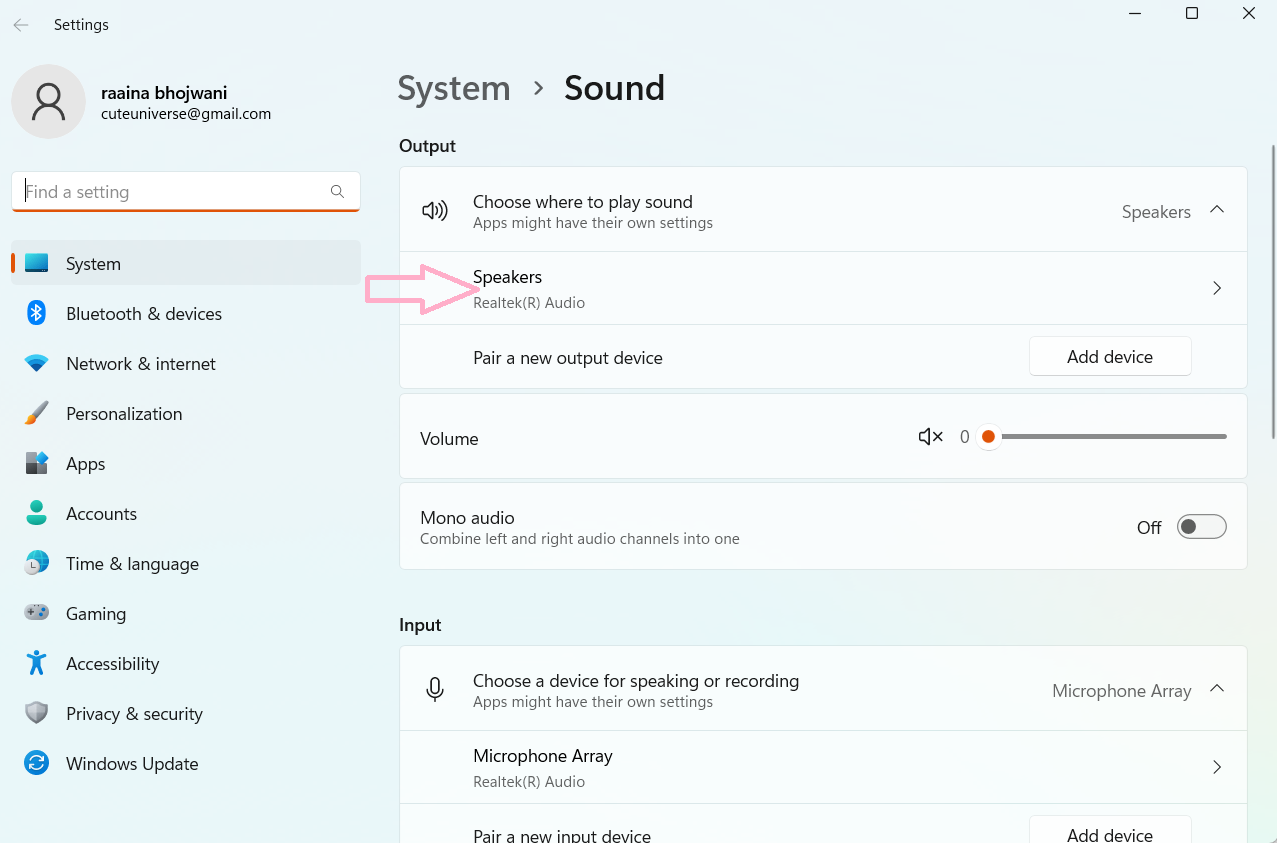
2. Now click on Speakers.
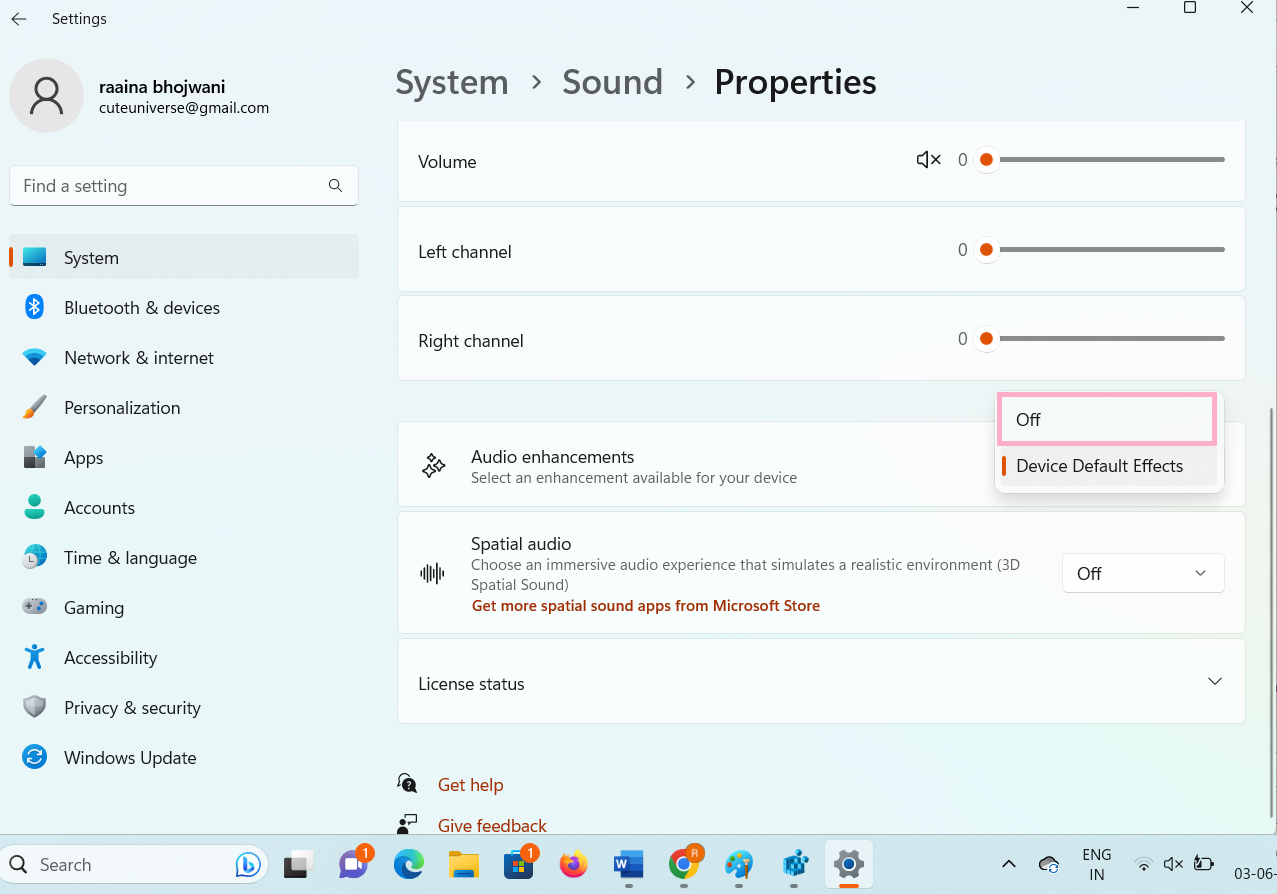
3. Next, click on Audio Enhancements and select Off.
Fix 2: Scan for malware to fix System Interrupts 100% CPU usage in Windows 11
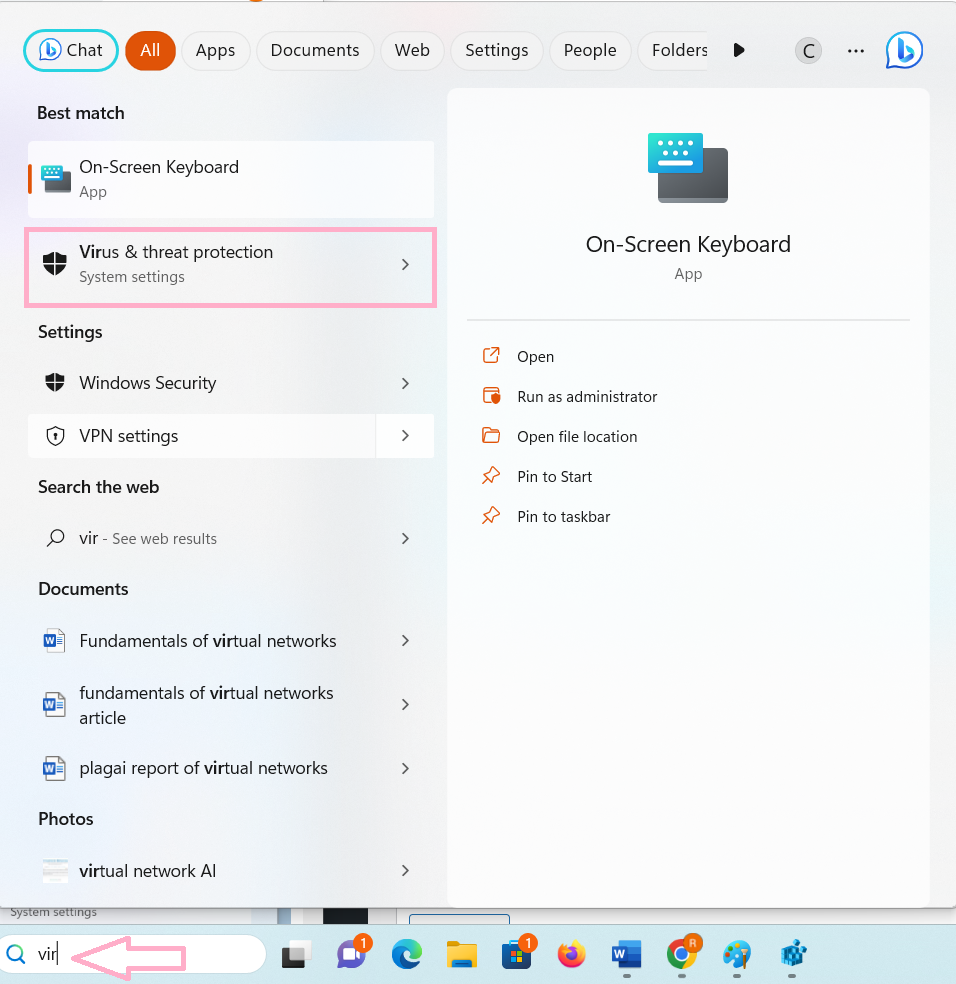
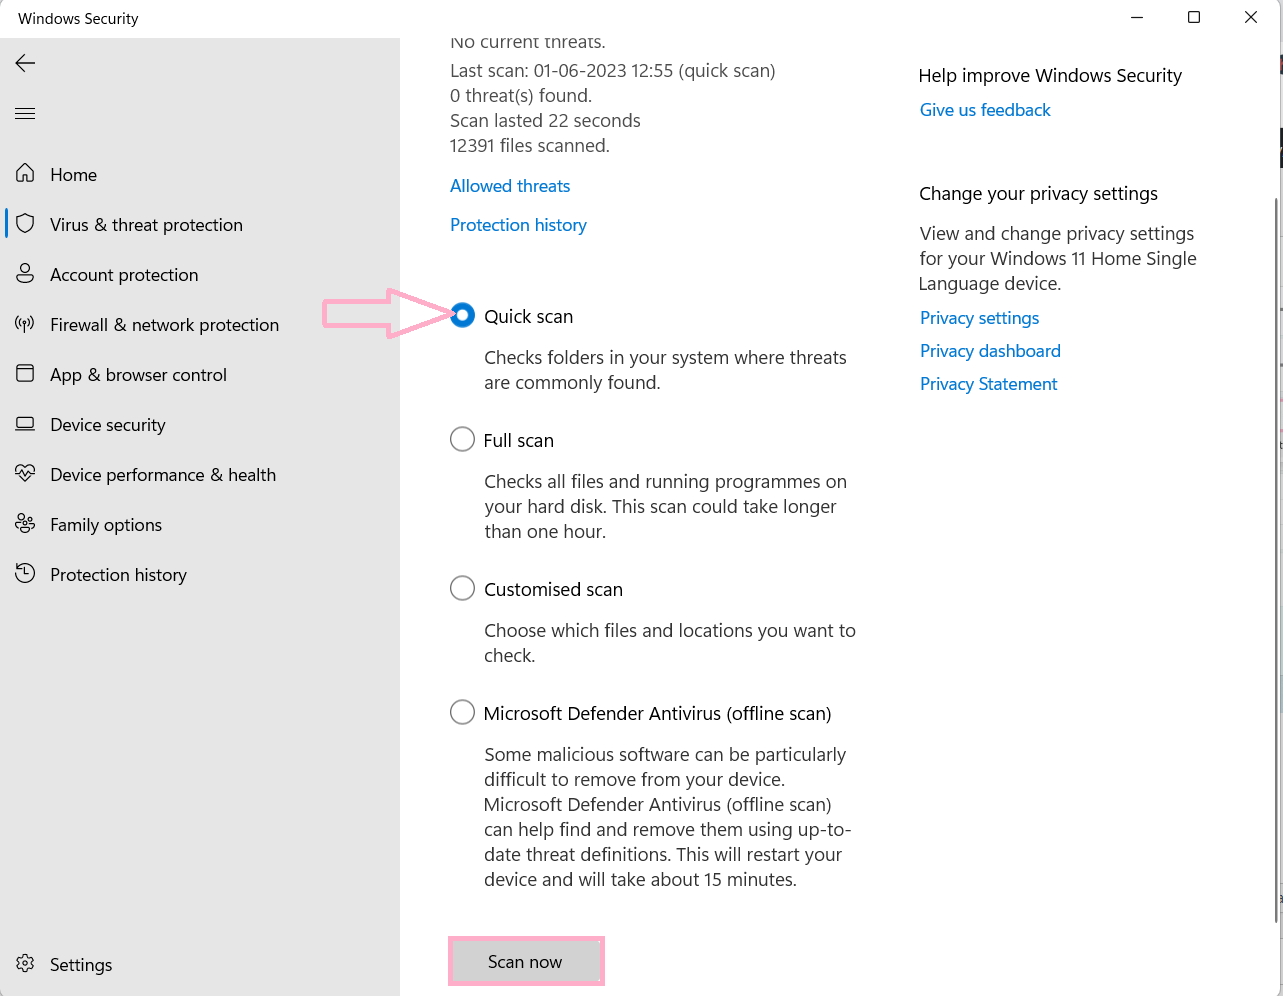
1. Type Virus in the Search bar and then open Virus & threat protection.
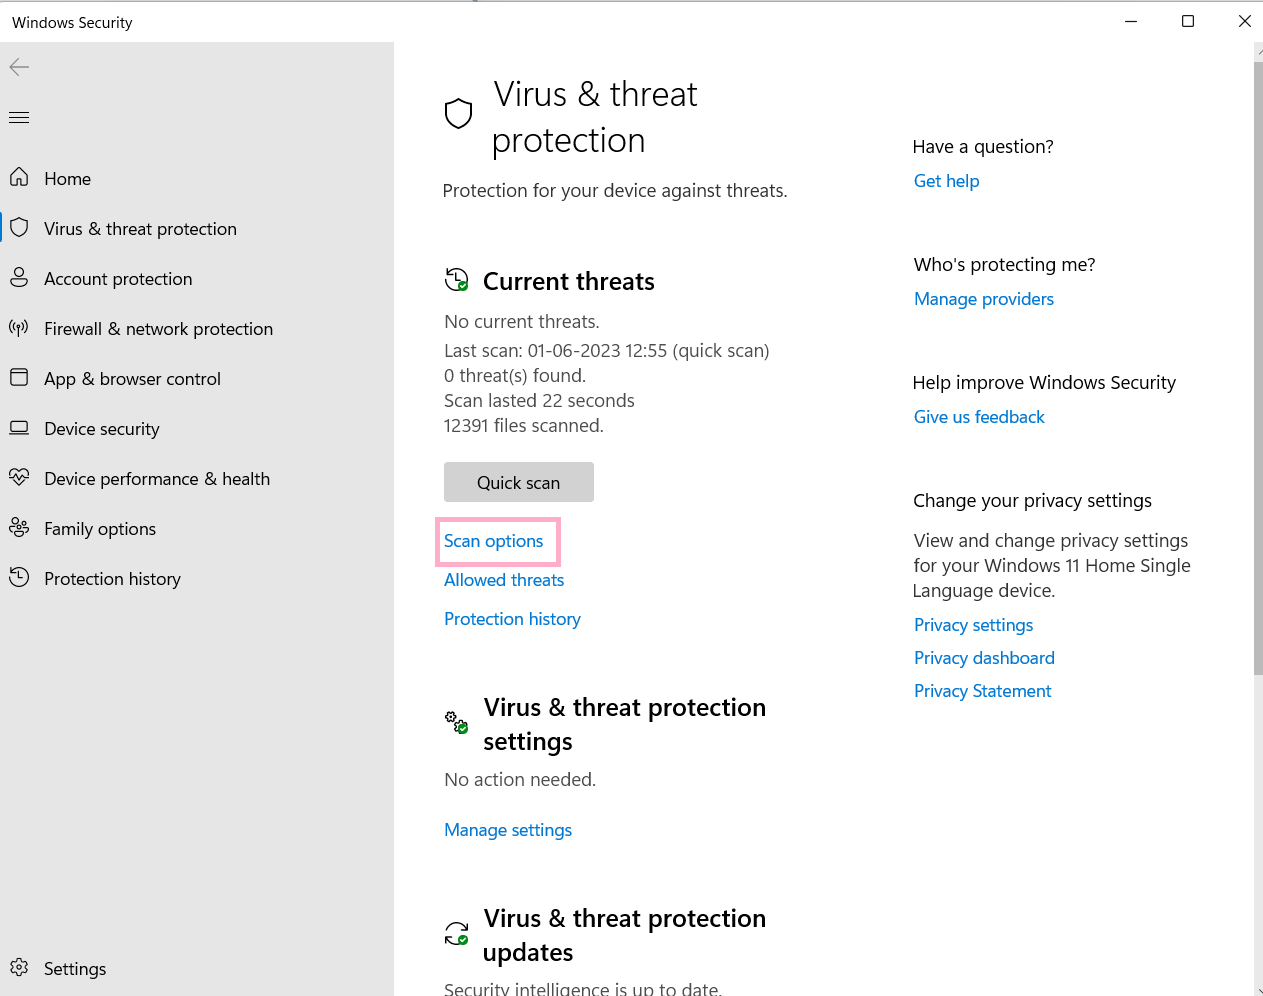
2. Now click on Scan options.
3. Next, select Quick Scan radio button and then click on Scan now.
Fix 3: Update drivers
1. Open Device manager.
2. Then expand the device options that you want to update the driver for.
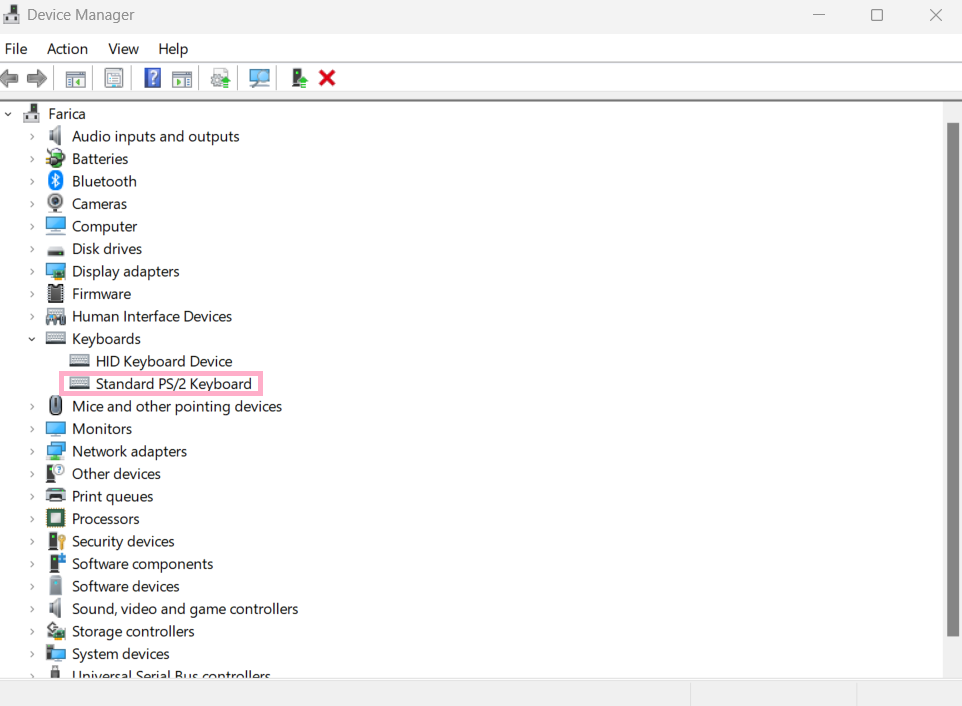
3. Now right-click on the device and choose the Update driver option.
4. Then click Search automatically for drivers.
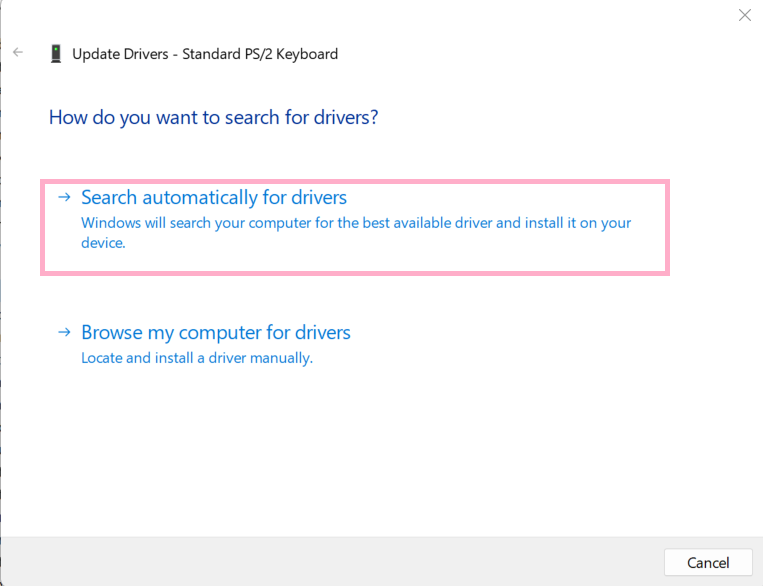
This will automatically search for latest drivers, update them to resolve the issue.
Fix 4: Disable your network adapters
1. Open Device Manager and click on Network Adapters.
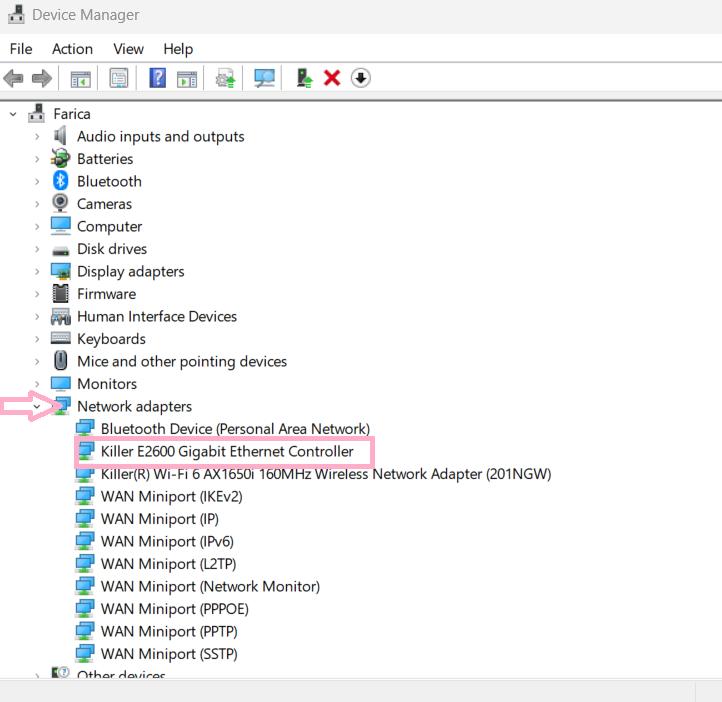
2. Next, right-click on your network adapter and select Properties.
3. Now select the Advanced tab and then click Wake on Magic Packet > Disabled in the Value section.
4. Then click Wake on pattern match > Disabled in the Value section.
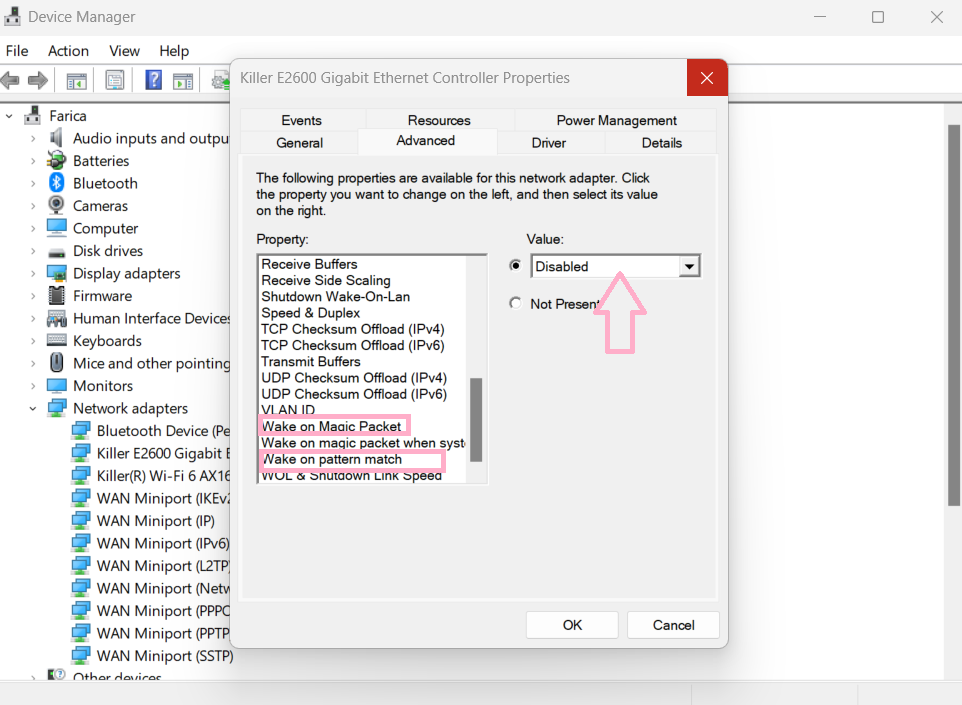
5. Next, click OK.
Fix 6: Run the CHKDSK command
1. Run Command Prompt as an administrator.
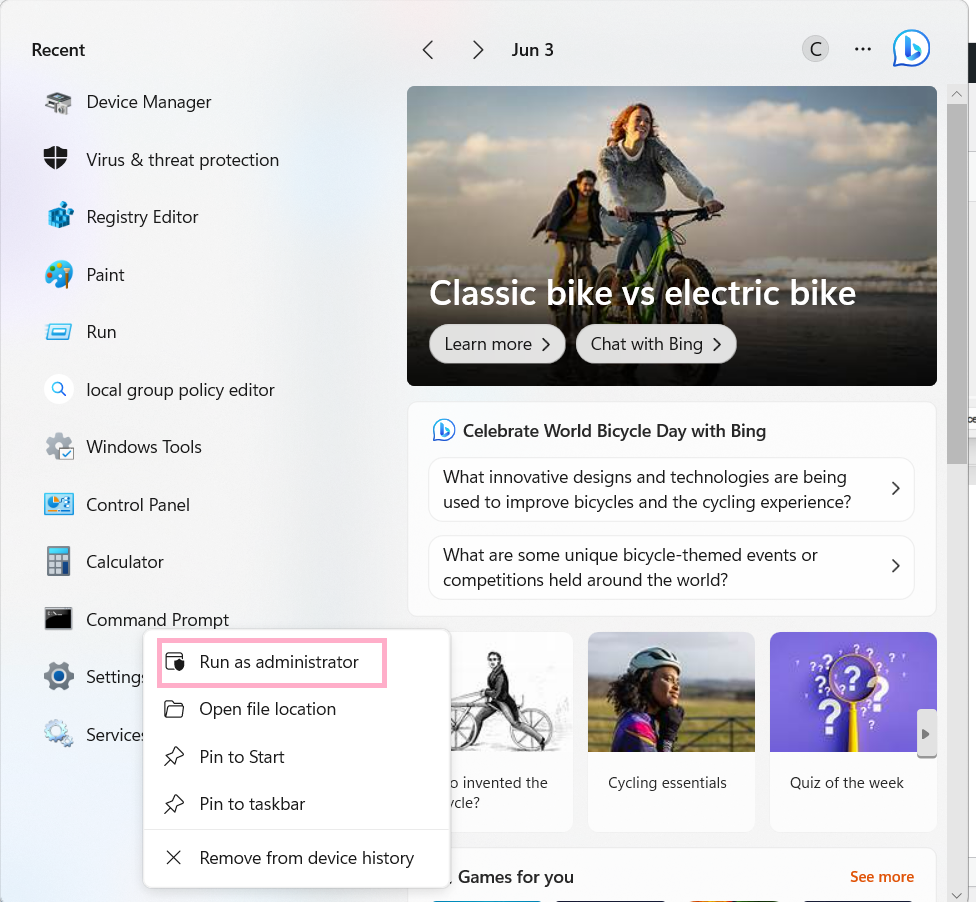
2. Then type the command: chkdsk c: /f /r and press Enter.
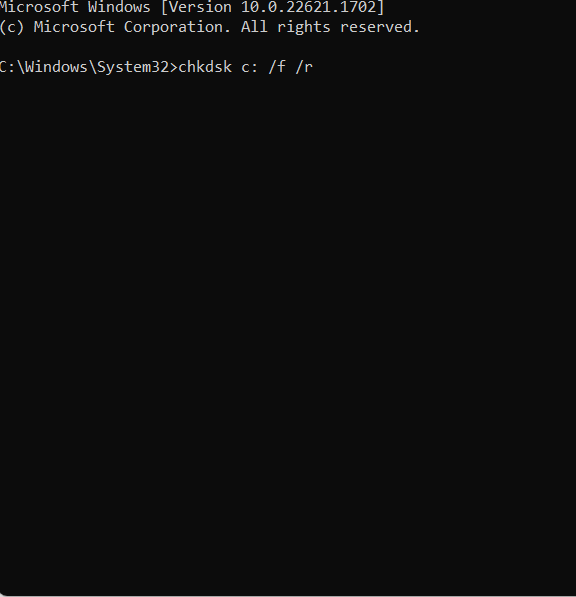
3. Next press Y when asked.
That’s it!
![KapilArya.com is a Windows troubleshooting & how to tutorials blog from Kapil Arya [Microsoft MVP (Windows IT Pro)]. KapilArya.com](https://images.kapilarya.com/Logo1.svg)


Leave a Reply