Windows 11 is a popular operating system used by millions of people worldwide, and sound not working is not uncommon on this platform. If you’re experiencing sound problems on your Windows 11 computer, it can be frustrating, especially if you rely on your computer for work, entertainment, or communication. However, the good news is that most sound problems on Windows 11 can be resolved with some simple troubleshooting steps. In this article, we’ll provide some tips on how to fix them.
Page Contents
Fix: Sound not working on Windows 11
Fix 1: Reinstall audio driver in Windows 11
- Press keys Windows + X to open Quick Access menu.
- Then, Select Device Manager option.

- Next, click on the small arrow besides Sound, video and game controllers.
- Now, right click on your system sound card. Then click on Uninstall device.
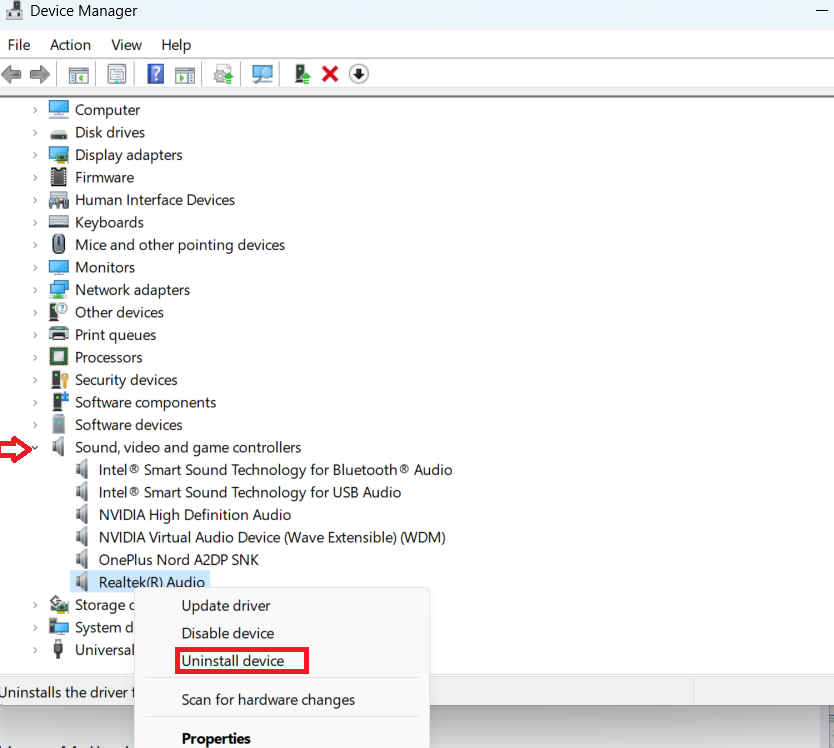
Next, restart your computer. As Windows 11 reboots, it will automatically install all audio drivers.
Fix 2: Adjust Windows 11 sound settings
- Open Sound Settings by searching on the search bar.
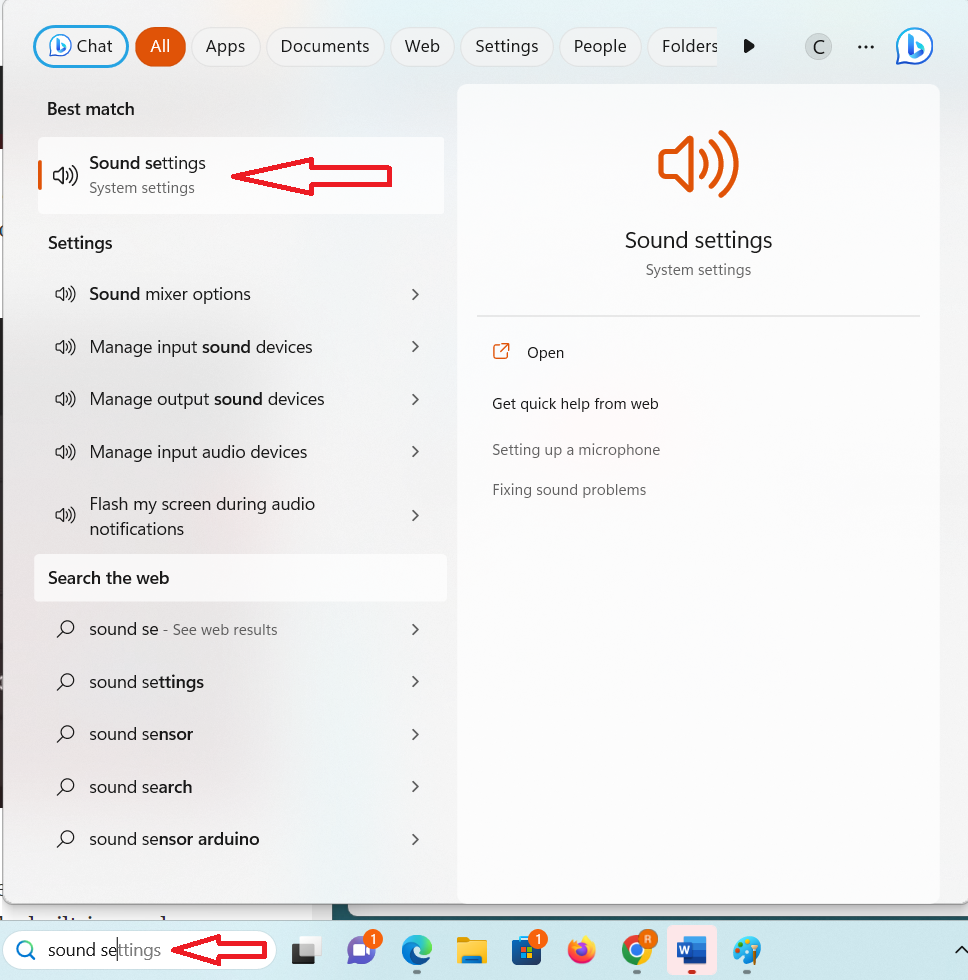
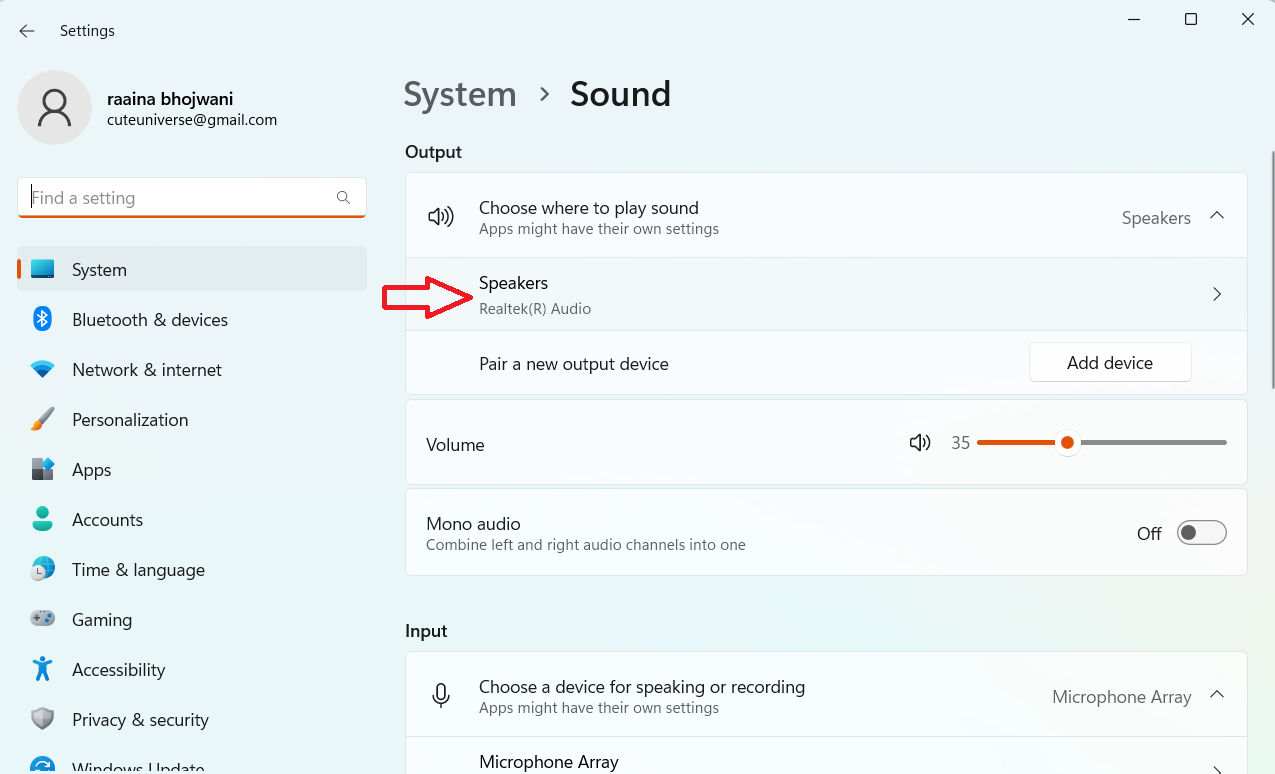
- Next, click on Speakers.
- Then, click on Allow button.
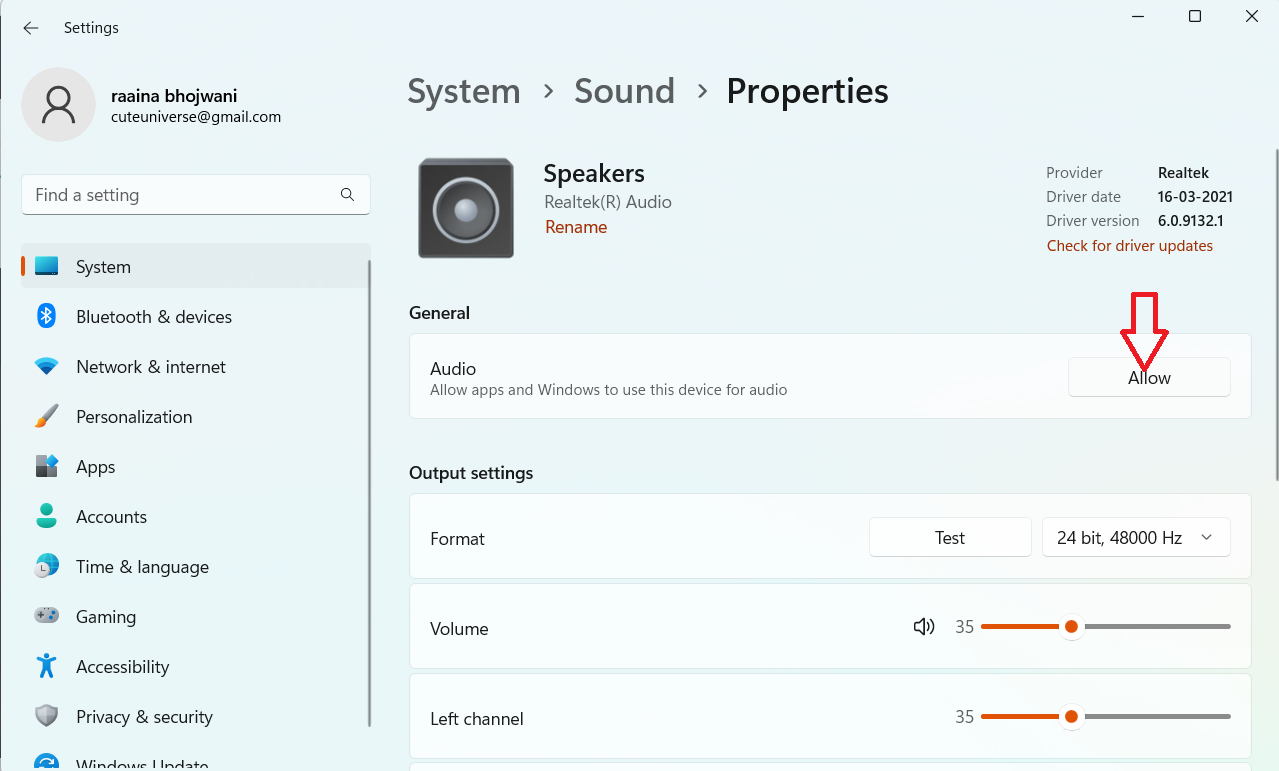
- Afterwards, scroll down and keep the Audio enhancements Off.
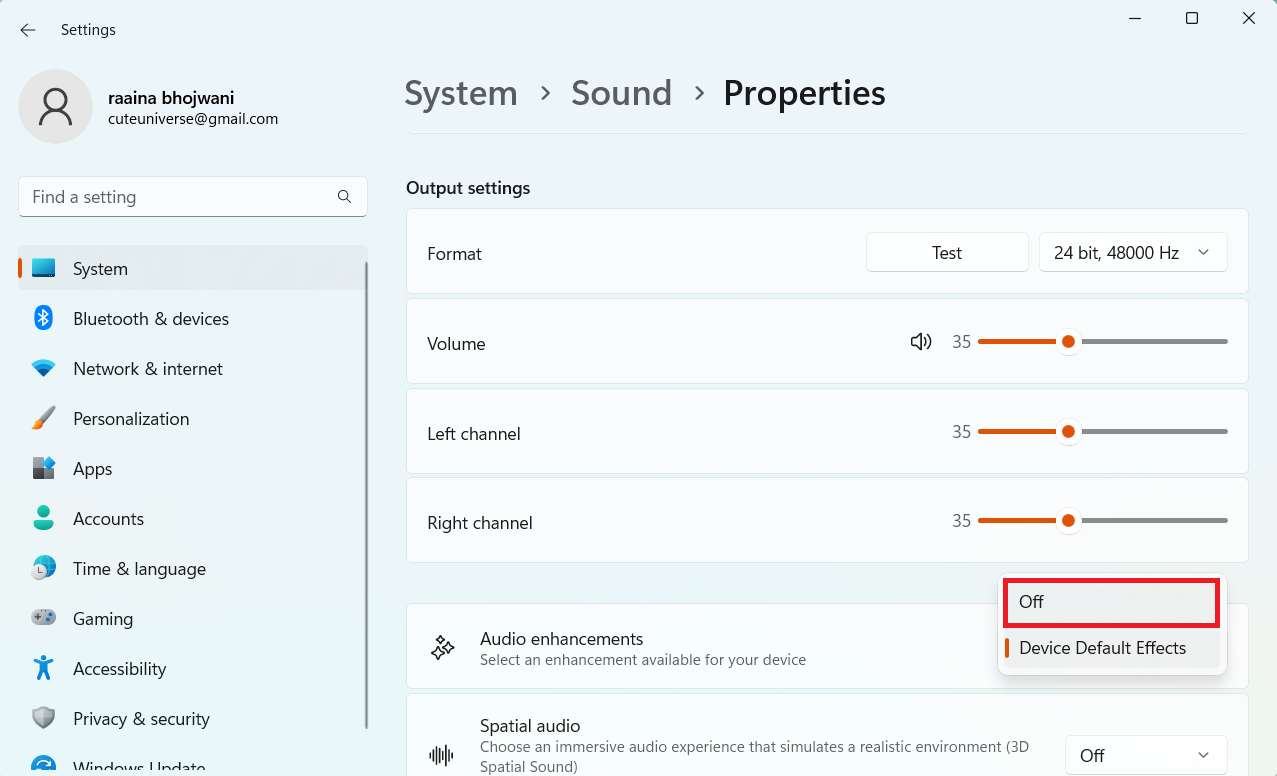
- Also keep Spatial audio Off.

Fix 3: Check Audio muted or Low volume levels
- Press keys Windows + A to open Action Center.
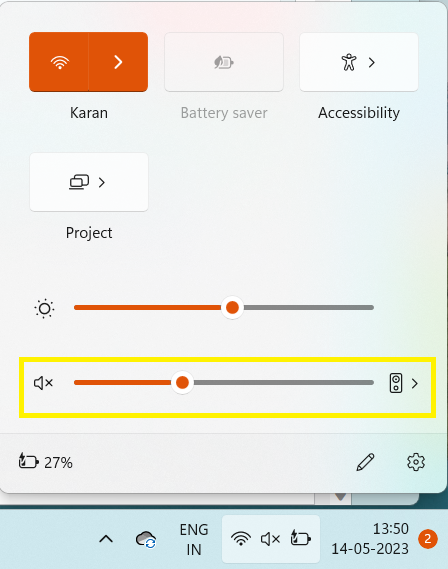
- Then click on audio icon to unmute the sound and increase the level to the audible level.
Fix 4: Connect the audio cable to the correct port
If you’re experiencing sound issues on your Windows 11 computer, one of the basic things you should check is whether your audio cable is connected to the correct port. Start by identifying the audio ports on your computer, which are usually color-coded. The green port is typically designated for speakers or headphones. If you’re using external speakers, ensure they’re powered on and connected to the green port. If you’re using headphones, make sure they’re plugged into the correct port.
Fix 5: Restart Windows Audio Service
- Open Run prompt by pressing Windows + R keys. Then type services.msc and click Enter.

- Next double click on Windows Audio.
- Now change the Startup type to Automatic.
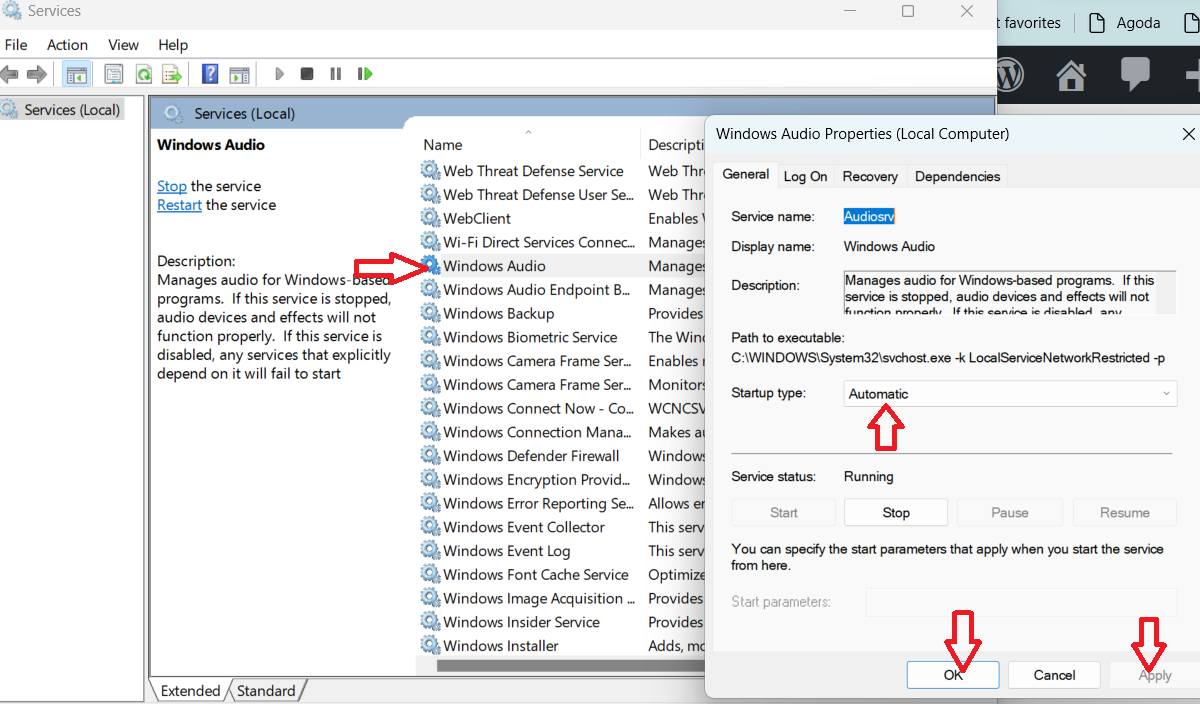
Then click on Start > Apply > OK.
Fix 6: Choose the right audio source
- Press Windows + A keys to open Action center.
- Then click on the arrow besides volume control.
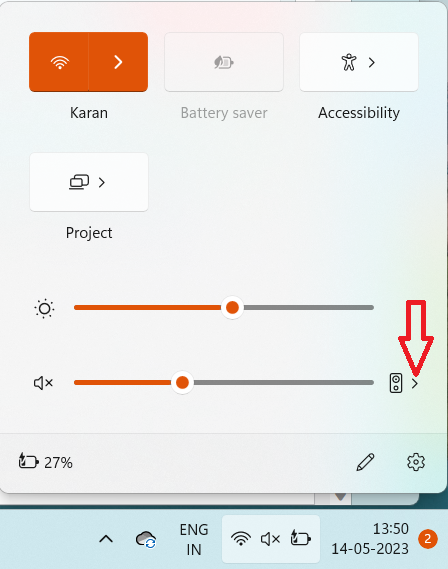
- Then select the audio source that is connected to your computer.

Fix 7: Make sure the playback device is enabled
- Open Run by clicking Win + R and type command mmsys.cpl.
- Then right click on your audio output and select Enable option.

- Again, right click on that device and select Test option to check if its working.

That’s it!
![KapilArya.com is a Windows troubleshooting & how to tutorials blog from Kapil Arya [Microsoft MVP (Windows IT Pro)]. KapilArya.com](https://images.kapilarya.com/Logo1.svg)


1 Comment
Add your comment
Since your update is what screwed up my sound send out a new update to fix it. I am not a computer tech and don’t want to go through the process of repair.