If you are looking forward to import iPhone photos to Windows 11, you can easily do this via iTunes or directly using the Photos app. For this, you have to simply plug-in your iPhone to your Windows device using USB cable. Make sure your iPhone is unlocked while you start importing your pictures. Then open the Photos app on Windows 11/10, click on Import > From a USB device. If you are unable to follow this process and have received Something went wrong with iPhone photo import, here’s how to fix it.

So sometimes you may get this error due to incompatibility among Windows software and iOS software. In many cases, the root cause is HEIC format of your iPhone photos. Because this format is not supported on Windows natively. However, you can buy HEVC video codec pack and extension from Microsoft Store but it is paid, not free.
Here is how you can fix this problem.
Page Contents
Fix: Something went wrong with iPhone photo import to Windows 11/10
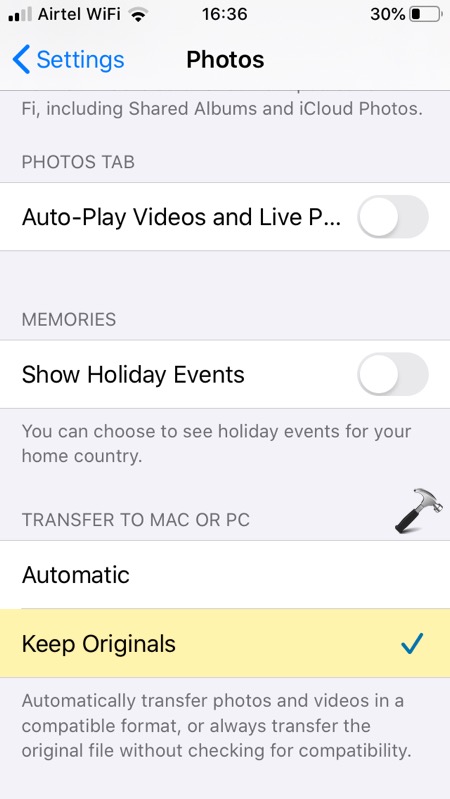
FIX 1 – Check iPhone Photo Settings
- Open iPhone’s Settings app.
- Now scroll down and tap on Photos.
- Then under Transfer to Mac or PC, choose Keep Originals.
FIX 2 – Check Windows Pictures Library Permission
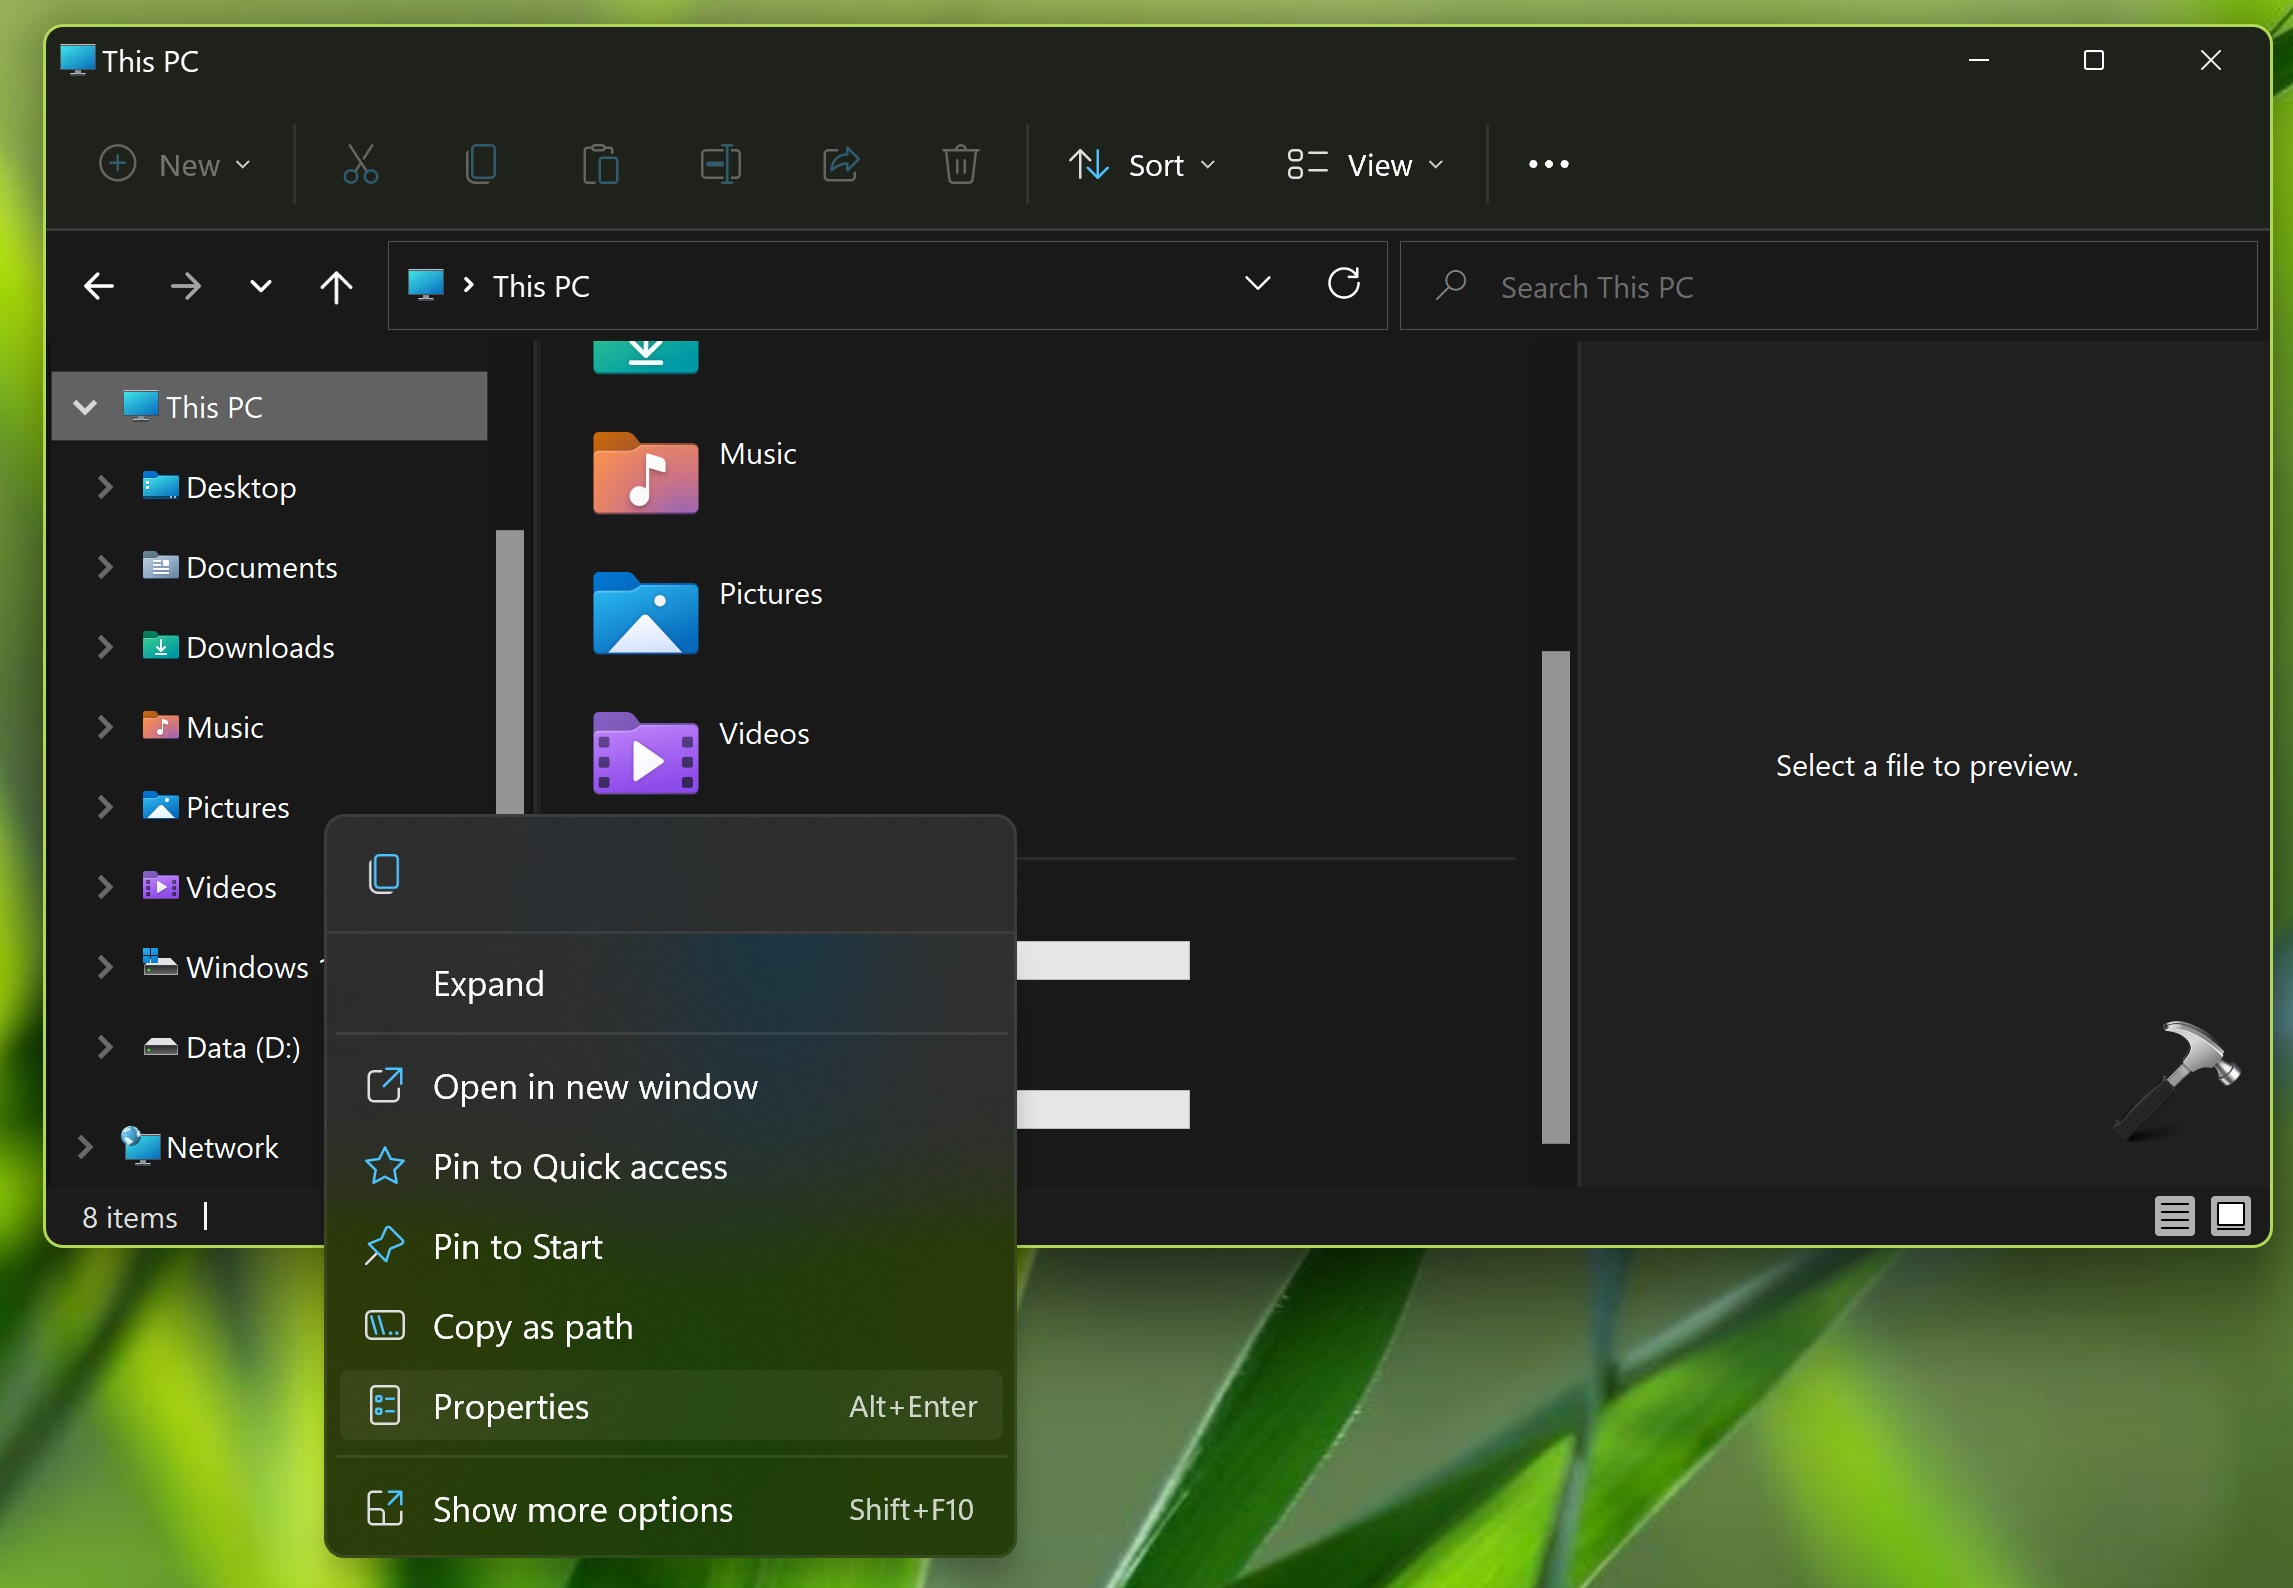
- Press
 + E and open File Explorer.
 - In the left pane, right click on Pictures library and select Properties.
- On the property sheet, switch to Security tab.
- Make sure you have Full control permissions for SYSTEM, your account and administrators group.

FIX 3 – Install latest updates
Make sure you are using the latest version of Photos app on Windows 11/10 operating system. You can go to Microsoft Store app and update Photos app.
Additionally, you can check for updates on your Windows operating system and make sure you have latest updates installed.
Similarly, you can tap on settings app on iPhone and then tap on Software update. Install the latest updates available to your iPhone.
FIX 4 – Import pictures in batches
It has been seen that if you import a lot of pictures at once, it may result into something went wrong error. This is because your images may be having different file formats, along with higher size as iPhone may capture them in highest resolution. And when you import a lot of pictures, you may not be able to figure out which specific pictures are causing this problem.
So the good workaround for this is importing pictures in small batches. Identify the pictures you need first, give priority to these pictures and import them. Then import the pictures you need less.
FIX 5 – Workarounds that usually works
- Make sure that the Photos app is open on the iPhone, and remains open throughout the process.
- Make sure the phone is NOT in Battery Saving mode.
- Make sure that the screen is turned on and ensure it is not locked.
Hopefully, these fixes should helped you to resolve the issue!
Related: Transfer iPhone photos to Mac without Photos app.
![KapilArya.com is a Windows troubleshooting & how to tutorials blog from Kapil Arya [Microsoft MVP (Windows IT Pro)]. KapilArya.com](https://images.kapilarya.com/Logo1.svg)


 + E and open File Explorer.



Leave a Reply