The SFC /SCANNOW command is the standard feature of the Windows 11 operating system, which checks and restores damaged system files for optimal performance. However, at times this command does not work in the following ways; it may not run, respond slowly or create errors. This can be quite discouraging, particularly if you heavily depend on it to solve crucial problems on your site.
In this article, you will learn how to solve the problem with the SFC SCANNOW not working in Windows 11.
Page Contents
Fix SFC SCANNOW not working in Windows 11
Method 1: Run CHKDSK Command to Fix Disk Errors
The working of the SFC command may be hampered by corrupted disk sectors. These disk problems can be detected and solved if the user runs the CHKDSK utility.
1. Get to the Command Prompt: type “cmd” in the Start menu search field, right-click on the app and choose “Run as administrator”.

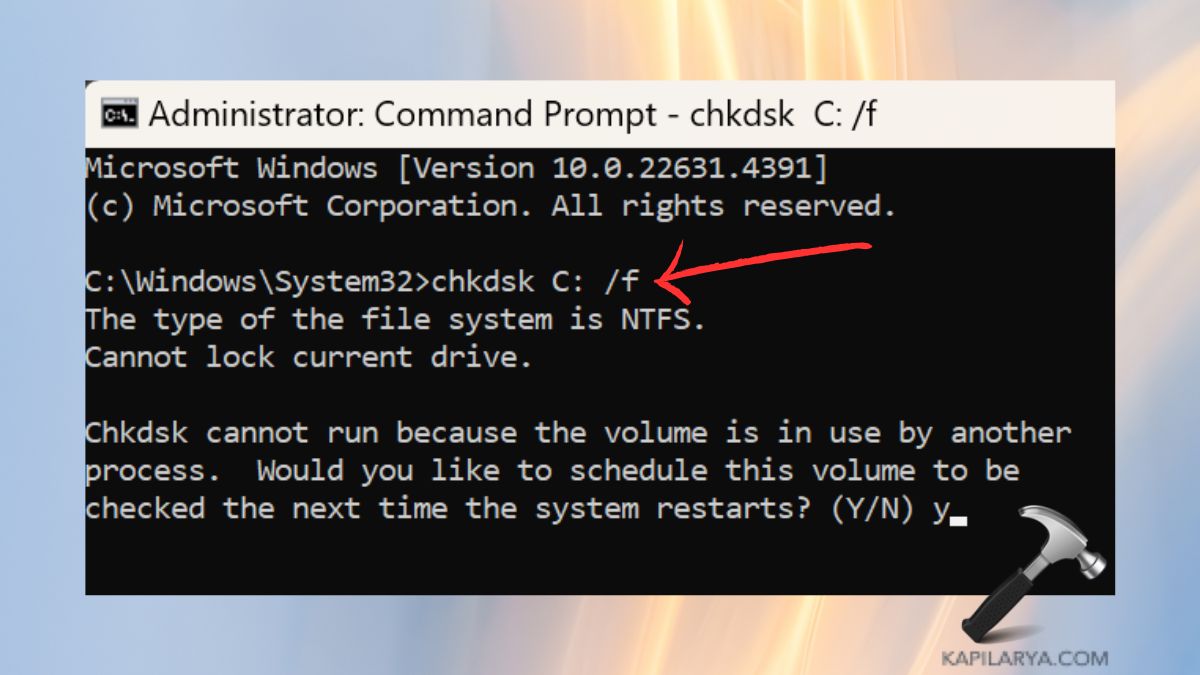
2. Then press Enter after typing this below command. When the option to schedule the scan for the next reboot appears press “Y” from the keyboard as shown in the image, and then reboot your computer.
chkdsk C: /f /r

Method 2: Use SFC SCANNOW in Safe Mode
Safe Mode starts your system with most of the drivers and services turned off, which can help to remove conflicts that would stop the SFC command for running.
1. Press the Windows key + I at the same time to open settings and select System > then select Recovery. In the “Advanced startup” tab, located in the right part of the window and click “Restart now”.

2. Upon restarting, hit F4 repeatedly. And then, click on “Advanced Boot Options” > “Start Settings” > “Safe Mode”.

3. Afterwards, open the Command Prompt as an administrator and type-
sfc /scannow
In most cases when performing an SFC SCANNOW in Safe Mode, this avoids problems created by a third-party software or service.
Method 3: Run Windows Update Troubleshooter
Inefficient updates might break up system files, and thus affect the Windows’ operations. That is why the Windows Update Troubleshooter can come in handy.
1. Press “Windows+I” keys to open Settings app. Then, in the left-panel, click System > Troubleshoot > Other troubleshooters.

2. Look for “Windows Update” in the list then click on “Run”. To successfully and quickly troubleshoot the issue, follow the on-screen instructions.

Method 4: Restart and Configure Required Services
The command also may not work, if necessary services for running SFC are disabled, or configured improperly. It can be solved by restarting these services.
1. Press the keys “Windows + R” to open the Run dialog box. Type this below text and press the Enter key.
services.msc

2. Some of the key services to look out for and check that are running includes-
a. Windows Modules Installer
b. Cryptographic Services
c. Background Intelligent Transfer Service (BITS)

3. Right-click on each one and tap “Properties”.

4. Then, set the “Startup type” of each service to “Automatic”. Now, click on “Start” if the service is not running already. After doing these services on, attempt and execute the SFC command once more.

Method 5: Fix SFC SCANNOW Using Advanced CMD Commands
If SFC SCANNOW does not work, there are other Command Prompt commands which will help you fix it.
1. First, open the Command Prompt as an administrator, as we did in the Method 1.
2. Execute the below mentioned command in it-
DISM /Online /Cleanup-Image /RestoreHealth
sfc /scannow

The DISM command then self-repairs the Windows image, which might address some unknown problems that are making SFC not functional.
Method 6: Change Security Descriptions of System Files
Incorrect user rights on system files can lead to the SFC SCANNOW tool not working. One way this can be solved is by updating the security description.
1. Again, open the Command Prompt as administrator on your Windows 11 system.
2. Paste this command in CMD to reset security descriptors:
icacls C:\Windows\System32 /grant Everyone:F /T
After the process, return back to command line and type SFC SCANNOW again.

Method 7: Delete Registry Key for Pending System Repair
At other times, an impending system repair hampers the overall working of SFC. Doing that can solve this problem, for instance by deleting the registry key that has a connection with it.
1. Press the Win + R to open the Run dialog box, then type the below command, and press the Enter for the Registry Editor.
regedit

2. Navigate to this path-
Computer\HKEY_LOCAL_MACHINE\SOFTWARE\Microsoft\Windows\CurrentVersion\Component Based Servicing\SessionsPending
3. Right click the Session Pending key, and then “Delete” it.

Turn your PC off and then, turn it back on again then enter the SFC SCANNOW command again.
Though, if you experience any error while performing any of these methods on how to Fix SFC SCANNOW not working in Windows 11, leave a comment below so we can help you out.
That’s it!
![KapilArya.com is a Windows troubleshooting & how to tutorials blog from Kapil Arya [Microsoft MVP (Windows IT Pro)]. KapilArya.com](https://images.kapilarya.com/Logo1.svg)


Leave a Reply