Windows gives you an option to set your time zone automatically in your device. However, some users find that they cannot set time zone automatically. This even creates problem in accessing certain websites and applications which require information on correct time zone. You need not worry about this. This post guides you on how to fix ‘Set time zone automatically greyed out in Windows 11’ issue.
Firstly, here is how see how you can set the Date and time automatically in your Windows 11
Page Contents
Set date and time automatically in Windows 11
- Open Settings app and go to Time & language.
- Click on Date & time in here.
- Enable the Set time automatically and Set time zone automatically with the help of the toggles.
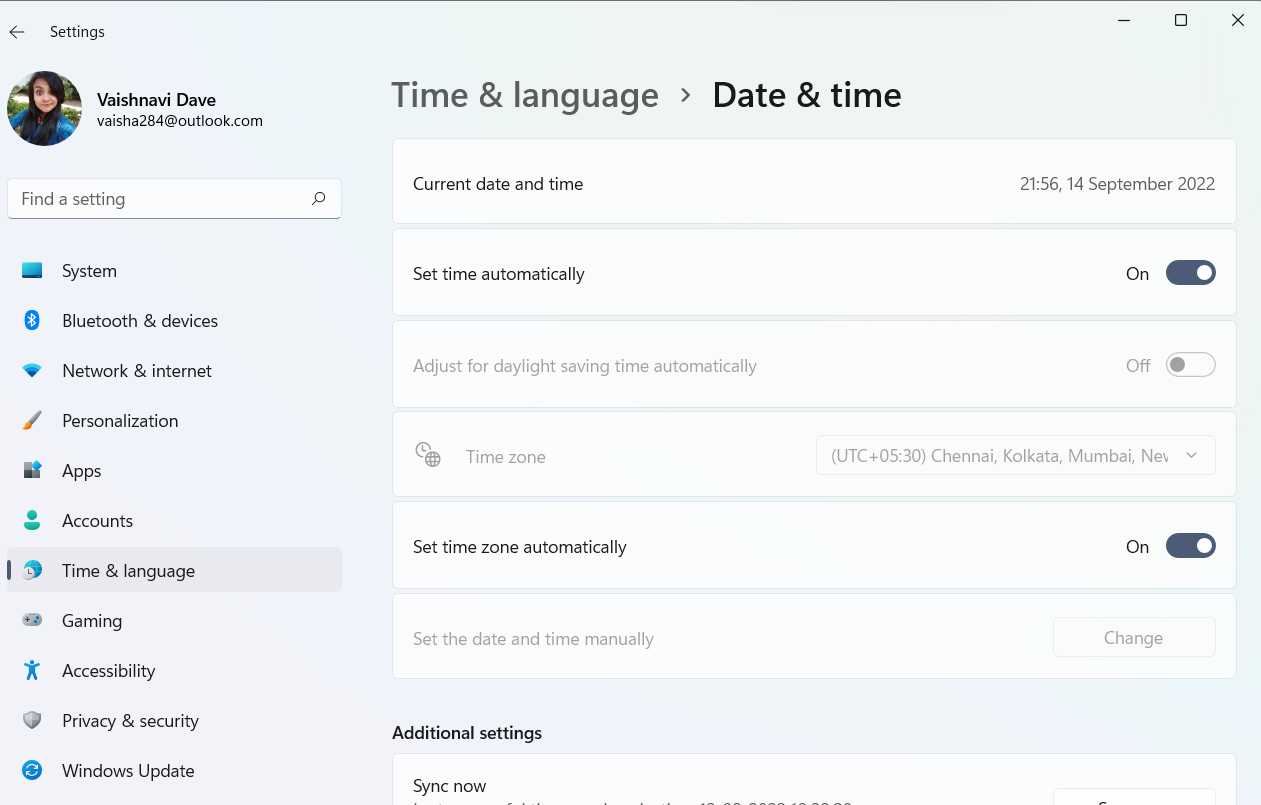
If you find this Set time zone automatically greyed out, below is a full guidance on how to fix it.
Fix: Set time zone automatically greyed out in Windows 11
This problem could be arising when the location is turned off in the settings or when the administrator access to use this feature is not given to the user. Here are certain options you can try to troubleshoot this issue.
Option 1: Enabling Location in Settings
This simple hack could be the solution if somehow location is disabled in your device. Here is how you do it.
- Open Settings and go to Privacy & security section.
- In the App permissions, click on Location.
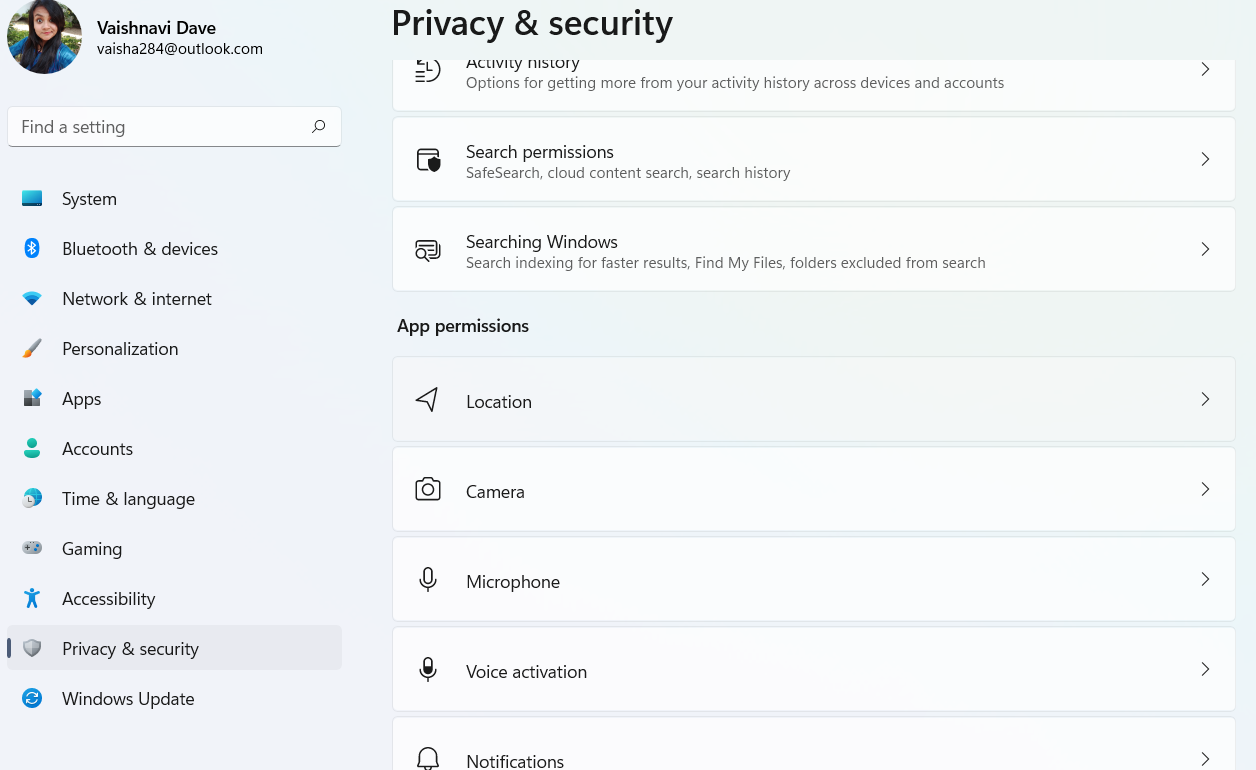
- Turn on the toggles available against Location services and Let apps access your location.
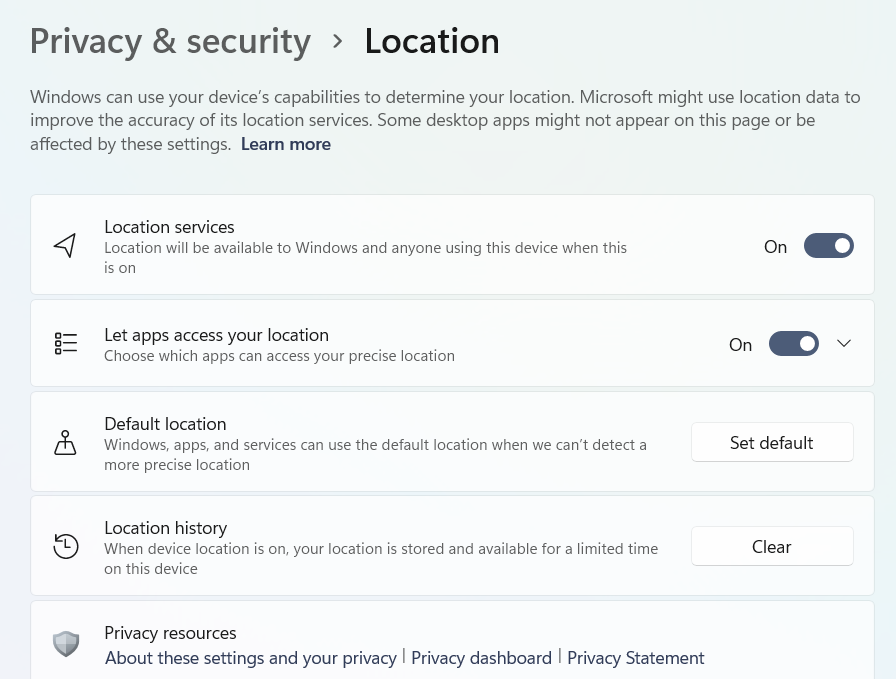
- Now, Restart your PC and check if the issue is solved. If not, try the next options.
Option 2 – Use Clean Boot to troubleshoot
One possible cause could be a third-party software in your computer that may have disabled the feature. Here is how you can correct this.
- Search for MSConfig in Windows menu and open the application.
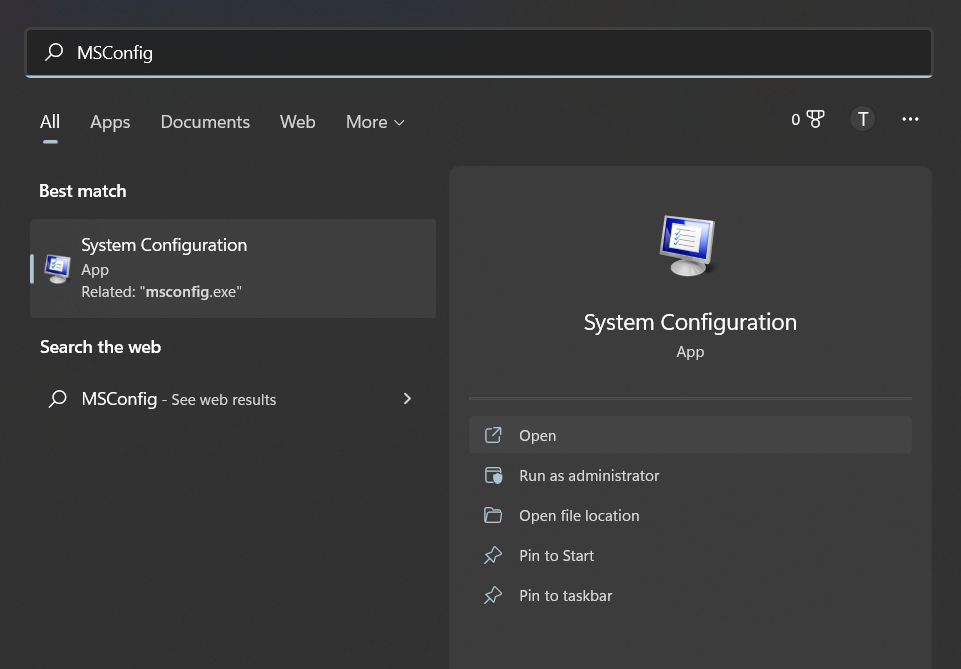
- Go to Services
- Tick the box suggesting Hide all Microsoft services and click on Disable all.
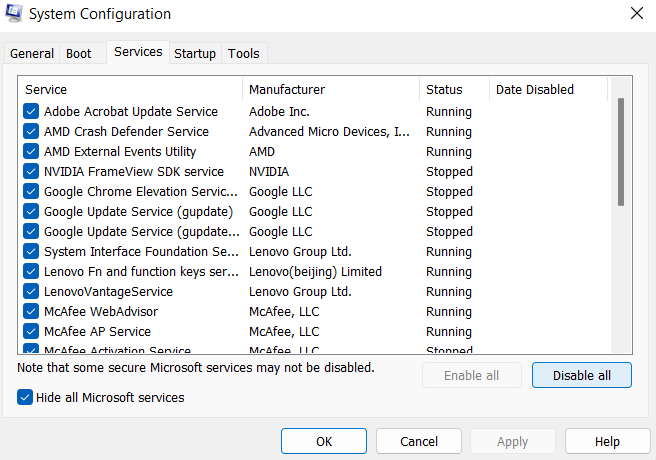
- Click on Apply, and then OK.
Restart your computer now to launch the system in the Clean Boot state. Now check if you can set the time zone to automatically. If not, you may have to repair your system files.
Option 3 – Repairing system files
- Open Command Prompt from the Windows by clicking on Run as administrator.
- In the Window that opens up, run the following commands one by one. Enter one command and then hit enter. Once it is done, type the next command to run it.
SFC /scannow

DISM /Online /Cleanup-Image /CheckHealth

DISM /Online /Cleanup-Image /ScanHealth

DISM /Online /Cleanup-Image /RestoreHealth
When you have run all four commands, go to the settings to check if the problem at hand is solved.
Option 4 – Use Registry Editor to enable Set time zone automatically feature
- Press Win + R keys and type regedit to launch Registry Editor. Click on Yes in the UAC prompt.
- In the window, follow the following path
Computer\HKEY_LOCAL_MACHINE\SYSTEM\CurrentControlSet\Services\tzautoupdate
- In the list that you see, you need to click on a value called Start.
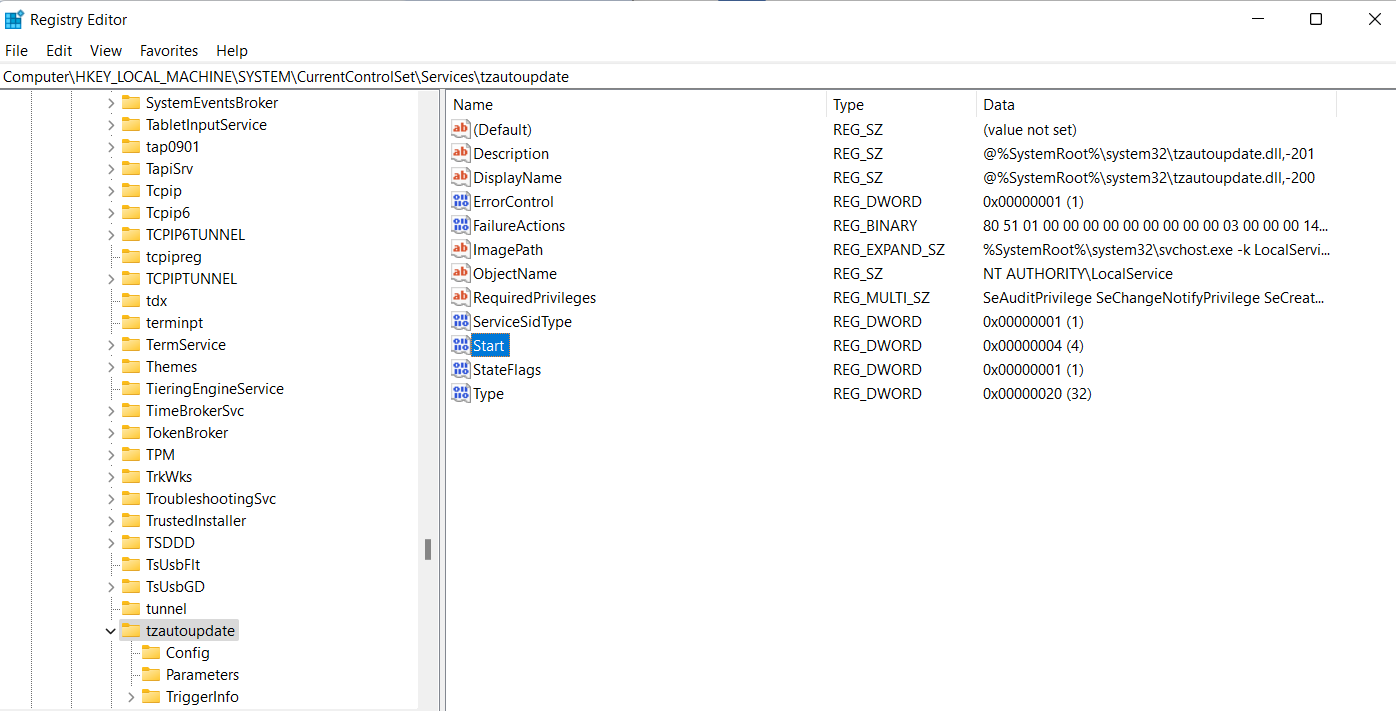
- In the dialogue box, change the value to 3 to enable the set time zone automatically feature.
- It is advisable to enable the location feature if it is turned off. To do it, follow the path below in the Registry Editor.
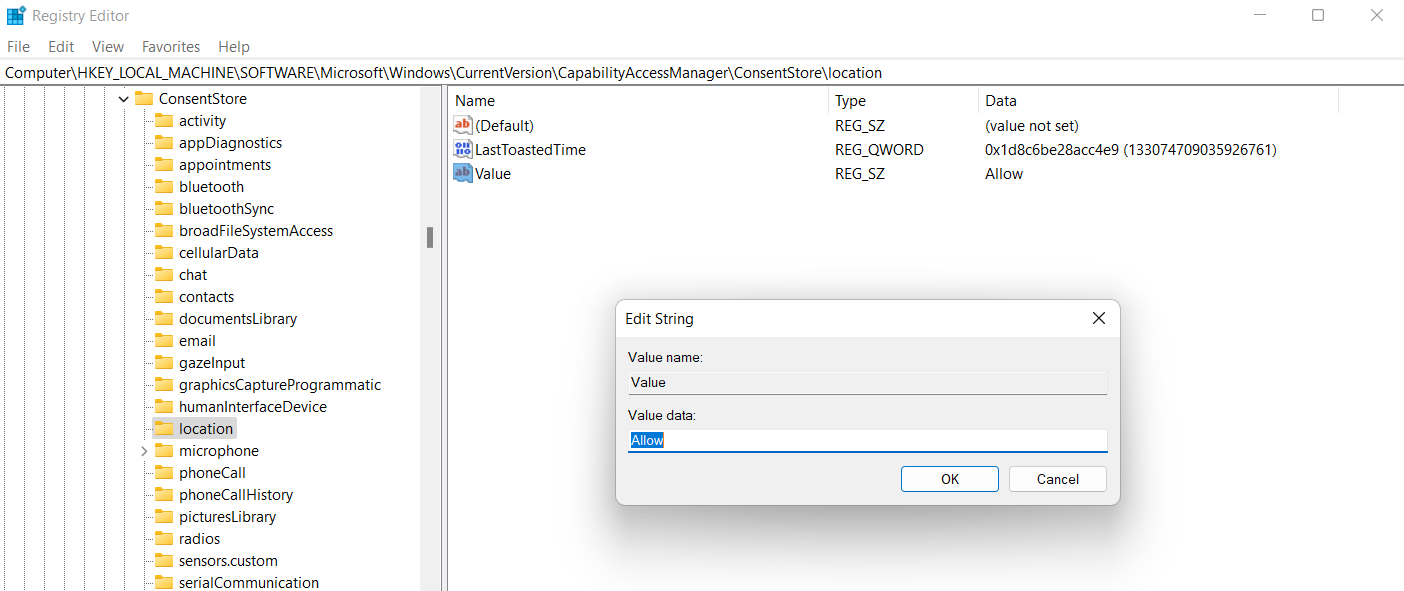
Computer\HKEY_LOCAL_MACHINE\SOFTWARE\Microsoft\Windows\CurrentVersion\CapabilityAccessManager\ConsentStore\location
- Find Value in this list and select it by double clicking on it and in the dialogue box, type allow.
One of these options must fix the problem you are facing.
And that is fix the issue when you find the set time zone automatically feature greyed in your Windows 11 system.
![KapilArya.com is a Windows troubleshooting & how to tutorials blog from Kapil Arya [Microsoft MVP (Windows IT Pro)]. KapilArya.com](https://images.kapilarya.com/Logo1.svg)


Leave a Reply