

Run as different user not showing in Windows 11 is an issue that many users may came across when they want to use other user accounts to run applications or files. This feature is particularly useful where the administrator and power users are required to perform an application with administrative privileges or as a different user without necessarily having to log out of the current session.
Page Contents
Causes of Run as different user not showing in Windows 11
Sometimes, users may fail to find the “Run as different user” option which is very inconvening and reduces control on tasks. This feature might be absent on your Windows 11 system because of the following reasons:-
1. Group Policy Settings
2. Windows Edition Limitations
3. Missing Context Menu Option
4. Incorrect or altered registry settings
5. User Account Control (UAC) Restrictions
Hence, this article collates six practical strategies to regain it. Get ahead to explore them.
Fix Run as different user not showing in Windows 11
Fix 1: Add Run as different user context menu item via the Registry Editor
1. Open the Notepad app.
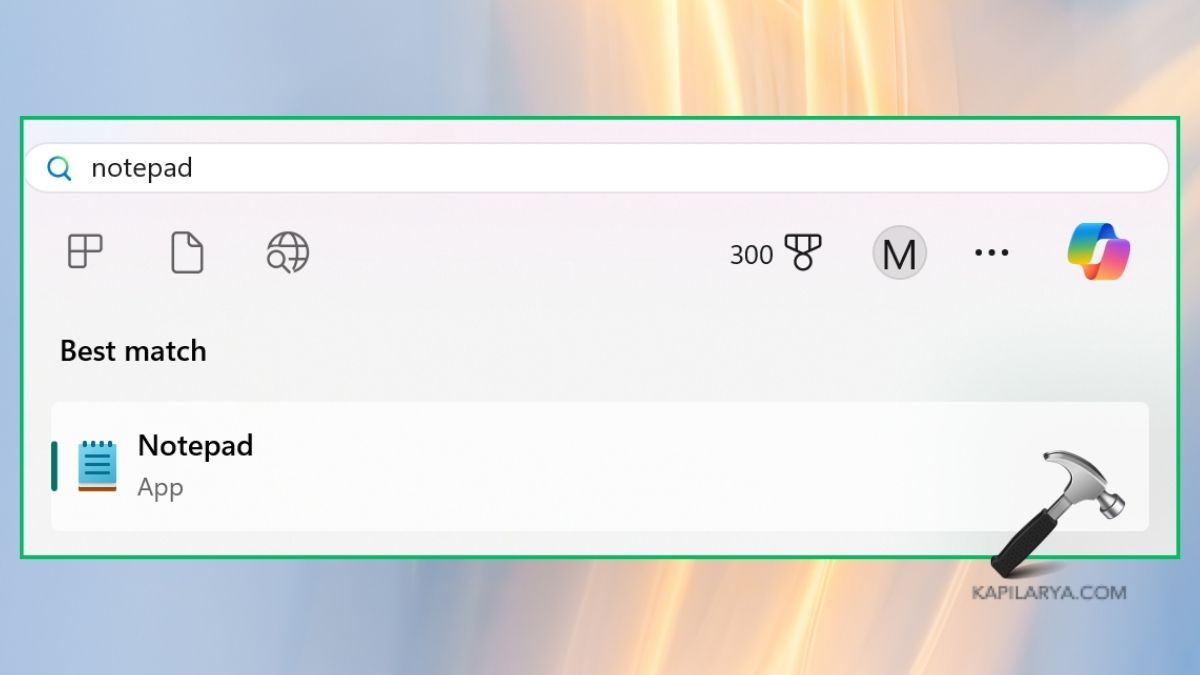
2. Open two separate files and paste either of two scripts in them.
Windows Registry Editor Version 5.00

[HKEY_CURRENT_USER\SOFTWARE\Policies\Microsoft\Windows\Explorer]
"ShowRunAsDifferentUserInStart"=dword:00000001

[HKEY_LOCAL_MACHINE\SOFTWARE\Policies\Microsoft\Windows\Explorer]
"ShowRunasDifferentuserinStart"=dword:00000001
Windows Registry Editor Version 5.00

[HKEY_CURRENT_USER\SOFTWARE\Policies\Microsoft\Windows\Explorer]
"ShowRunAsDifferentUserInStart"=-

[HKEY_LOCAL_MACHINE\SOFTWARE\Policies\Microsoft\Windows\Explorer]
"ShowRunasDifferentuserinStart"=-

3. Now, save the first file as “runasdiffuser1.reg” and another file as “runasdiffuser2.reg”. Close the Notepad.

4. Now, open the file location and Right-click on each file and choose “Run as administrator”.
Fix 2: Restart the Secondary Logon Service
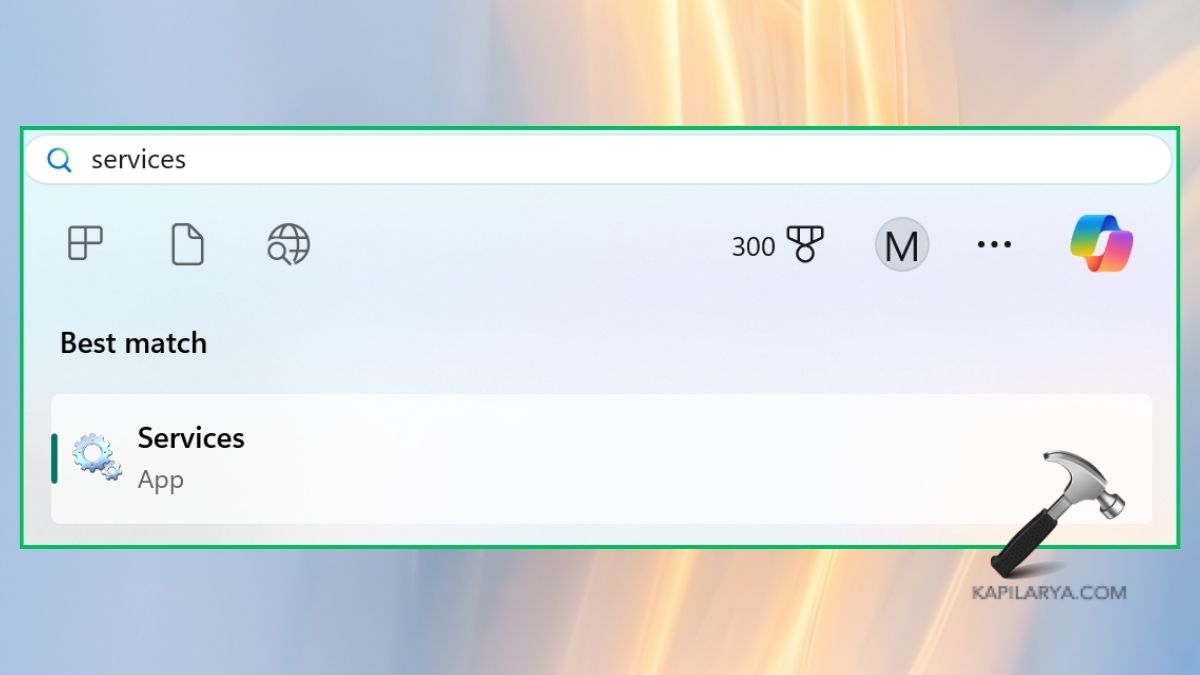
1. Open the Services app from the Windows search menu.
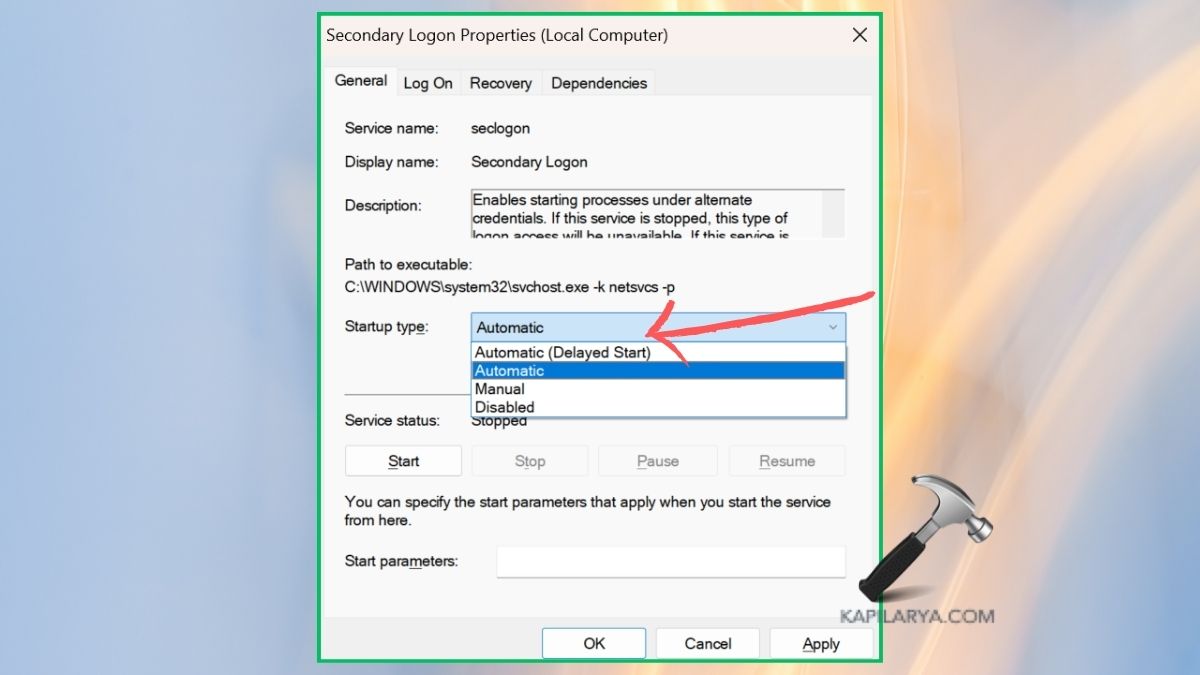
2. From the list, find “Secondary Logon” and double-click it to open Properties.

3. In the Startup Menu, select “Automatic” from the drop down. Tap “Apply” and “Ok”.
Fix 3: Adjust UAC settings
1. Open the “System Configuration” app from the Windows search bar.

2. Go to the “Tools” tab. Click on “Change UAC Settings”. Tap on “Launch” button.

3. Keep the slider to “Never Notify” and click on “OK”.

Fix 4: Uninstall recent Windows update
1. Open Windows Settings. From the left side panel, select Windows Update. Choose “Update history”.

2. Scroll down and tap “Uninstall updates” option.

3. Now, tap “Uninstall” on the last update listed.

Fix 5: Add Run as different user context via Local Group Policy Editor
1. Open the Run dialogue by pressing the “Windows key + R”. Type below command in it and press enter to open the Group Policy Editor.
gpedit.msc
2. Click on User Configuration > Administrative Templates > Start Menu and Taskbar.
3. Next click on “Show Run as different user command on Start” and then, set its value to “Enabled”. Lastly, you must click on the buttons “Apply” and “OK” to effect the changes.

Fix 6: Perform a System Restore
1. Go to the Windows search bar and enter “restore point” then click the best search result that comes forth.

2. From those that appear, go to the option labeled as “System Restore”.

3. Select a restore point that has been created earlier and then click next and then follow the steps that are mentioned on the screen.

That’s it!


Leave a Reply