The “Remote Desktop cannot verify the identity of the remote computer” error in Windows 11 is triggered if there is a difference of time or date between the local and remote computer that is more than five minutes. This time shift hampers accurate Kerberos authentication, which is necessary to allow the remote desktop. Also, this can make you unable to gain access to important systems and applications operating in the remote machines.

Some of the reasons why this error occurs are the following-
1. Time or time zone settings of the remote computer are improperly set.
2. DNS settings are incorrectly configured on the remote computer which hinders name resolution.
3. Lack of a proper trust relationship between the local computer and the domain of Active Directory.
4. Misconfigured ‘RDP Security Layer’ settings for the remote device.
To fix this issue, you have come to the right place. Follow the six best and easy solutions in this article, to effectively fix the error.
Page Contents
Fix Remote Desktop cannot verify the identity of the remote computer
Fix 1: Use the IP address
Make sure to use the public IP address while establishing a connection with the remote device. Do not use the PC’s name or anything else to connect.
Fix 2: Set the time and date settings
The date and time must align with your location. Also, the time zone should be the same for the remote computer. You can do this in two ways:
Option 1: Using Windows Settings to fix Remote Desktop cannot verify the identity
1. Go to the Windows Settings. From the left panel, select “Time & language” >“Language & region” option.

2. In the “Region” section, set the Country & region.

3. Now go back to “Time & language” and choose the “Date & time” option.
4. Toggle on the “Set time automatically”.

Option 2: Using Command Prompt
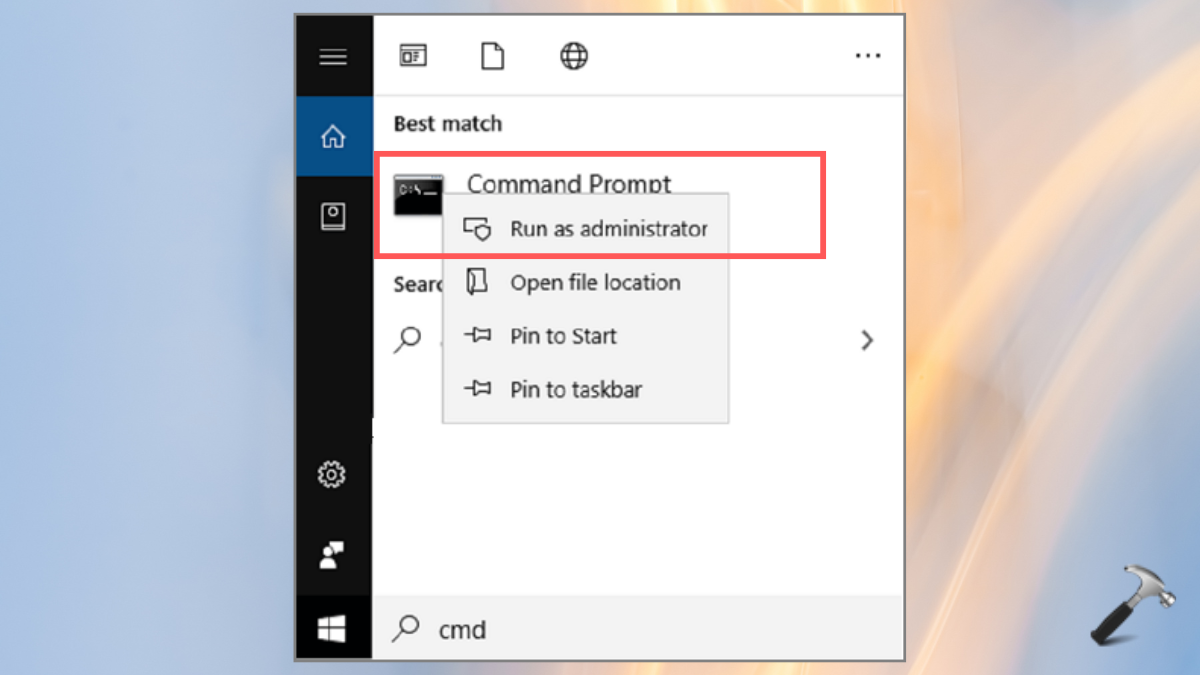
1. Right-click on the Command Prompt icon and choose “Run as Administrator”. Tap “Yes” on the next UAC pop-up.

2. Copy and paste these below commands. Make sure to press the Enter key after pasting each command in the CMD.
net time \\remote-computer-IP-address
Note: Replace “remote-computer-IP-address” with your remote PC’s IP address.
net stop w32time & net start w32time & w32tm /resync

Fix 3: Change the RDP Layer Settings
1. Press the Windows+R keys and type the below command:
gpedit.msc
2. Go to the below path in it-
Computer Configuration > Administrative Templates > Windows Components > Remote Desktop Services > Remote Desktop Session Host > Security
3. From the right-side panel, search and double-tap “Require use of specific security layer for remote connections”.

4. Set the policy to be “Enabled”. In the “Security Layer”, select “RDP”. Tap “Apply” and “OK”.
Now, restart the computer and check if the error is solved.
Fix 4: Opt for Private Network Profile to fix Remote Desktop cannot verify identity
1. Go to Windows Settings > Network & internet.

2. Choose the network you are using Ethernet or WiFi. Select “Private Network”.

Fix 5: Check the DNS server discoverability
1. Press Windows+X keys and select Terminal(Admin).

2. Copy and paste the below command in the Terminal to check DNS server discoverability. Make sure to replace the “server_name” and “DNSServername”.
nslookup server_name DNSServername

Fix 6: Turn off the real-time protection to fix Remote Desktop cannot verify identity
The real-time protection in antivirus can block access to the remote device.
1. Open Windows Security > Virus & threat protection.

Note: Click here if you can’t access Virus and threat Protection on Windows 11.
2. Click on “Manage settings”.

3. Toggle off “Real-time protection”.

That’s it!
![KapilArya.com is a Windows troubleshooting & how to tutorials blog from Kapil Arya [Microsoft MVP (Windows IT Pro)]. KapilArya.com](https://images.kapilarya.com/Logo1.svg)


Leave a Reply