Windows 11 is the latest operating system from Microsoft, boasting a sleek and modern interface along with a range of new features. However, users may encounter certain issues and discrepancies while navigating through its settings. One such problem is the missing Power Management tab in the Windows 11 settings, which can be a cause of problems for those seeking to customize their power options. In this article, we will delve into the possible fixes to restore it, allowing users to regain control over their power settings and optimize their system’s performance.
Page Contents
Fix: Power Management tab missing in Windows 11
Fix 1: Reinstall the driver
1. Open the Run prompt by pressing the keys Windows + R.
2. Type this command devmgmt.msc in the text box and press Enter key.

3. In the Device Manager window, find the device that is creating an issue.
4. Click on the small arrow beside it to expand it.
5. Right-click on the device name (as an example I have taken mouse driver) and choose the option “uninstall device”.
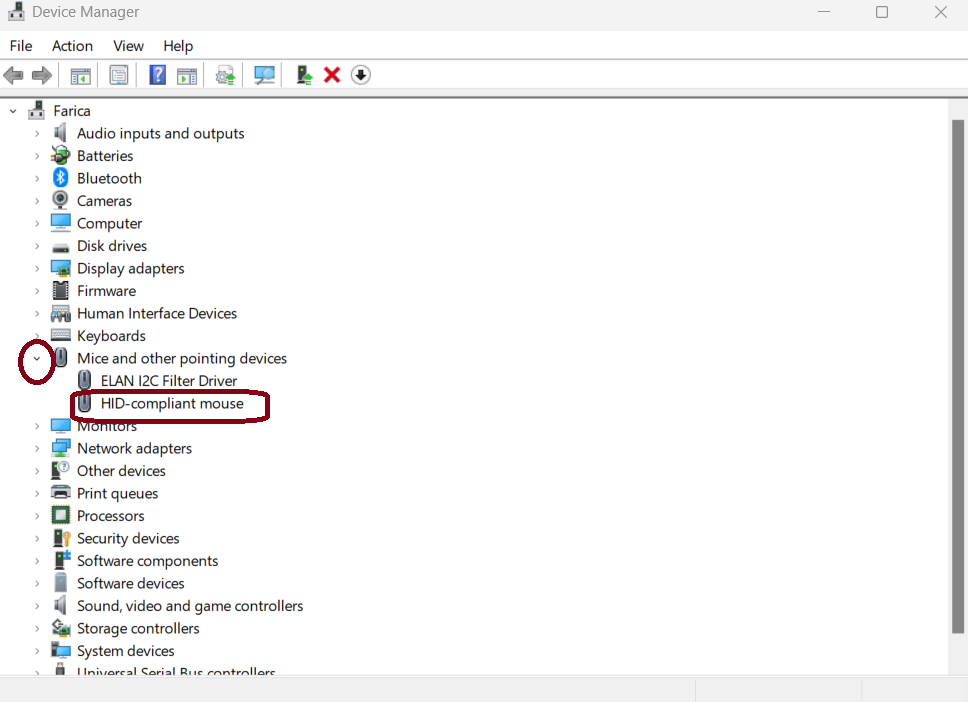
6. Click on the “uninstall” button.

Fix 2: Modify the Registry
1. Open the Run prompt by pressing Windows + R keys.
2. Type “regedit” in the text box to open Registry Editor.

3. Copy and paste this on the address bar of Registry Editor and press Enter:
Computer\HKEY_LOCAL_MACHINE\SYSTEM\CurrentControlSet\Control\Power

4. Locate “CsEnabled”. If there is no “CsEnabled” then create one by following these steps:
5. Right-click on the blank area and click on “New” > then click on “DWord (32-bit) Value”.
6. Name it as CsEnabled. Right-click on “CsEnabled” and choose “modify”.
7. Enter value date “0” and click “OK”.

8. Restart your computer.
Fix 3: Update Windows
1. Open Settings by pressing the Windows + I keys.
2. Click on “Windows Update”.
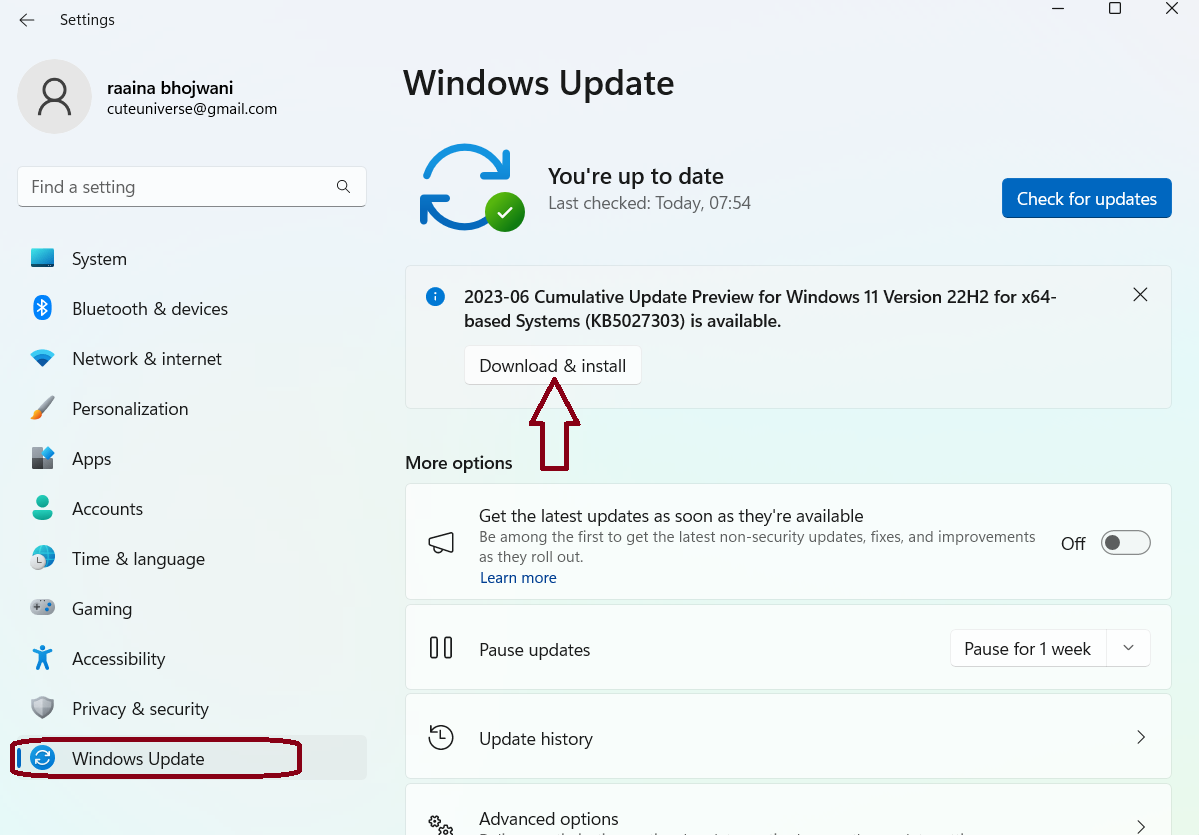
3. Click on “Download & install”.
Fix 4: Update the device’s driver
1. Open the Run prompt by pressing the keys Windows + R.
2. Type this command devmgmt.msc in the text box and press Enter key.

3. In the Device Manager window, find the device that is creating an issue.
4. Click on the small arrow beside it to expand it.
5. Right-click on the device name (as an example I have taken mouse driver) and choose the option “Update driver”.

6. Click on “Search automatically for drivers”.

7. Wait for Windows to find the best available driver on the system.
Fix 5: Change BIOS settings to fix the Power Management tab missing in Windows 11
1. Press the Windows key and click on the Power icon + hold the Shift key. Then click Restart.
2. Select “Troubleshoot”.

3. Click on “Advanced options”.
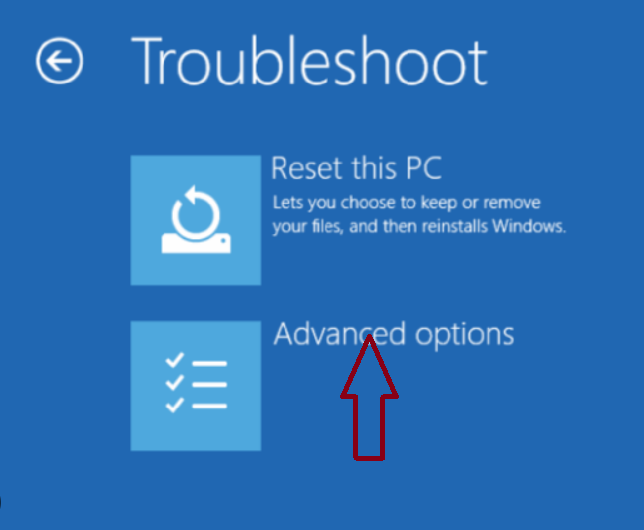
4. Click on “UEFI Firmware Settings”.

5. Click the “Restart” button to enter the system BIOS.
6. Click on the “Power Management” tab
7. Enable “USB Wake Support” > click on “Save”.
8. Exit from BIOS.
Fix 6: Access the Power Management tab via Control Panel to fix the Power Management tab missing in Windows 11
1. Open Control Panel.
2. Click on “Hardware and Sound”.

3. Click on “Device Manager”.
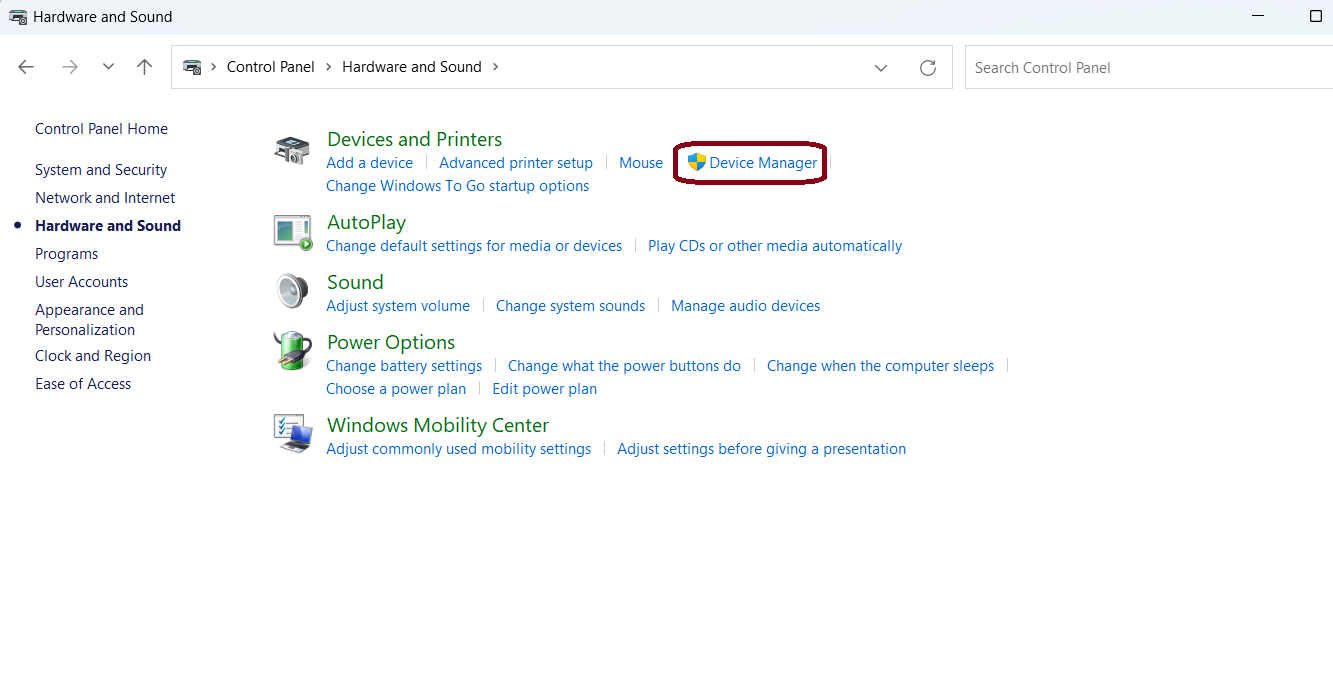
4. Right-click on the device for which you want to change the power settings (as an example I have taken mouse driver) . Choose “Properties”.

5. Click on the “Power management” tab and make the required changes.

6. Click “OK”
Fix 7: Perform a system restore
1. In the Search box of the Task Bar type ” Create a restore point” and double-click on the “Create a restore point” icon to open it.
2. Click on the drive for which you want to enable system restore.
3. Click on the “Configure” button.
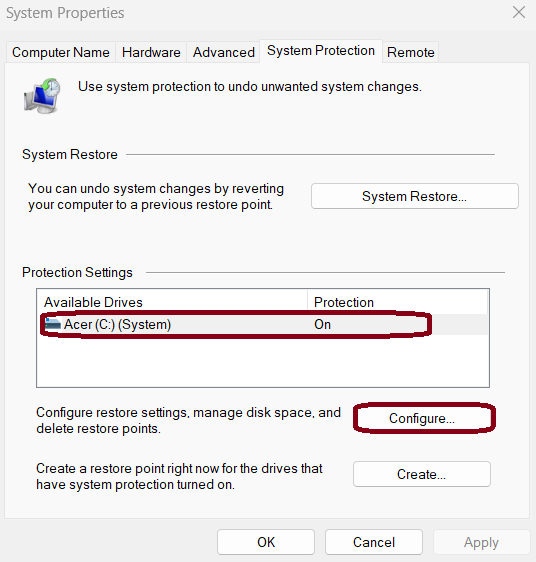
4. Select “Turn on system protection”.

5. Click “OK”.
That’s it!
![KapilArya.com is a Windows troubleshooting & how to tutorials blog from Kapil Arya [Microsoft MVP (Windows IT Pro)]. KapilArya.com](https://images.kapilarya.com/Logo1.svg)




Leave a Reply