

Getting the error code 0x80043103 with no error description message on Windows 11/10 can be quite irritating and somewhat puzzling. The most common situation when it appears is during operations such as synchronization of emails, connecting to certain services, or updating applications, users are given little information about what went wrong.
Since, there is no detailed error description the process of diagnosing the problem may seem complicated. Nevertheless, recognizing the possible reasons and using suitable remedies enables us to overcome this error and fix the problem. In this article, we will discuss the effective solutions of the 0x80043103 error on Windows 11/10.
Page Contents
Fix No error description available, Error Code 0x80043103 on Windows 11/10
Fix 1: Move the file to a different location and try
The first and rather obvious solution to fix error code 0x80043103 on Windows 11 is to change the location where the problematic file is stored and use/access it again. At times this may occur because the file may have been stored in a location that the system cannot access or it is already corrupted hence the system cannot perform the operation effectively.
Fix 2: Restart and retry
If you have failed to fix the error by closing the program, then you should consider restarting your computer because it helps in refreshing system processes, clears temporary files as well as solving other minor issues that may be causing the error. Again, before restarting, ensure that you have saved all the file you were working on and even close all other applications that are opened.
If the same error appears after the restart is complete, then there may be the need for more diagnostics.
Fix 3: Use the PowerShell command to delete
1. Open the Powershell with Administrative rights from the search bar.
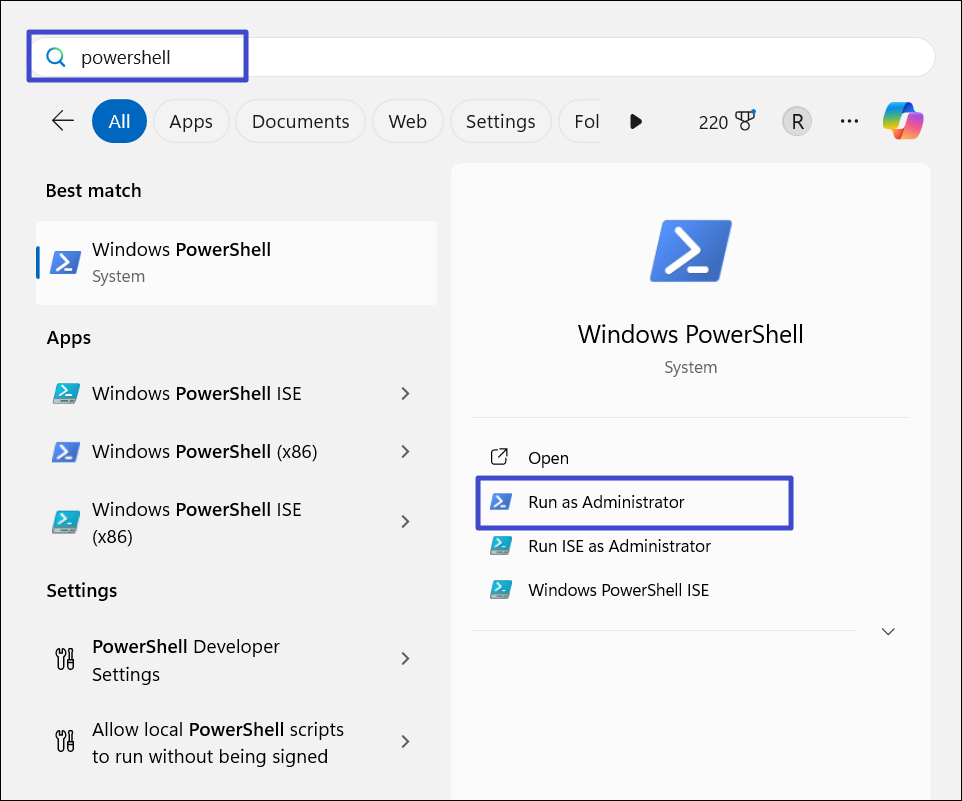
2. Paste the below command on it and hit Enter key.
Remove-Item "path of the folder or file" -Recurse -Force
In the “path of the folder or file” specify the folder’s path.

Fix 4: Disable Windows Search Service and then delete
1. From the Windows search bar, open the “Services” app.

2. Find and double-click the “Windows Search”.

3. On the Startup type, select “Disabled”.

Fix 5: Temporarily disable the firewall
1. Open Windows Security app from the Windows search console. Go to “Firewall & network protection”.

2. Click on “Domain network” and toggle off the “Microsoft Defender Firewall”. Repeat the same with “Private network” and “Public network”.

Fix 6: Delete the file in Clean Boot or Safe Mode
Cleaning the troubled file using the Clean Boot or Safe Mode could be helpful in resolving the issue. These modes run only the basic system drivers and services which assist in avoiding certain conflicts or limitations imposed by other programs.
1. Perform a Clean Boot
a. To open the Run dialog you have to press the keys: Windows + R.
b. Open the Run by pressing the Windows key + R, and then type below command and press Enter.
msconfig

c. For Windows XP, directly search and open the System Configuration. Switch to the “General” tab where you need to choose “Selective startup”.

d. Make sure that the checkbox next to “Load system services” is checked while the one beside “Load startup items” is not checked.

2. Disable Non-Microsoft Services
a. Click on the “Services” tab, within the box that pops up untick the “Hide all Microsoft services” option.
b. Then, select the “Disable all” button.

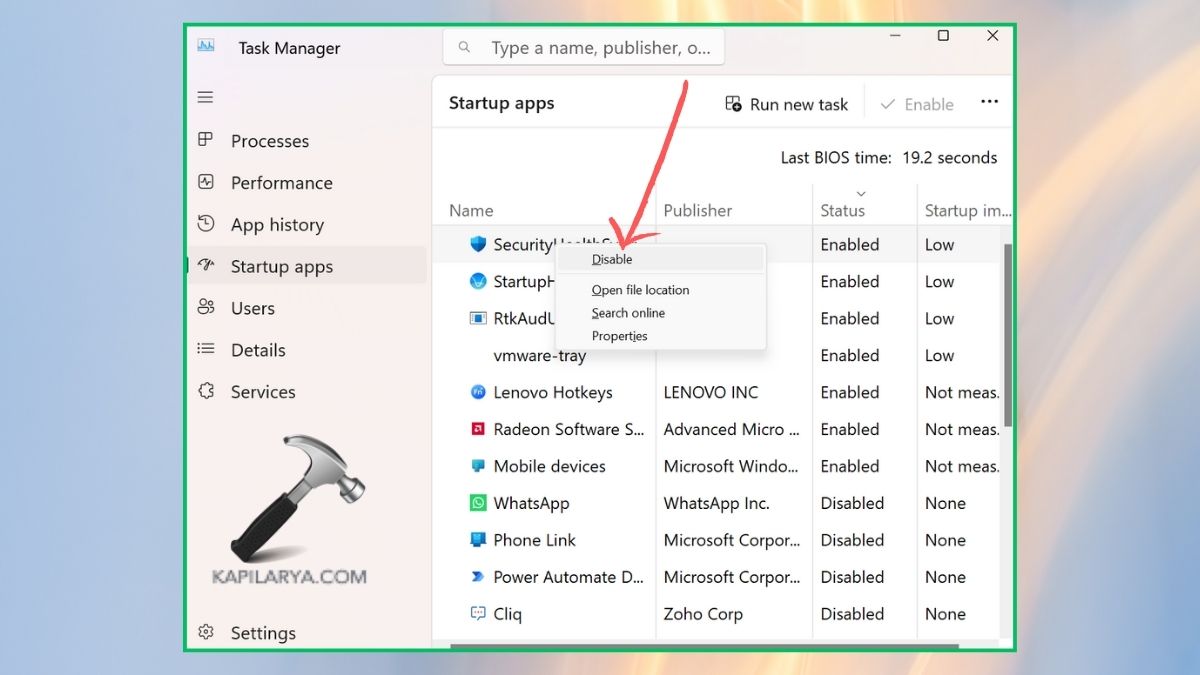
3. Disable Startup Programs
a. Go to the “Startup” tab and launch Task Manager.

b. Turn off all the startup programs by right click on each program and then select the option of “disable”.
4. Save these changes you have made and then you have to reboot your computer.
5. After your computer have restarted in Clean Boot mode, get to the location of the file. For this, right click on the file icon and choose “Delete” option. The application will ask if you to confirm the deletion process, to delete the application click ok.
6. Go back to the System Configuration window and in the General tab, choose “Normal startup” Then, click “OK”.
7. Select “Apply” and “OK” to go back to the normal setting; restart the computer.

We hope these methods help you well. If you experience any error while performing any of these methods to fix “No error description available Error Code 0x80043103” on Windows 11, leave a comment below so we can help you out.
That’s it!


![[Latest Windows 10 Update] What’s new in KB5055612?](https://www.kapilarya.com/assets/Windows10-Update.png "[Latest Windows 10 Update] What’s new in KB5055612?")


Leave a Reply