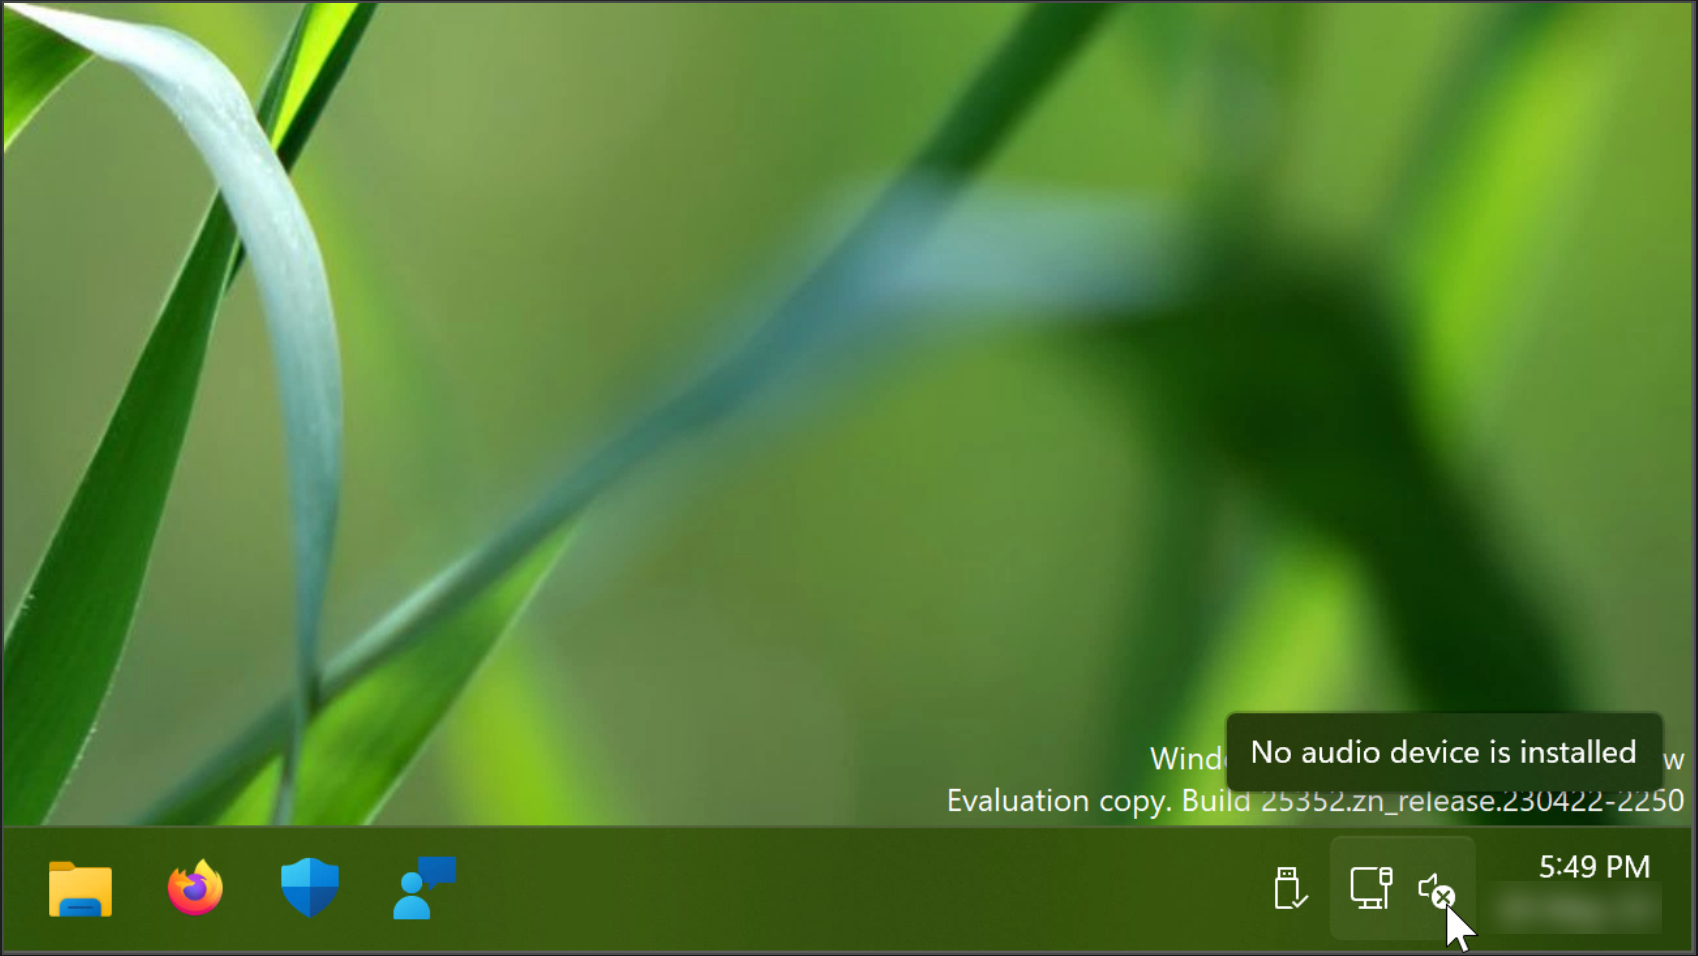
Windows 11 is the latest operating system released by Microsoft, offering various features and improvements over its predecessor. But, one common issue that users might encounter is the “No audio device is Installed” error message. This problem can occur due to several reasons, such as outdated drivers, incorrect audio settings, or hardware malfunctions. This error can be frustrating for users, especially if they rely on their computer’s audio for work or entertainment. In this article, we will explore some of the possible solutions to fix the “No audio device is Installed” error in Windows 11.
Page Contents
Fix: No audio device is installed in Windows 11
Fix 1: Check if your audio device is disabled
- Firstly, open Run by pressing Win + R keys together.
- Then type mmsys.cpl > click OK. The Sound dialog box opens.

- Next, click on the Playback tab > thereafter right-click and select Enable.
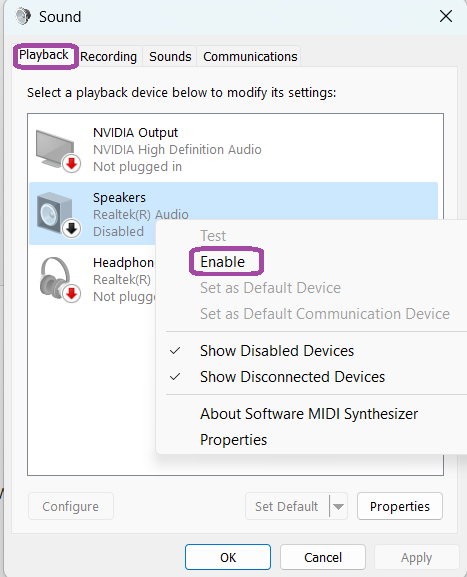
- Right-click in the window and then click Show disabled devices.
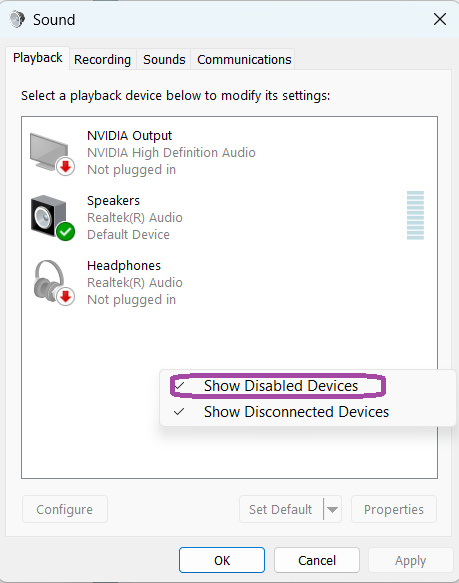
- After enabling the output audio device, click on the Set default option and then restart your PC.
Fix 2: Uninstall or disable any third-party driver updater tools
Third-party driver updater tool is easy to use to to scan and update all your drivers. Though sometimes it may conflict with audio components in your computer. To avoid these conflicts, disable or uninstall this tool.
Fix 3: Reinstall the audio output driver with a generic device driver
- Open Run by pressing Win + R keys together.

- Now, type devmgmt. msc and click OK.
- Then click on the Audio inputs and outputs arrow.
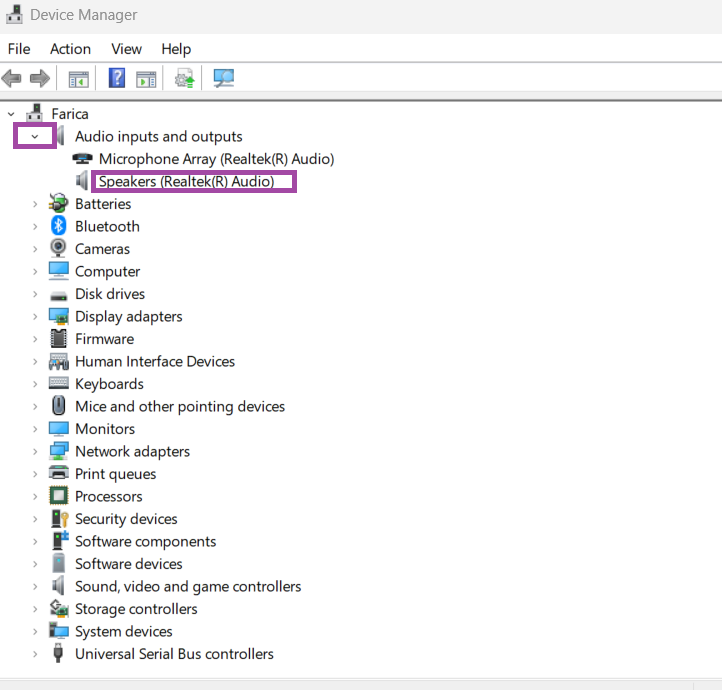
- Next, Right-click on your output device and click on Update driver.
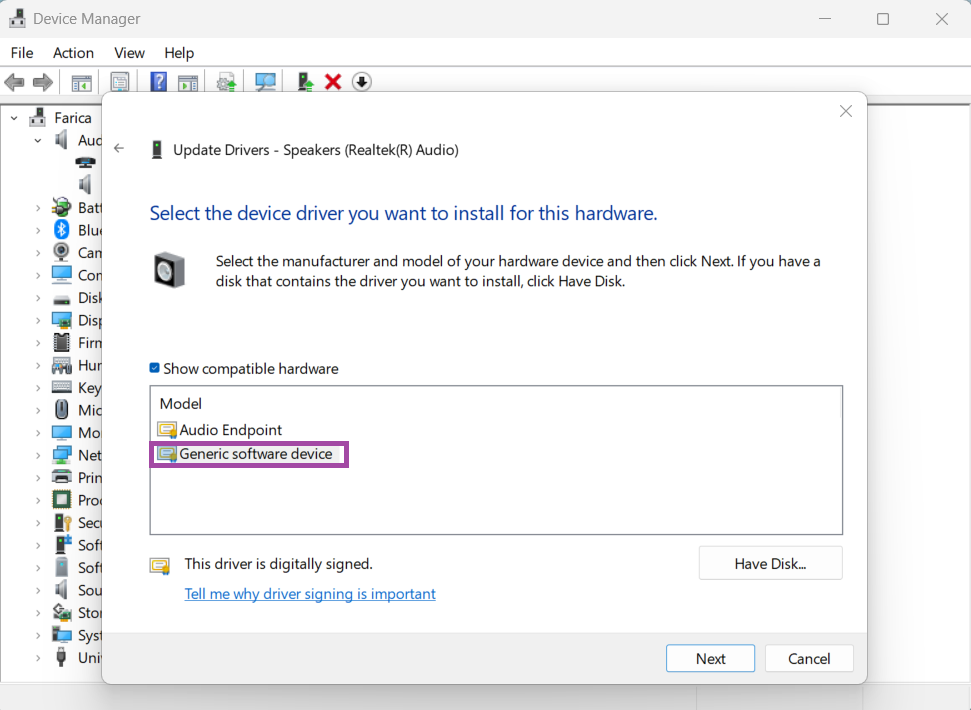
- Then, Select Browse my computer for drivers > Let me pick from a list of available drivers on my computer.


- Afterwards click on Generic software device > Next.
Fix 4: Install Generic Audio Device Driver using the device manager
- Open the WinX menu by pressing Win + X keys and clicking on Device Manager.
- Click on the small arrow next to Computer and select your computer.

- Click on the Action tab and then select Add Legacy hardware option.

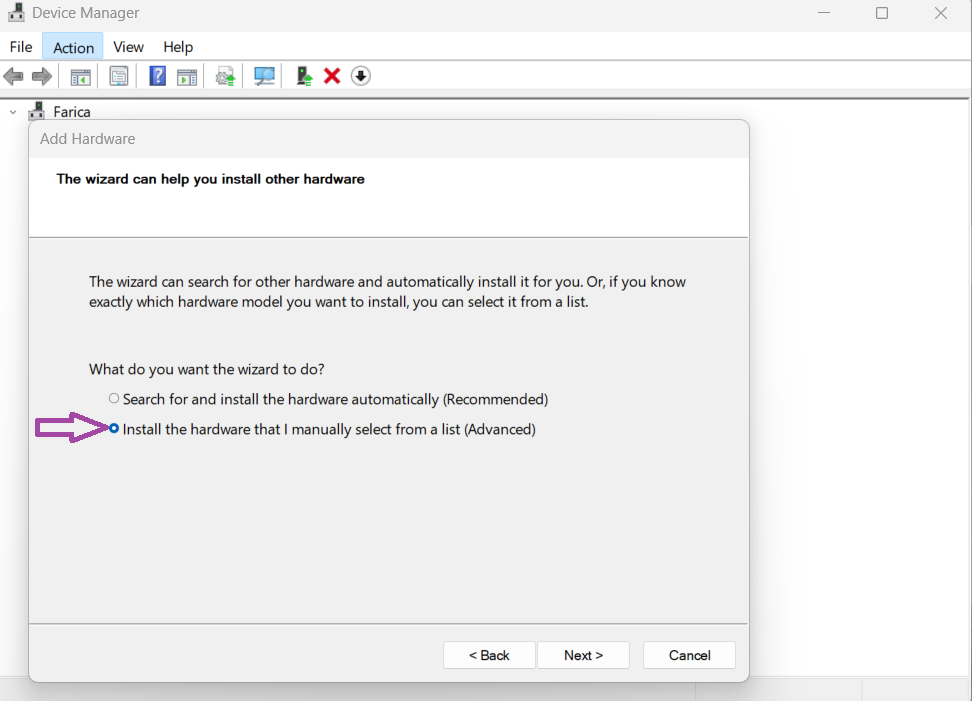
- Click Next > then select Install the hardware that I manually select from a list (Advanced) > and click on Next.
- Select Sound, video, and game controllers from the Common hardware types list. Afterwards click Next.

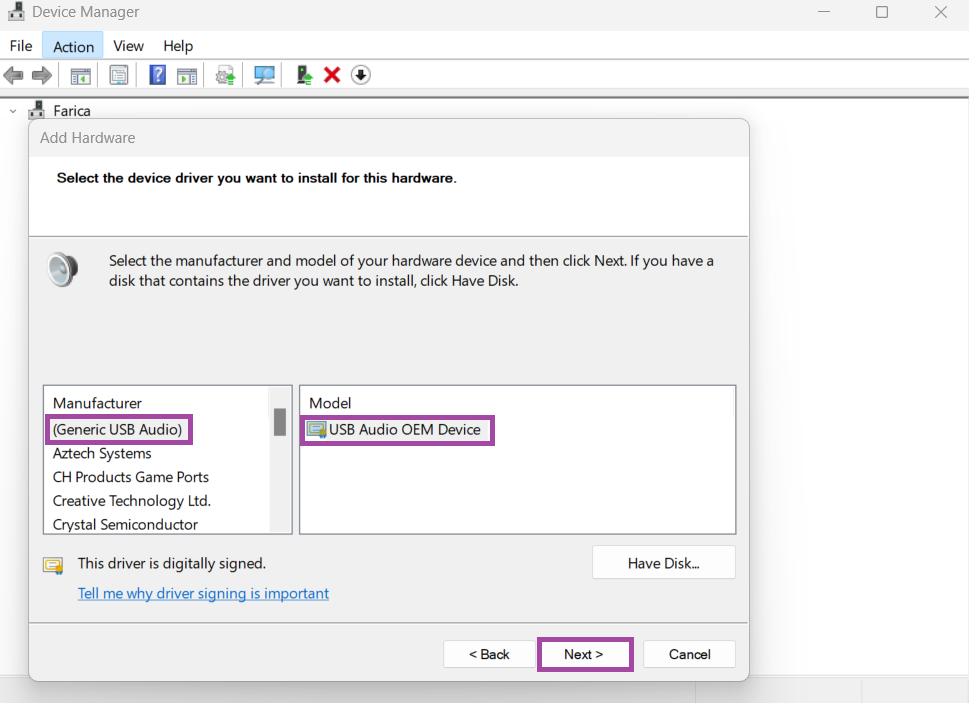
- Next, click on Generic USB Audio and USB Audio OEM Device > Next > Next.
- After sometime as the installation completes, click on Finish.
Fix 5: Run the audio troubleshooter
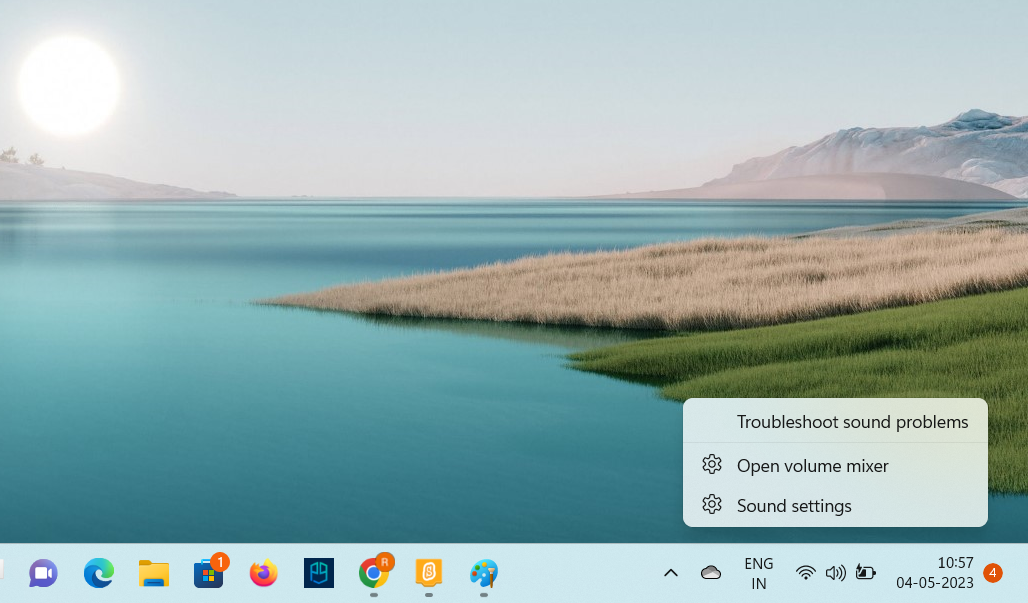
- Right-click on the speaker icon and then select Troubleshoot sound problems option.
- As the window opens select the device that you want to troubleshoot and click Next.
- Then, Follow the instructions and check if the problem has been fixed.
Fix 6: Repair the Windows Image with DISM
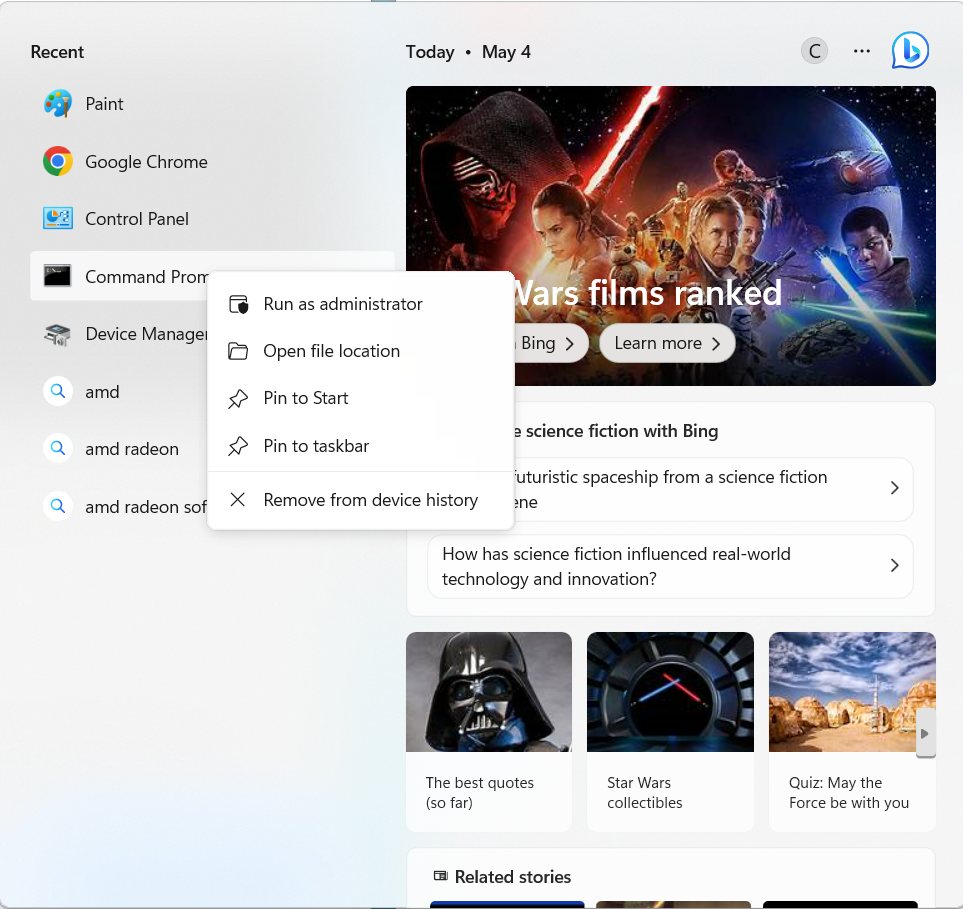
- Right-click on the Command prompt and select Run as an administrator.
- Type the command:
DISM /Online /Cleanup-Image /ScanHealth

This will scan your system image. If there is any problem you will see a message The component store is reparable.
- Next type this command:
DISM /Online /Cleanup-Image /RestoreHealth
- Press Enter to execute.
It will take some time to complete.
Fix 7: Check if the audio service is running
Open the Run prompt by pressing Win + R.
Type services.msc and click OK.
In the Services window, right-click on Windows Audio Endpoint Builder and select the properties option.
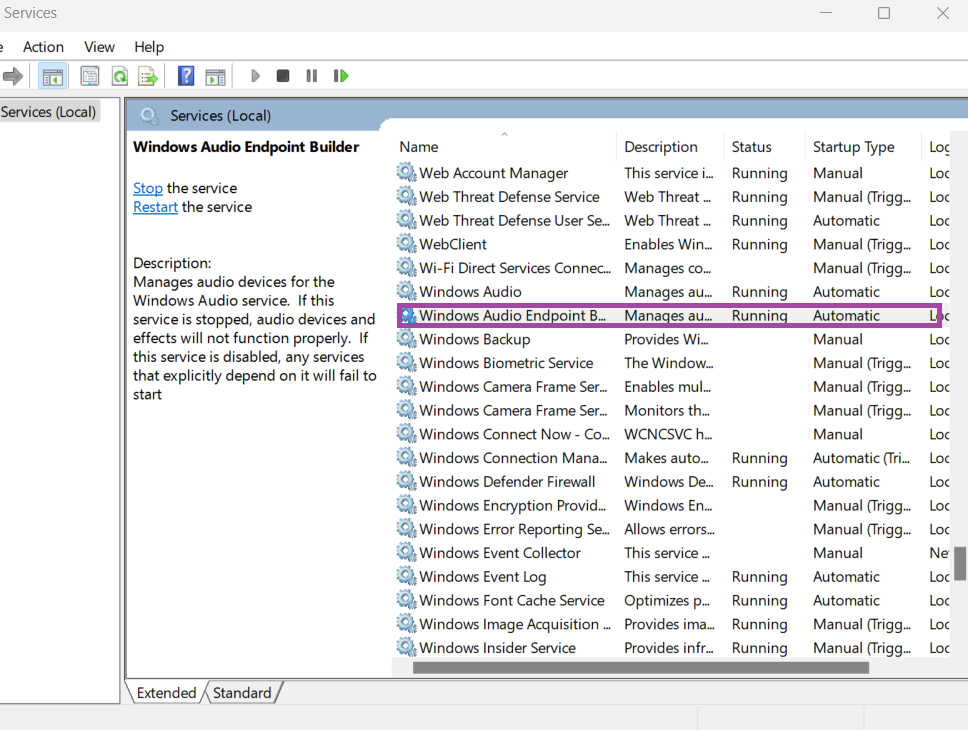
Click the drop-down in Startup type and select Automatic.

- Click OK.
- In the Services window, right-click on Windows Audio Endpoint Builder again and select the Restart option.
- Now, Repeat the same steps for Windows Audio Service.
Video fix
You can also checkout this video fix for live demonstration:
That’s it!
Don’t forget to check fix for No Audio Output Device Is Installed in Windows 10.
![KapilArya.com is a Windows troubleshooting & how to tutorials blog from Kapil Arya [Microsoft MVP (Windows IT Pro)]. KapilArya.com](https://images.kapilarya.com/Logo1.svg)


5 Comments
Add your comment
Hi, guys.
Thanks for everything you do for Windows users’ community.
I went through steps and those didn’t work out for me.
Please, keep in touch it you may provide a helping hand further.
Cheers.
thank you the first method worked, mine was already enbaled. if you find yours also enabled but not working, just disable it, then enable it again, and it should work. thank you :)
^^ Glad it worked!
Worked..thank you for your help!
^^ Glad it helped 😎