

When you’re travelling or working remotely, a mobile hotspot is likely your only way to connect your computer to the internet. But what if your computer is connected to the hotspot, but there’s no internet access? Then, this article can help you fix the issue on Windows 11/10.
Page Contents
Fix: Mobile Hotspot Connected but No Internet
Before attempting any of these troubleshooting methods, check your mobile device has a working internet connection. If your internet is functioning properly, proceed with these methods one by one.
Method 1: Restart your Devices
Sometimes a quick restart is all you need to fix the problem. Restarting the devices will cut the connection your devices have from the hotspot and make them reconnect fresh.
Depending on what you’re using, restart your computer, your phone, or even the hotspot itself if it’s a separate device.
Method 2: Turn off the VPN
If you’re using a VPN, it might be the culprit. Turn off your VPN on both your computer and phone (if you’re using it there too). Turn on your phone’s mobile hotspot and connect your computer to it.
If the internet starts working on your computer through the hotspot after turning off the VPN, then the VPN might be causing some issues. You can also try changing the VPN port or protocol. You can find these options in your VPN app settings.
Method 3: Reset your Network on the PC
1. Open Windows Settings and head to “Network & internet”.
2. Click on “Advanced network settings” on the right.
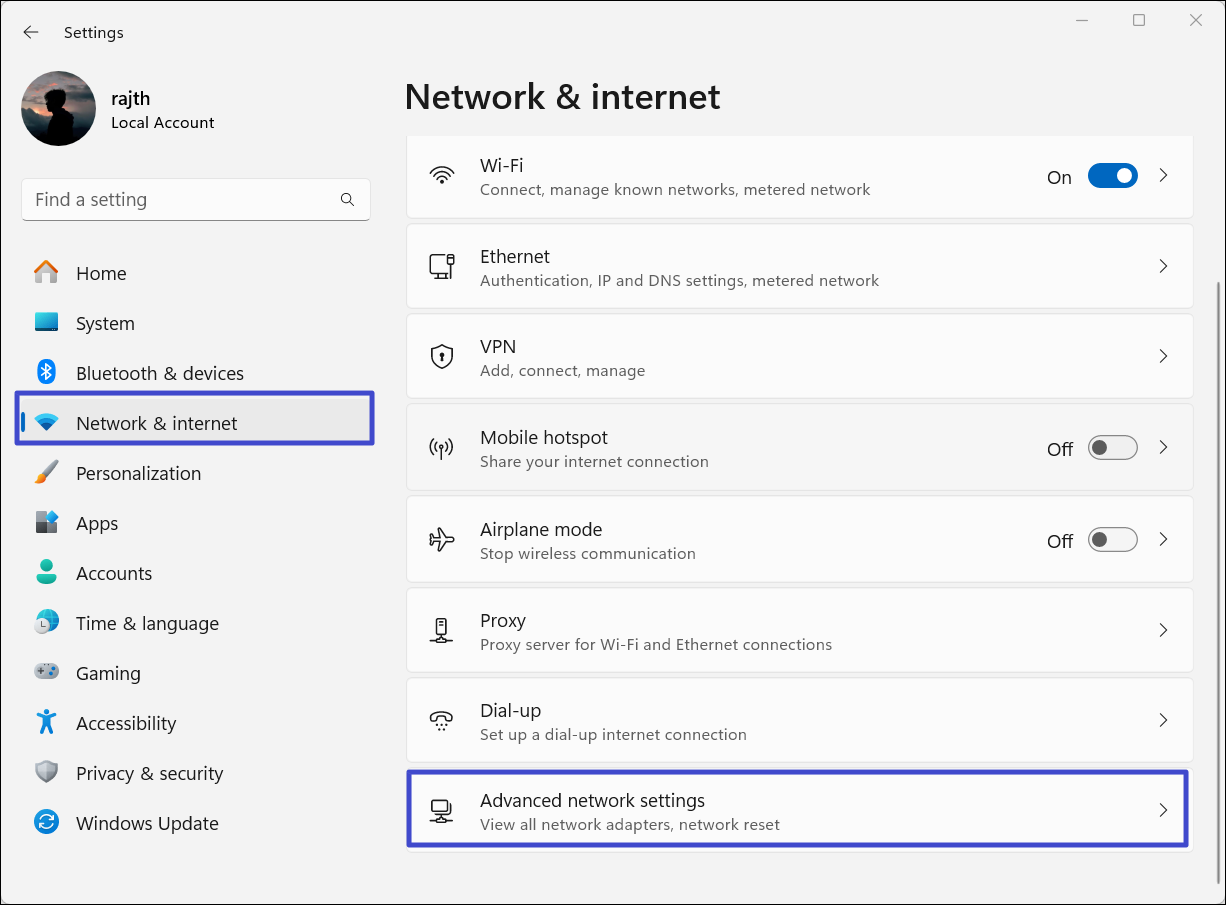
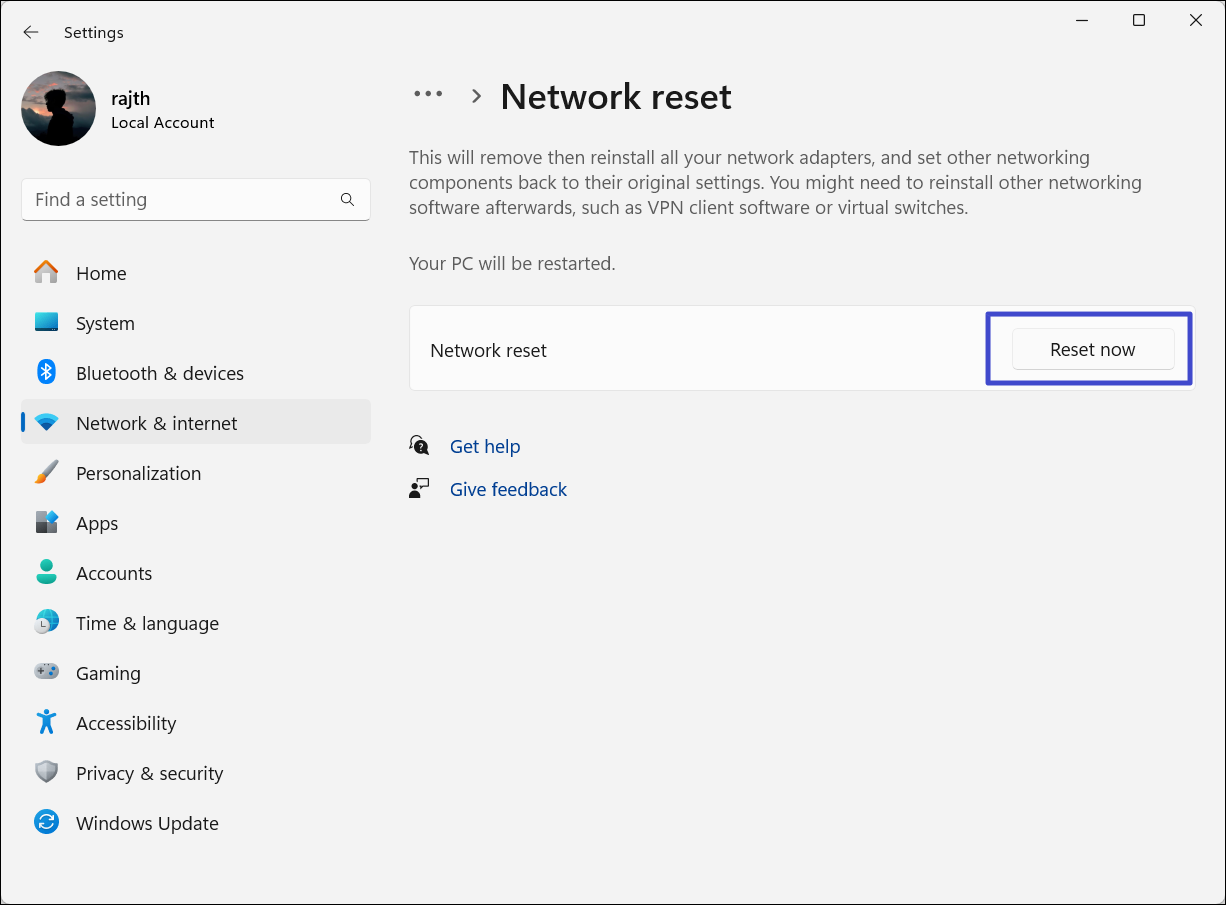
3. Under Advanced network settings, select “Network reset“.

4. Click the “Reset now“ button to reset the settings to default.
Method 4: Run Network and Internet Troubleshooter
1. In the Windows Settings, go to the “System” tab, and select “Troubleshoot“.
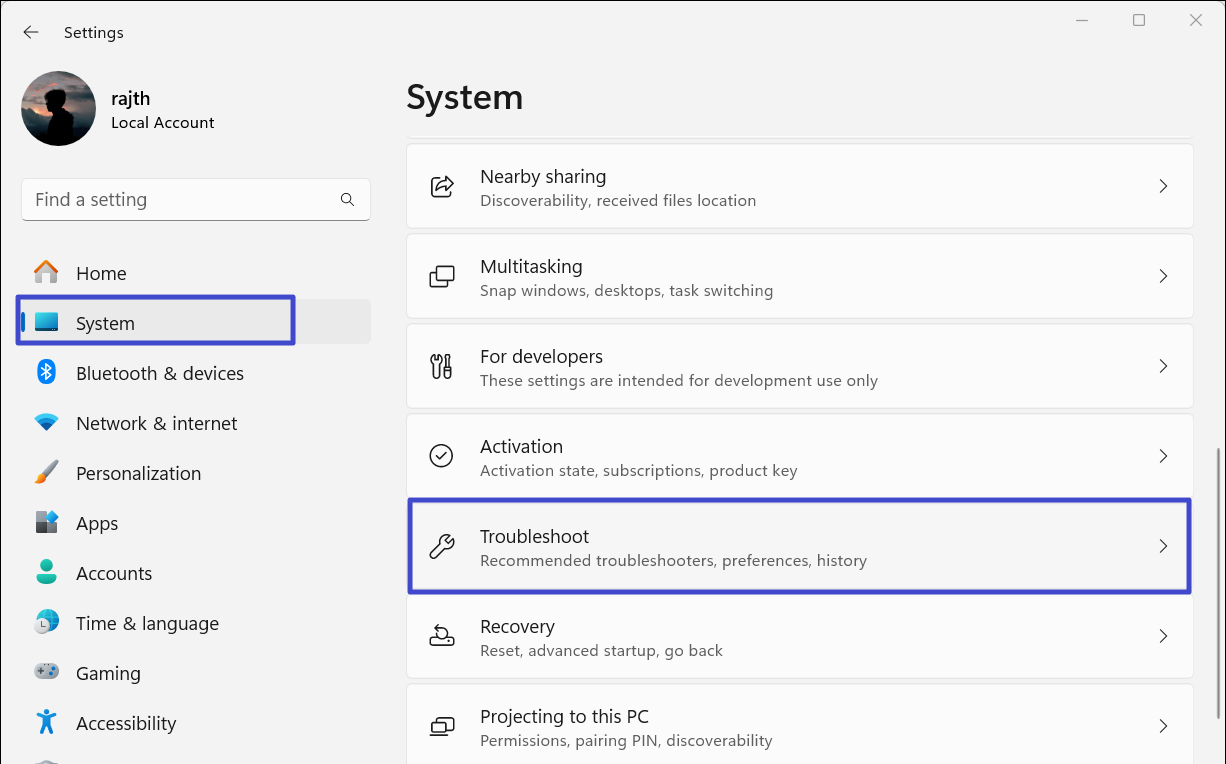
2. Next, select “Other troubleshooters“.

3. Under Other troubleshooters, click the “Run” button next to Network and Internet.

Method 5: Reset TCP/IP, DNS, and Winsock
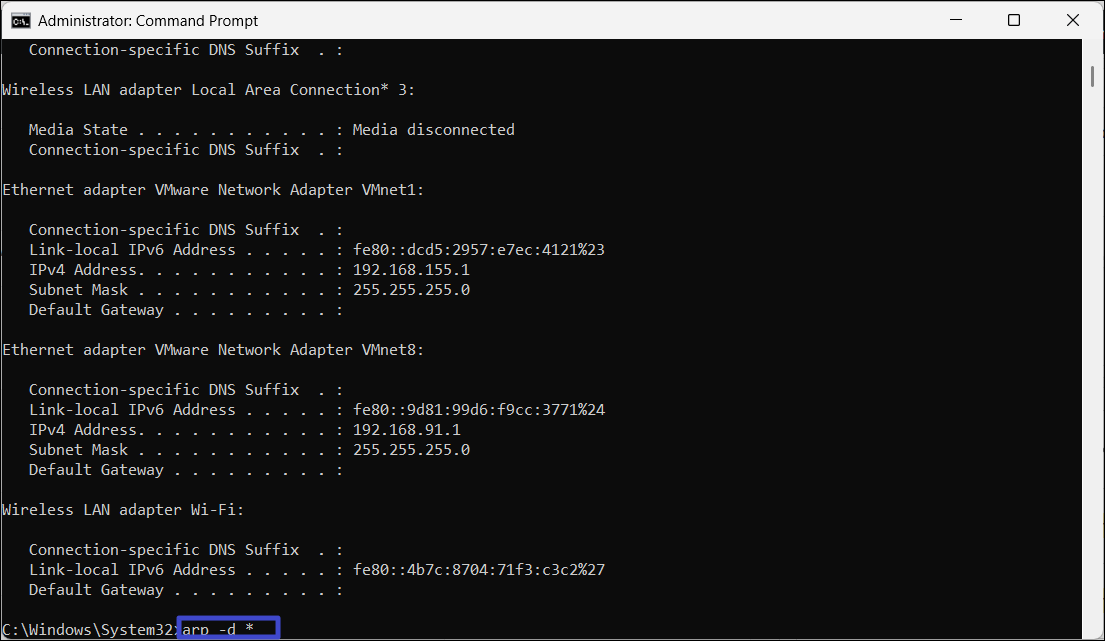
1. In the Start menu, type Command Prompt and select “Run as administrator” to open Command Prompt as administrator.
2. In the Command Prompt, type the following commands one after the other:
ipconfig /release
ipconfig /renew
arp -d *
nbtstat -R
nbtstat -RR
netsh int ip reset
netsh winsock reset
ipconfig /flushdns
ipconfig /registerdns
3. After executing the above commands, restart your PC.
Method 6: Reinstall the Network Adaptor
1. Press Windows + R to open the Run Command box, type devmgmt.msc and press Enter.

2. In the Device Manager, expand “Network adapters“.

3. Right-click the wireless network adapter and select “Uninstall device“.

4. Check the “Attempt to remove the driver for this device” option and click “Uninstall“.

That’s it.


![[Latest Windows 10 Update] What’s new in KB5055612?](https://www.kapilarya.com/assets/Windows10-Update.png "[Latest Windows 10 Update] What’s new in KB5055612?")


Leave a Reply