The Microsoft Store is an integral part of the Windows 11 operating system, providing users with a wide range of applications, games, and content. However, like any software, it is not immune to issues and glitches. One problem that some Windows 11 users may encounter is the Microsoft Store getting stuck on the loading screen. This can prevent users from accessing and installing their desired apps, causing inconvenience and frustration. In this article, we will discuss effective solutions to fix the Microsoft Store’s loading screen problem in Windows 11, ensuring a seamless experience for users.
Page Contents
Fix: Microsoft Store stuck on Loading screen in Windows 11 or Microsoft Store infinite loading issue
Fix 1: Rename LocalState folder
1. Find File Explorer in your system by Searching it on the search bar. Click to open it.
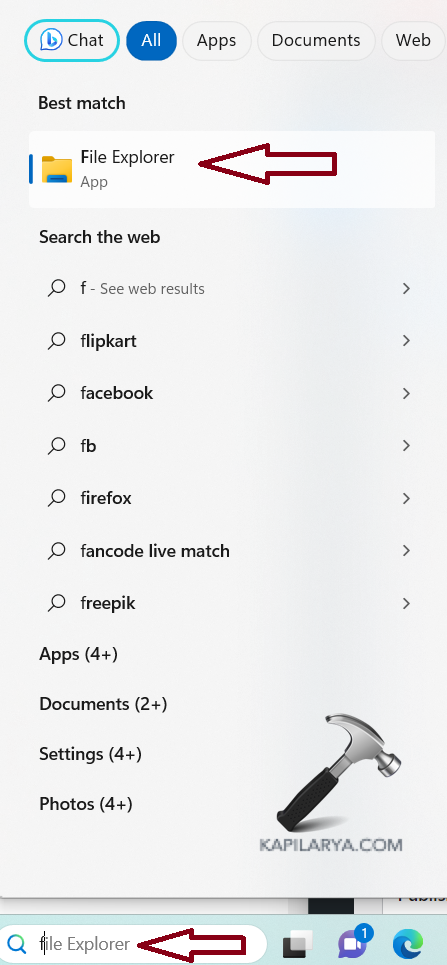
2. Navigate to the path –
C:\Users\Username>\AppData\Local\Packages\WinStore_<some characters>\LocalState
3. Rename the LocalState folder to LocalState.old.
4. Restart your computer.
Fix 2: Install pending Windows Update
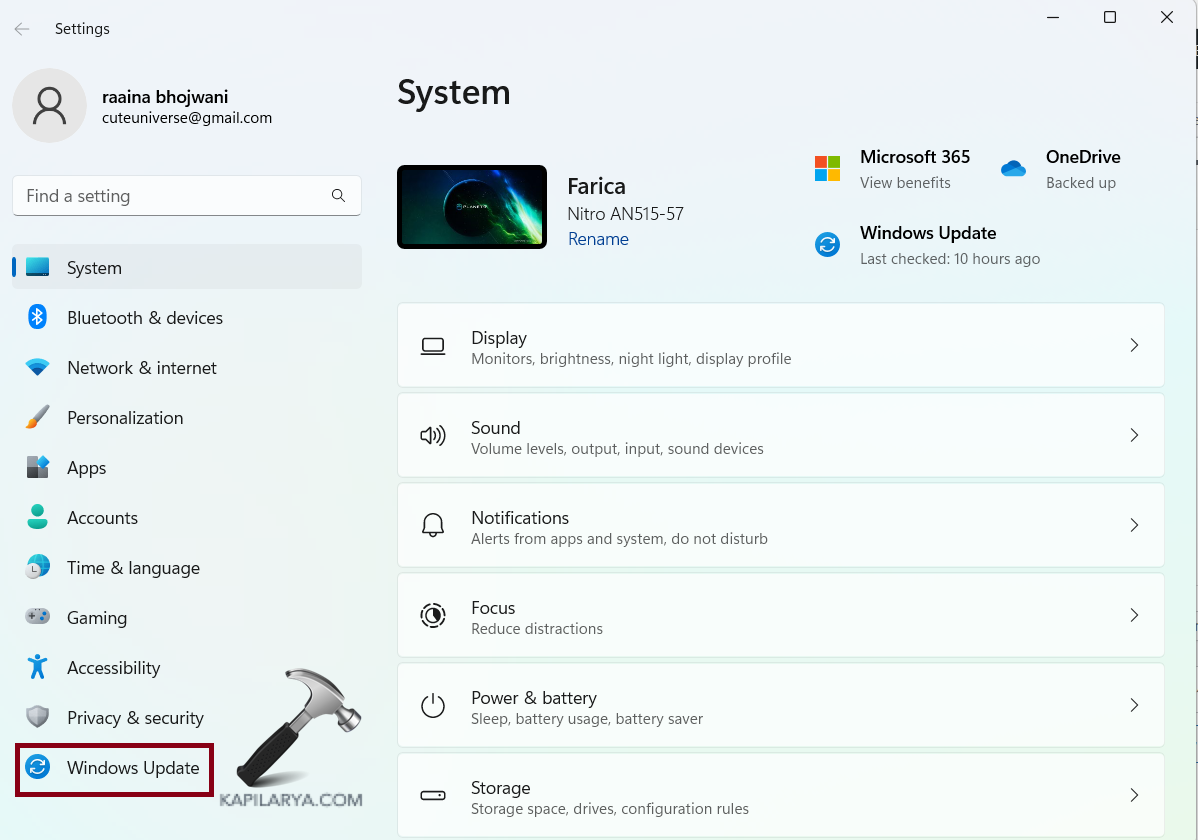
1. Open Settings by pressing the Windows + I keys.
2. Click on “Windows Update”.
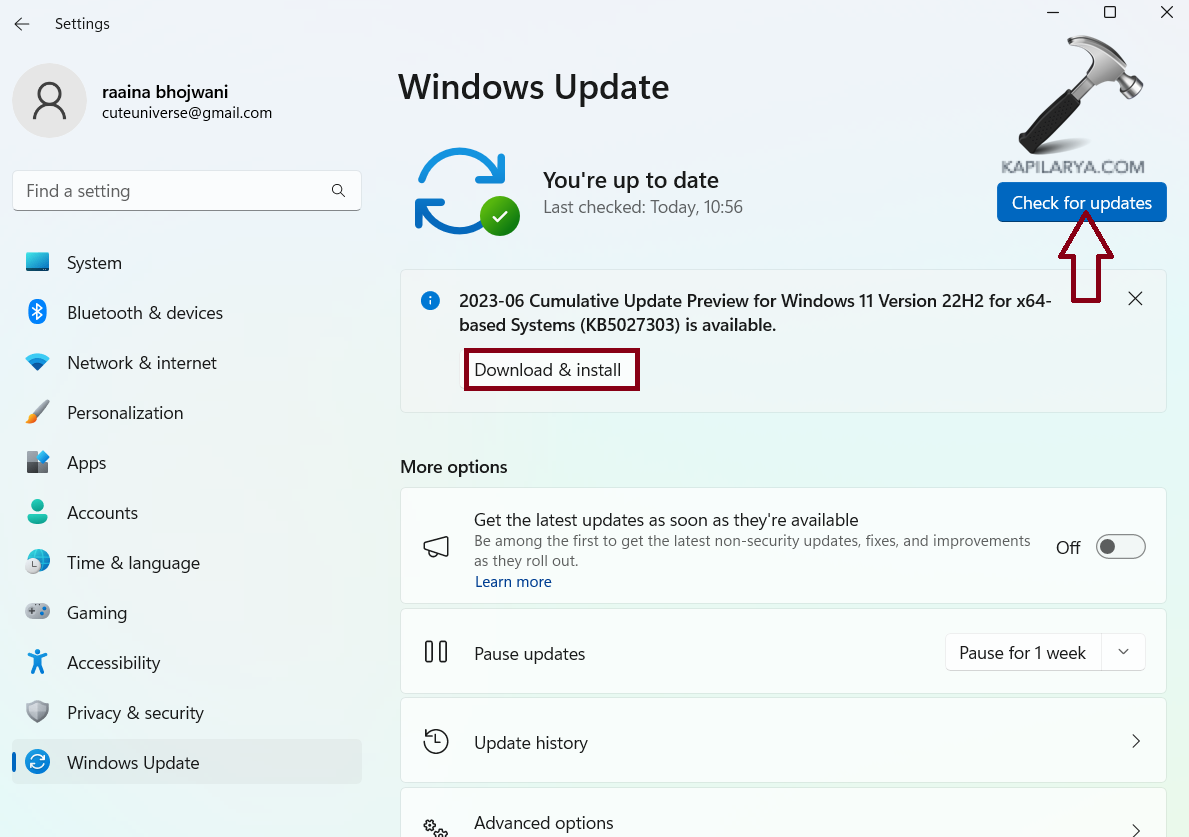
3. Click on the “Download & install” button. If this button is not shown, then click on “Check for updates”.
4. Restart your system.
Fix 3: Uninstall and reinstall the Microsoft store
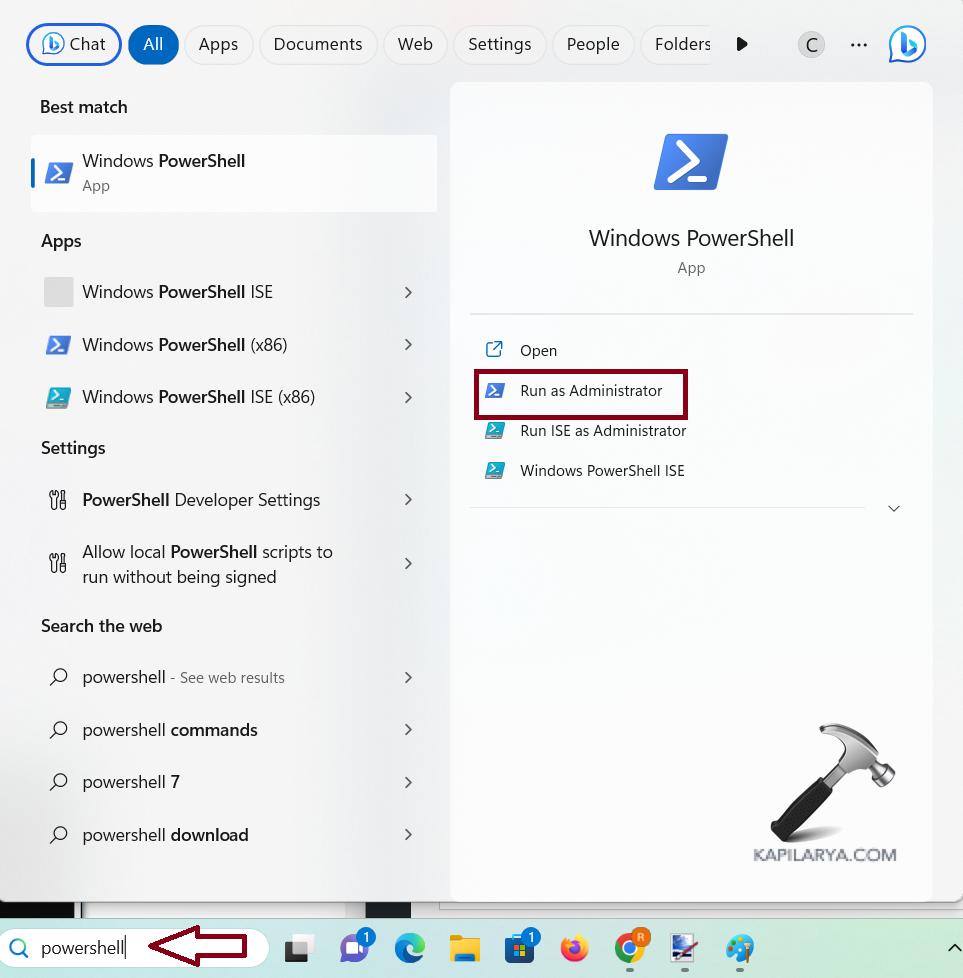
1. Type “Powershell” in the search bar and open “Windows PowerShell” by clicking on “Run as Administrator”.
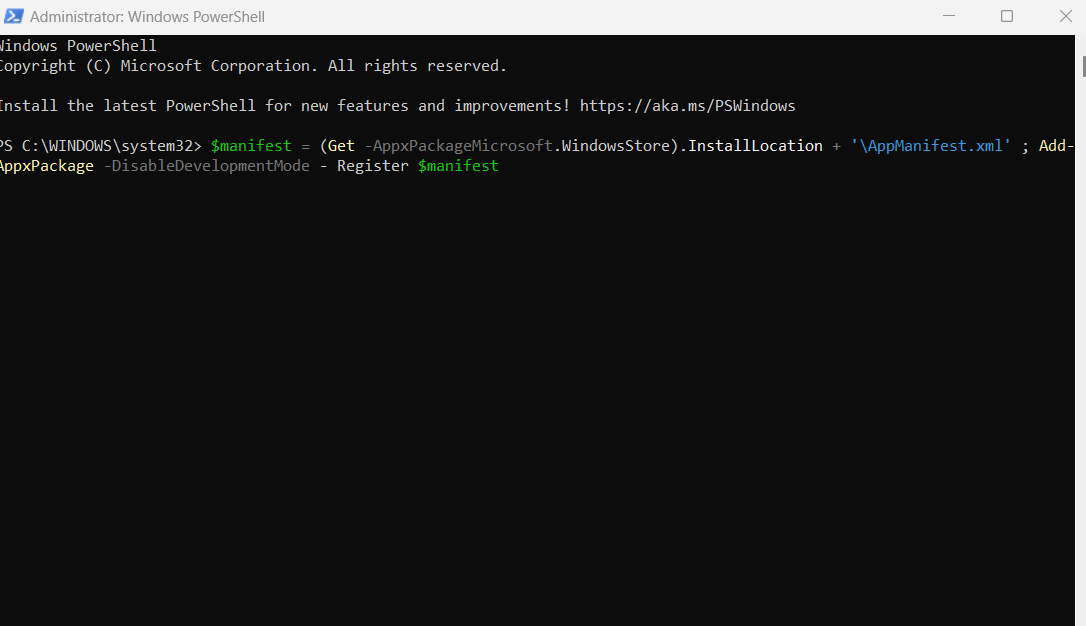
2. Type this command and press Enter :
$manifest = (Get-AppxPackage Microsoft.WindowsStore).InstallLocation + '\AppxManifest.xml' ; Add-AppxPackage -DisableDevelopmentMode -Register $manifest
3. Restart your Computer.
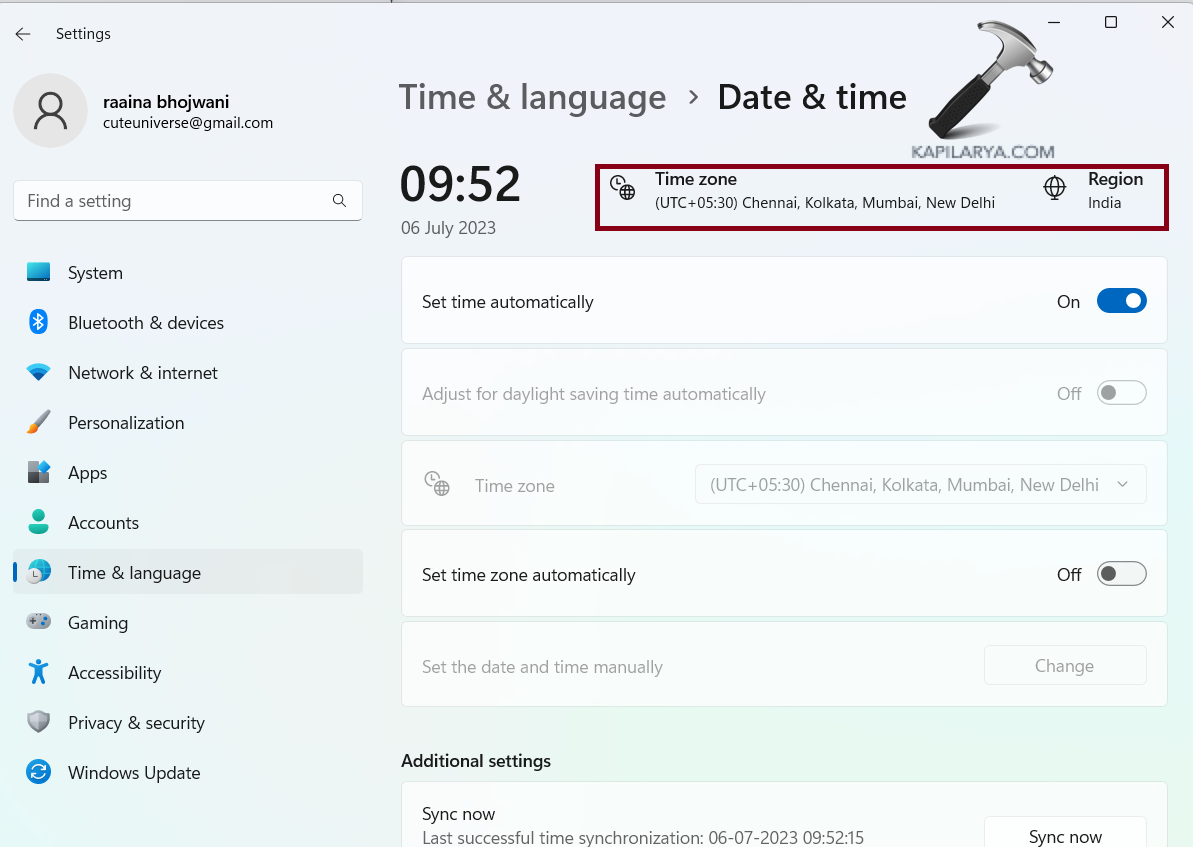
Fix 4: Check Region and time settings to fix Microsoft Store stuck on Loading screen in Windows 11
1. Open Settings by pressing the Windows + I keys.
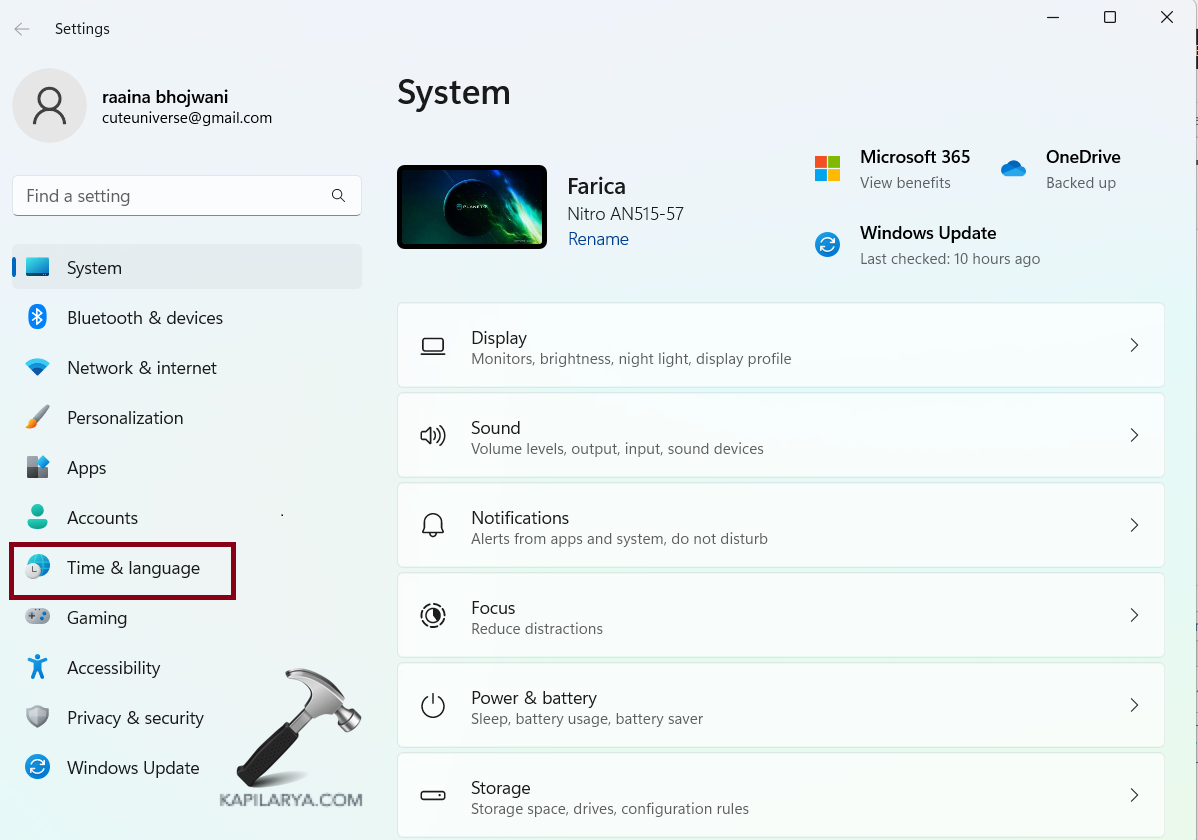
2. Click on “Time & language”.
3. If the date and time are incorrectly shown then click on “Date & time”.
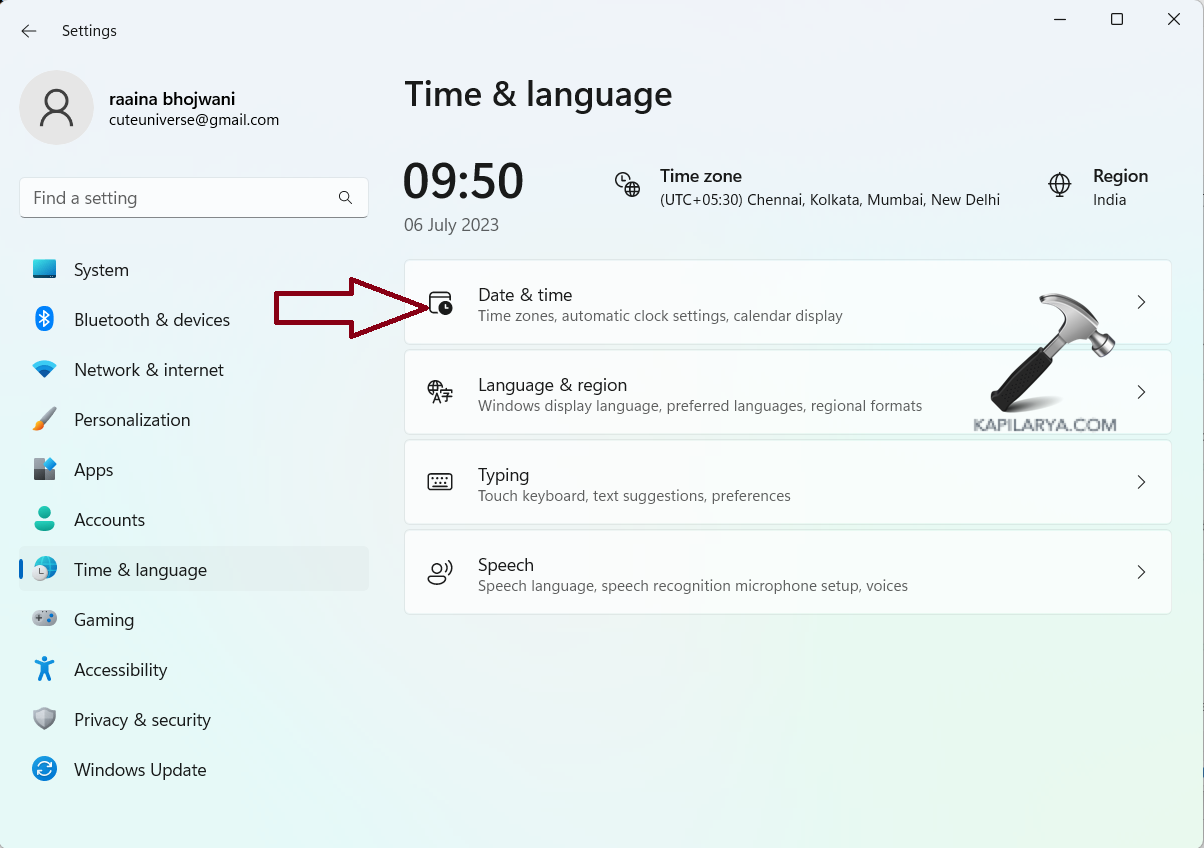
4. Click on “Region” to change the time zone.
Fix 5: Reset cache to fix Microsoft Store stuck on Loading screen in Windows 11
1. Type “wsreset” in the search bar.
2. Right-click on wsreset and choose “Run as administrator”.
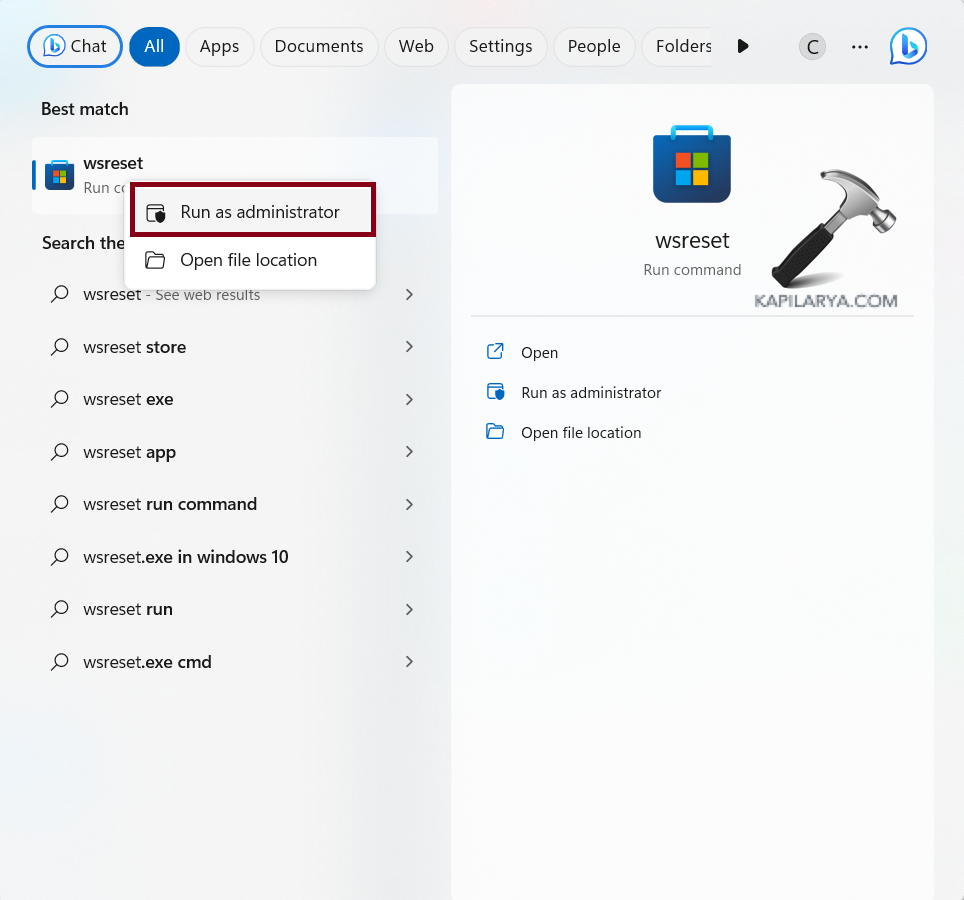
3. A blank Command prompt screen will flash for 1 second and Microsoft Store will open automatically.
Fix 6: Correct the Service Configuration
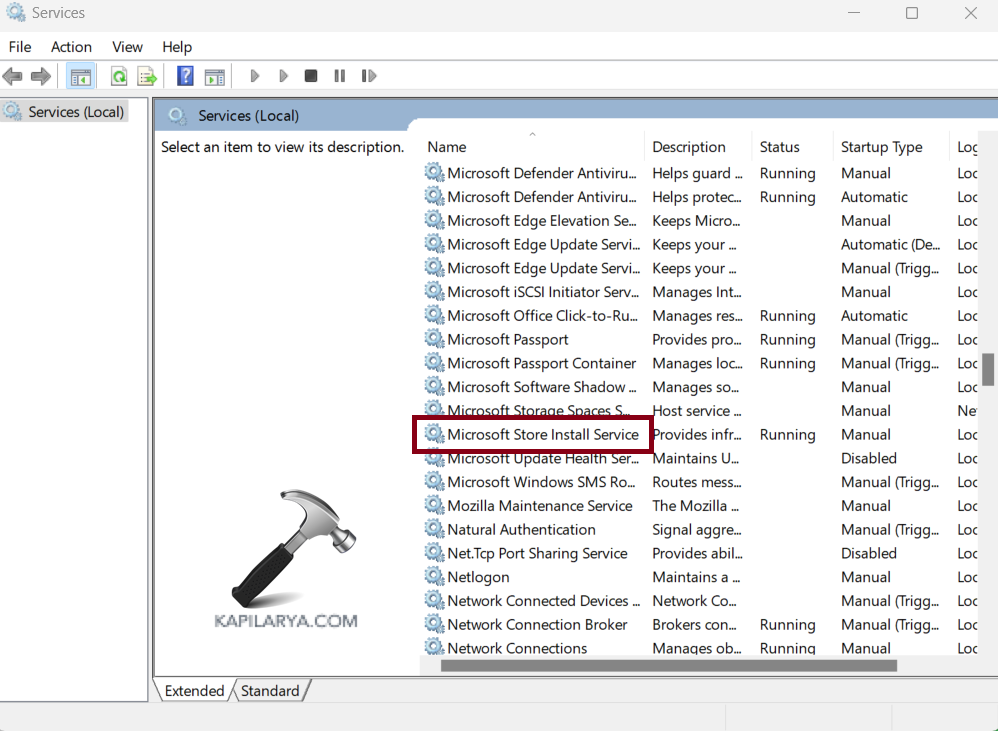
1. Click on Search in Task Bar and type “services.msc”.
2. Click on the “Services” app to open.
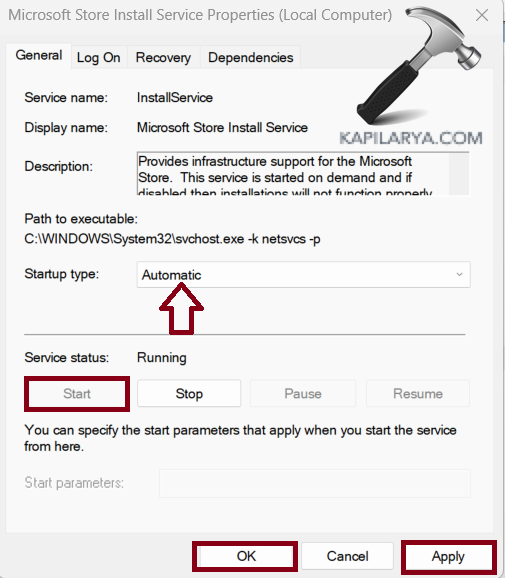
3. Double-click on “Microsoft Store Install Service”.
4. In the “Startup type” select “Automatic”.
5. Click on “Start” > “Apply” > “OK”.
Fix 7: Run System Files Checker and DISM sequentially
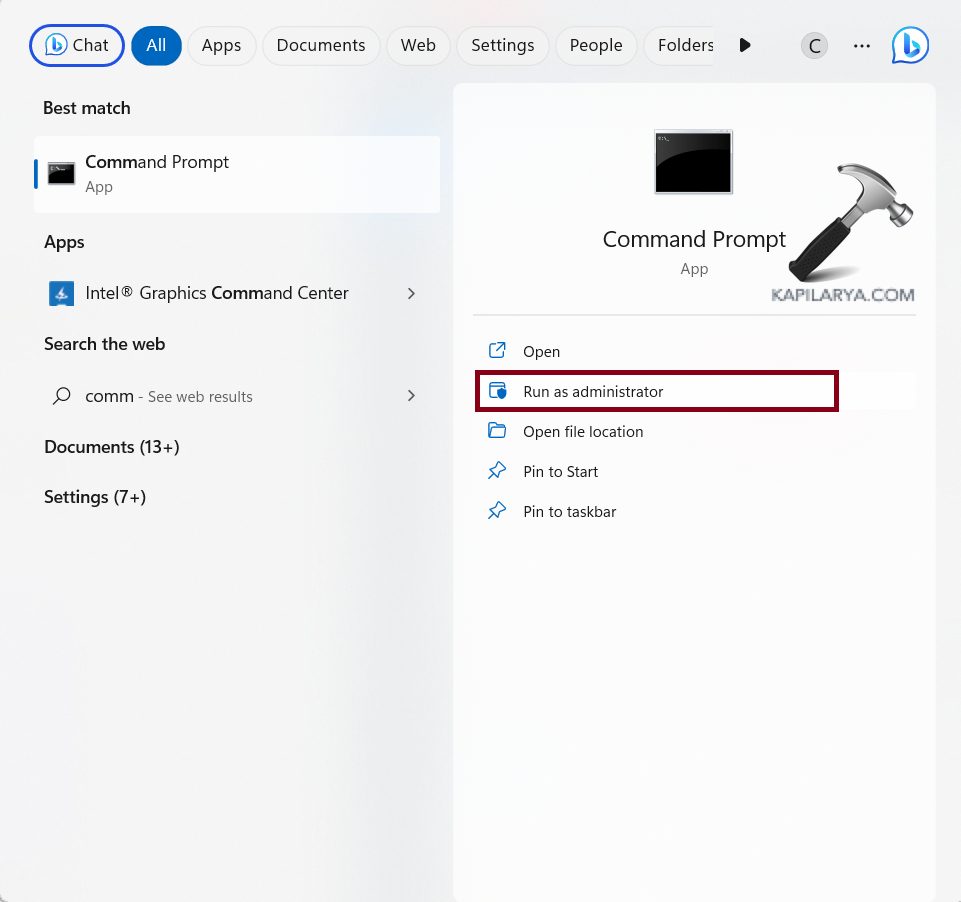
1. Open the Command prompt and an administrator.
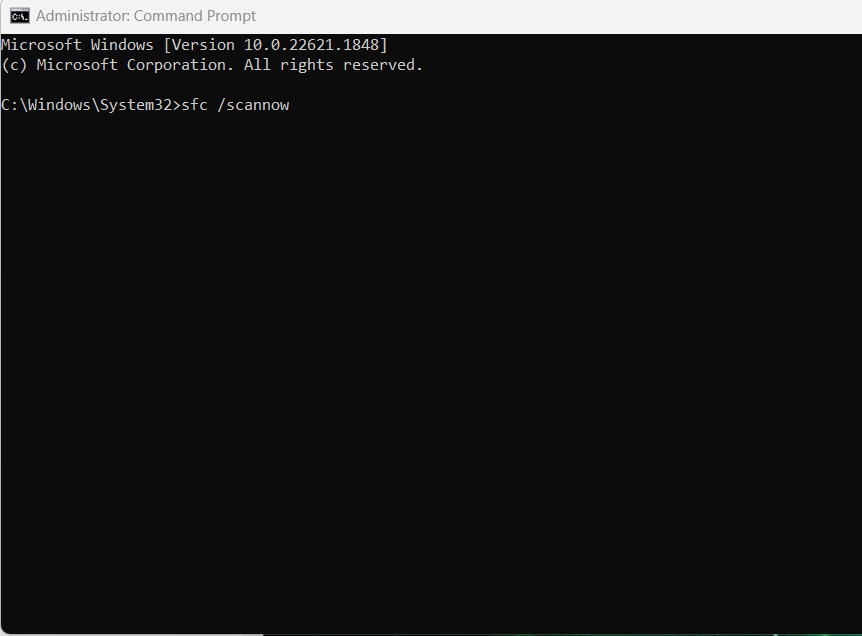
2. Type command: sfc /scannow
3. Press Enter to execute.
4. Restart your computer after the scan is complete.
5. If the problem has not been resolved then type the below given command in the command prompt (run as administrator), and press Enter after each command.
dism /online /cleanup-image /checkhealthdism /online /cleanup-image /scanhealthdism /online /cleanup-image /restorehealth6. Restart your system.
Fix 8: Use other DNS
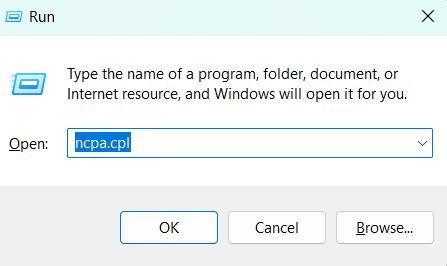
1. Open Run Prompt by pressing Windows + R keys. Type “ncpa.cpl” and press Enter.
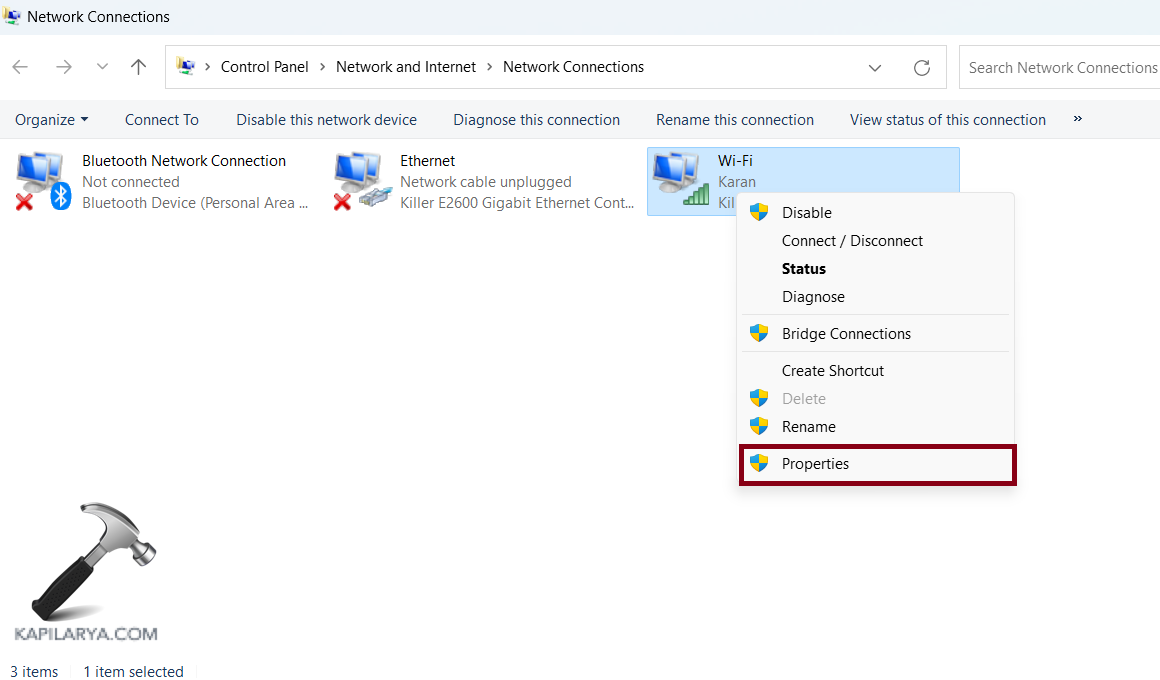
2. Right-click on the network that you are using currently and choose “Properties”.
3. Click on “Internet Protocol version 4 (TCP/IPv4)”.
4. Then click on “properties”.
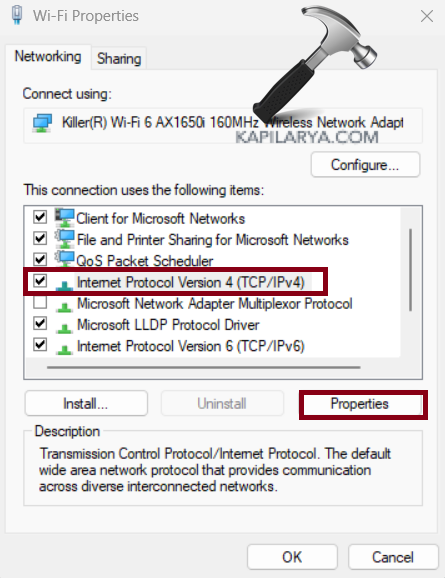
5. Check the option “Use the following DNS server addresses“.
6. Enter the following addresses:
Preferred DNS server – 4.2.2.1
Alternate DNS server – 4.2.2.2.
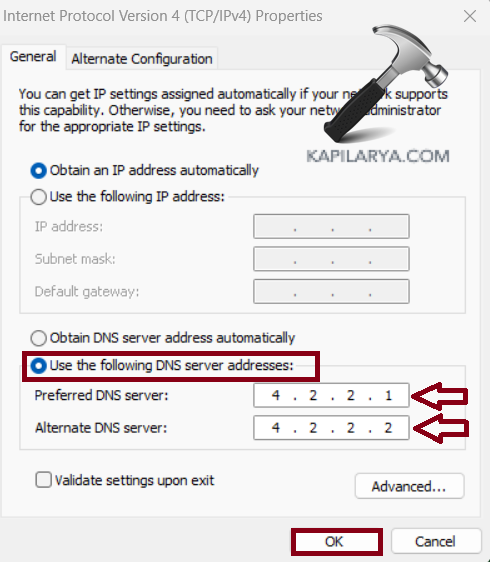
7. Click “OK”.
That’s it!
![KapilArya.com is a Windows troubleshooting & how to tutorials blog from Kapil Arya [Microsoft MVP (Windows IT Pro)]. KapilArya.com](https://images.kapilarya.com/Logo1.svg)


![[Latest Windows 10 Update] What’s new in KB5055612? [Latest Windows 10 Update] What’s new in KB5055612?](https://www.kapilarya.com/assets/Windows10-Update.png)


Leave a Reply