Previously, we’ve seen how to map a network drive in Windows 10. Map drives are useful and easy to access network based storage. In this article, we’ll talk about the issue where mapped drives are no longer shown in File Explorer.
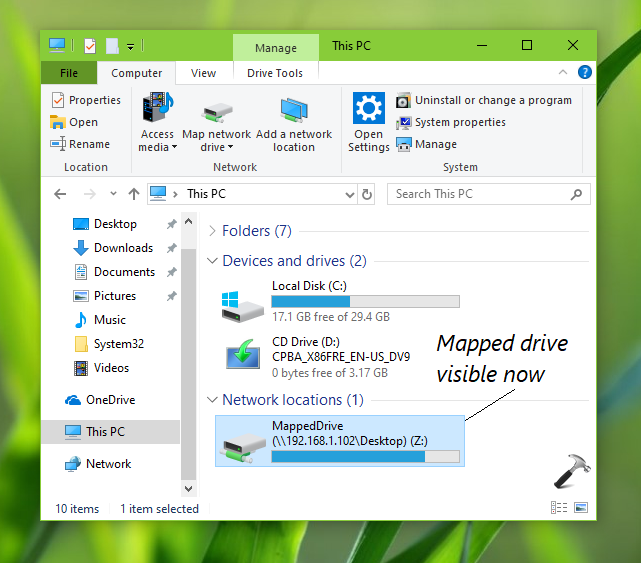
In such cases, the drive is not visible under Network Locations of This PC in File Explorer. Although, if you try to access them via Command Prompt, you may or may not be able to do so, depending upon how the drive is mapped. In some cases, you may be able to get mapped drives in File Explorer but when you browse through any application, you don’t see mapped drives. Sometimes re-mapping the drive may solve this kind of issue but if it doesn’t, here is how you can fix.
FIX: Mapped Drives Not Showing In File Explorer In Windows 10/8/7
One of the common reason behind this issue is the level at which mapped drive is accessed. According to Microsoft, when you map drive there are symbolic link objects created which assign drive letters to UNC path. These objects are specific for a login session and is not shared between sessions. So when you use access the mapped drive at user account level, you’ve least rights and it shown in File Explorer. However, when you access mapped drive at administrator level, it is not shown in File Explorer because EnableLinkedConnections registry entry forces the symbolic links to be written to both linked logon sessions that are created. To avoid this, you can configure this registry DWORD in the way shown below.
Registry Disclaimer: The further steps will involve registry manipulation. Making mistakes while manipulating registry could affect your system adversely. So be careful while editing registry entries and create a System Restore point first.
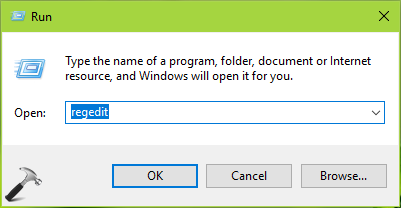
1. Press  + R and type
 regedit in Run dialog box to open Registry Editor (if you’re not familiar with Registry Editor, then click here). Click OK.

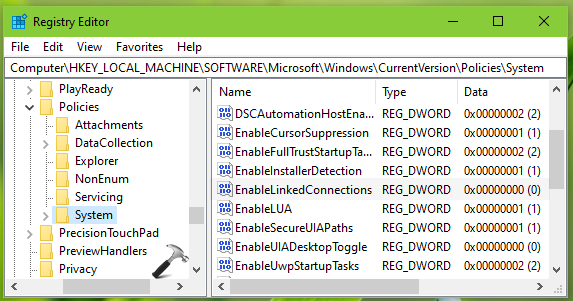
2. In left pane of Registry Editor window, navigate to following registry key:
HKEY_LOCAL_MACHINE\SOFTWARE\Microsoft\Windows\CurrentVersion\Policies\System

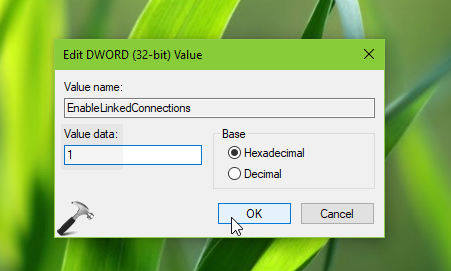
3. Now in the right pane of System registry key, look for the registry DWORD (REG_DWORD) named EnableLinkedConnections. If the registry DWORD doesn’t exists, create it. Double click on the DWORD to modify its Value data:

4. Set the Value data to 1, click OK and close Registry Editor. Reboot and you’ll find that mapped drives are now visible in File Explorer.

Hope this helps!
Related: Mapped drives not working in Windows 10.
![KapilArya.com is a Windows troubleshooting & how to tutorials blog from Kapil Arya [Microsoft MVP (Windows IT Pro)]. KapilArya.com](https://images.kapilarya.com/Logo1.svg)


![[Latest Windows 10 Update] What’s new in KB5055612? [Latest Windows 10 Update] What’s new in KB5055612?](https://www.kapilarya.com/assets/Windows10-Update.png)


3 Comments
Add your comment
Did not help.
If you go to a DOS Prompt and type:
Net Use
Does it show your mapped drives?
If so, I found that by removing the EnableLinkedConnections entry in the registry has actually fixed the issue.
^^ Thanks for adding this Dave!