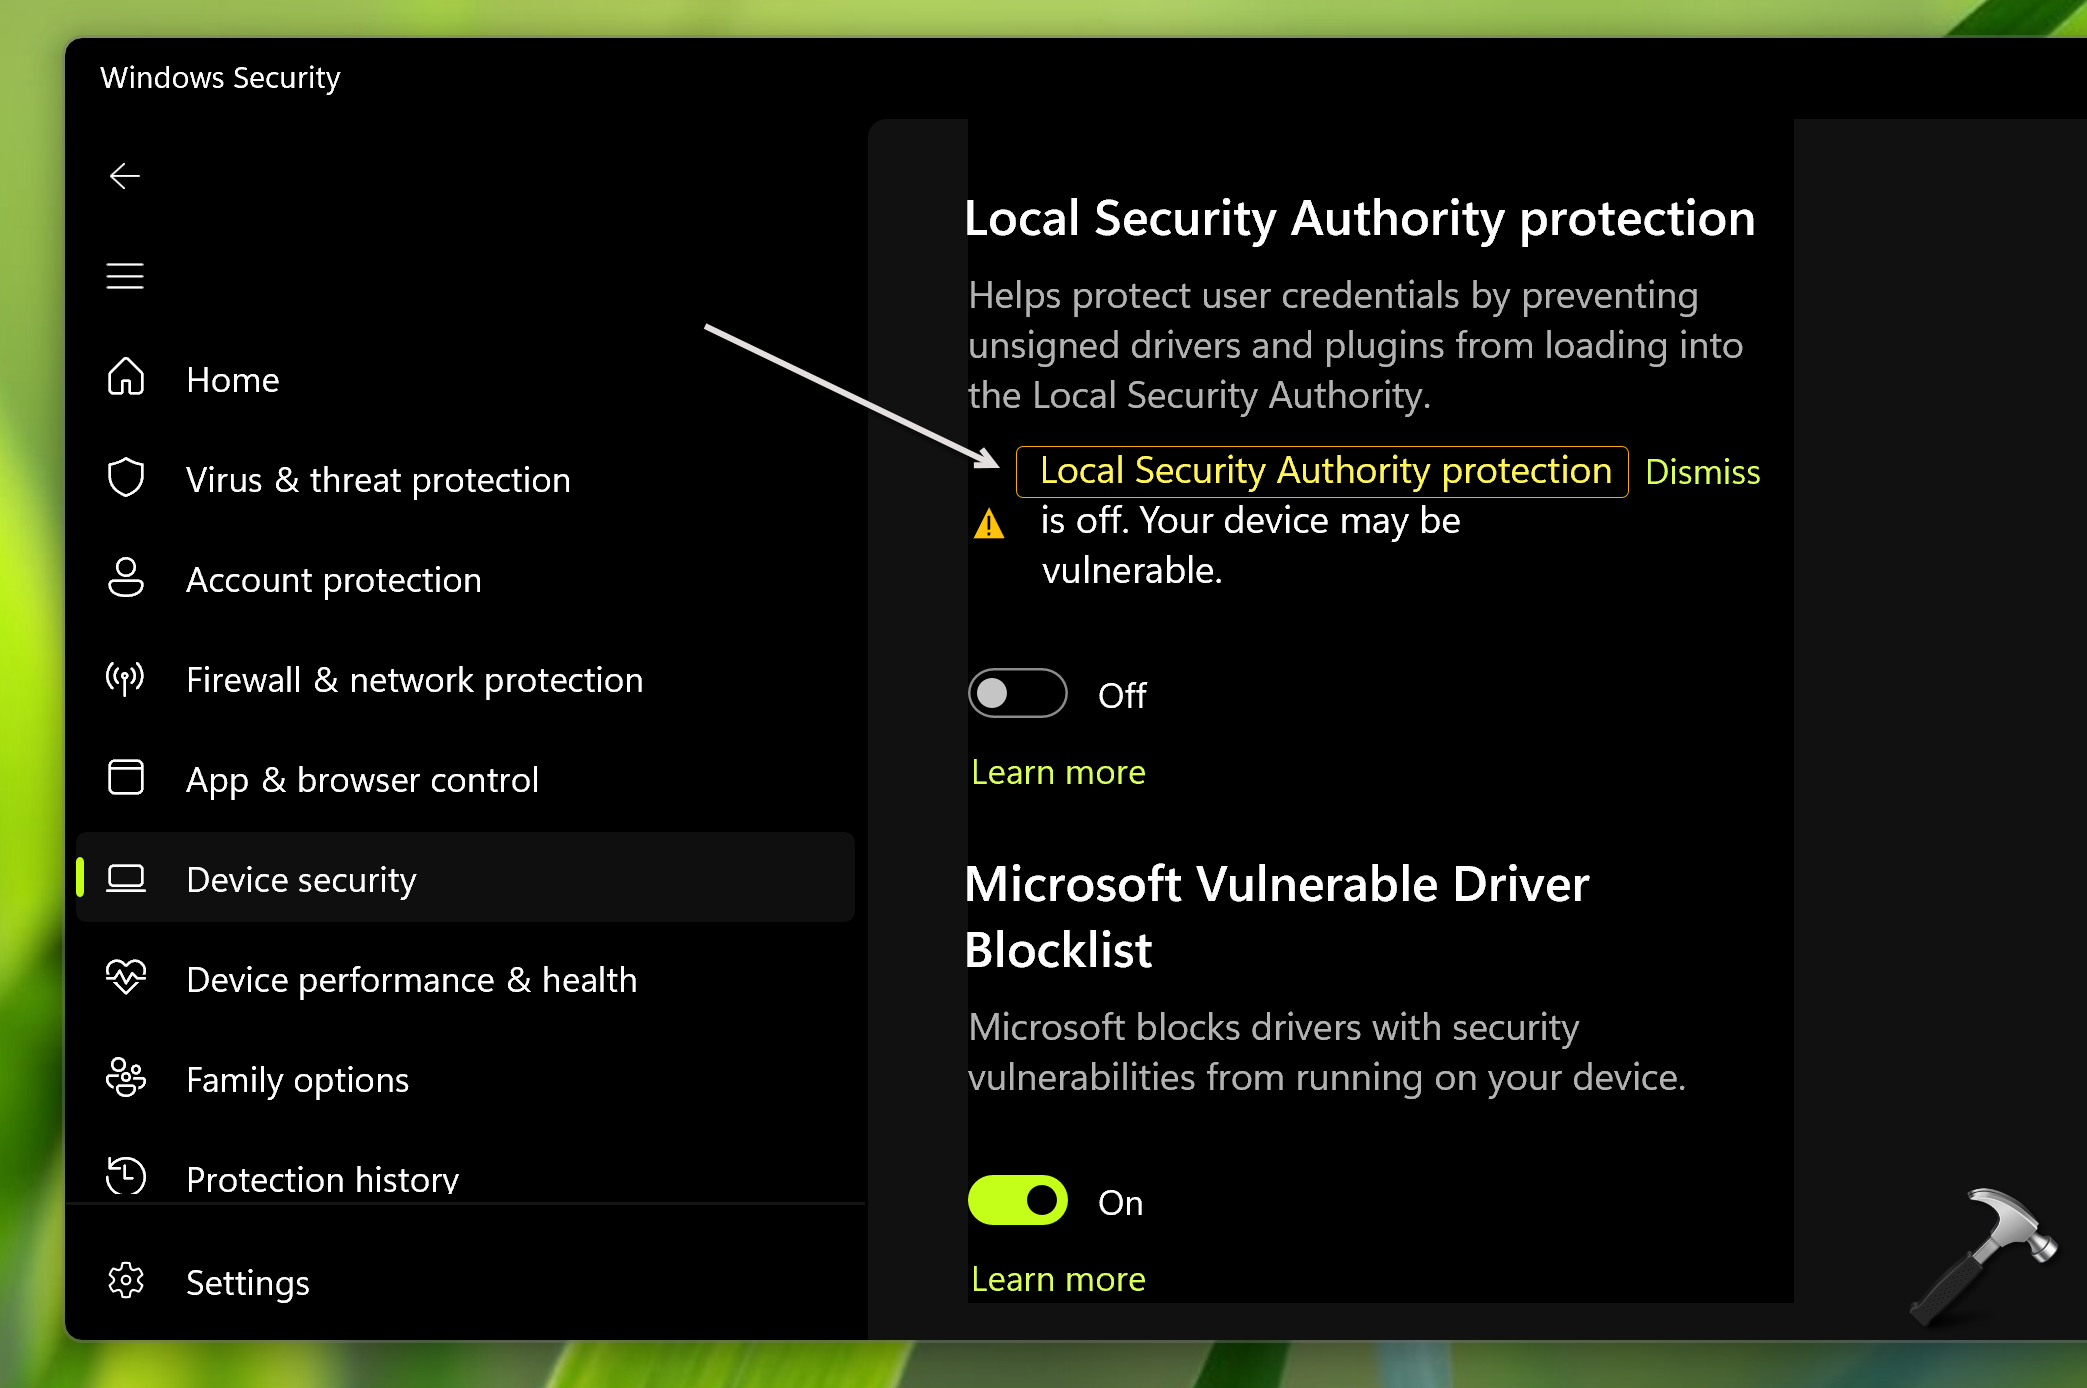
If you started getting Local System Authority protection is off notifications in Windows 11, then this article will definitely interest you. Recently, someone reached to me in forums with this issue. When the user clicked Go to settings button on the notification, it gives the error message: Page not available, The page you are trying to access has no supported features and is not available. If the user manually open Windows Security and go to LSA protection settings, it shows Local System Authority protection is off. Your device may be vulnerable. This can be seen in below screenshot. Even after turning it On, after a reboot, it is automatically turned off. In this article, we will see how to fix this problem.

Page Contents
Fix: ‘Local System Authority protection is off’ in Windows 11
FIX 1 – Using Command Prompt
In this case, you need to update the registry configuration. You’ve to add two registry values. First registry value is RunAsPPL, which should be added automatically when you turn on LSA protection. Second registry value is RunAsPPLBoot which is expected to manually remove exclamation.
1. Open administrative Command Prompt.
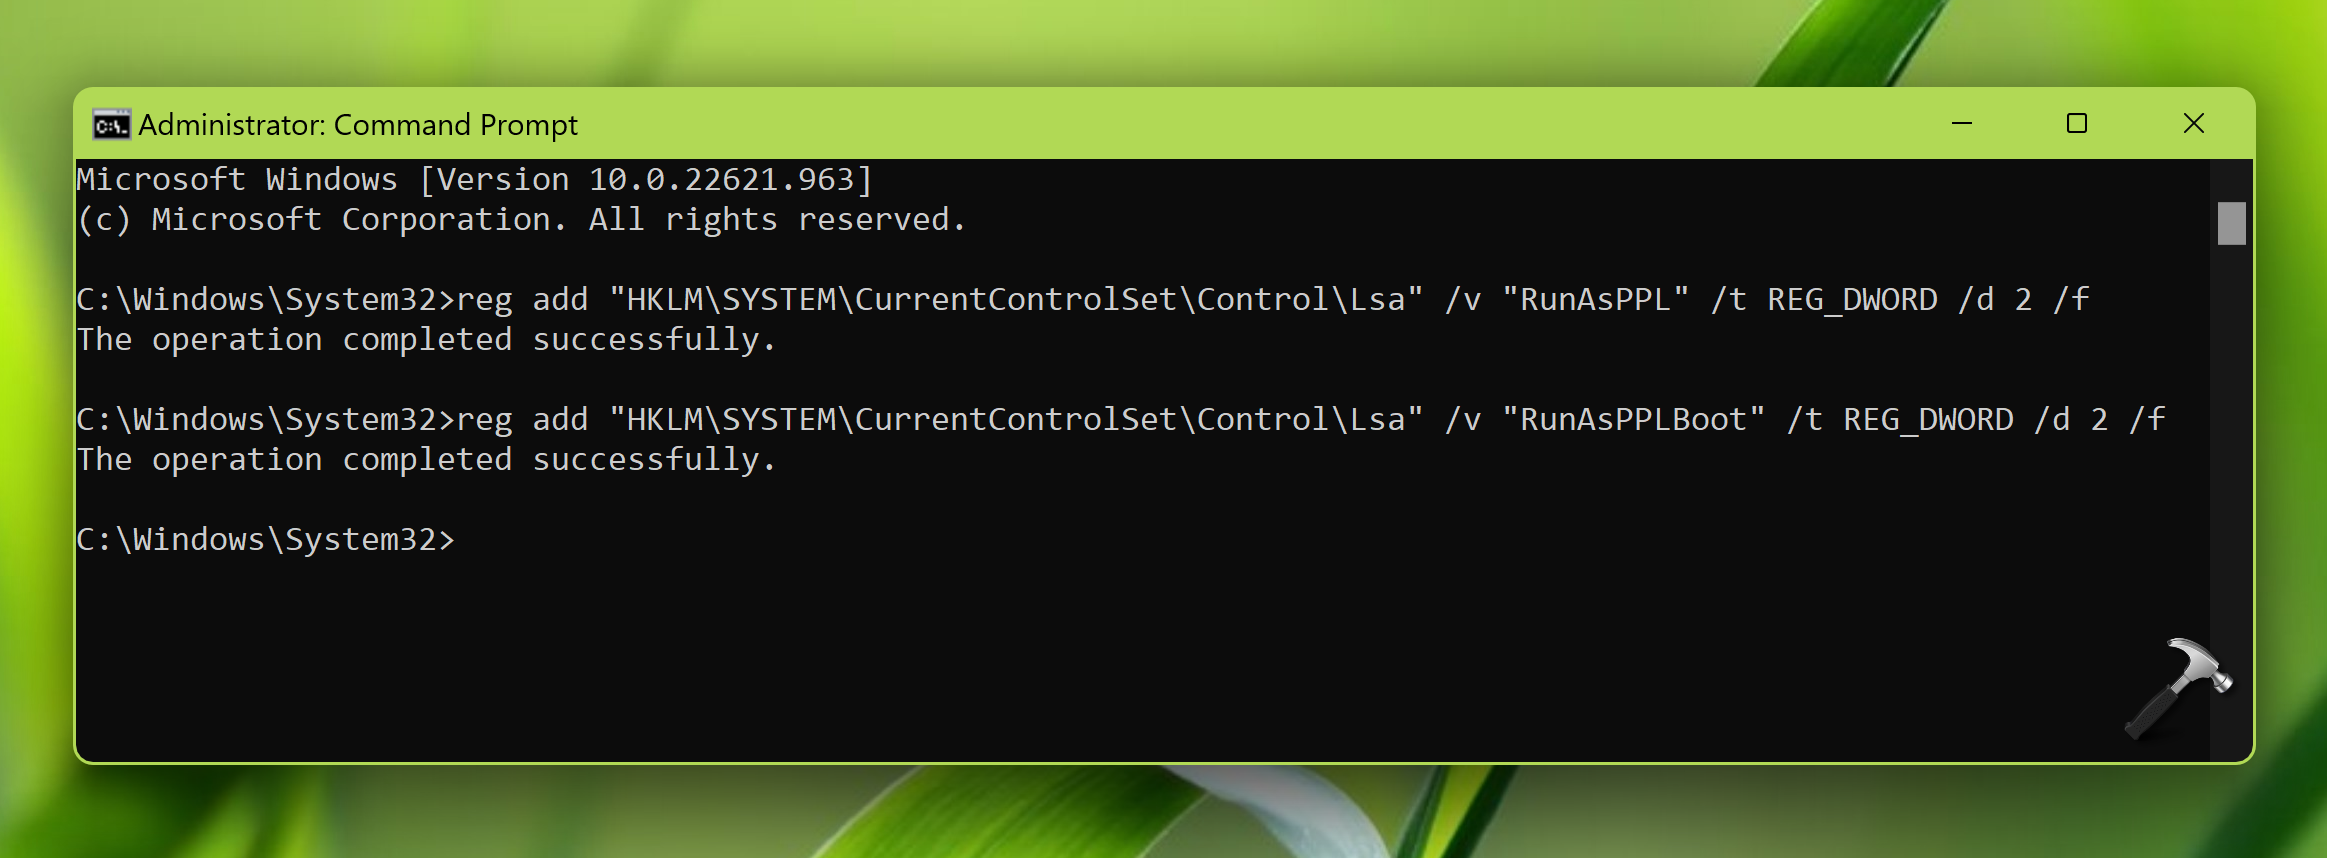
2. Paste these two commands one-by-one and press the Enter key after each:
reg add "HKLM\SYSTEM\CurrentControlSet\Control\Lsa" /v "RunAsPPL" /t REG_DWORD /d 2 /f
reg add "HKLM\SYSTEM\CurrentControlSet\Control\Lsa" /v "RunAsPPLBoot" /t REG_DWORD /d 2 /f
3. Once these commands completed successfully, you can close the Command Prompt.

4. Now reboot once to confirm that the issue has been resolved.
FIX 2 – Using Group Policy
FYI: These steps not applicable to Windows 11 Home users.
1. Open Local Group Policy Editor by running gpedit.msc command.
2. In the Local Group Policy Editor window, navigate to the following path:
Computer Configuration\Administrative Templates\System\Local Security Authority
3. In the right panel, double-click on the Configures LSASS to run as a protected process policy.
4. In the policy configuration window, select the Enabled option.

5. Then click on the dropdown under Configure LSA to run as a protected process and select Enabled with UEFI Lock.
Hope this helps!
![KapilArya.com is a Windows troubleshooting & how to tutorials blog from Kapil Arya [Microsoft MVP (Windows IT Pro)]. KapilArya.com](https://images.kapilarya.com/Logo1.svg)


![[Latest Windows 10 Update] What’s new in KB5055612? [Latest Windows 10 Update] What’s new in KB5055612?](https://www.kapilarya.com/assets/Windows10-Update.png)


8 Comments
Add your comment
HKLM\SYSTEM\CurrentControlSet\Control\Lsa /v RunAsPPL /t REG_DWORD /d 2 /f
HKLM\SYSTEM\CurrentControlSet\Control\Lsa : The module ‘HKLM’ could not be loaded. For more information, run
‘Import-Module HKLM’.
At line:1 char:1
+ HKLM\SYSTEM\CurrentControlSet\Control\Lsa” /v “RunAsPPL” /t REG_DWORD …
+ ~~~~~~~~~~~~~~~~~~~~~~~~~~~~~~~~~~~~~~~~~~~~~~~~~~~~~~~~~~~~~~~~~~~~~
+ CategoryInfo : ObjectNotFound: (HKLM\SYSTEM\Cur…Set\Control\Lsa:String) [], CommandNotFoundException
+ FullyQualifiedErrorId : CouldNotAutoLoadModule
^^ Directly run these commands in Command Prompt, not in PowerShell.
Thank you very much. Did exactly as directed above and it worked. Just make sure to run the command prompt as administrator. Start>all apps>windows tools. Right click command prompt and select “run as administrator”
^^ Glad to help Scott!
reg add “HKLM\SYSTEM\CurrentControlSet\Control\Lsa” /v “RunAsPPLBoot” /t REG_DWORD /d 2 /f
It shows access denied.
^^ Make sure you open Command Prompt as administrator.
Everything I tried on Windows 11 Enterprise and I can’t verify that LSA is on. I have zero events in the event log under the event log where there should be an event 5004. Credential guard is on, and I have LSA enabled with UEFI lock set in the local group policy. Yet I have no verification that LSA is on.
I and using Windows 11 Enterprise.
^^ You must have ‘Local System Authority protection’ option set to On, in this case.