Ever get annoyed when your computer’s keyboard language changes on its own, especially while you’re typing? It can be a real hassle, especially if you use programs like MS Word or Excel. If your computer keeps switching to a different language, like English, without you wanting it to, we’ve got some solutions for you. In this article, we’ll figure out ways to why this happens on Windows 11 and how to fix the Keyboard language keeps changing Windows 11 from messing up your typing.
Page Contents
Fix: Keyboard language keeps changing Windows 11
Typically, your computer is set to use a specific keyboard layout, but in Windows 11, you can set up multiple languages or even create custom keyboard layouts. This allows you to switch languages easily whenever you need to, which is useful if you’re bilingual or work in multiple languages.
If your keyboard language keeps changing automatically, it can be frustrating, especially if you don’t have a multi-language keyboard.
This can happen due to:
- Incompatible third-party app
- Corrupted user profile
- The Fast Startup feature
- Enabling of keyboard shortcuts
While shortcuts are designed to make computer use more efficient, having the default shortcut to switch layouts enabled can lead to accidental language changes while typing.
To address these issues and prevent your keyboard language from switching automatically, you can follow the solutions provided below.
Solution 1: Update the Keyboard drivers
1. Press the Windows key + X. Select the “Device Manager” option.
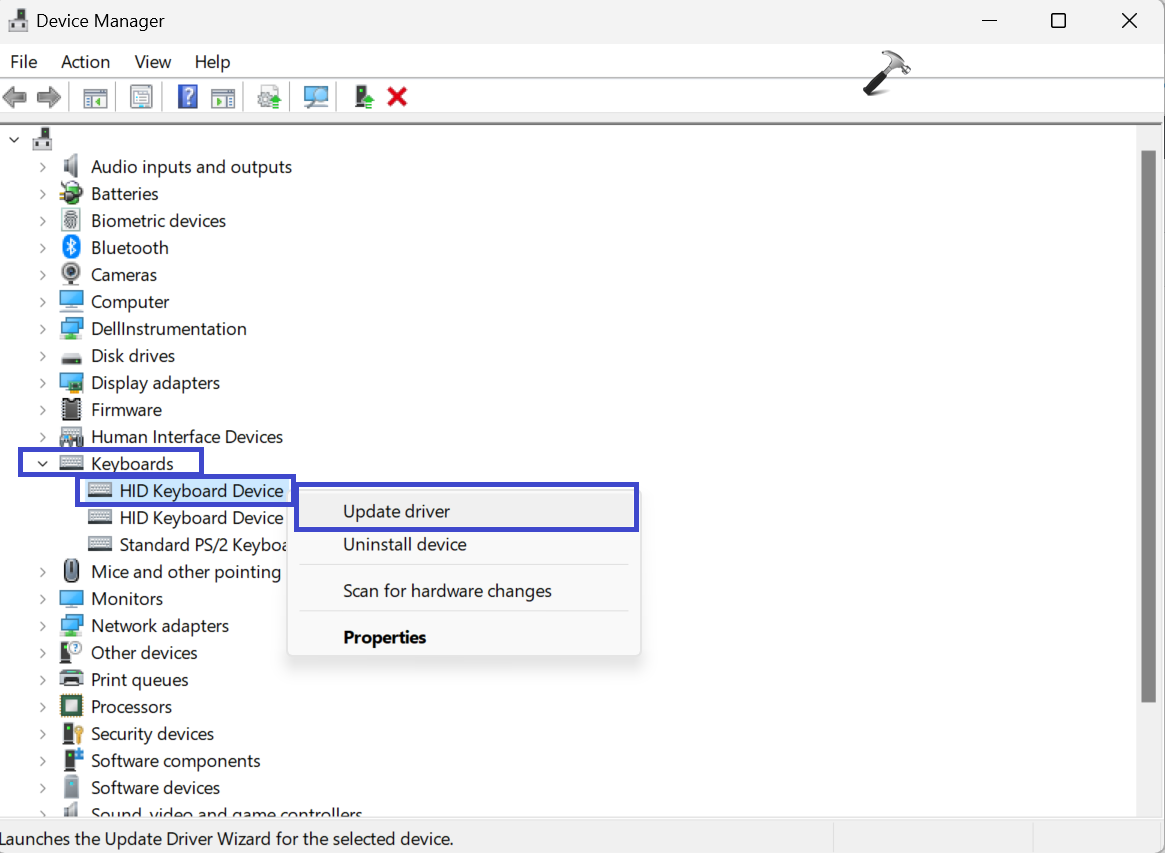
2. Under Keyboards, right-click on the keyboard and select “Update driver“.

3. A prompt box will appear. Select “Search automatically for drivers“.

Solution 2: Use PowerShell commands
1. Open the PowerShell command prompt and run as administrator.
2. Copy and paste the below commands one by one. Press Enter after each command:
$1 = New-WinUserLanguageList en-US

$1.add("ar-EG")

Set-WinUserLanguageList $1

3. After executing commands, restart the PC.
Solution 3: Set different inputs for each Window
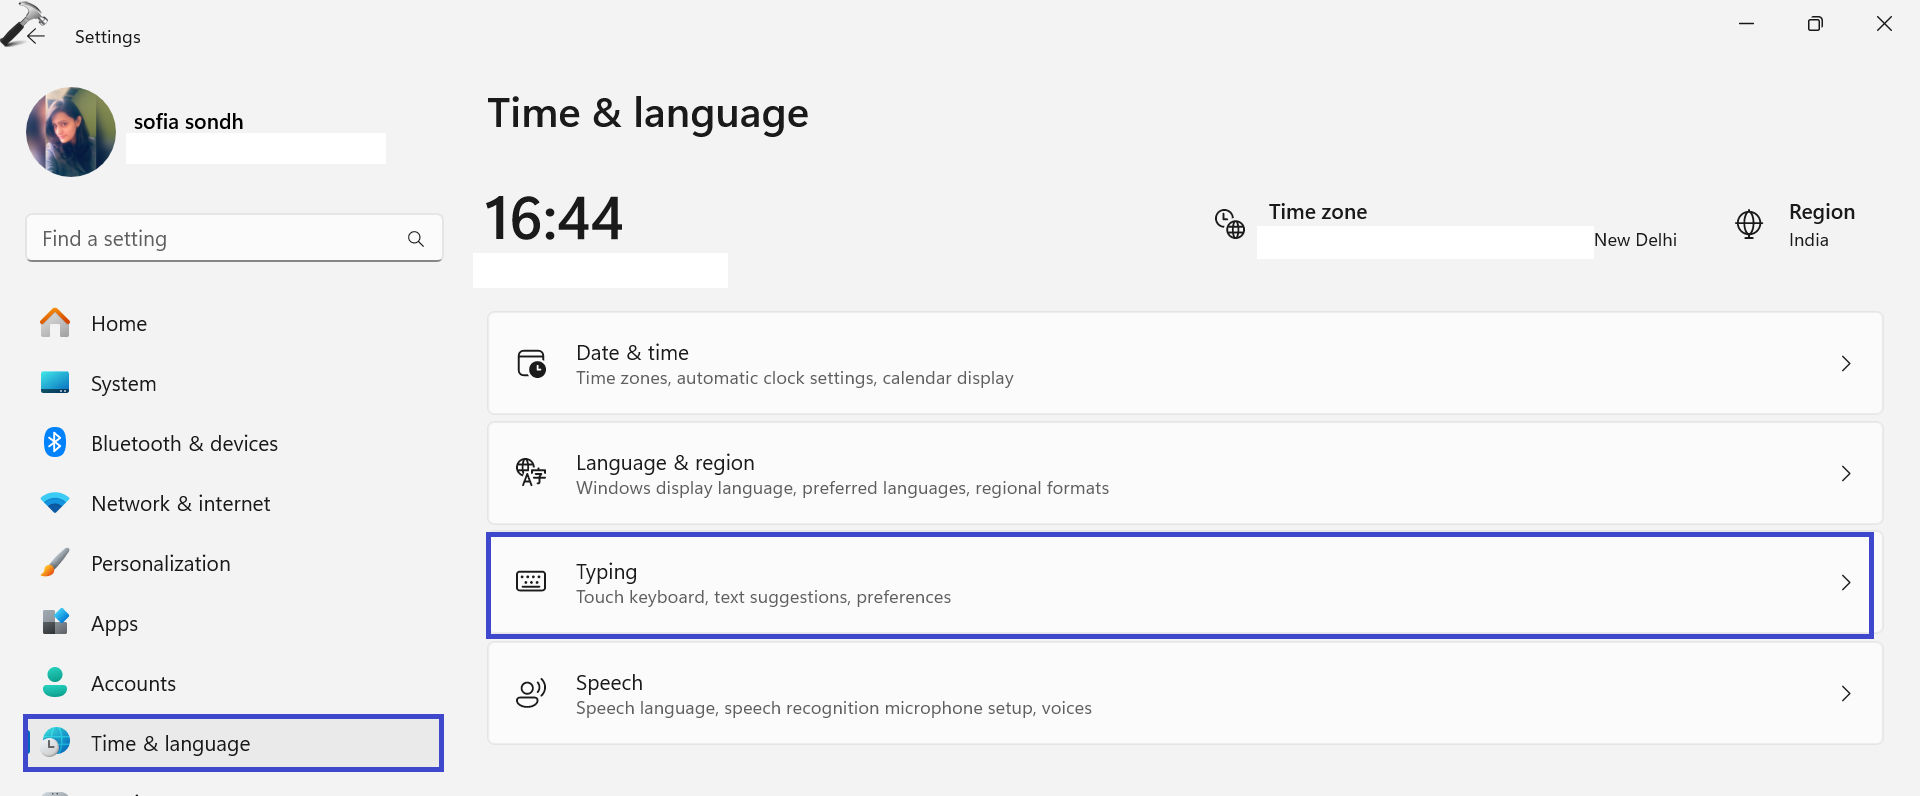
1. Open the Settings app and go to “Time & Language“.
2. Select “Typing“.

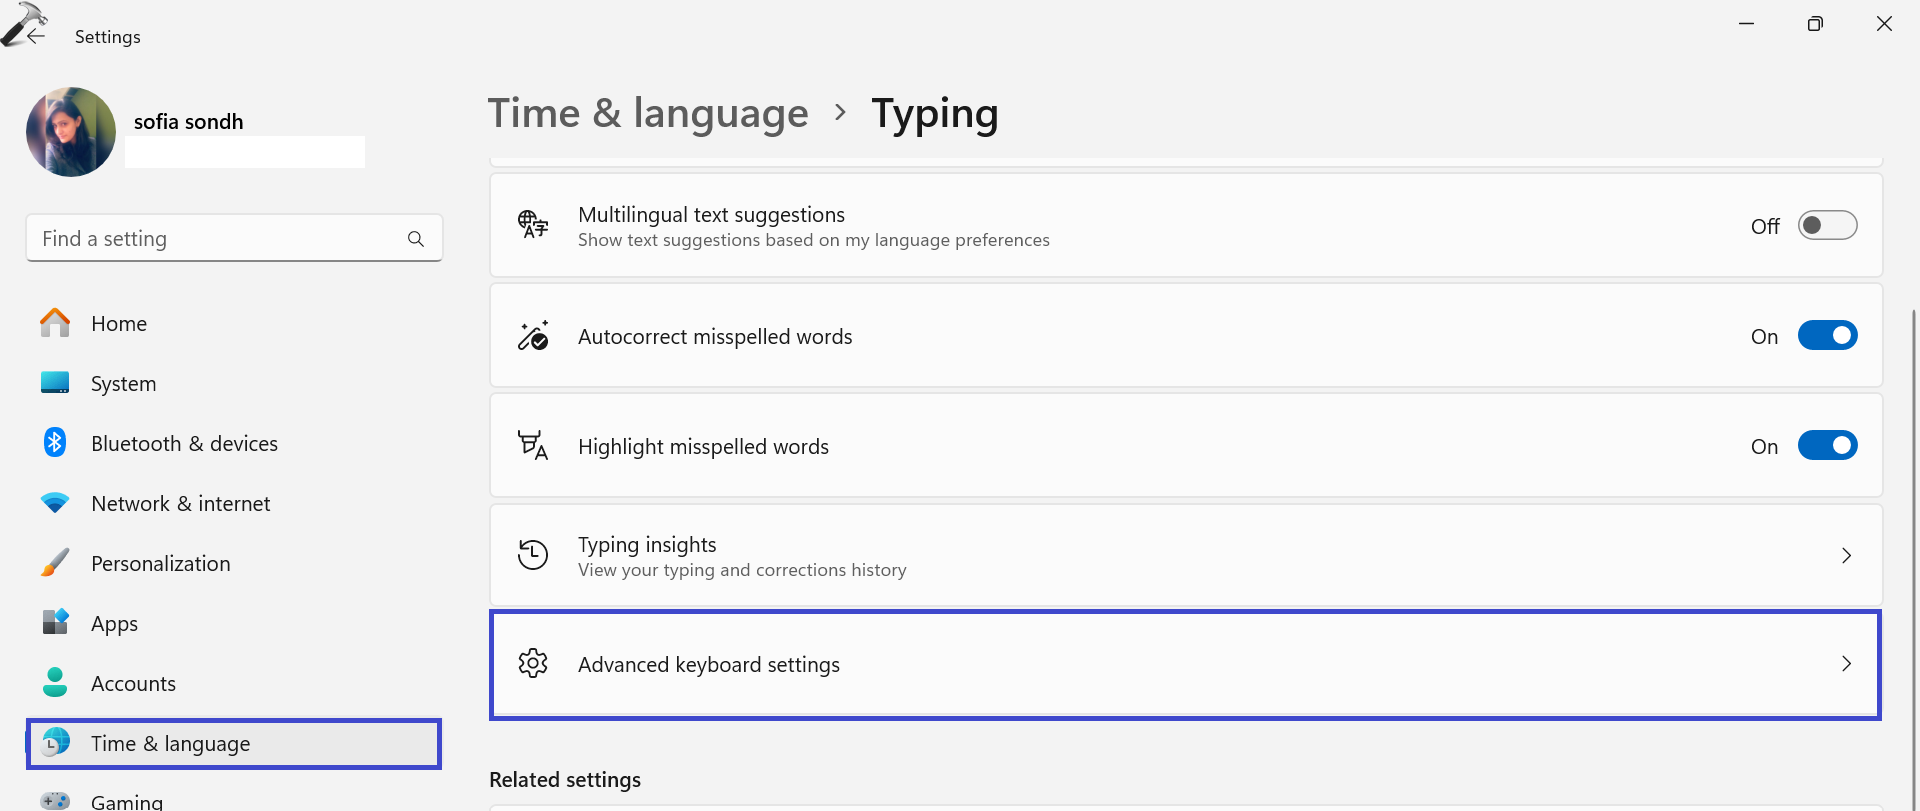
3. Now, select the “Advanced keyboard settings” option.

4. Under the “Switching input methods” section, check the “Let me use a different input method for each app windows” box.

5. Restart the PC.
Solution 4: Delete the Preload key using the Registry Editor
1. Press the Windows key + R. Type “regedit.exe” and click OK.
2. Navigate to the following path:
HKEY_USERS\.DEFAULT\Keyboard Layout\Preload
3. Now, right-click the preload key and click “Delete“.

4. Close all the registry windows and restart the PC.
That’s It!
![KapilArya.com is a Windows troubleshooting & how to tutorials blog from Kapil Arya [Microsoft MVP (Windows IT Pro)]. KapilArya.com](https://images.kapilarya.com/Logo1.svg)


Leave a Reply