The “Invalid IP address” problem in Windows 11 issue hinders your ability to connect to the internet. When this error occurs, it indicates that your computer is unable to obtain a valid IP address, which is essential for communication within a network. However, there are several troubleshooting steps you can take to fix this problem and restore your network connectivity.
Page Contents
Fix: Invalid IP address problem in Windows 11
Fix 1: Update Network drivers
1. Open Settings by pressing Windows + I keys.
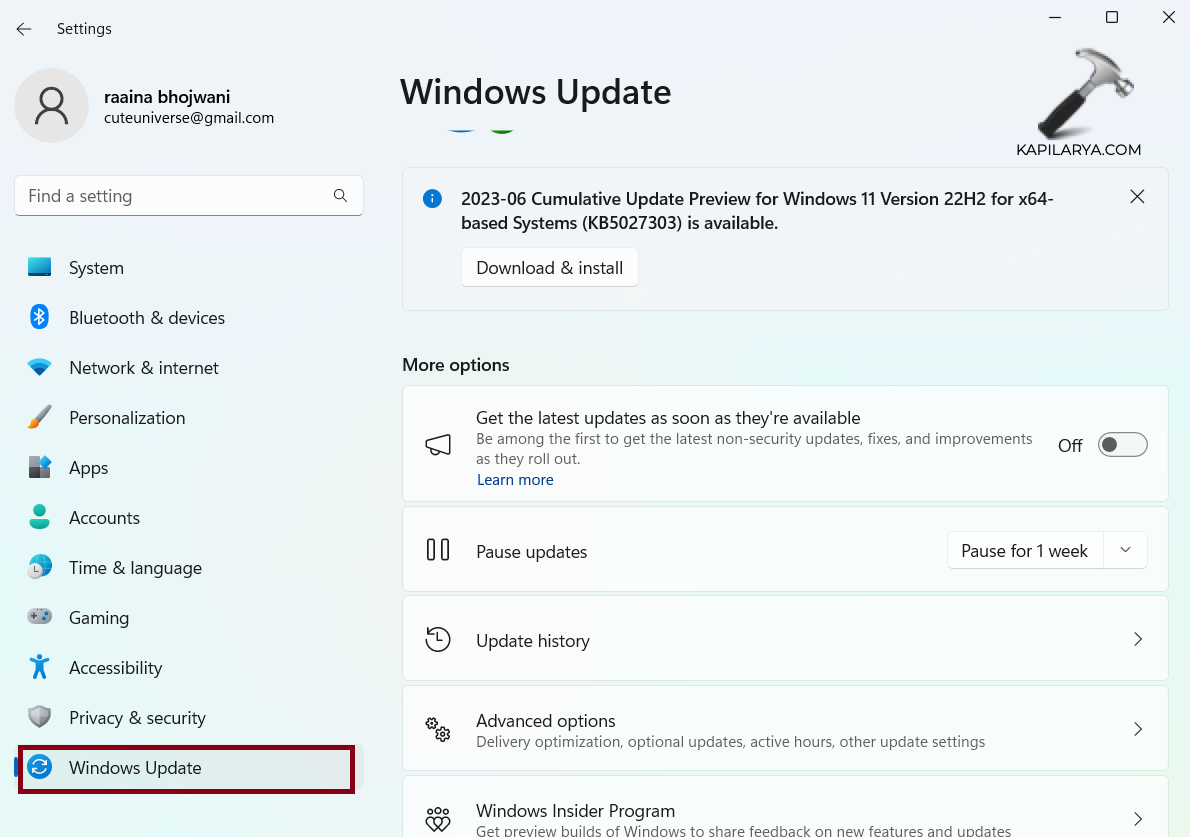
2. Click on “Windows Update”.
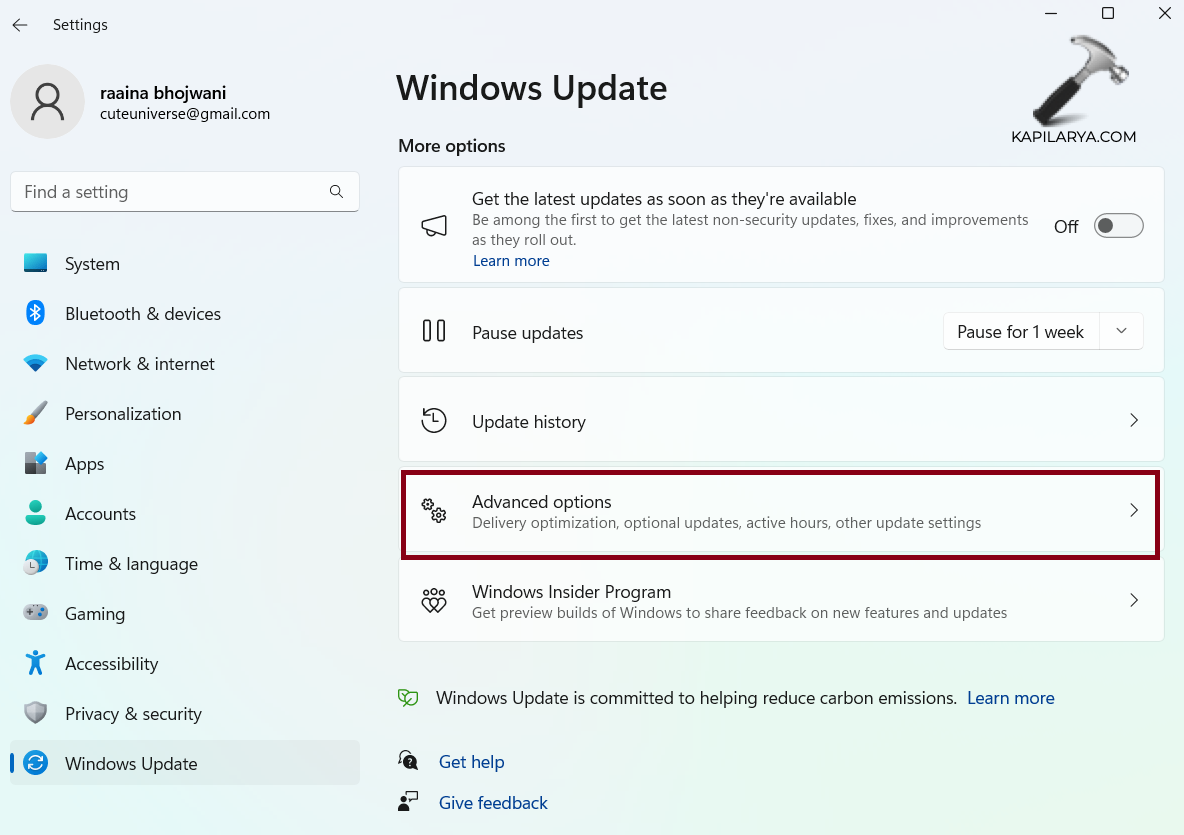
3. Click on “Advanced options”.
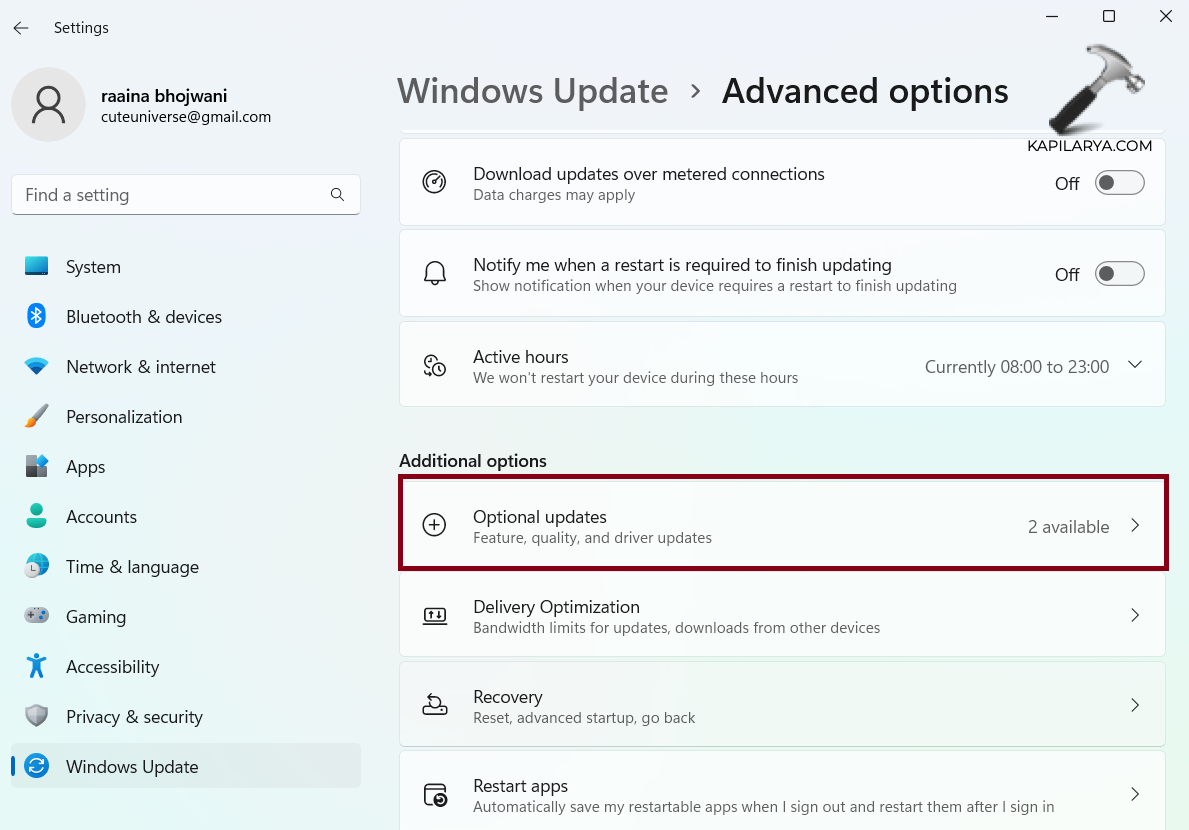
4. Click on “Optional updates”.
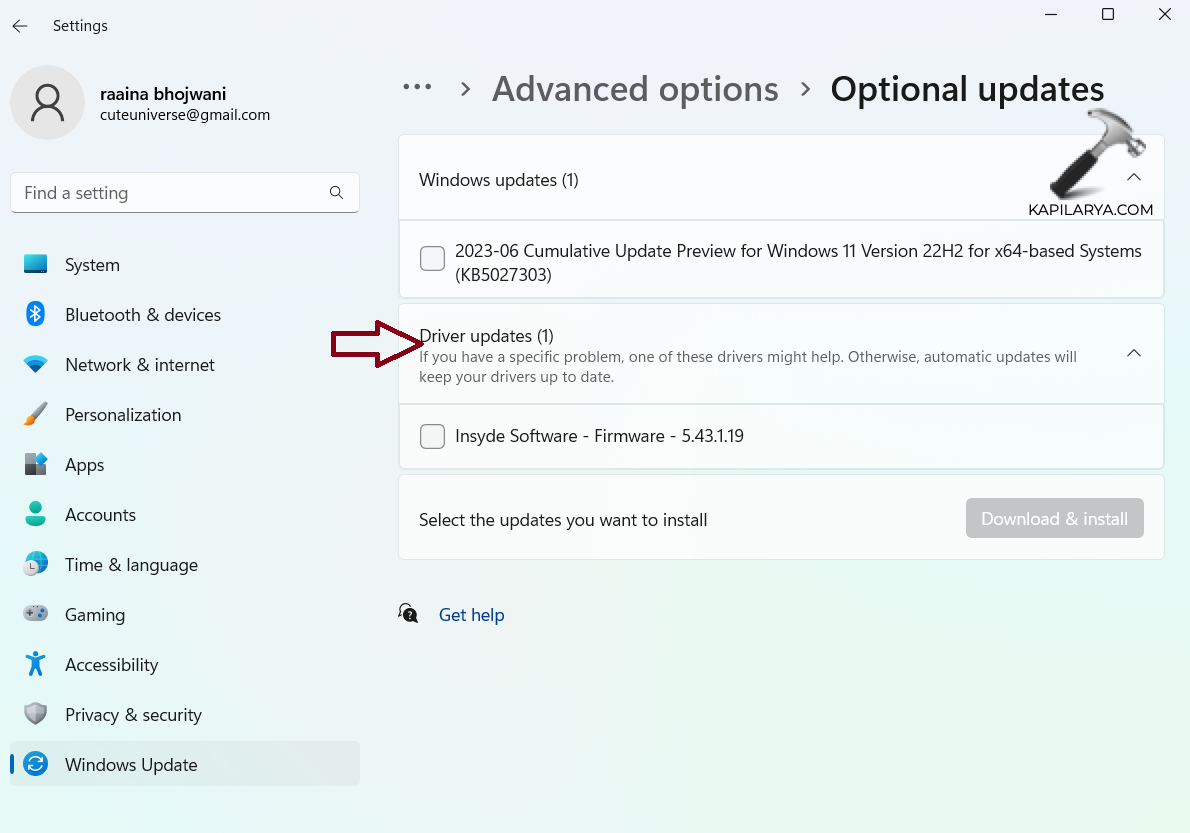
5. Under Driver Updates, a list of updates will be available, which you can choose to install.
Fix 2: Modify DNS Settings
1. Open Control Panel.
2. Click on “Network and Internet”

3. Click on “Network and Sharing Center”.

4. Click on “Change adapter settings”.
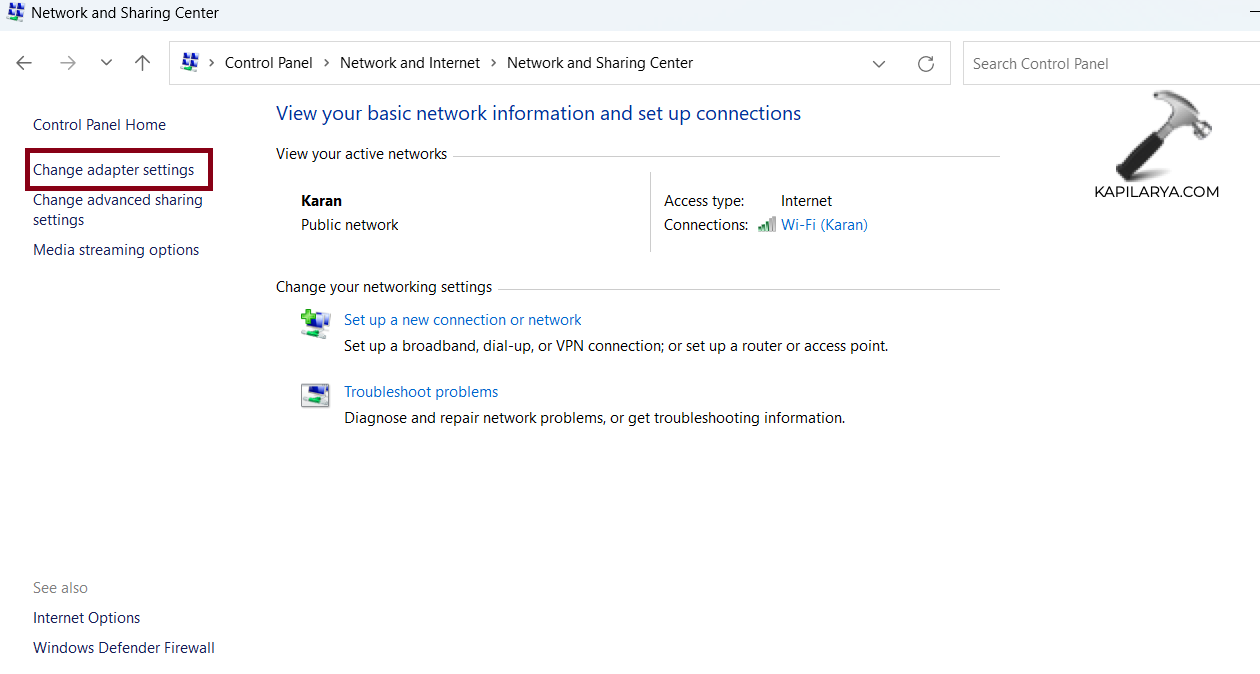
5. Right click on Wi-Fi connection and choose “Properties”.
6. Select “Internet Protocol Version 4 (TCP/IPv4)” and click on “Properties” button.
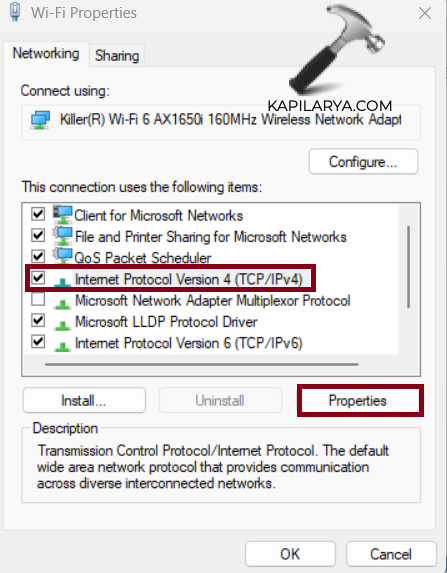
7. Enter the below values:
- Preferred DNS Value: 8.8.8.8
- Alternate DNS Value: 8.8.4.4
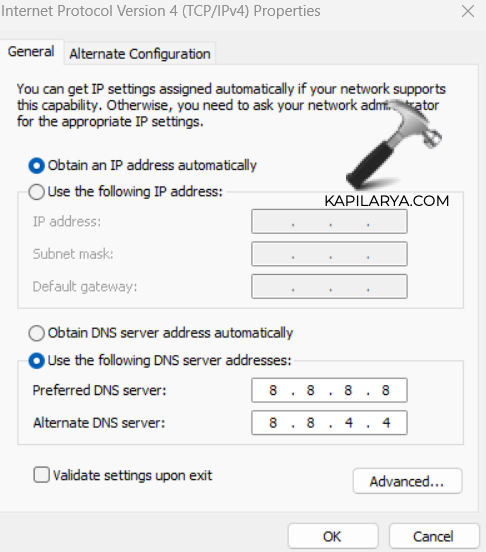
8. Click on “OK” button.
Fix 3: Reset Network Settings to fix Invalid IP address problem in Windows 11
1. Open Settings by pressing Windows + I keys.
2. Click on “Network & internet”.
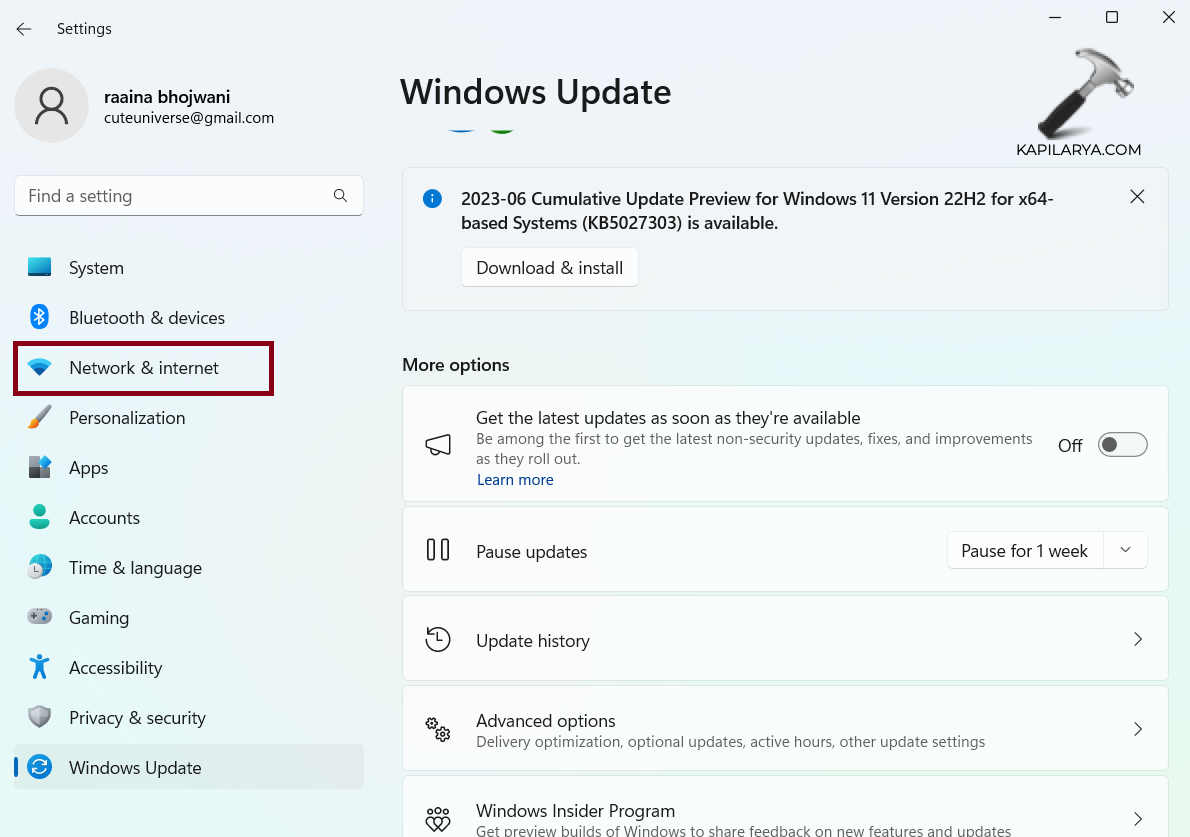
3. Click on “Advanced network settings”.
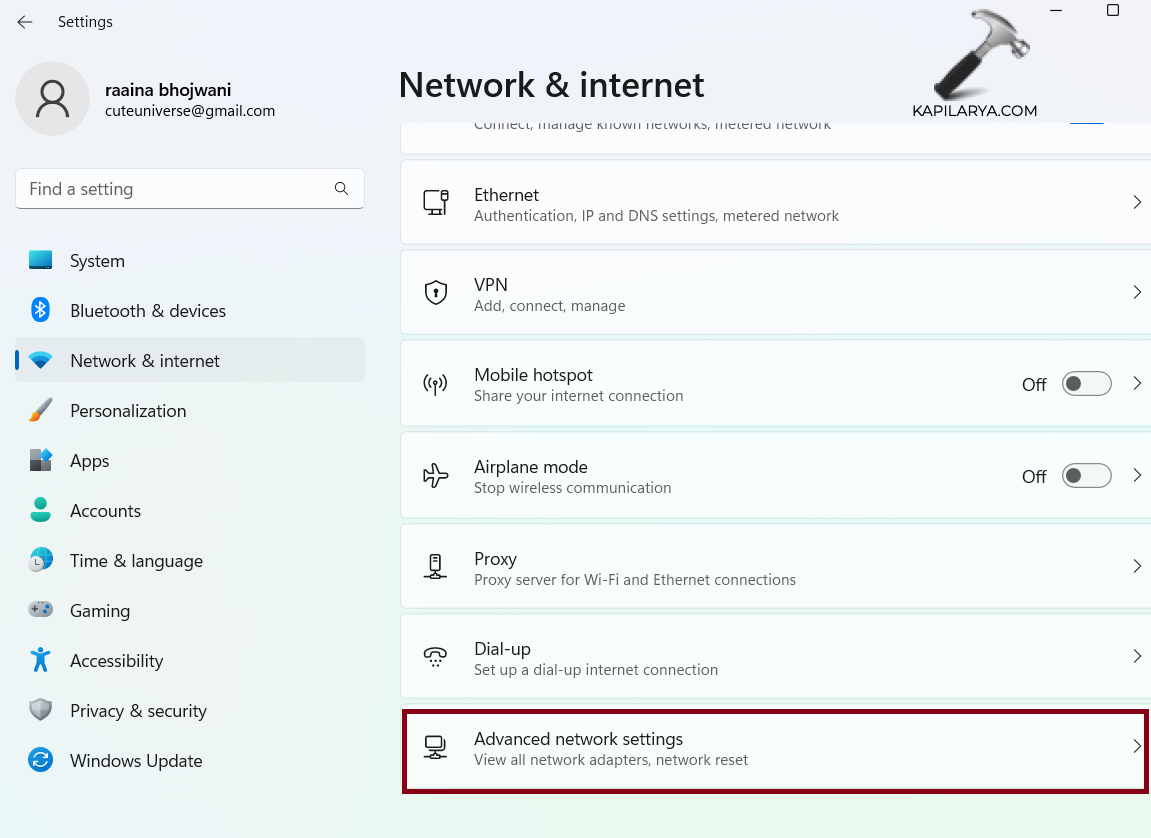
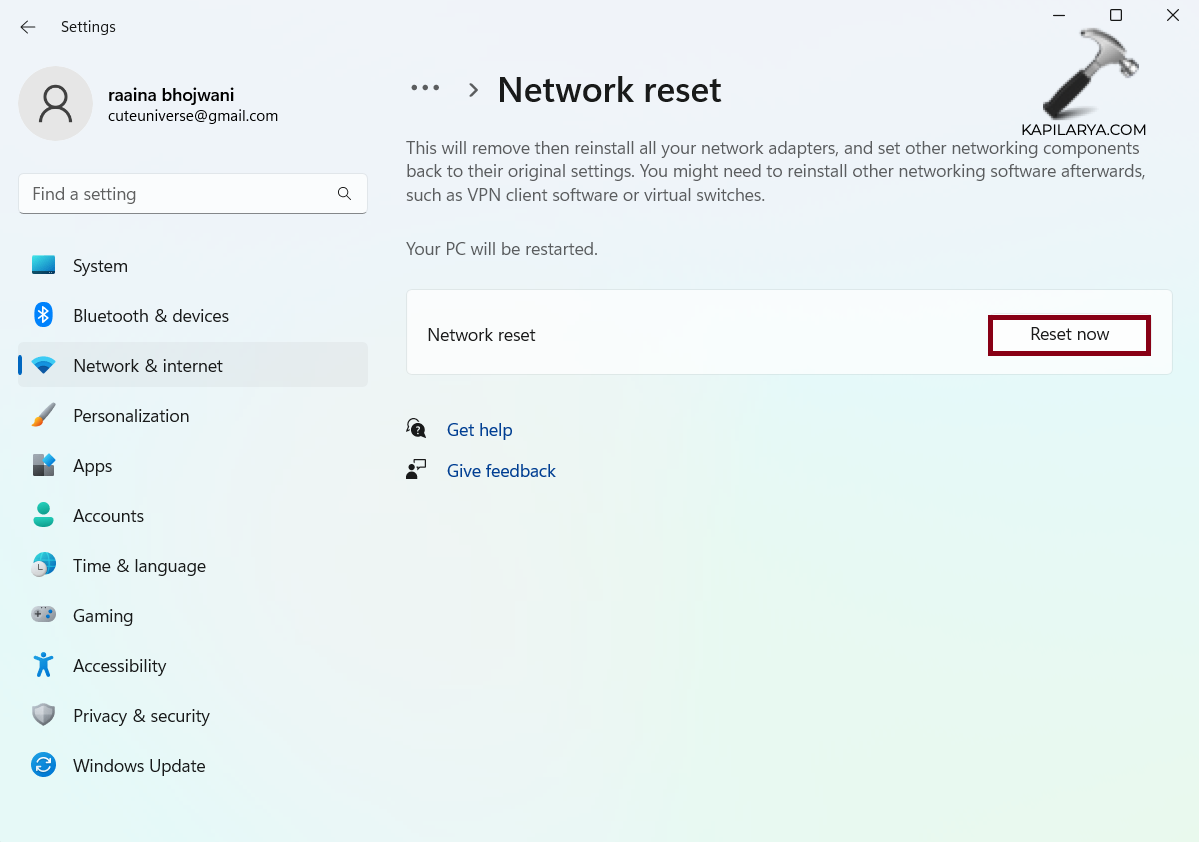
4. Click on “Network reset” > then click “Reset now” button.
Fix 4: Run Network Adapter Troubleshooter
1. Open Settings by pressing Windows + I keys.
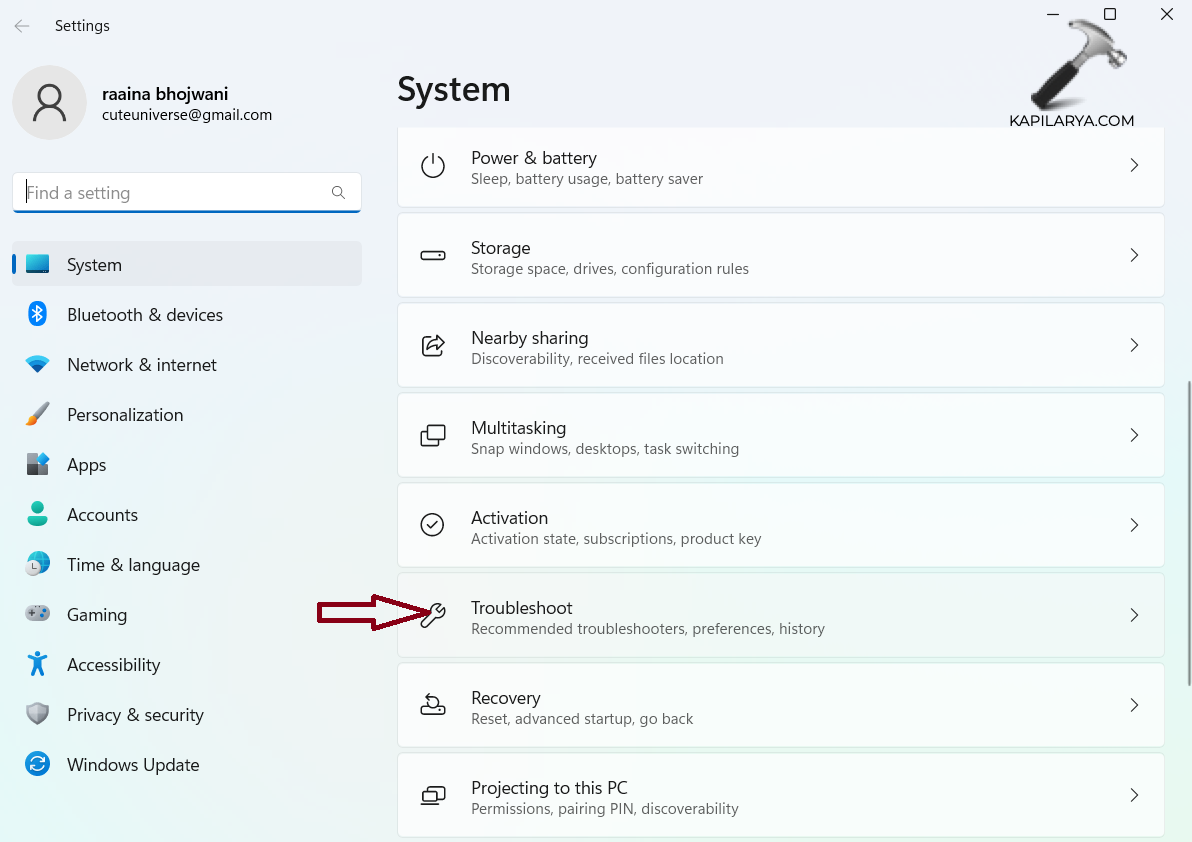
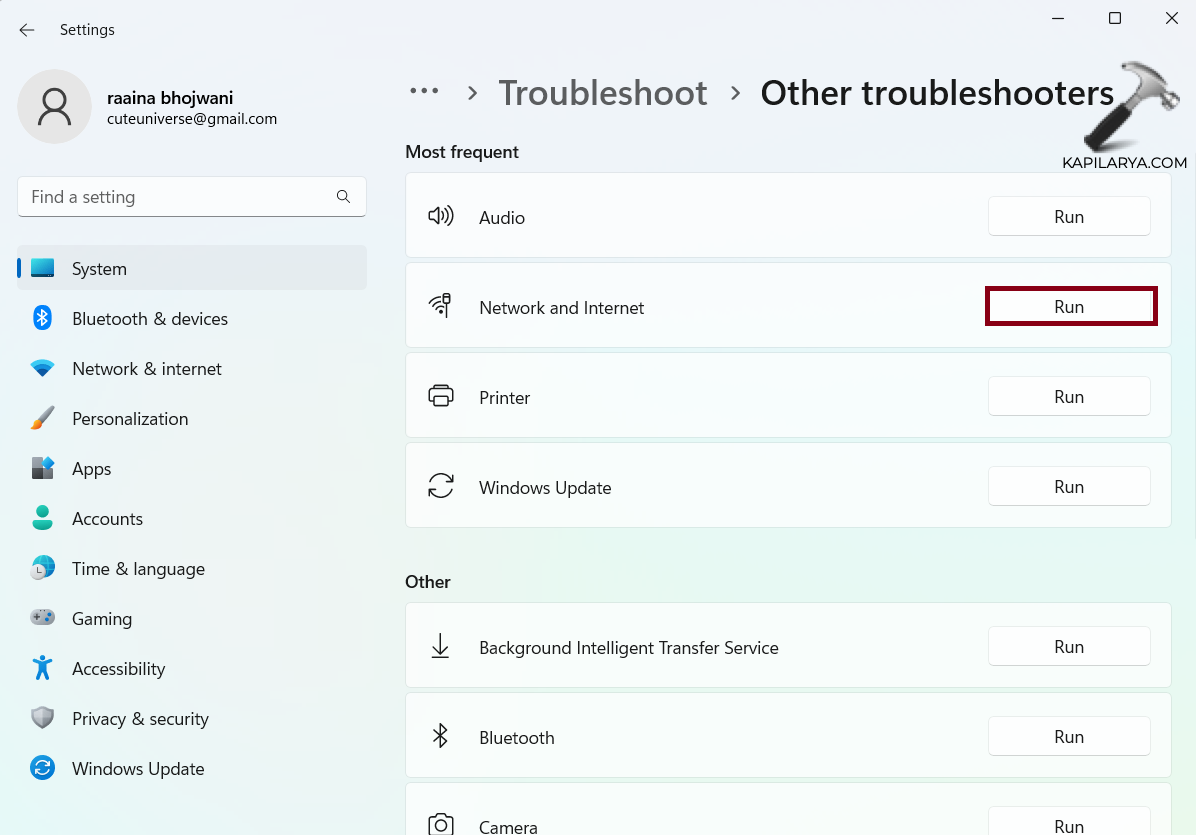
2. Click on “Troubleshoot”.
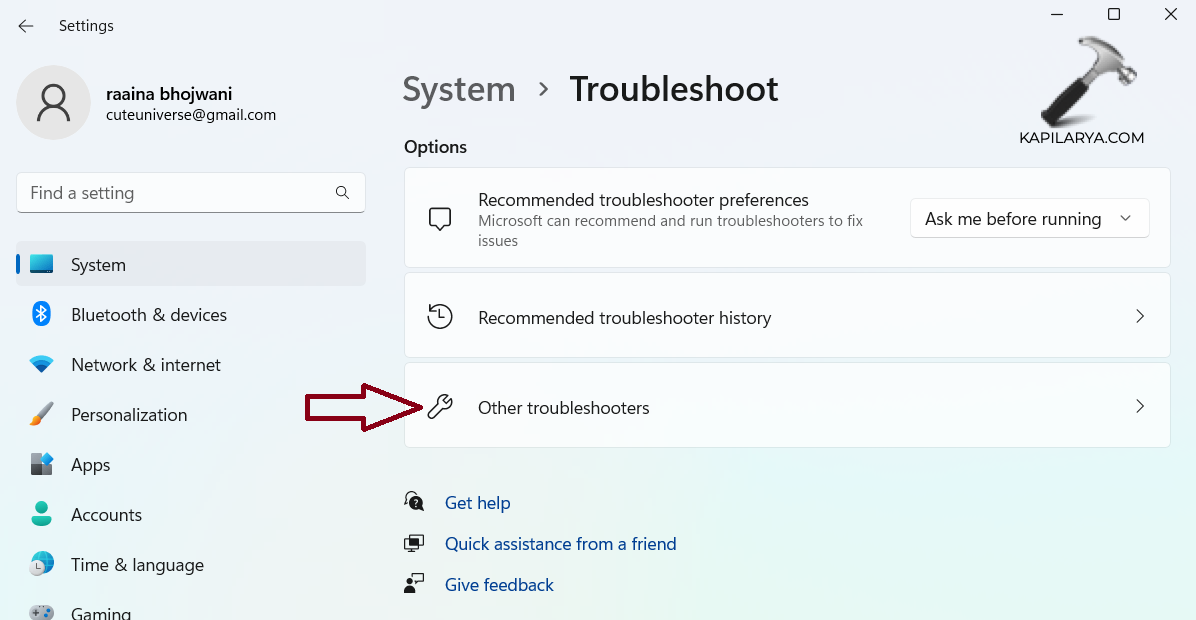
3. Click on “Other Troubleshooters”.
4. Click on “Run” next to “Network and Internet”.
Fix 5: Restart the designated service fix Invalid IP address problem in Windows 11
1. Click on Start to open menu.
2. Click on “services” to open it.
3. Scroll down and search for one of these services:
Wired AutoConfig (For Ethernet Connections)
WLAN AutoConfig (For Wi-Fi Connections)
WWAN AutoConfig (For Mobile Broadband Connections)

4. Right-click on it and choose “Restart”.
Fix 6: Run these Network Commands
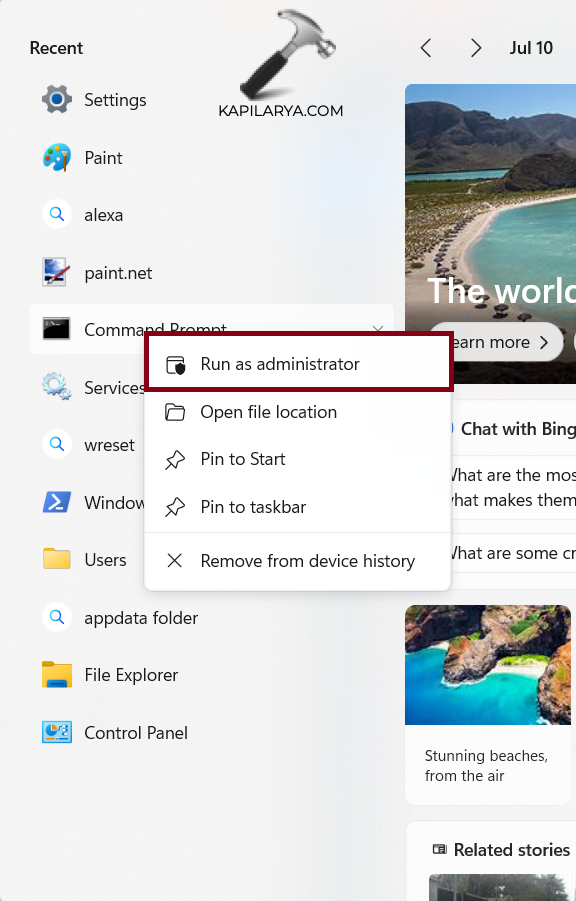
1. Open Command Prompt as an administrator.
2. Execute these commands one by one:
netsh winsock reset
netsh int IP reset
netsh int ipv4 reset all
netsh int ipv6 reset all
ipconfig /release
ipconfig /renew
ipconfig /flushdns

Fix 7: Allow Windows to Obtain IP Address Automatically
1. Open Control Panel.
2. Click on “Network and Internet”

3. Click on “Network and Sharing Center”.

4. Click on “Change adapter settings”.

5. Right click on Wi-Fi connection and choose “Properties”.
6. Select “Internet Protocol Version 4 (TCP/IPv4)” and click on “Properties” button.

7. Click on “Obtain an IP address automatically” > click “OK”.

Fix 8: Check Internet Connection
Begin by verifying that your network cables are securely connected to your computer and router. If you are using a wireless connection, ensure that the Wi-Fi is turned on and you are connected to the correct network. If your connection seems stable, try restarting your router or modem to refresh the network settings.
That’s it!
![KapilArya.com is a Windows troubleshooting & how to tutorials blog from Kapil Arya [Microsoft MVP (Windows IT Pro)]. KapilArya.com](https://images.kapilarya.com/Logo1.svg)




![[Latest Windows 10 Update] What’s new in KB5055612? [Latest Windows 10 Update] What’s new in KB5055612?](https://www.kapilarya.com/assets/Windows10-Update.png)


Leave a Reply