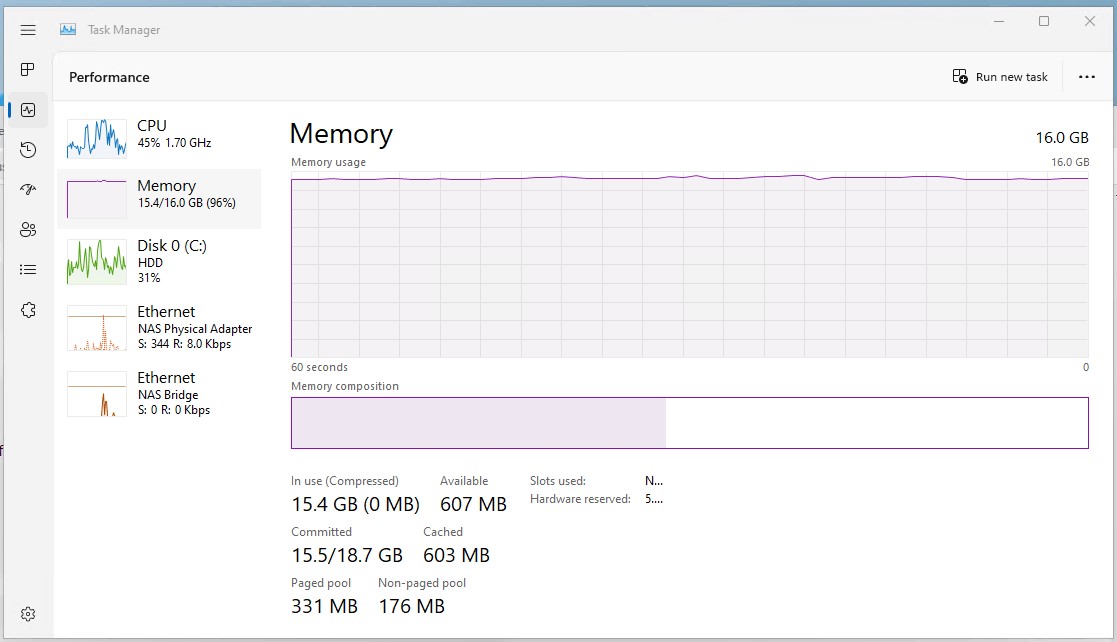
Have you been facing high memory issue after upgrading to the latest Windows 11 version? If yes, then you can resolve this issue by freeing up the RAM on your Windows 11 device. Any of the below mentioned methods can be use to fix high memory usage in Windows 11 22H2 of your device.
Page Contents
Fix: High memory usage in Windows 11
Method 1: By disabling the unnecessary Startup Apps
1. Start by opening Task Manager.
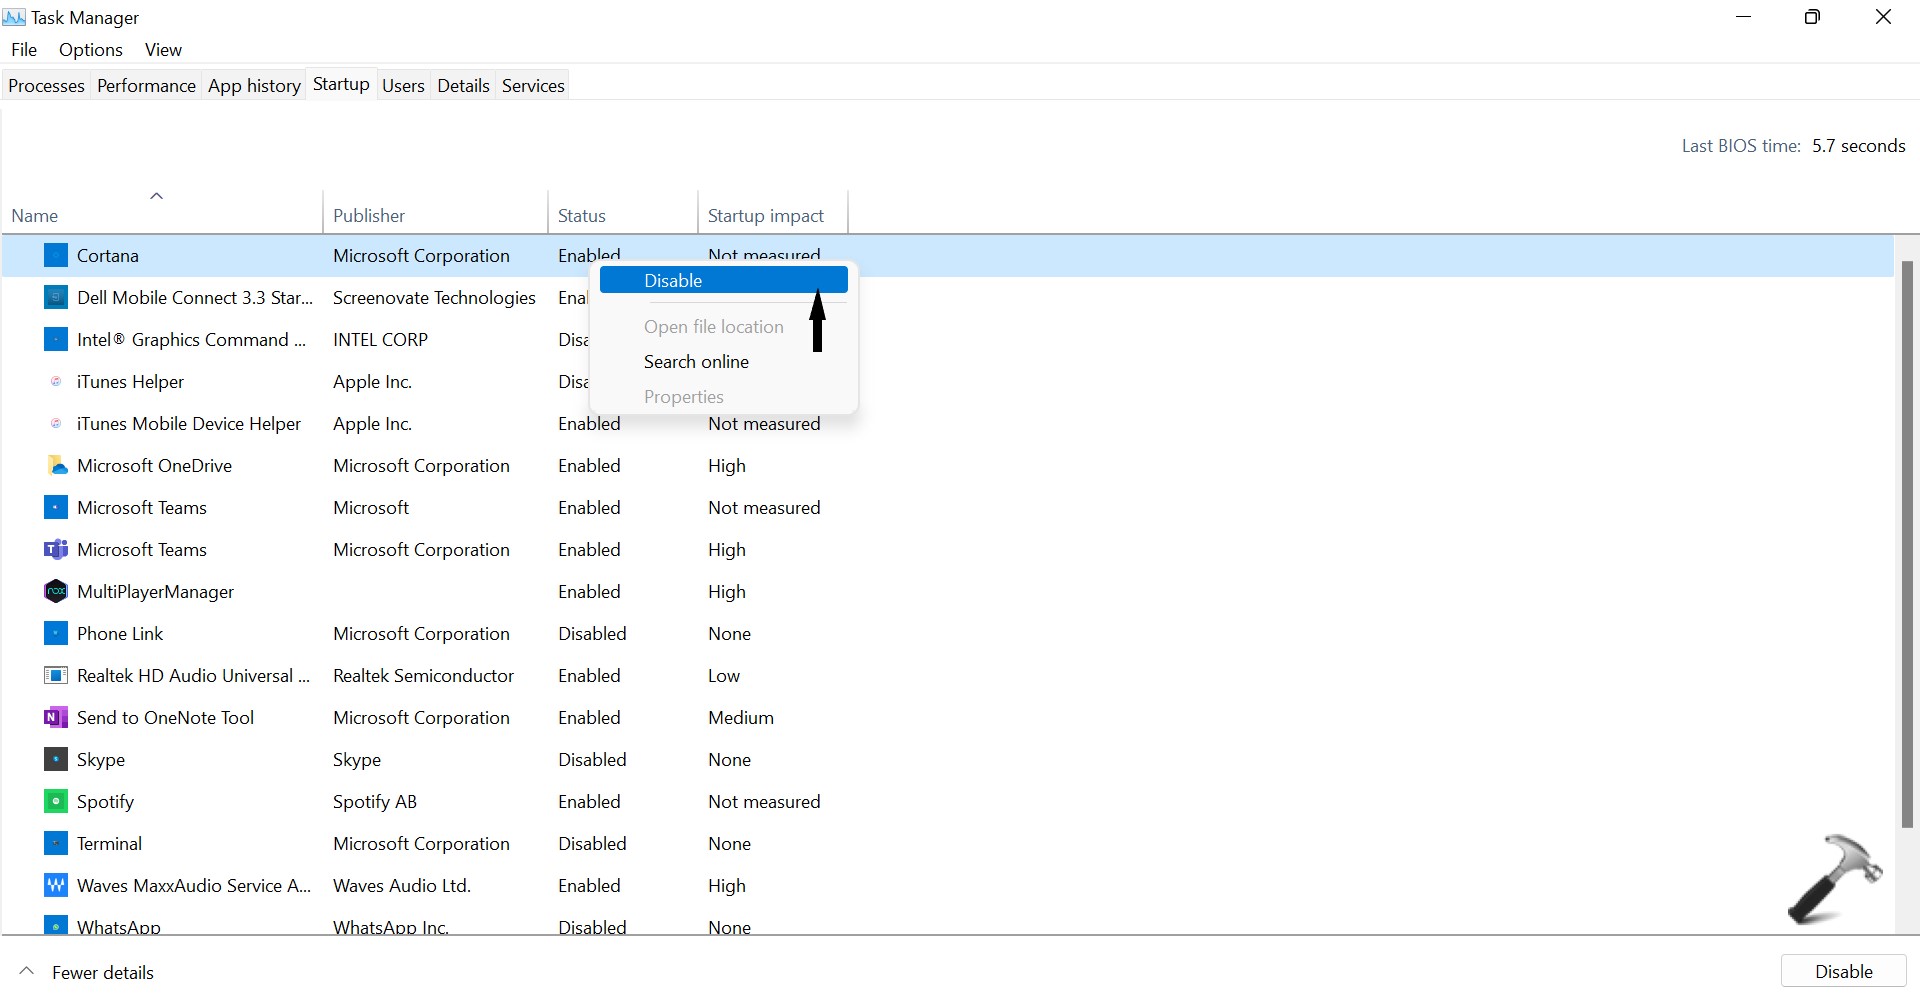
2. Select the Startup section. Here you can see the apps and services that are set as startup items or not.
3. Now, you can select the apps where you want to disable the startup feature. Copy this set to disable all the unnecessary startups.
Method 2: End unnecessary Apps and Services to Fix High memory usage
1. Start by opening Task Manager.
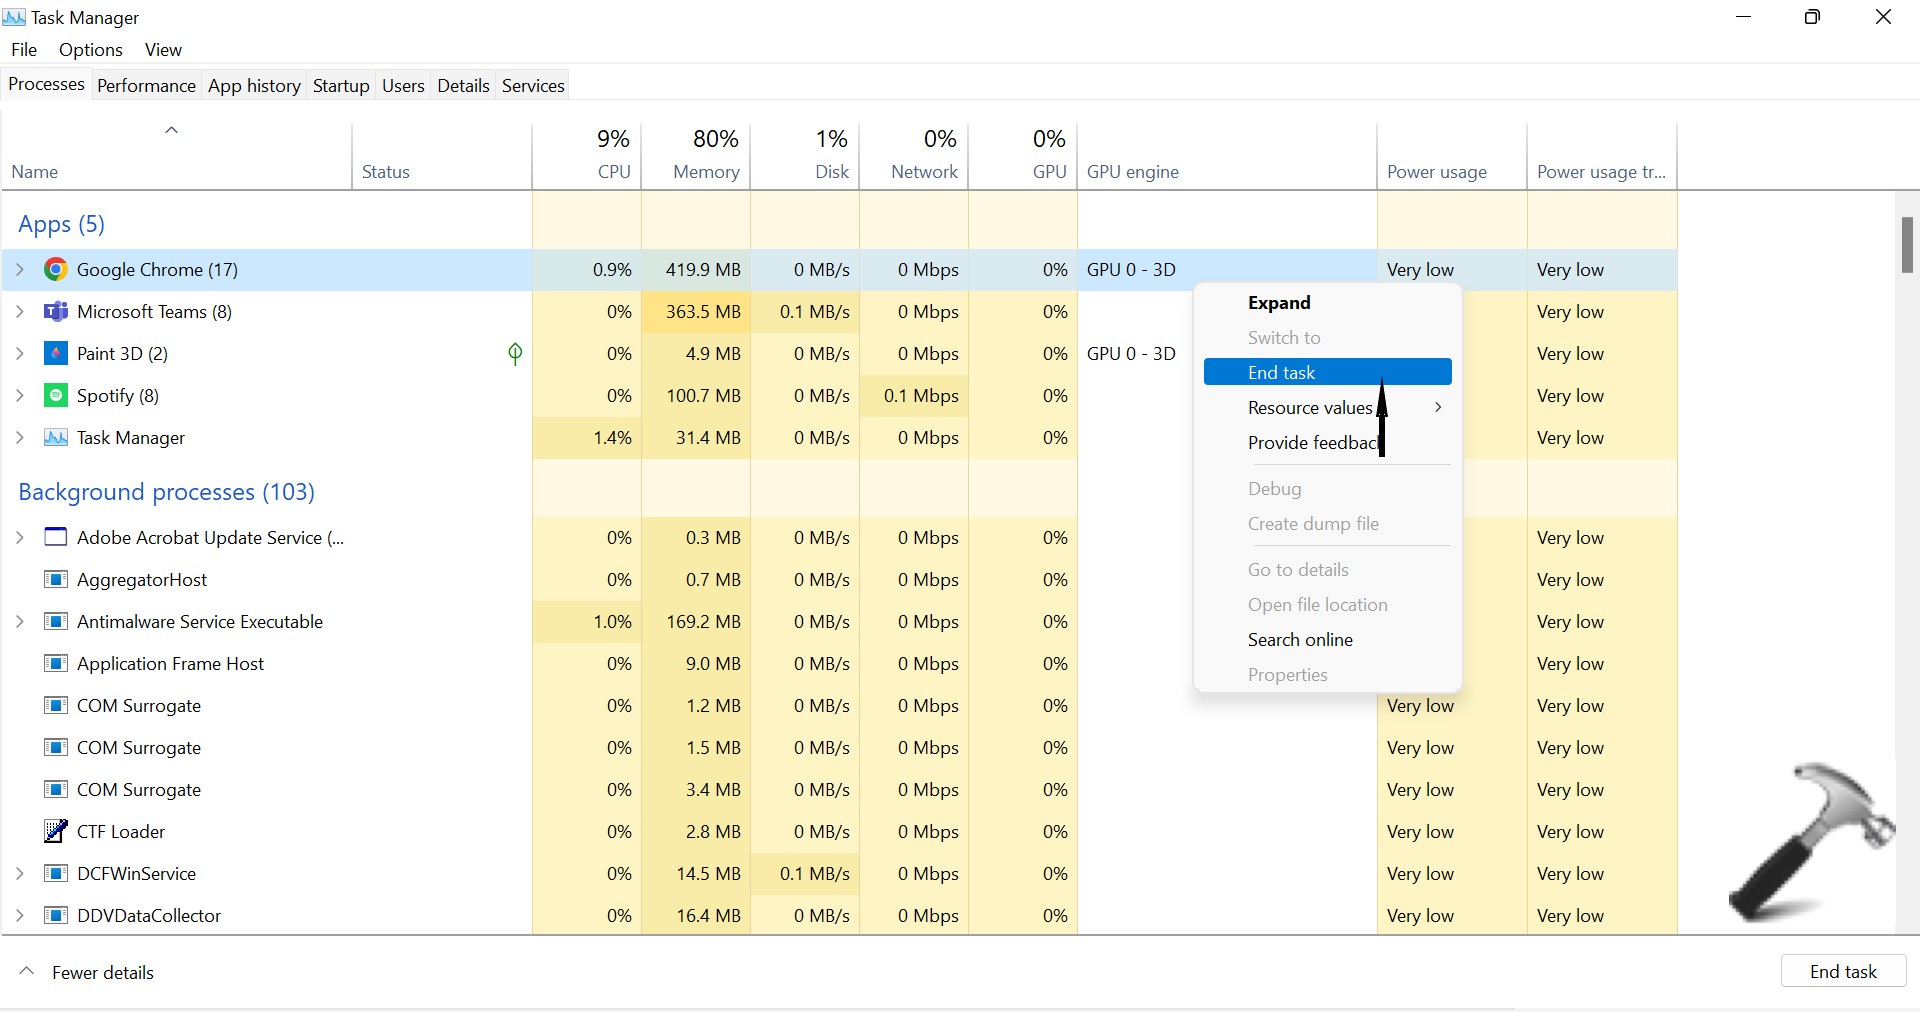
2. Now, find the unnecessary apps and services that are using too much memory. Then, right click on the app or service and select End task. Copy this set to close all the unnecessary apps.
Method 3: By Disabling SysMain Service
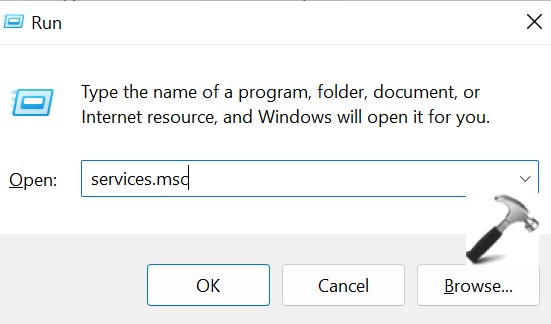
1. Start by opening Run directly or by pressing Windows + R keys together.
2. Type services.msc and press OK.
3. Now, scroll down to find SysMain service. Double click on SysMain to open its Properties interface.
4. Click on Disabled for Startup type.
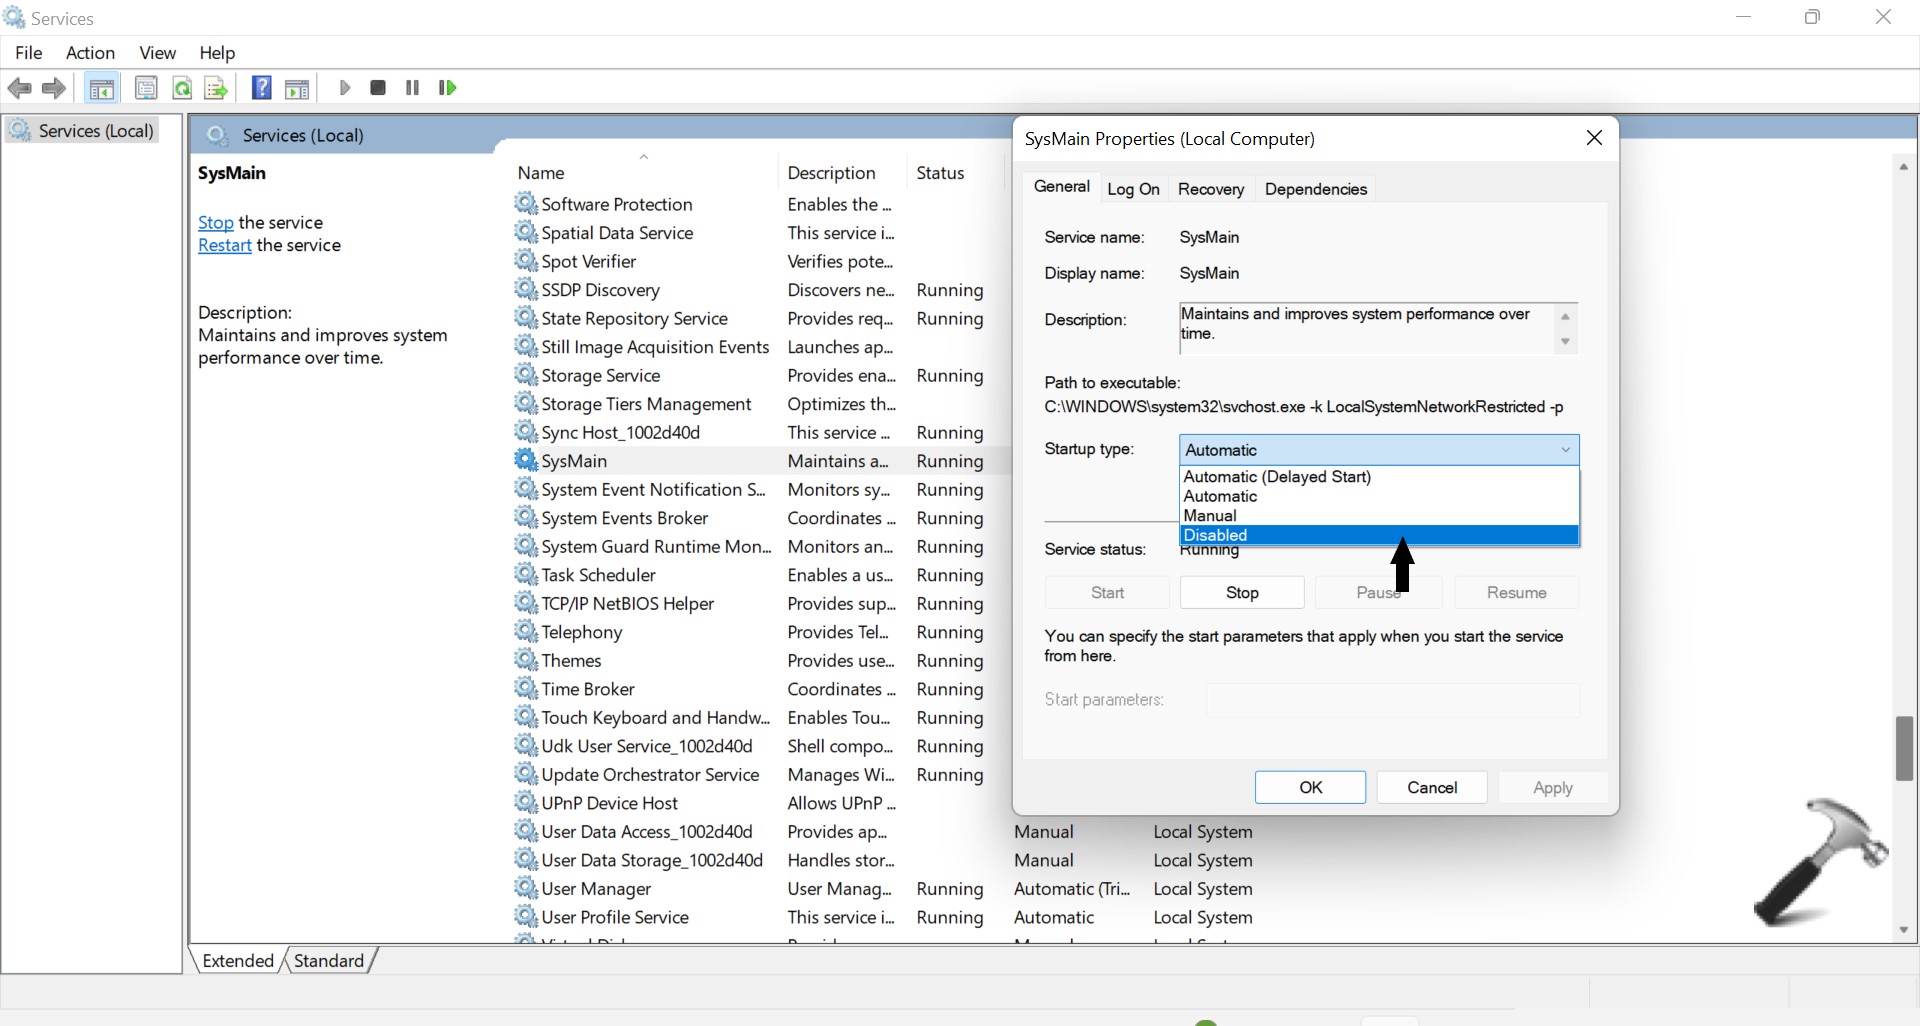
5. Press the Stop button and wait until the process ends.
6. Click on Apply.
7. Click on OK.
Method 4: Adjust for Best Performance
1. Search sysdm.cpl to open System Properties.
2. Select Advanced tab.
3. Now, select Settings button under Performance.
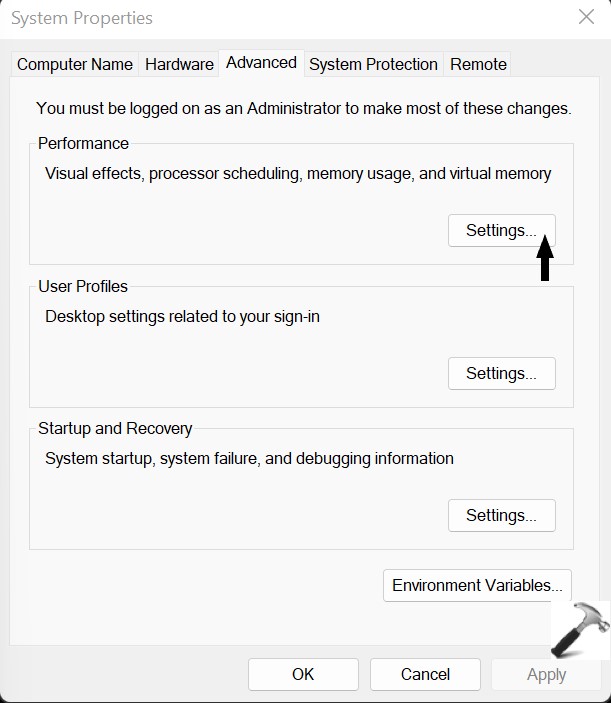
4. Select Adjust for best performance under Visual Effects.

5. Click on OK.
Method 5: By Defragmenting your drive
1. Start by opening Defragment and Optimize Drives.
2. Now, select the drive you want to defragment and click the Optimize button to defragment it.
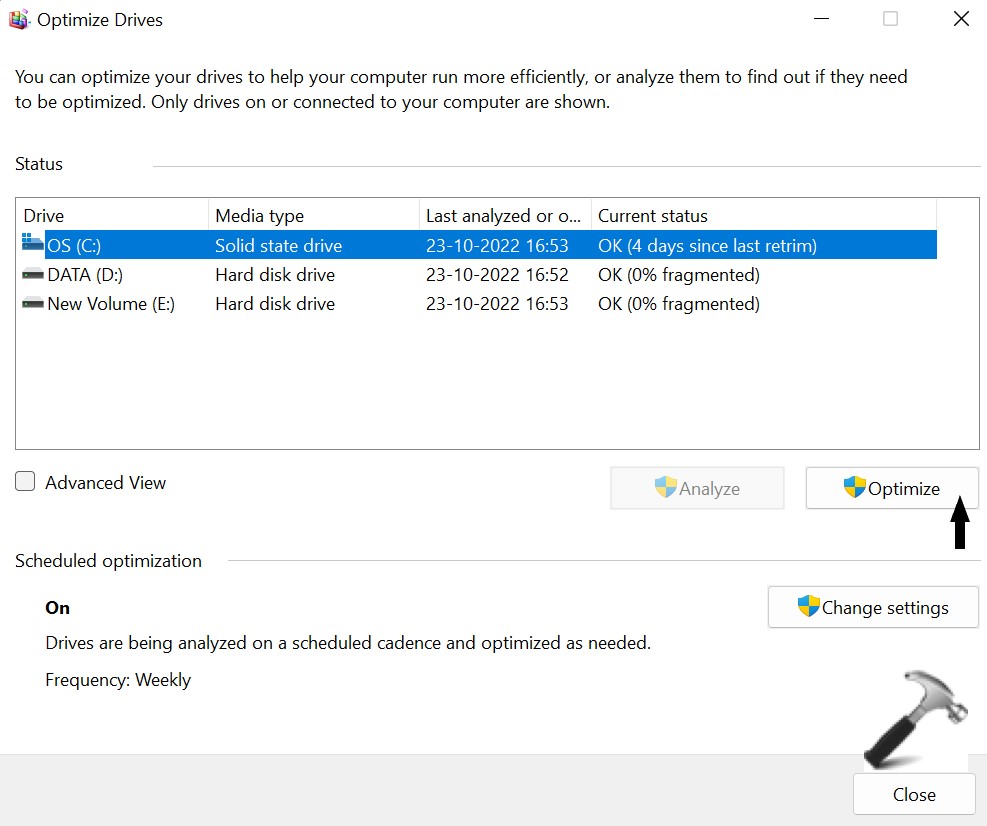
3. Restart your device once the process ends and see if more memory is released.
Method 6: Modify the Registry Key
1. Start by opening Run directly or by pressing Windows + R keys together.
2. Type regedit and press OK.
3. Copy and paste,
Computer\HKEY_LOCAL_MACHINE\SYSTEM\CurrentControlSet\Control\Session Manager\Memory Management
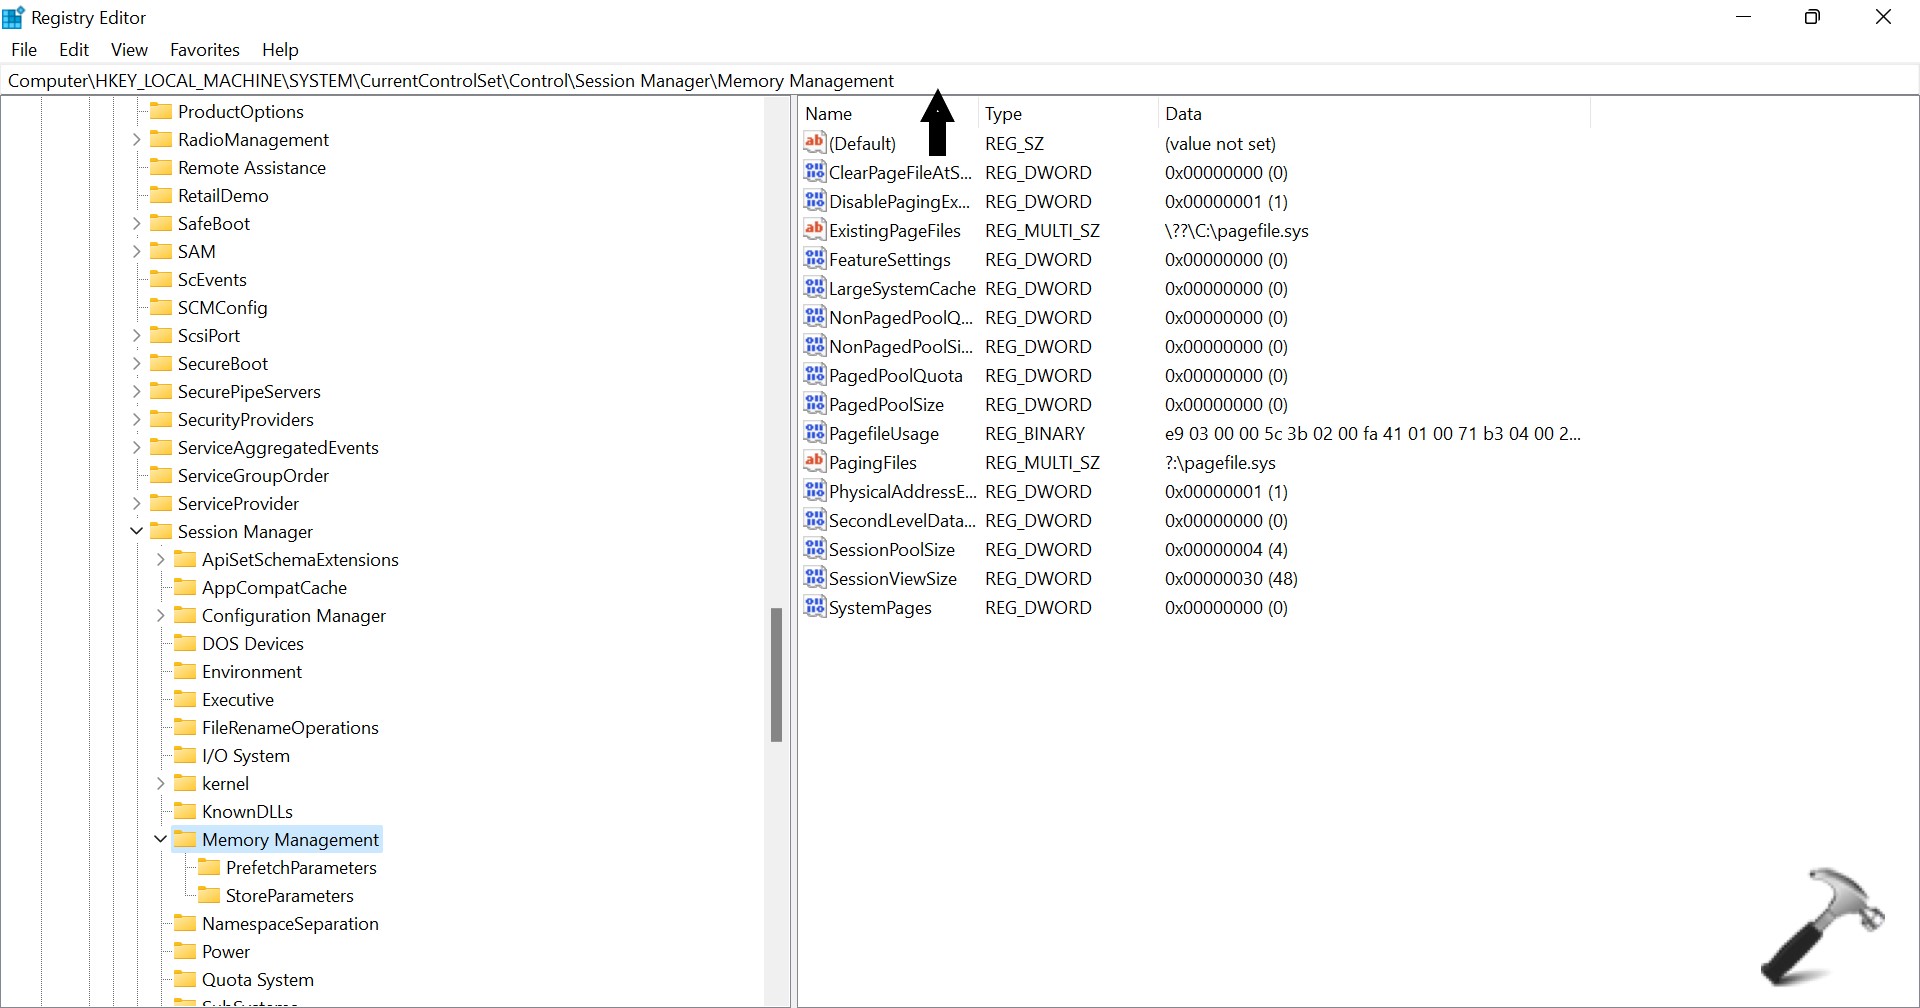
4. Double click on ClearPageFileAtShutDown.
5. Enter 1 as the value data.

6. Press on OK to save the changes.
7. Lastly, Restart your computer.
Method 7: Scan & Remove Viruses and Malware
1. Start by opening Windows Security.
2. Select Virus & threat protection.
3. Click on Quick scan button to scan your device for viruses and malware.
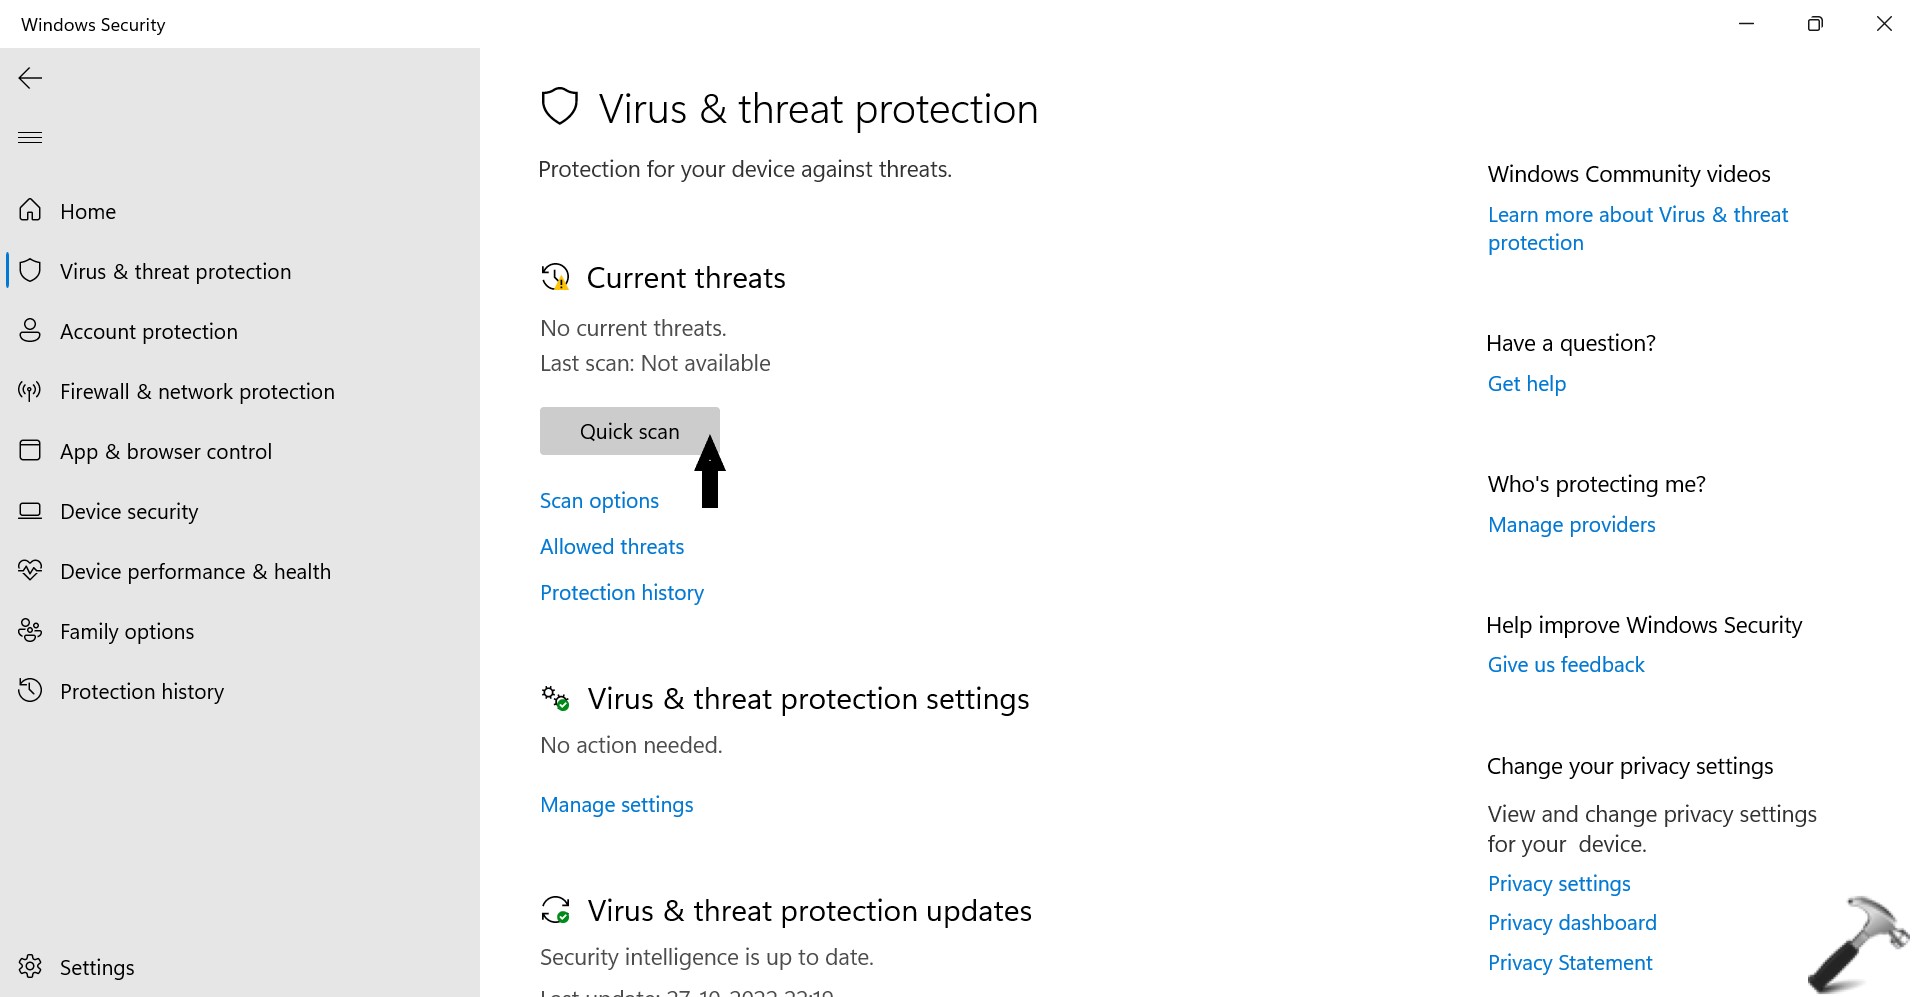
4. If nothing is detected, then you can Scan options, select Full scan, and click on Scan now to perform a full scan of your device.
![KapilArya.com is a Windows troubleshooting & how to tutorials blog from Kapil Arya [Microsoft MVP (Windows IT Pro)]. KapilArya.com](https://images.kapilarya.com/Logo1.svg)




![[Latest Windows 10 Update] What’s new in KB5055612? [Latest Windows 10 Update] What’s new in KB5055612?](https://www.kapilarya.com/assets/Windows10-Update.png)


Leave a Reply