Are you facing issues with File Explorer on your Windows 11 system? Don’t worry, we’ve got you covered! File Explorer is a vital tool for navigating and managing files and folders, so it can be frustrating when it stops working properly. In this guide, we’ll explore some effective solutions to help you fix File Explorer on your Windows 11 device. Get ready to regain control over your files and streamline your file management experience. Let’s dive in!
Page Contents
Fix: File Explorer not working on Windows 11
Fix 1: Restart your system
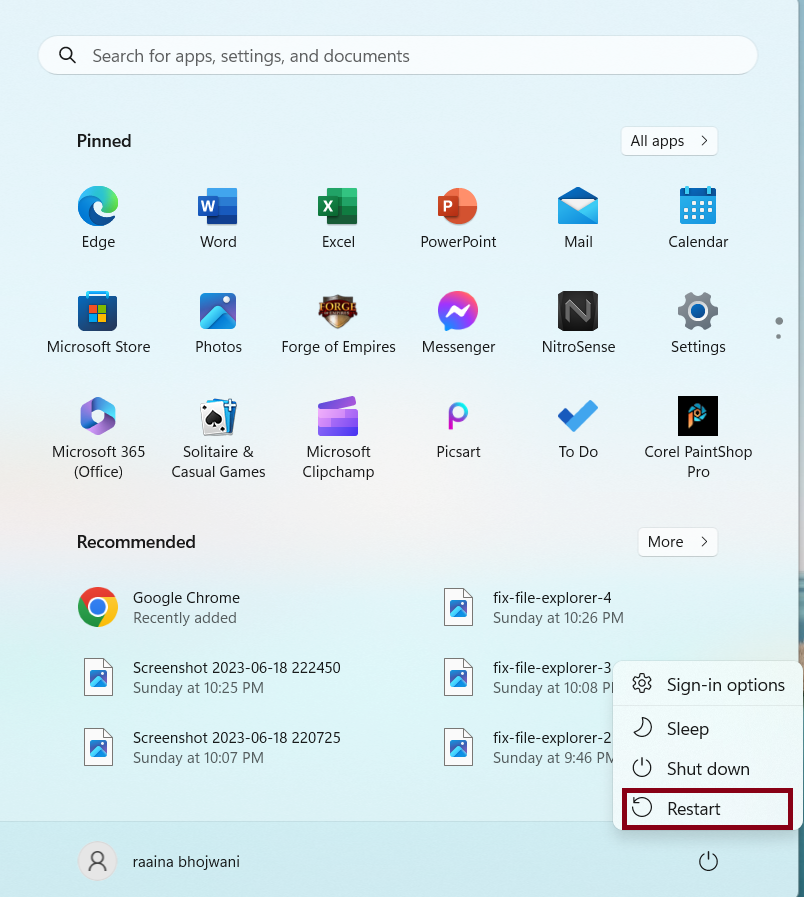
1. Click on the Windows icon in Taskbar.
2. Then click on the power button and choose Restart.
Fix 2: Use the System File Checker
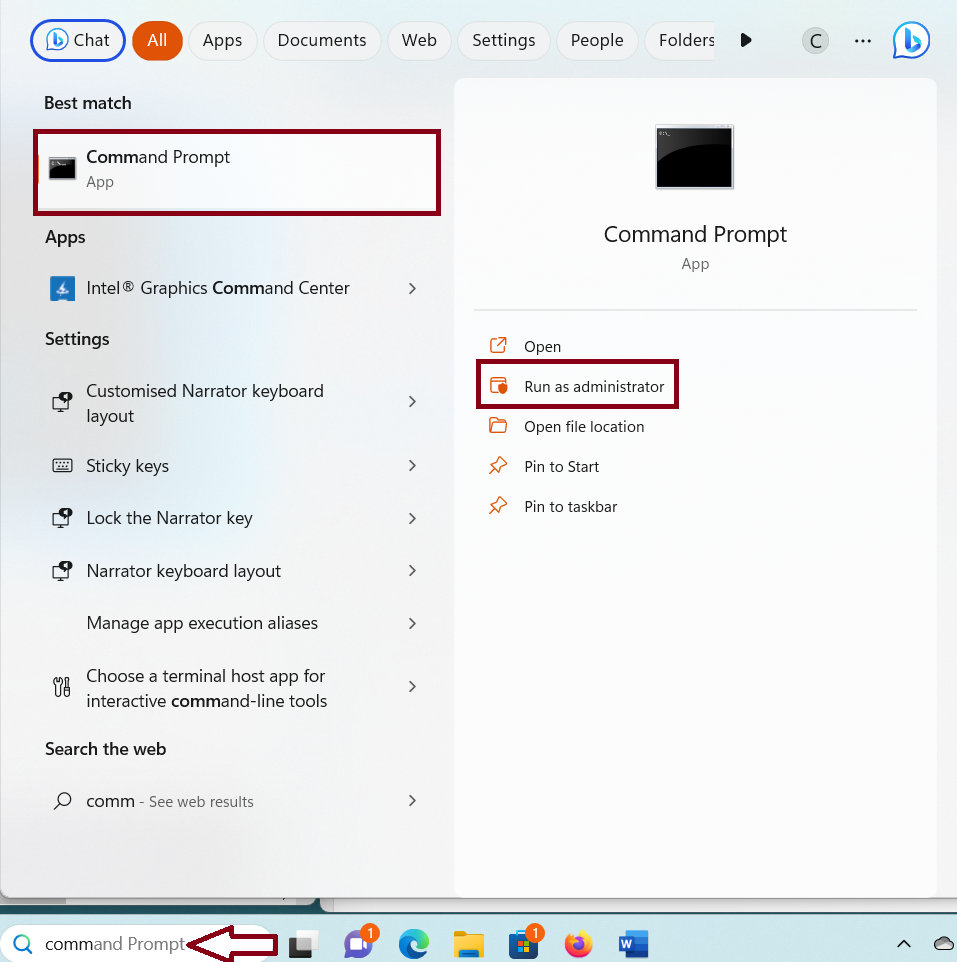
1. Open the Command prompt as an administrator.
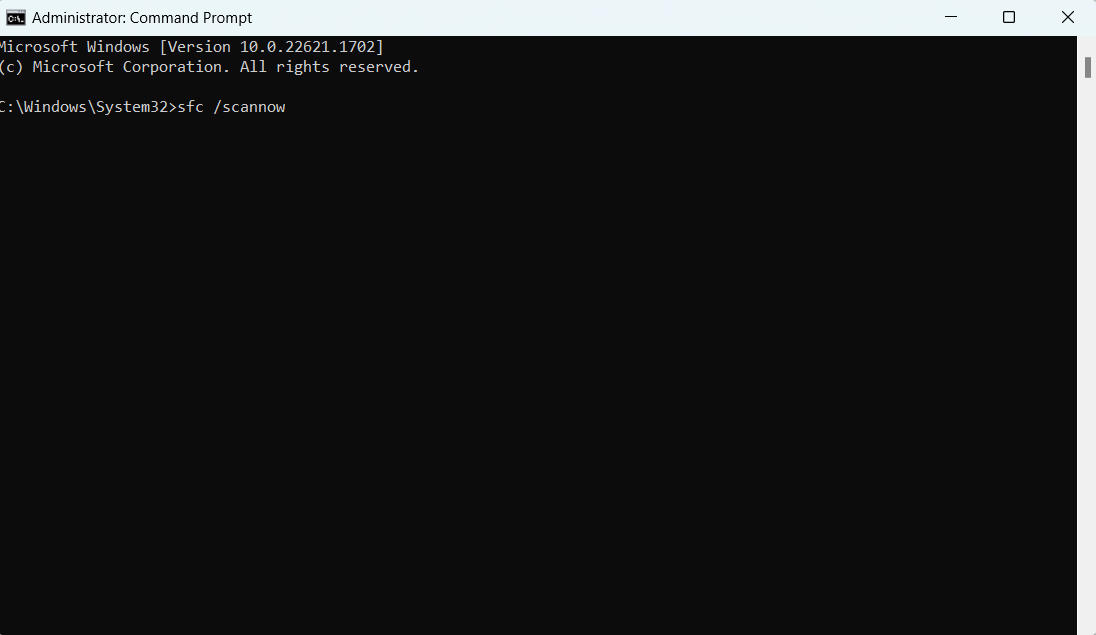
2. Type this command and press Enter.
sfc /scannow
Fix 3: Run system maintenance
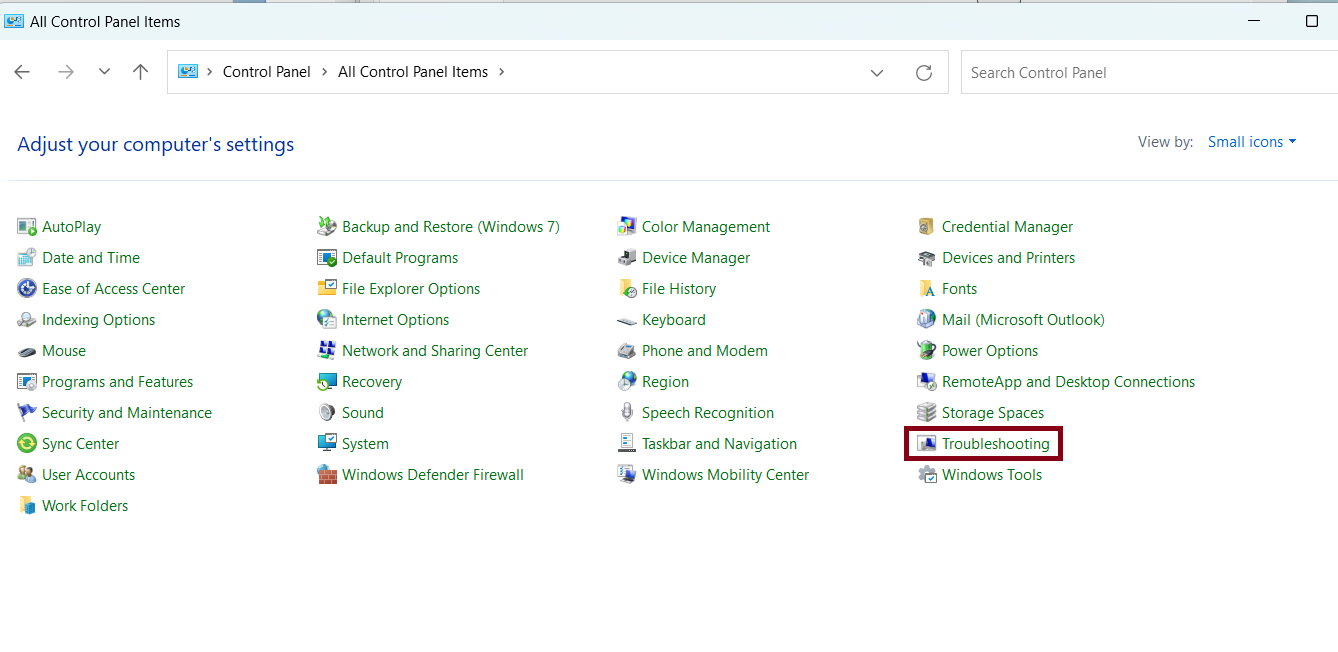
1. Open Control Panel.
2. Click on Category and choose “small icons”.

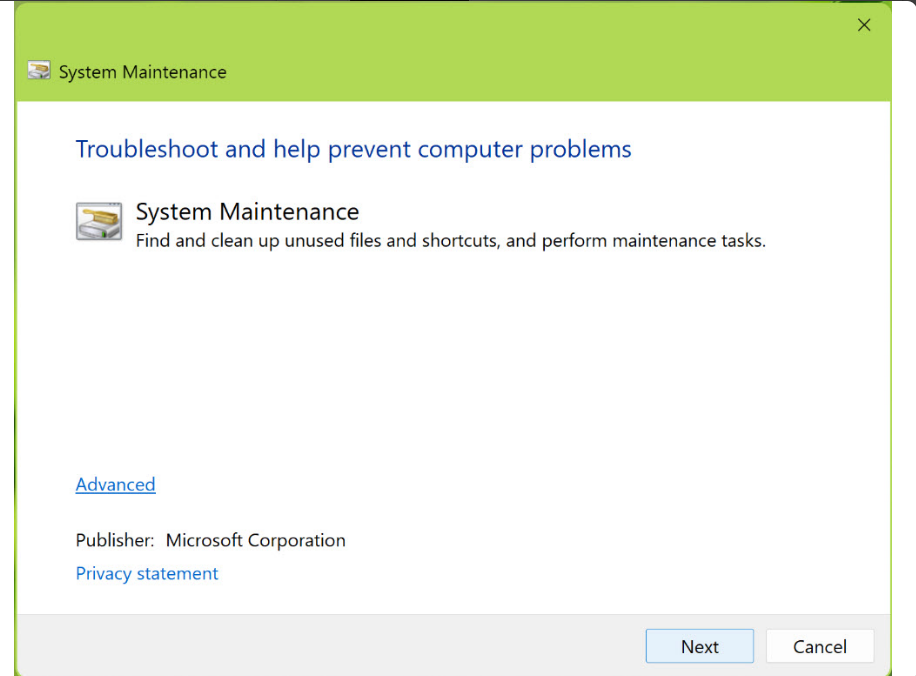
3. Click on “Troubleshooting” > “Run maintenance tasks”.
4. It will take some time for System Maintenance to clean the unused files.
Fix 4: Check for updates
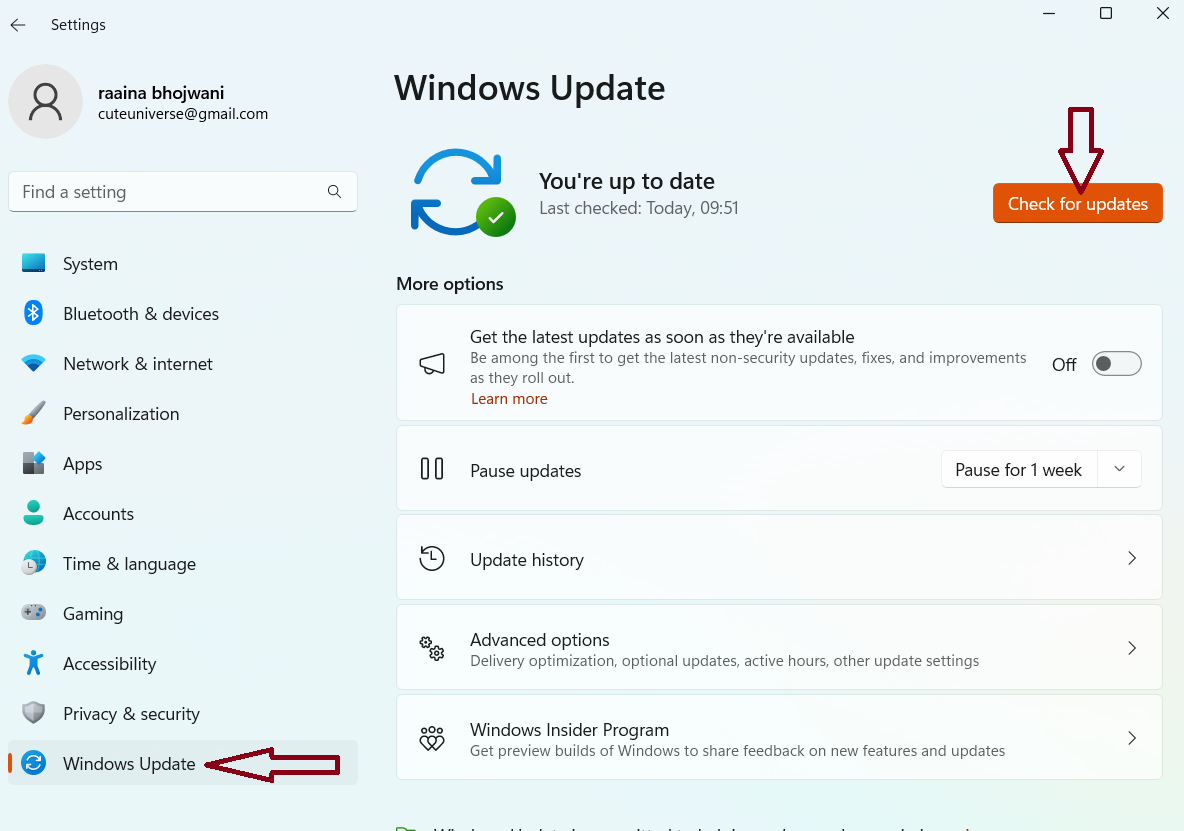
1. Open Settings by pressing Windows + I keys.
2. Click “Windows Update” > “Check for updates”.
3. Check if the issue has been resolved.
Fix 5: Restart the file explorer
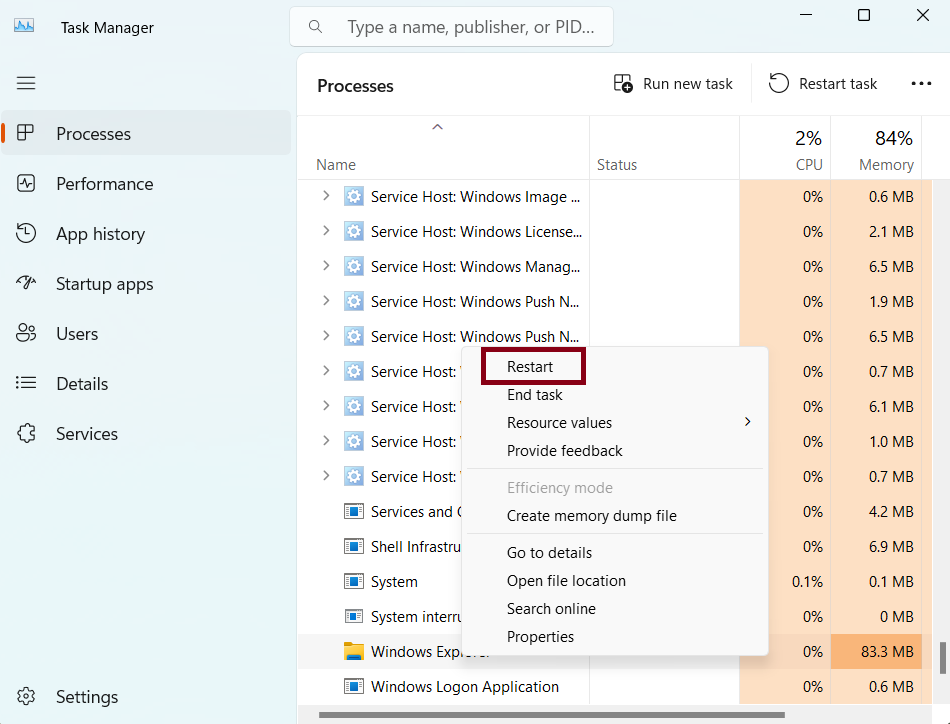
1. Press Ctrl + Shift + Esc keys to open Task Manager.
2. Right-click on Windows Explorer and select Restart from the pop-up menu.
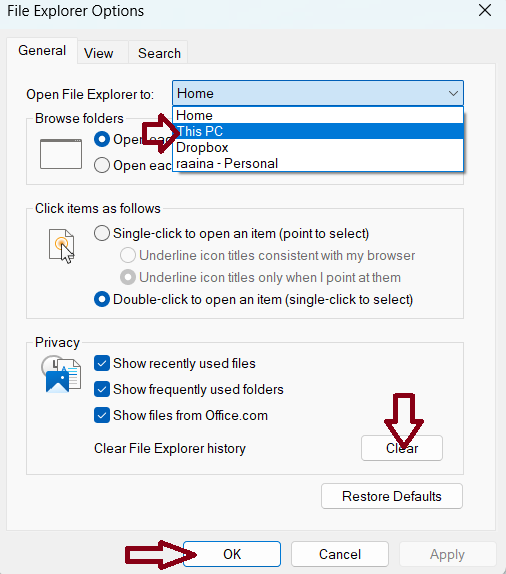
Fix 6: Adjust file explorer options to fix File Explorer not working on Windows 11
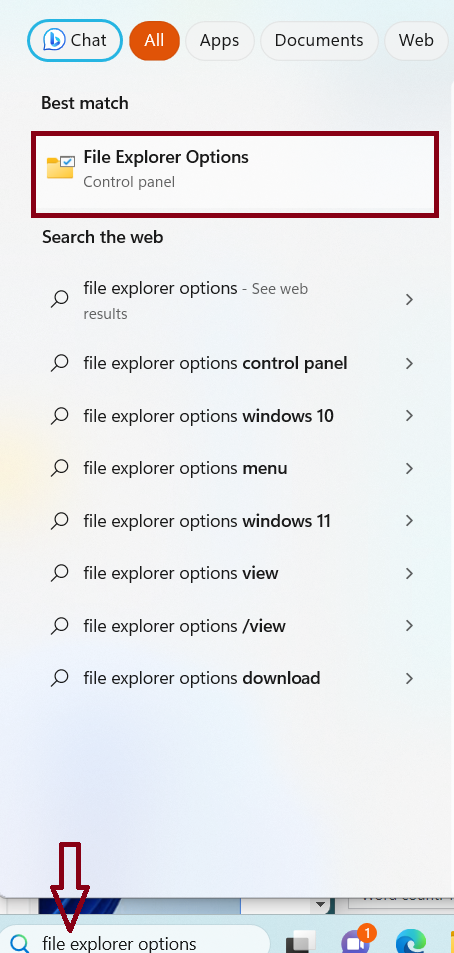
1. Search File Explorer options in the Search bar and open it.
2. In the “Open File Explorer to” section, choose This PC. Then click Clear > OK.
Fix 7: Scan for Malware
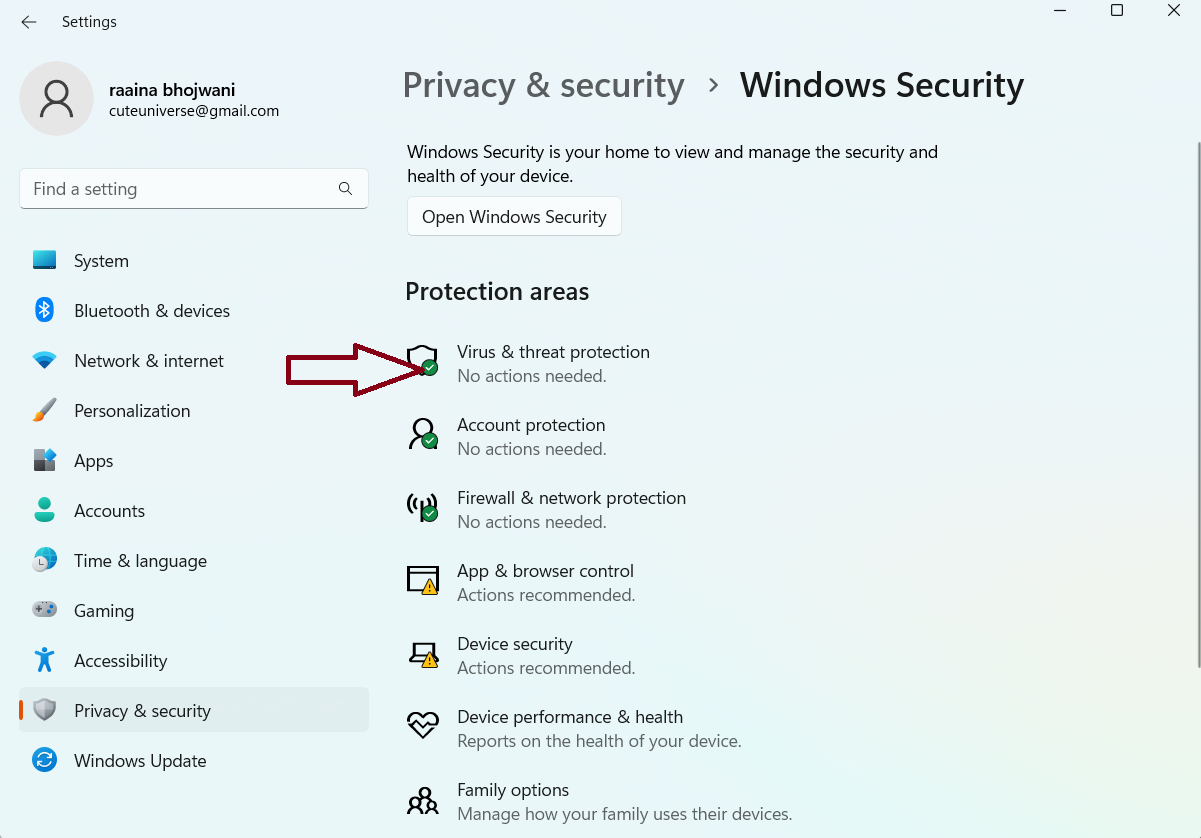
1. Open Settings by pressing Windows + I keys.
2. Click on “Privacy & security” > then click “Windows Security”.
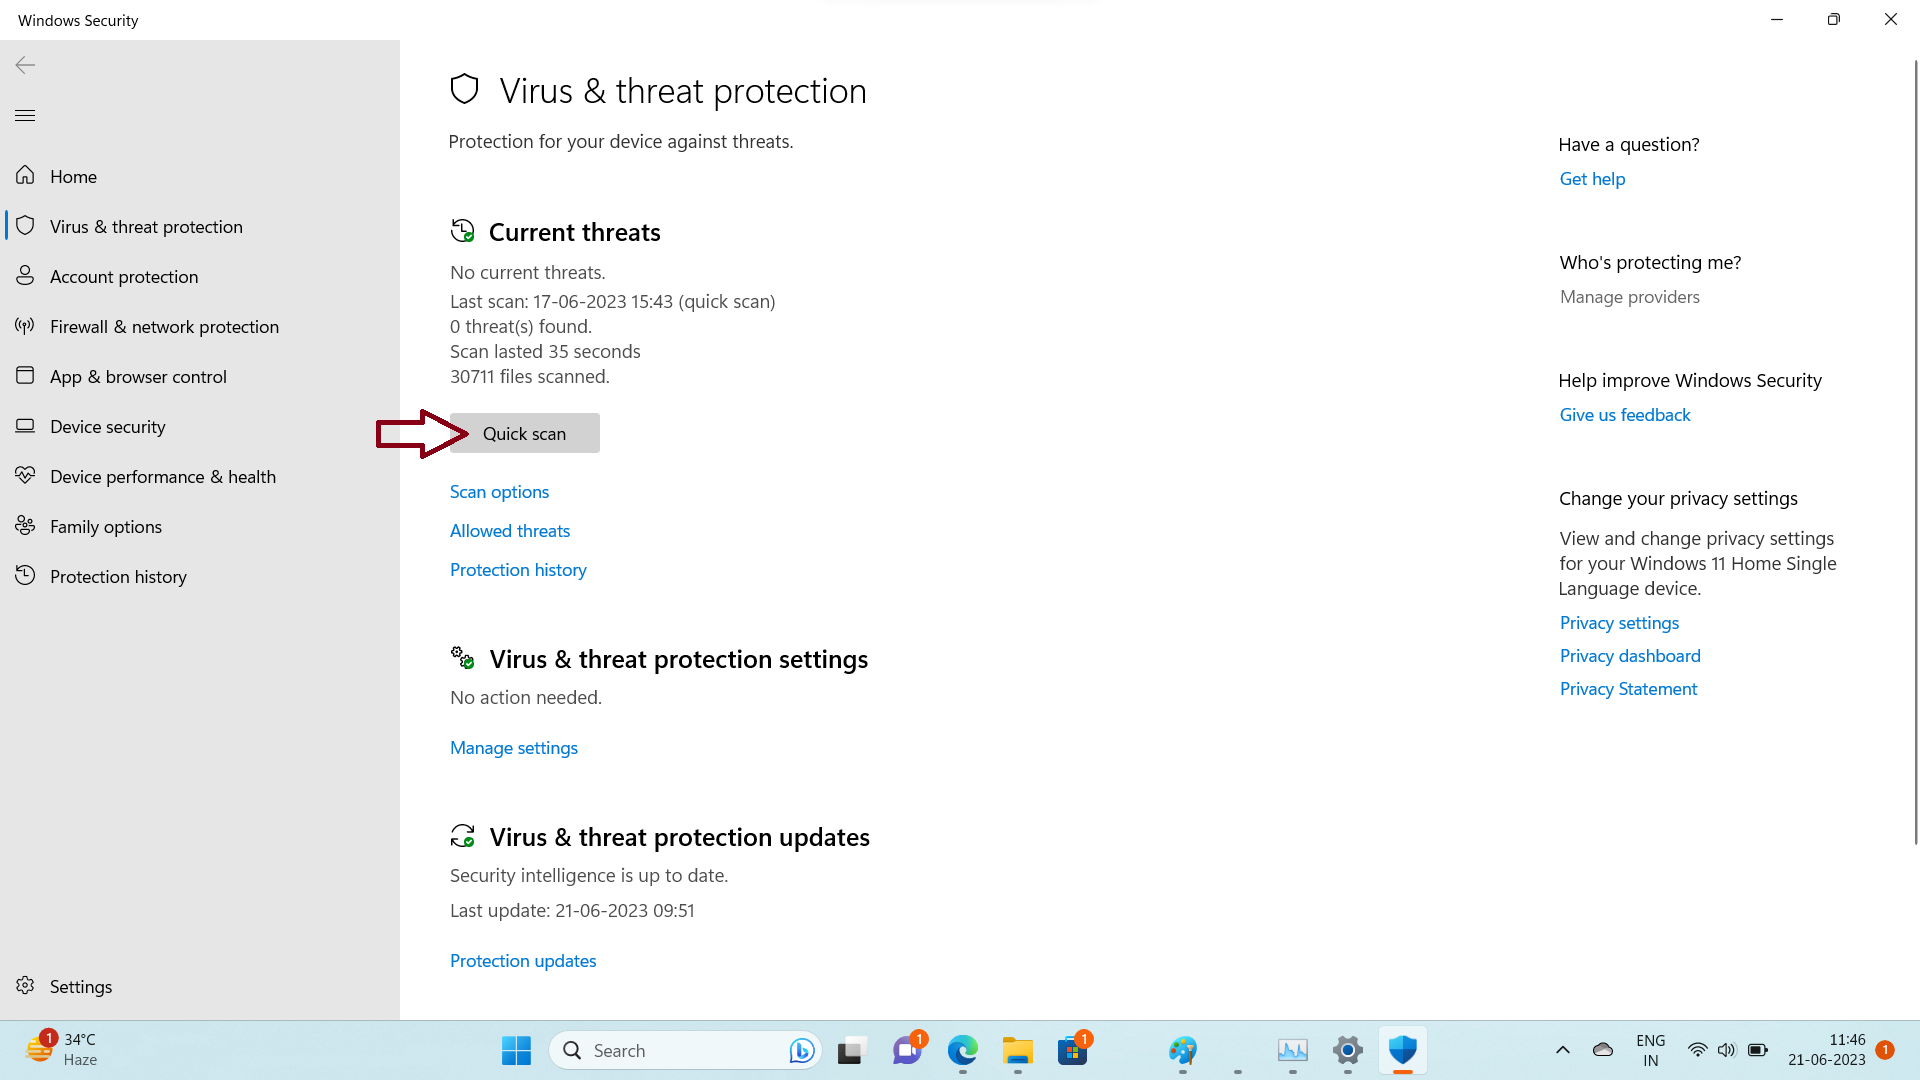
3. Click on “Quick scan”.
Fix 8: Uninstall an update to fix File Explorer not working on Windows 11
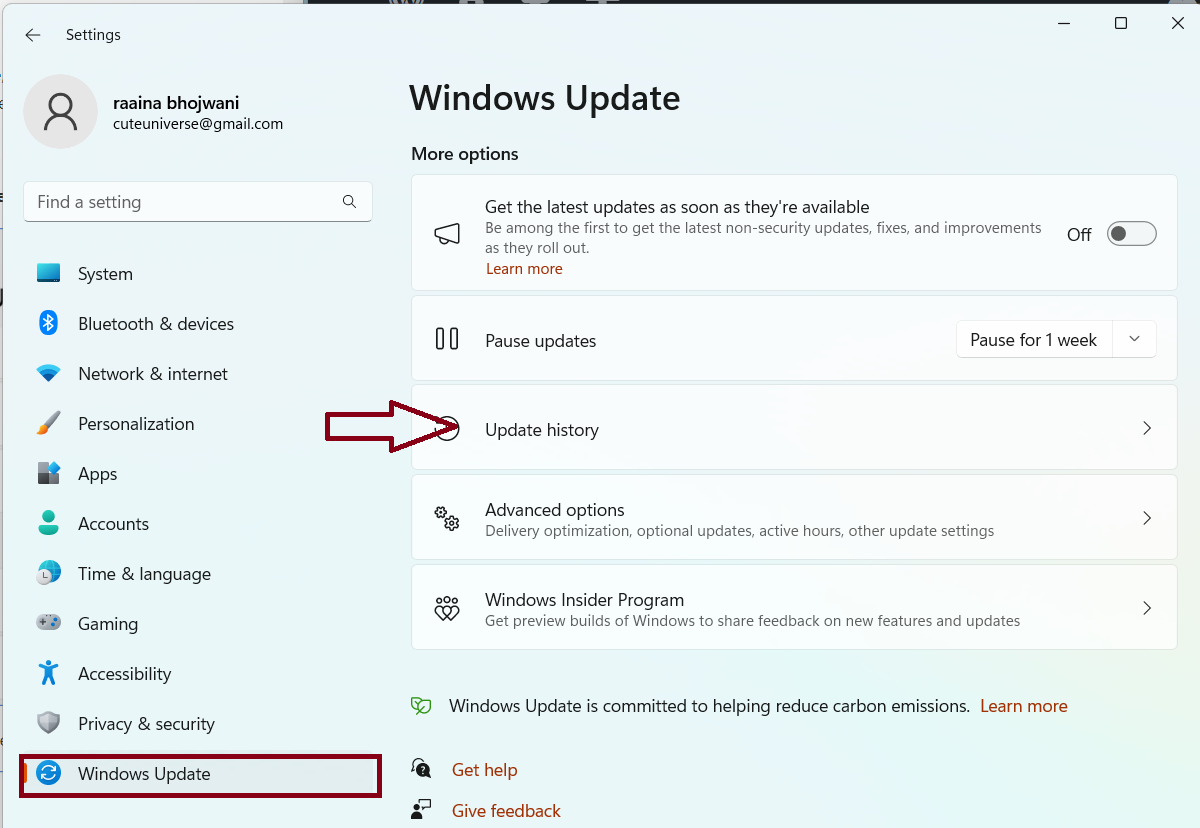
1. Open Settings by pressing Windows + I keys.
2. Click on “Windows Update” > then click “Update history”.
3. Click on “Uninstall updates”.
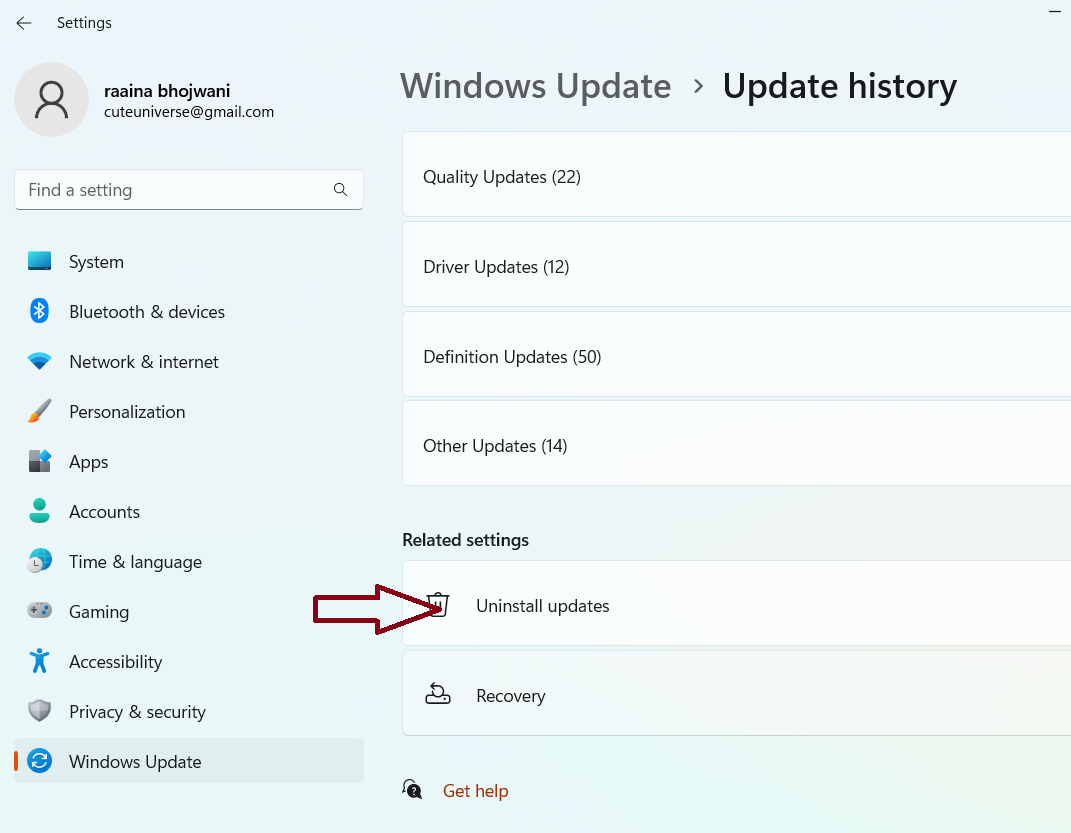
4. Click “Uninstall”. Check if the issue has been resolved.
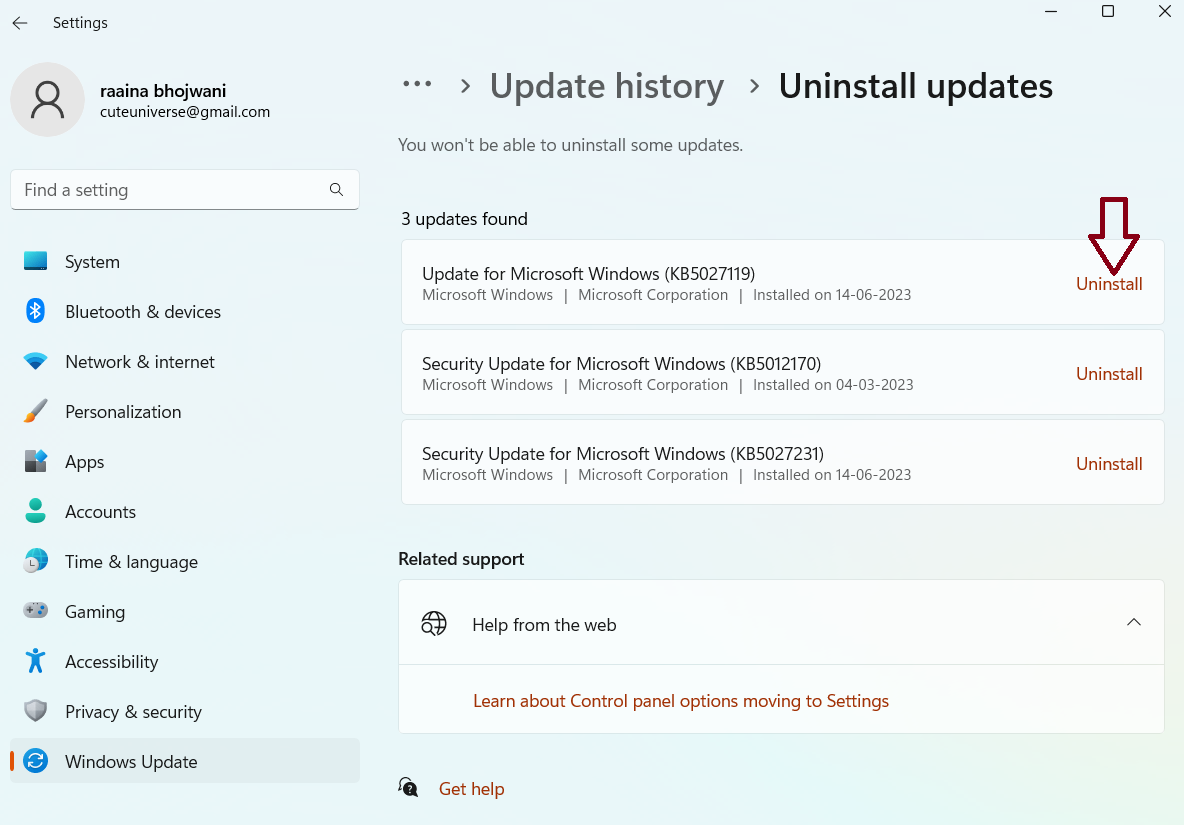
That’s it!
![KapilArya.com is a Windows troubleshooting & how to tutorials blog from Kapil Arya [Microsoft MVP (Windows IT Pro)]. KapilArya.com](https://images.kapilarya.com/Logo1.svg)


1 Comment
Add your comment
Tried windows update: Ran into “Updates failed”
Windows 11, version 23H2 (repair version)
This update can’t be downloaded and installed because it’s not yet ready for your device.